How to Do Vintage Rag Curls Inspired by the Victorian Era

I’m going to show you how to create authentic vintage rag curls inspired by the Victorian era. Heatless curls are very on-trend right now, but this method has been used throughout history; it’s an old and very effective way of creating heatless curls overnight. Let's get started!
Tools and materials:
- Rags
- Claw clips
- Spray bottle (filled with water)
- Bristle brush
I used six rags to make the curls, and you want the rags to be approximately twice as long as your hair.
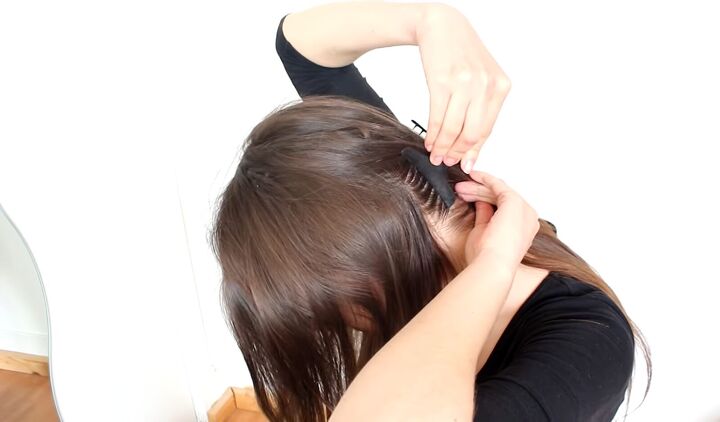
1. Section off your hair
Divide your hair into however many sections you want. Because I have six rags, I’m going to divide my hair into six portions. I like to take one portion and then clip all the rest of my hair back, so it’s out of the way.
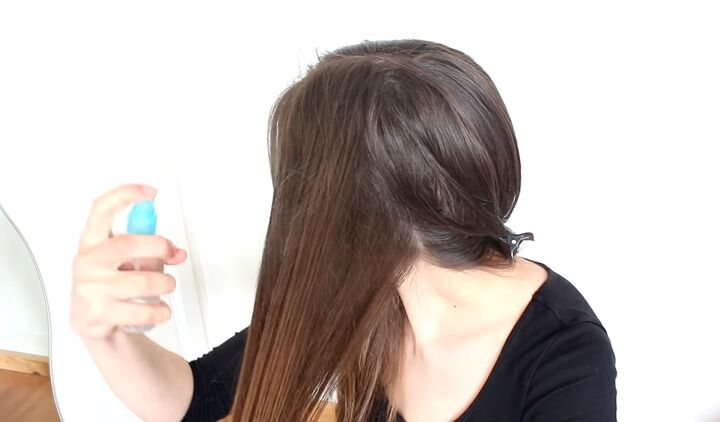
2. Dampen your hair
Then, spray the section you’re working with with a little bit of water so that it's damp because hair curls best when it's damp.
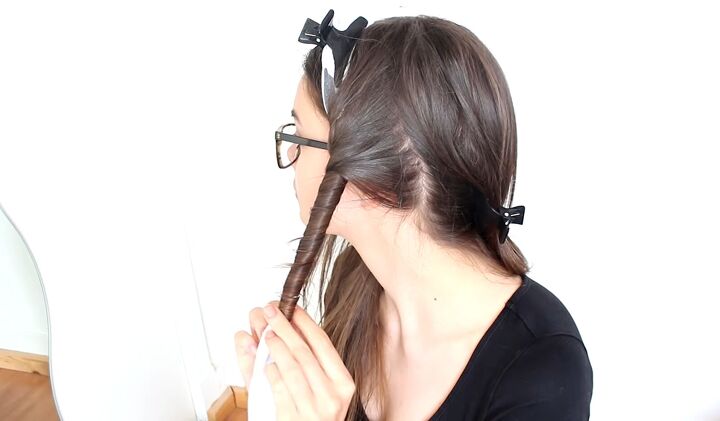
3. Wrap top to bottom
Take the rag, and clip it to the top of your head to hold it there. Then it’s time to start wrapping your hair around the rag.
When you do this, you want to make sure that your hair is absolutely flat and that you keep it flat throughout your wrapping. That is what’s going to make that really nice spiral curl.
4. Wrap bottom to top
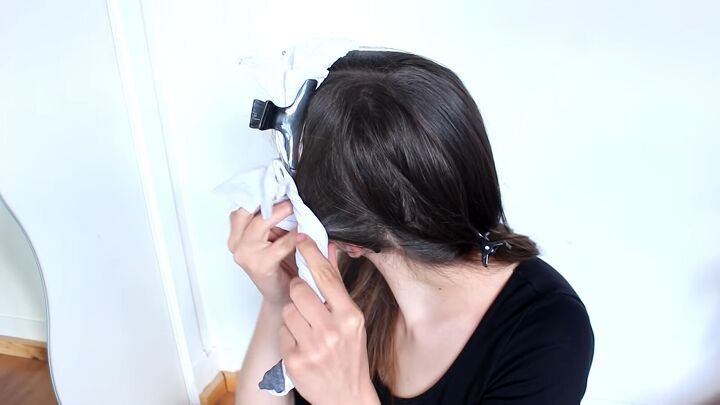
When you reach the end of your hair, take the rest of the rag, spread it out, and then wrap it back up around your hair.
Make sure that you wrap it in the same direction you wrapped your hair in. This will help your ends curl around the rag a little bit better and enforce the curl shape.
Also, this second wrapping will help protect your hair while you sleep with the rags in and make sure that they don’t get loose or your hair becomes frizzy.
Finally, just tie a knot when you get to the top of your hair.
5. Repeat
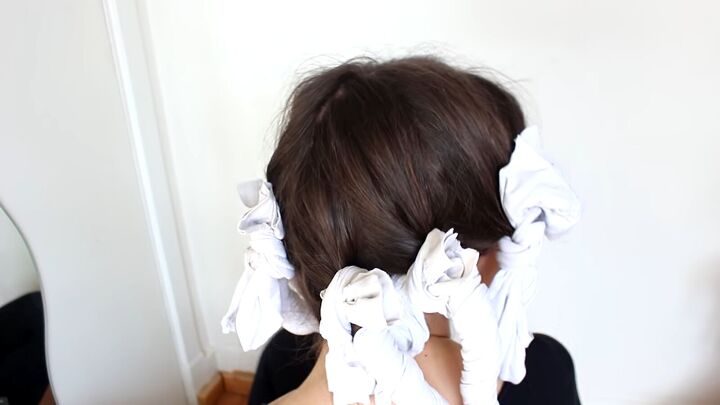
Do the rest of your hair in the exact same way. When I have done all six of these, this is what it looks like.
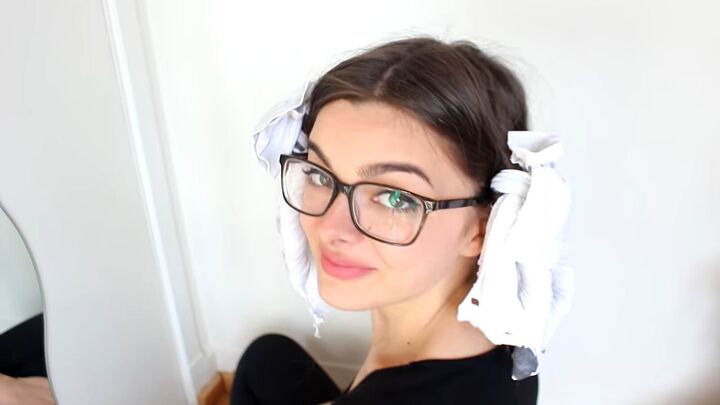
6. Sleep in the curls
The next step is to sleep in the curls. The longer you leave this in, the better the curls will be and the longer your curls will last. Sleeping with these in, I’m going to be completely honest with you, it wasn’t completely comfortable.
While you are sleeping, your damp hair will dry in this shape and set the curls.
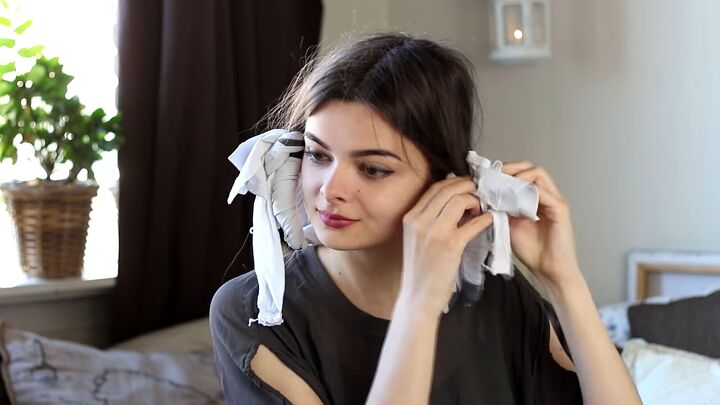
7. Take out the rags
To remove the rags, undo the knot, unravel the outer part of the rag and then untwist the rag out of your hair. I like to start at the top because I find it easier than starting at the bottom.
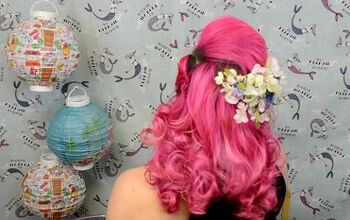
You should end up with beautiful, smooth, perfect spiral curls.

8. Brush your hair
This last step is optional, but I like to brush my hair through once with a boar-bristle brush; it makes the curls a little bit softer and more like second or third-day hair, which is the look I like a little bit more rather than these tight ringlets.
To brush my hair, I first divided each curl into two so that I would have twelve curls around my head instead of six, and then I brushed each curl out individually.
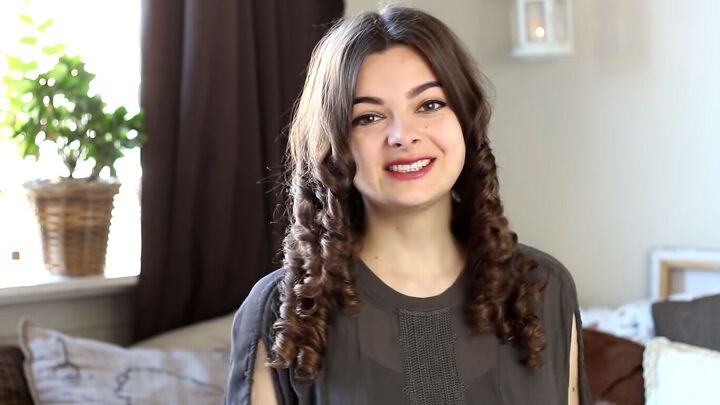
Vintage rag curls tutorial
I think that this is a gorgeous look. I also think it looks very authentic and historical, and I love that this is what they used to do back in the old days.
I am really happy with this curling method; it is a little bit time-consuming, but it is a fault-proof method, and your curls should come out perfect every single time.
Let me know what you think in the comments below!
The author may collect a small share of sales from the links on this page.


Comments
Join the conversation
We did this back in the 80’s
My grandmother did this weekly for my sister and me in the 50s. It was painful to sleep on though. The curls lasted in different stages for the week.