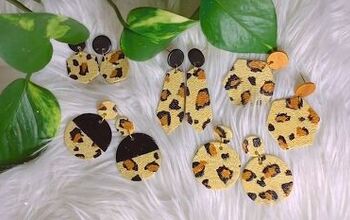
How to Make Leopard Print Resin Earrings
It is no secret I am a little obsessed with two things right now, firstly anything leopard print (watch my how to paint leopard print here) and secondly making resin earrings. The thought of making resin items can sound scary but two-part resin kits make it so easy to mix and create resin items. In this blog post, I will show you how to make these cool leopard print glitter earrings.

You Will Need
- Two part resin mix – I use this one
- Glitter, mixed colours including black
- Medicine measuring cups
- Lollypop stickers or stirrers
- Resin earring moulds
- Stainless steel earring backs
How to Make
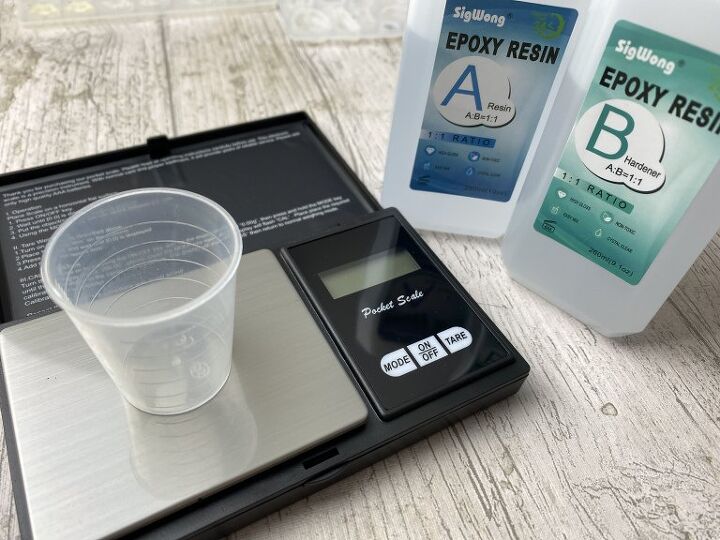
The first step of making resin is to mix equal parts of resin and hardener, I got this pocket scale off Amazon to help me weigh out the same amounts, for earrings resin goes pretty far, as a rough guide, I mixed 4g of each liquid and created 8 pairs of earrings.
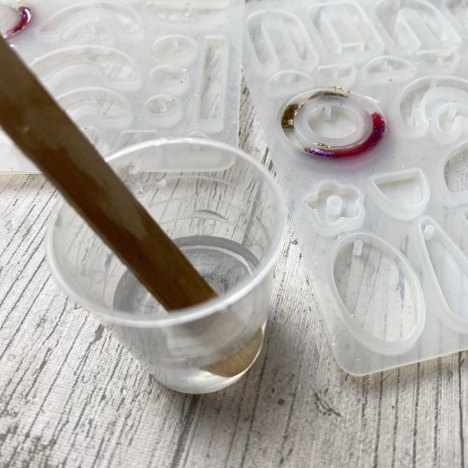
The next step is to mix your resin for a good few minutes, I usually mix for 3-4 minutes, it will have lots of air bubbles in but this won’t matter, you won’t see these once you add the glitter. If you wanted a clear resin, use a heat gun to remove the air bubbles.
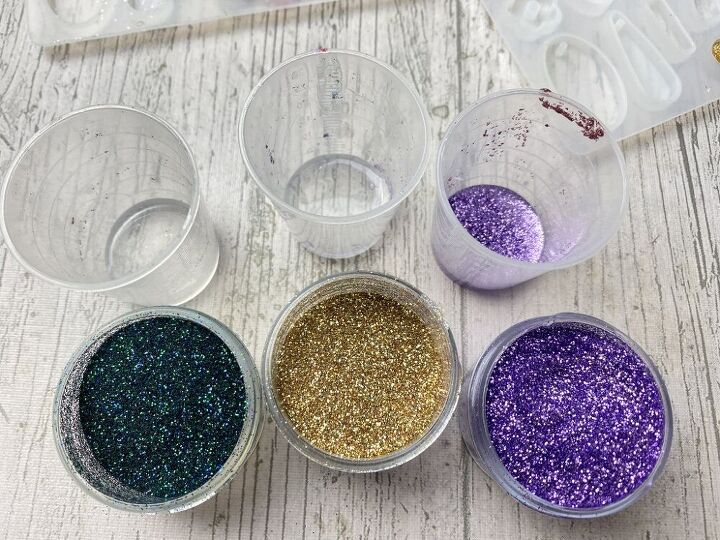
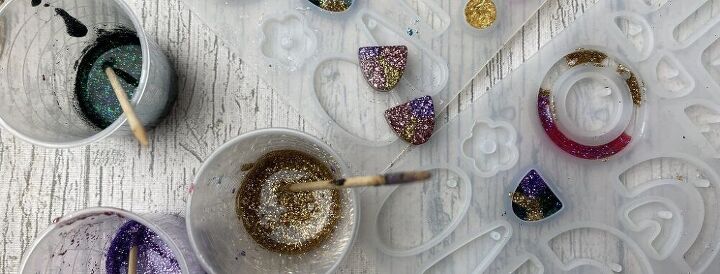
Once you have mixed your resin, separate some resin into different pots, for the different colours. You can have any colour option you like, I had 3 glitter colours green, gold and purple. Add enough glitter to the resin until you have an intense glitter paste, adding little by little helps you get the balance right.
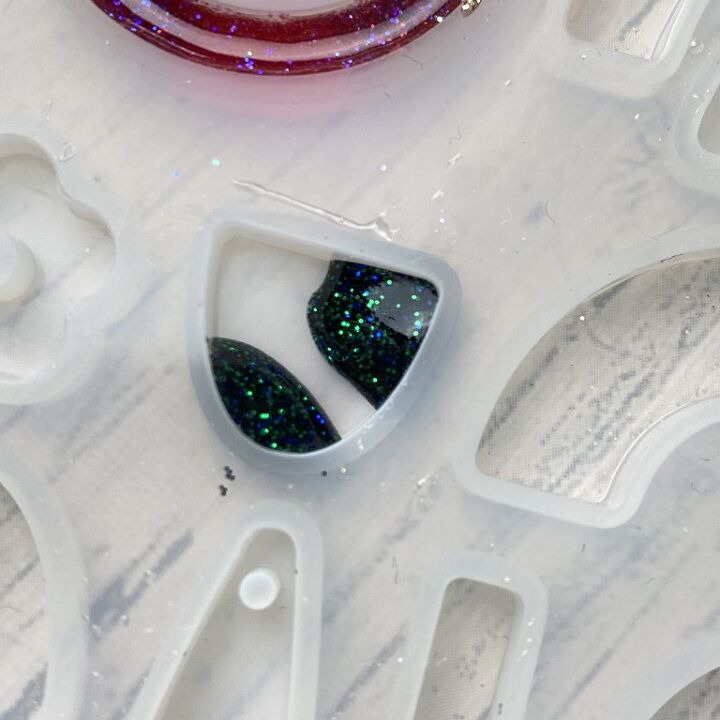
Add some blobs of glitter resin into your clean resin mould, I find a cocktail stick is delicate enough to help you control the amount you add. When making earrings, try and mirror where you add the colour so they complement each other when finished. The great thing about mixing colours is each earring will be unique and different.
Once your earring mould is full, leave it to dry for at least 24 hours, it should be cured after 24 hours but I like to leave it to dry in the mould for a day and them take it out and leave it another day to air dry out the mould.

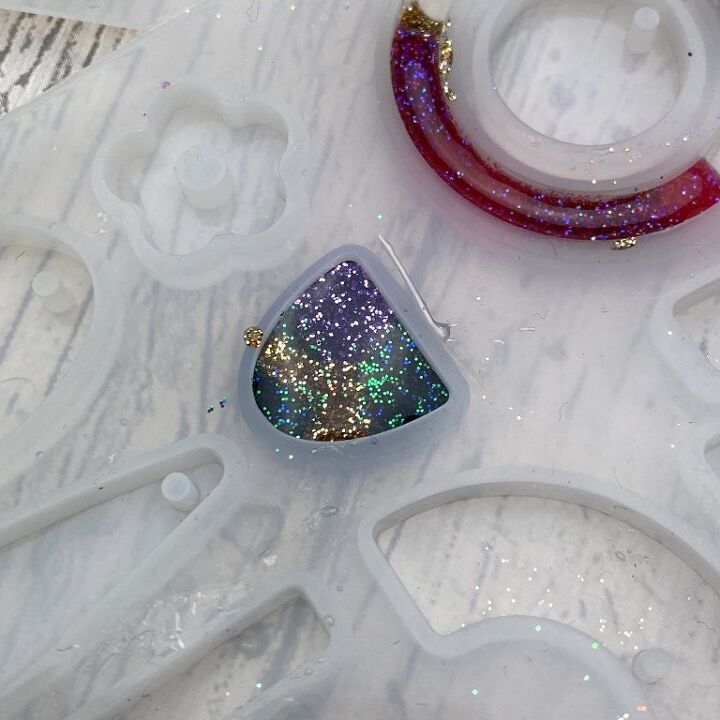
Once your earring is solid, mix a small amount of resin and add some black glitter. I pop some onto the back of a resin mould as a palette for creating the leopard print. If you find your resin starts to harden, you can gently heat it with a heat gun to bring it back to life. Take a small amount of resin on a cocktail stick and start creating your design with dots and dashes. Leave to cure over night.
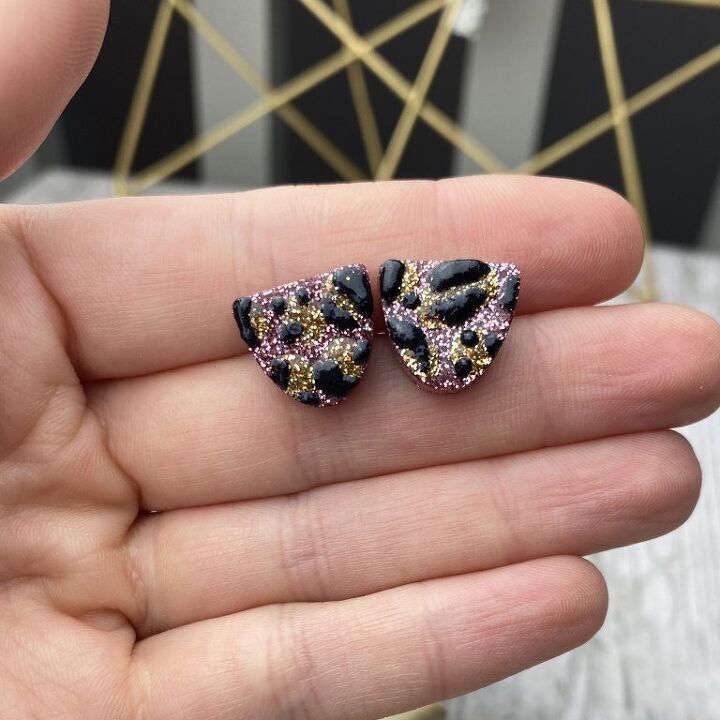
Once dry, you can add the earring backs, mix a very small amount of resin and use it as a glue to secure your earring backs to your earring, again, leave to dry. You will then have a gorgeous pair of leopard print glitter earrings. You can create studs or dangly earrings in this style and be as creative as you like!
I really hope you give resin jewellery making a try, it is a lot of fun and a great creative outlet. Just a little warning, it is addictive! If you give this tutorial a try then tag me on @i_heart_maggie on Instagram or @IHeart_Maggie on Twitter so I can see your makes.
Love
Claire X
The author may collect a small share of sales from the links on this page.


Comments
Join the conversation