How to Make Leopard Print Polymer Clay Earrings

Hey all you cool cats and kittens! Learn how to make polymer clay leopard print earrings with me! Just follow along with my step-by-step tutorial.
Tools and materials:
- Pasta machine
- Yellow, black and gold polymer clay
- Roller
- Parchment paper
- Needle tool
- Cookie cutters
- Oven
- Bowl with soapy water
- Electric sanding tool
- Drill bit attachment
- Earring hardware
- Matte varnish
- Small paintbrush
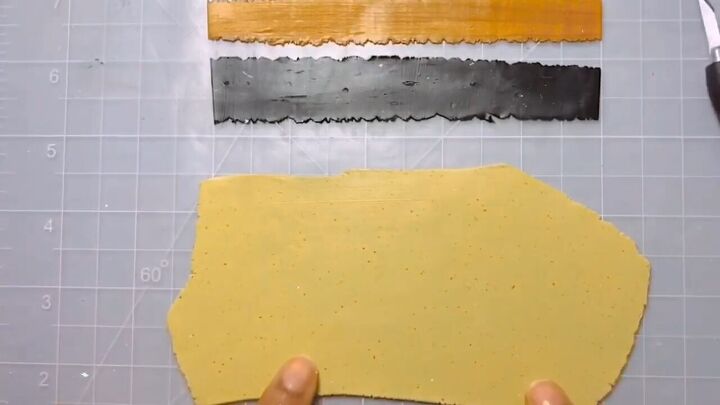
1. Flatten your clays
Run a mustard yellow polymer clay through the pasta machine on medium thickness. This will become the base clay.
For the pattern, run black and gold clay through the machine on a thinner setting.
2. Add black and gold pieces to the base
Rip small pieces of black clay and place them at random on the base clay, keeping in mind that you want the pattern to look organic.
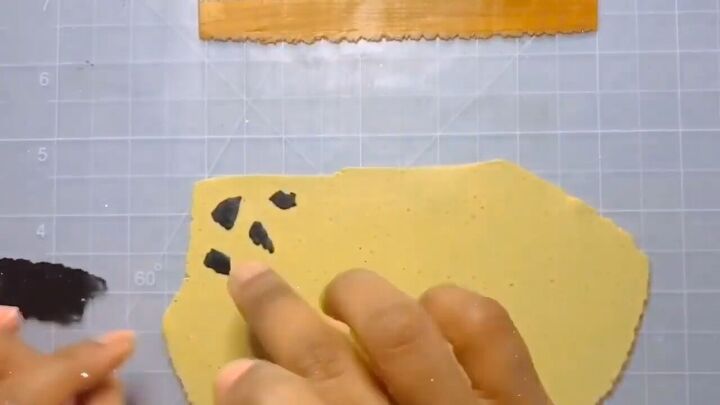
Next, tear even smaller pieces of the gold clay and place them onto the base, partially overlapping with the black spots.
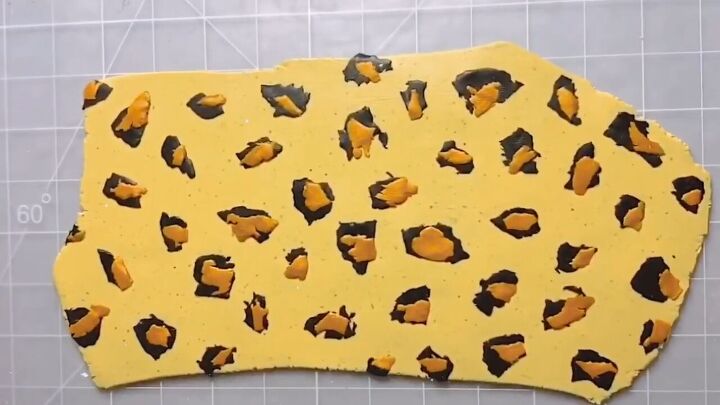
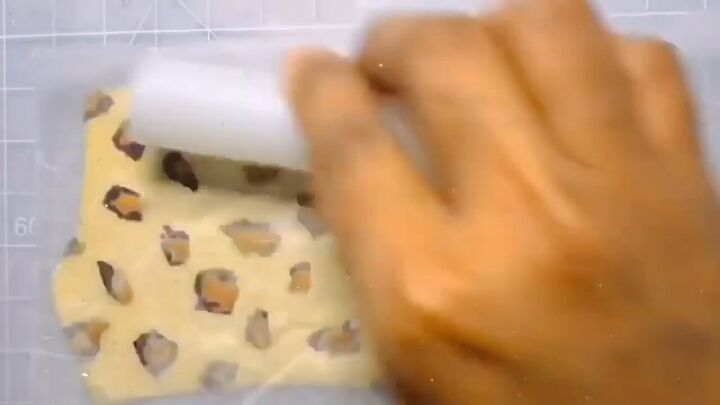
3. Flatten the pattern
Using a roller, flatten the pattern to secure it into the base.
Next, cover the slab of clay with a piece of parchment paper and burnish.
This will ensure that the surface is flat, without any distortions.
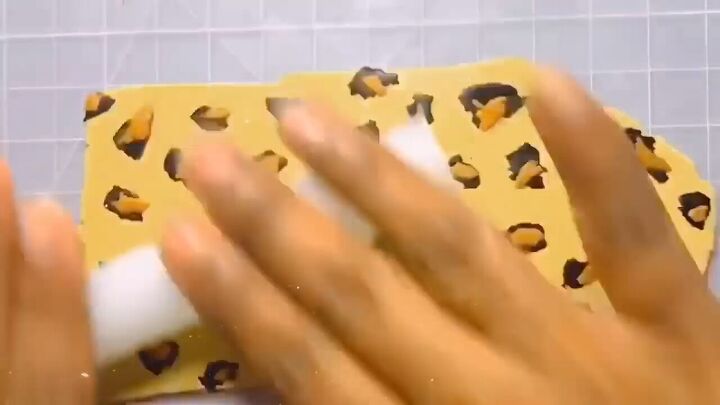
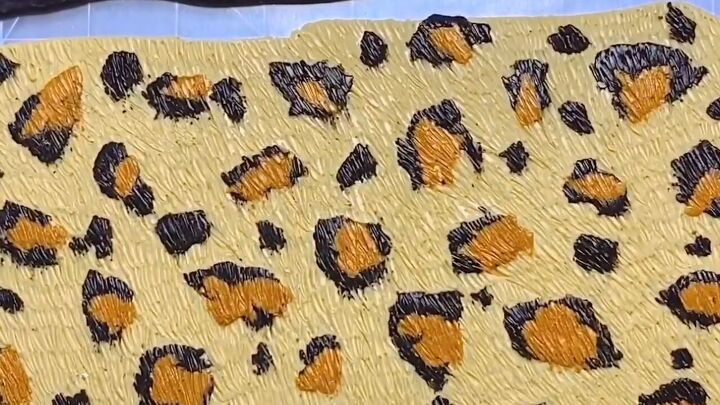
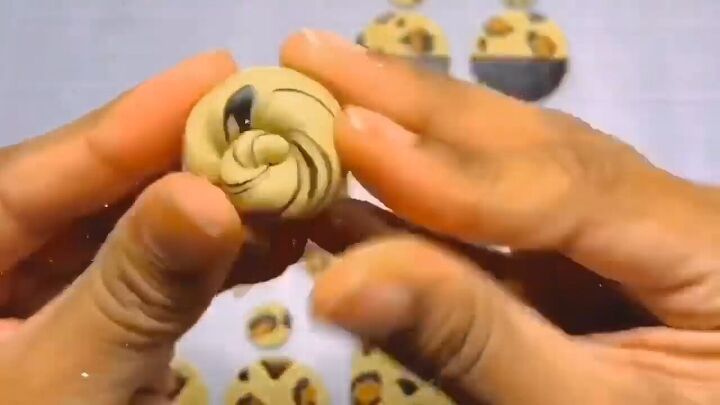
4. Add texture and more black spots
Optional: Use a needle tool to score thin lines along the clay for natural looking texture.
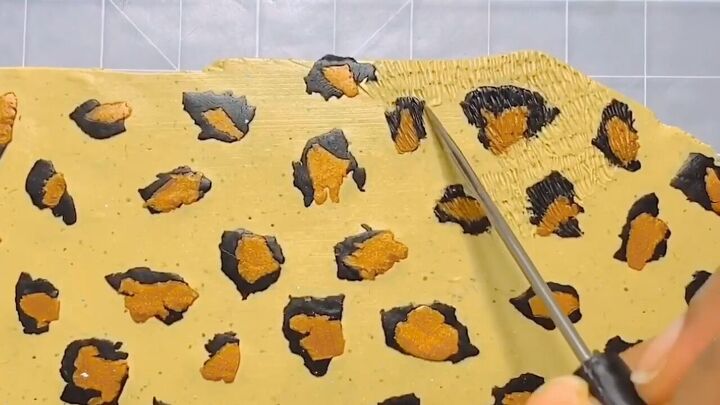
Halfway through this process, I felt like something was missing so I added small black pieces between the main spots.
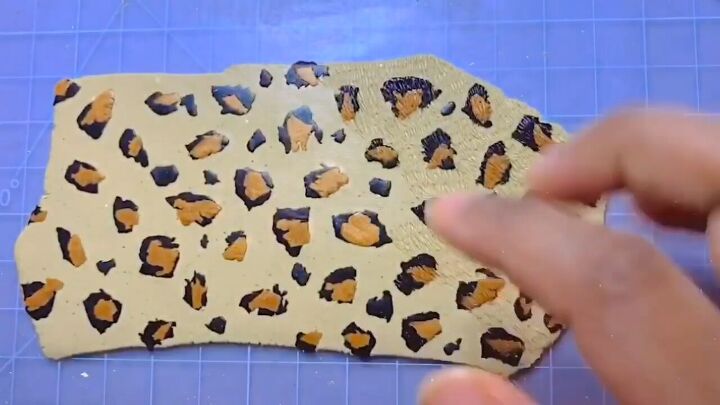
Don’t forget to carefully flatten the new spots into the base again using parchment paper and a roller.
Then finish the scoring on the entire piece.
I’m so happy with how it turned out!
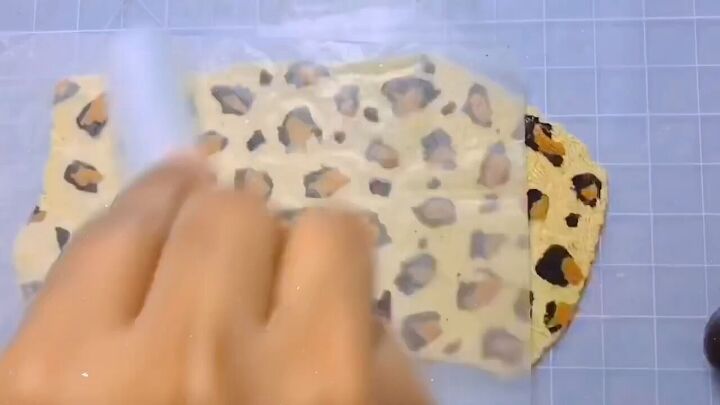
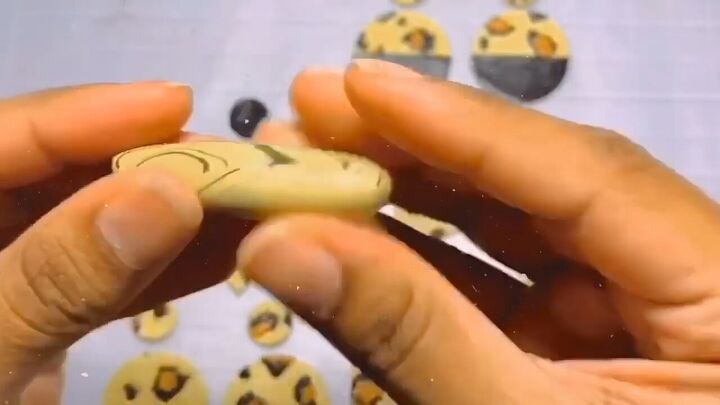
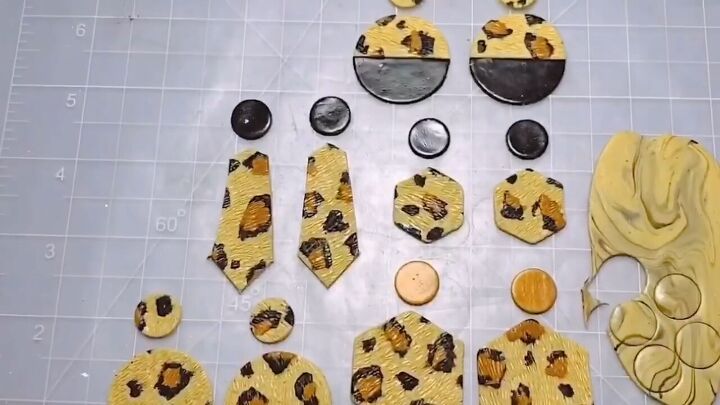
5. Cut earring shapes and smooth out bubbles
Next, use cookie cutters in assorted shapes to cut out your earring pieces. You can also create your own shapes using a blade.
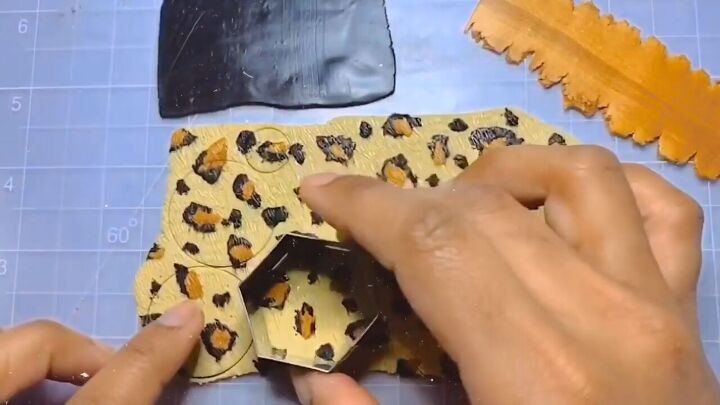
You can also make some solid black shapes to compliment the leopard print.
If you have any air bubbles, simply use a needle tool to pop them and smooth them out with your finger.
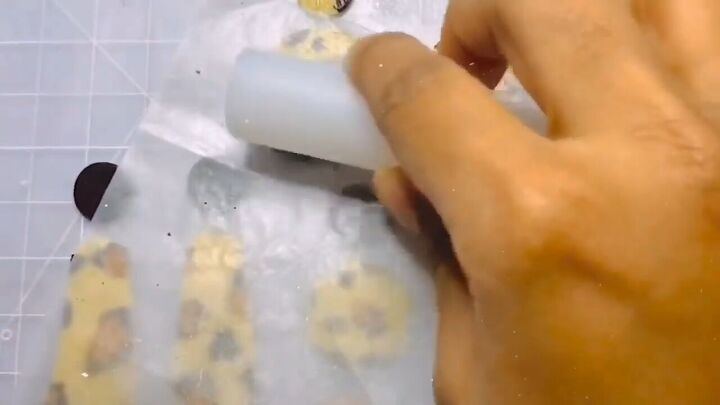
Next, cover the piece with parchment paper and smooth them out more with a roller.
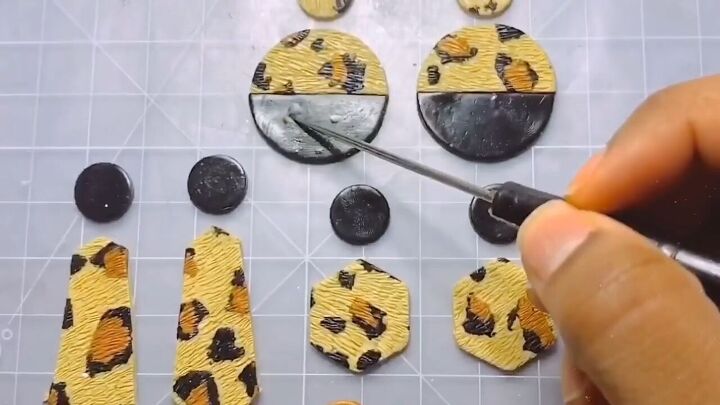
6. Reuse your scraps
Combine any scrap clay, roll it into a log and then a spiral.
To make a marble effect, roll the spiral back into a log and flatten it with your hands.
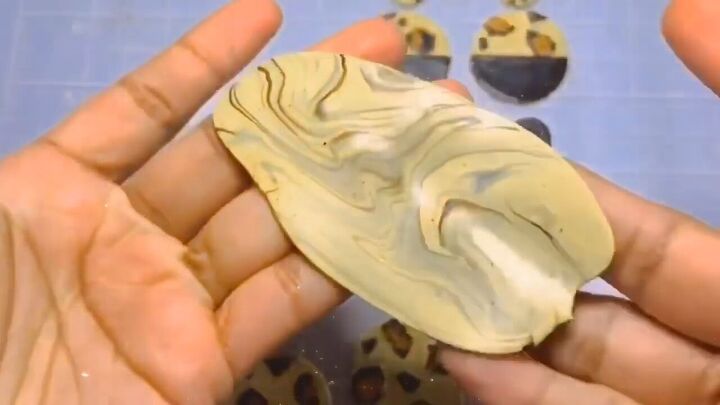
Then cut out more small shapes from the marbled clay.
7. Bake the earring shapes
Next, follow the instructions on the clay package to bake your earring pieces.
Instead of 275 Fahrenheit, I put 225 and bake it for about an hour.

8. Sand the pieces
Once the pieces are finished baking, dip your pieces in soapy water and then sand the rough edges with an electric sanding tool.
Then rinse off any dust in the water.
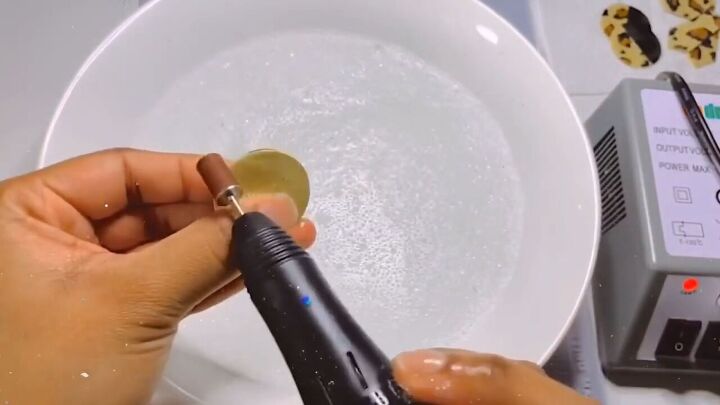
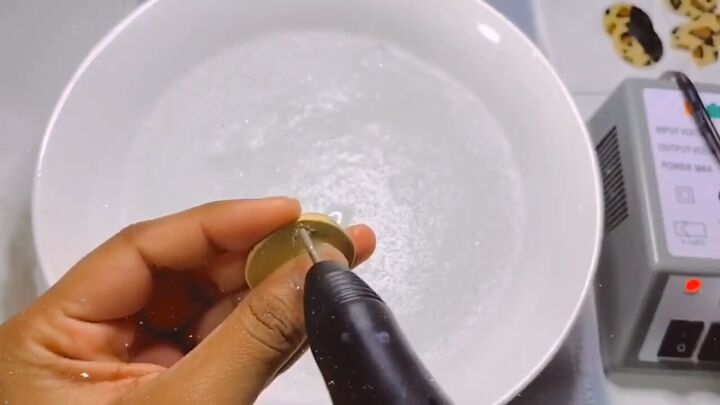
9. Make holes for jump rings
Using the drill bit attachment on the sanding tool, make holes for jump rings.
You may need to flip the piece and drill into the same spot from the other direction. Then rinse off the piece to remove any new dust.
10. Apply varnish and add hardware
For the finish, apply a matte varnish. Hold each piece down with the needle tool while painting on the varnish with a small brush.
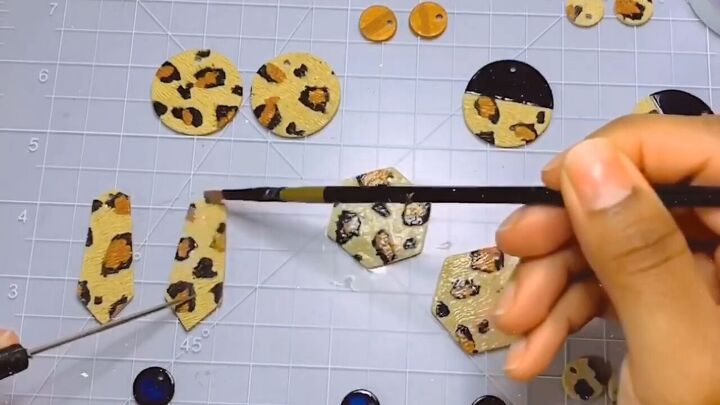
Once the varnish dries completely, add the earring hardware.
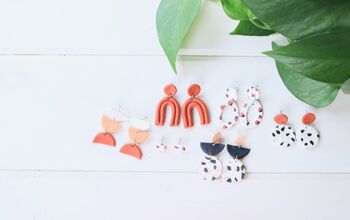
Here’s how these cute, polymer clay earrings came out:
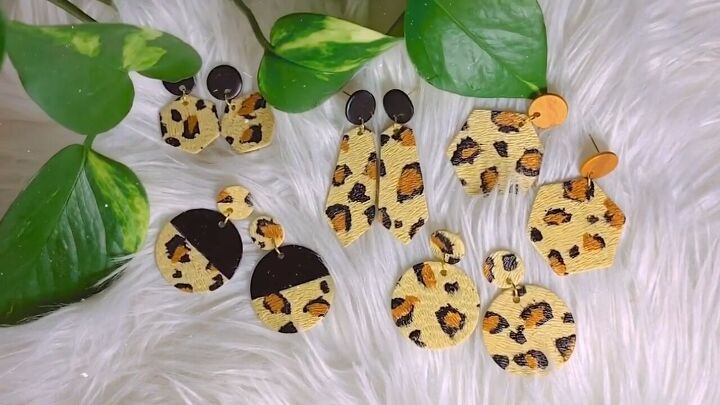
How to make polymer clay earrings
Now that you’ve followed along to learn how to make these polymer clay earrings, will you make a pair for a feline-loving friend? Let me know in the comments.
Check out my post on How to Make Pretty Gold Leaf Marble Polymer Clay Earrings.
The author may collect a small share of sales from the links on this page.


Comments
Join the conversation