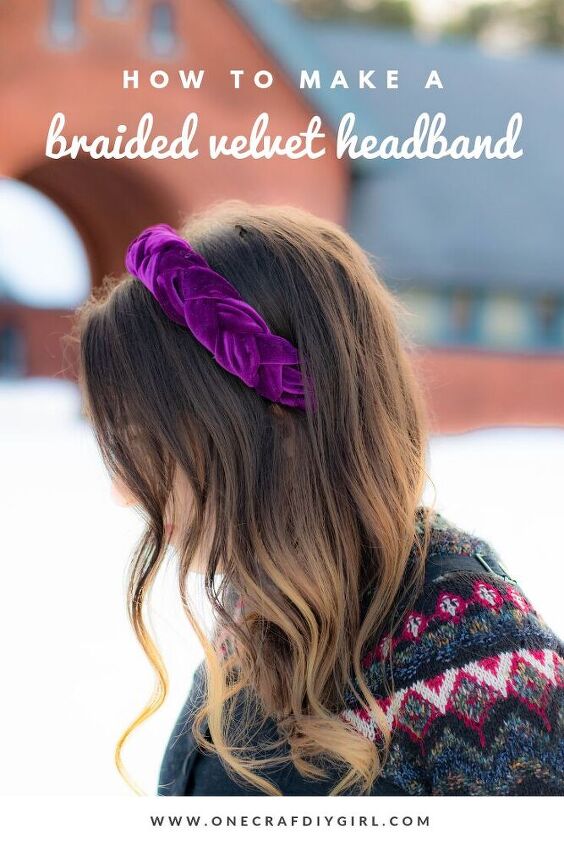
Braided Velvet Headband Tutorial

Mirror, mirror on the wall, who is the craftiest of them all? Like the spooky mirror from Snow White, I am getting total medieval vibes from the new velvet braided headband trend. When I first spotted this iconic head piece on one of my favorite blogger babes, I knew I wanted to channel my inner princess. However, when I clicked the link I learned that my favorite new coveted accessory had a staggering price tag that only true royalty could afford. So, with this braided headband tutorial I’m hoping to change that. So every girl can get the velvet crown she deserves.
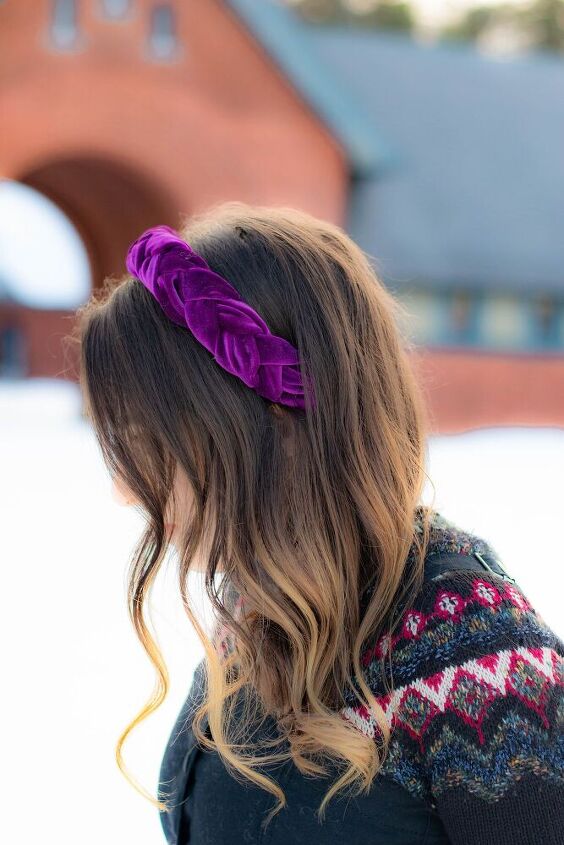
I’ve seen these gorgeous braided bands on my favorite bloggers ( here) ( here) ( here). However, like many things on the internet and beyond – the price tag made me stagger. Luckily, I found a $10 way to create the same look so that every girl can wear her very one velvet crown.
I found this purple velvet from a discount fabric store in the area and it has been sitting in my cabinet for quite some time. Being a cultivator (i.e. hoarder) of fabrics, I bought this 3 months ago with no real idea of what it would later become. The fabric was such a rich purple, I knew it would compliment my dark roots. However, creating these in yellow, green, black and red are definitely in the cards based on all your requests!
1 spool of grosgrain ribbon
1/2 yard of stretch velvet
1 – 1-1/5 inch wide plastic headband
hot glue gun
sewing machine or needle/thread

Instructions
I recommend running to the fabric store 1st on your errand list. Grab your velvet, then make the grosgrain ribbon matches as closely as possibly. This ensures that your finished piece looks cohesive.
Using your hot glue gun, secure grosgrain ribbon to the headband by slowly wrapping. Make sure you leave an overlap so that none of the plastic headband shows through. Going at an even slow pace helps eliminate any bumps or wrinkles in the finished product. Note: only the bottom of the finished piece will be visible. So if you have to create a small wrinkle – manipulate it to the top of the headband.
Cut your velvet using sharp fabric scissors into three strips (20 inches long by 4 inches thick). Fold the velvet in half on the vertical edge right side out, so after the fold you have 3 strips (20 inches long by 2 inches wide).
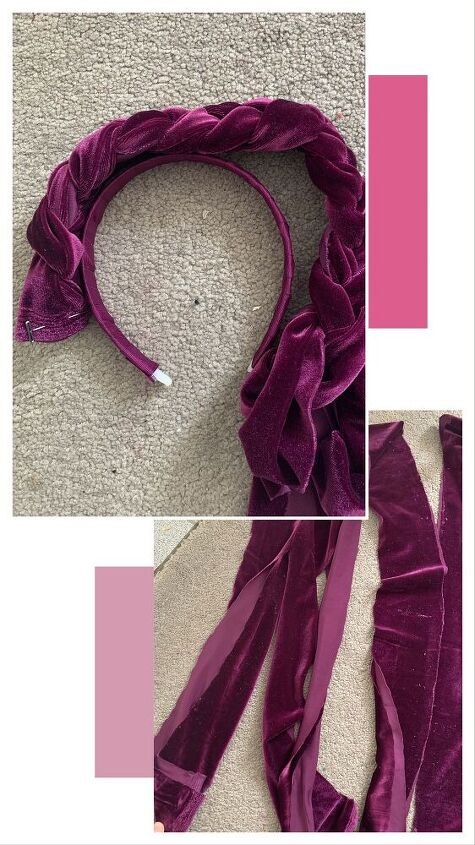
Stack the three pieces on top of each other and pin the end. Braid until you reach the length of your headband. Pin the edges closed. Sew both sides to seal your braid. Glue works too, but doesn’t look quite as clean as sewing.
Using your hot glue gun, secure the braid to the top of the headband until secure.
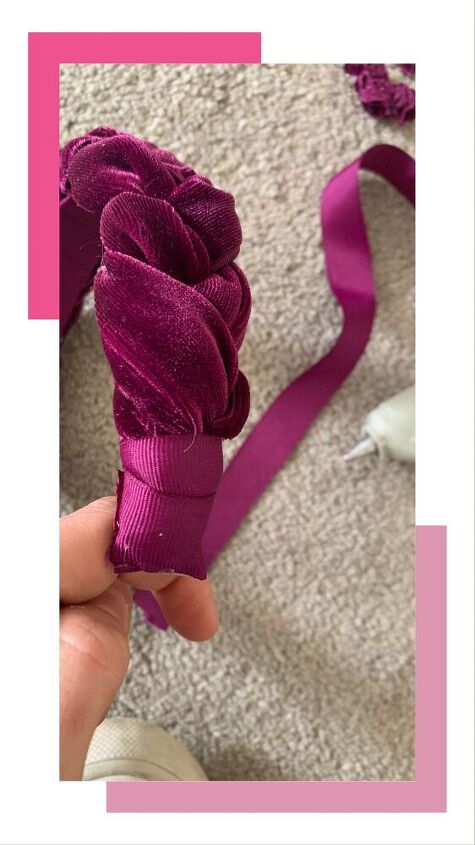
Using your grosgrain ribbon, seal the ends by wrapping horizontally to create a “cap”. Glue to secure.

The author may collect a small share of sales from the links on this page.


Comments
Join the conversation