DIY Embroidered Sun Hat for Summer
Handmade apparel is the best way to create exactly what you want for your wardrobe, like this embroidered summer hat!
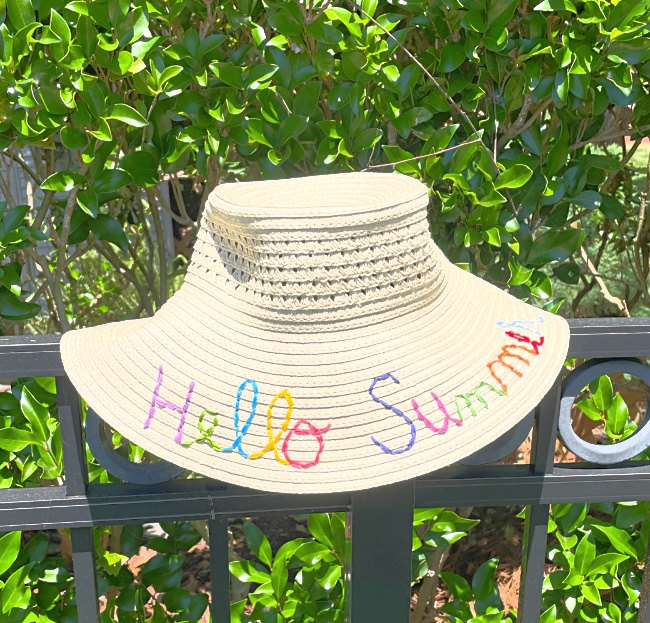
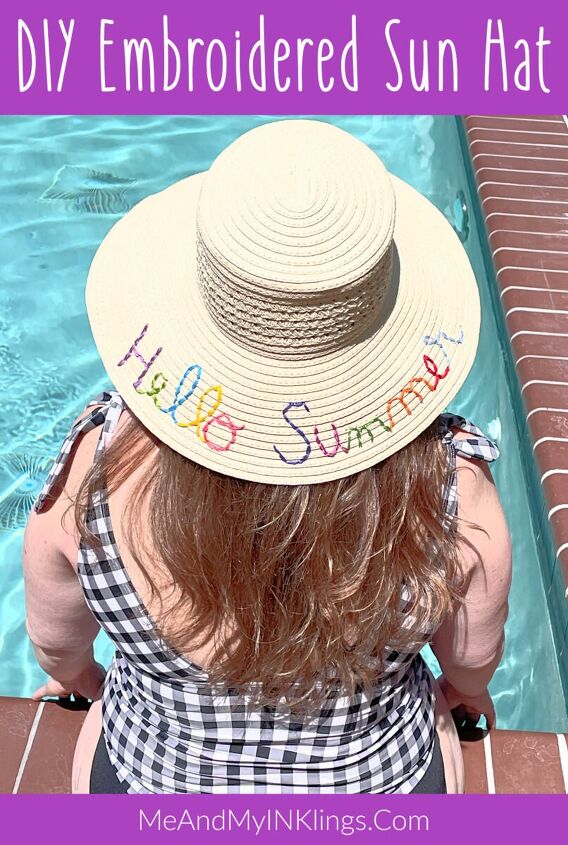
Summertime is great for being outdoors and spending time at the pool. However, it is always a good idea to protect the skin on your face from that direct sunlight. DIY hand-stitched hat is a perfect way to create exactly what message you want to share with everyone around you. For me that message is HELLO SUMMER! The embroidery floss from Anchor comes on spools which makes it my favorite because it travels well (and I am always on the go) and doesn’t create tangles or knots. Let’s make an embroidered sun hat!
Materials and Supplies Needed for DIY Sun Hat
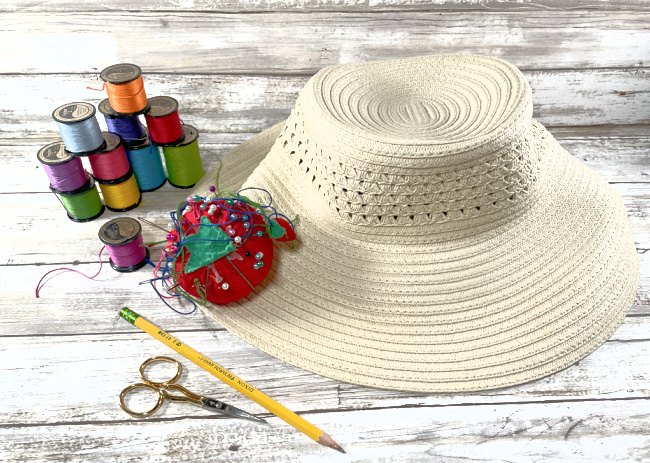
To make this fabulous project, you will need the following supplies and materials. Note that the hat could be any style, shape or size – even a ball cap! This would be a great way to take an older hat that needs a refresh and give it a brand new fashionable life.
- Anchor® Embroidery Floss Spools
- Scissors
- Pencil
- Straw Hat (I found this one at Target.)
Directions to Stitch DIY Embroidered Sun Hat
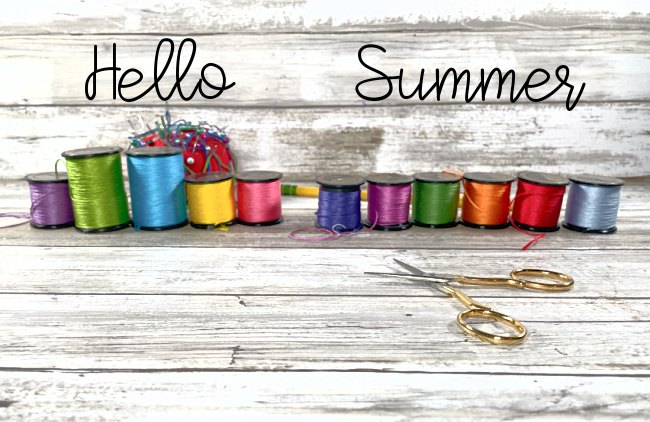
The first thing to be decided is what message or words are going to be added to the sun hat. Once you have that determined it it time to decide what colors of embroidery floss are best for the look you are designing. I chose rainbow colors, of course.
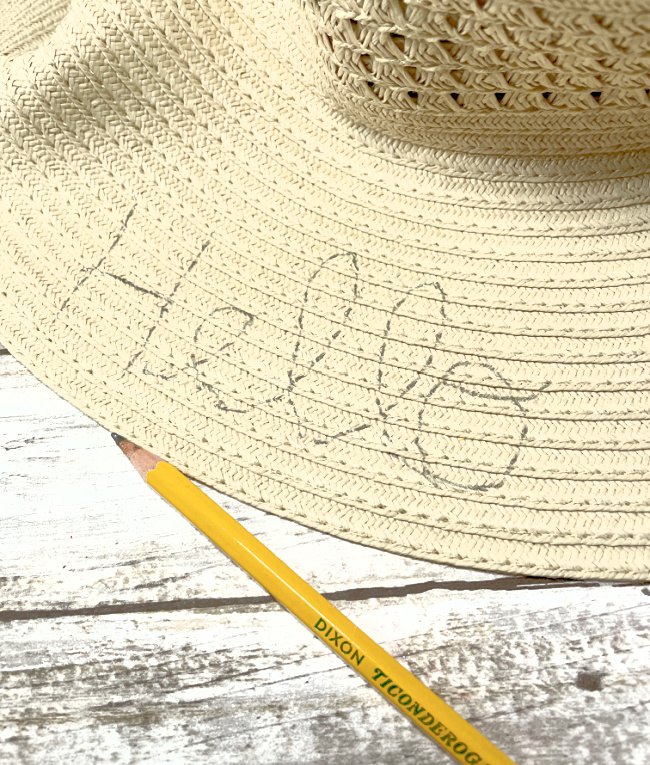
Step One
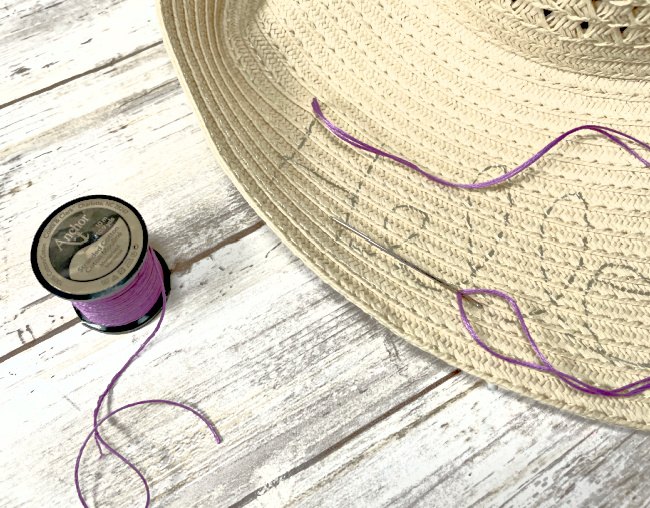
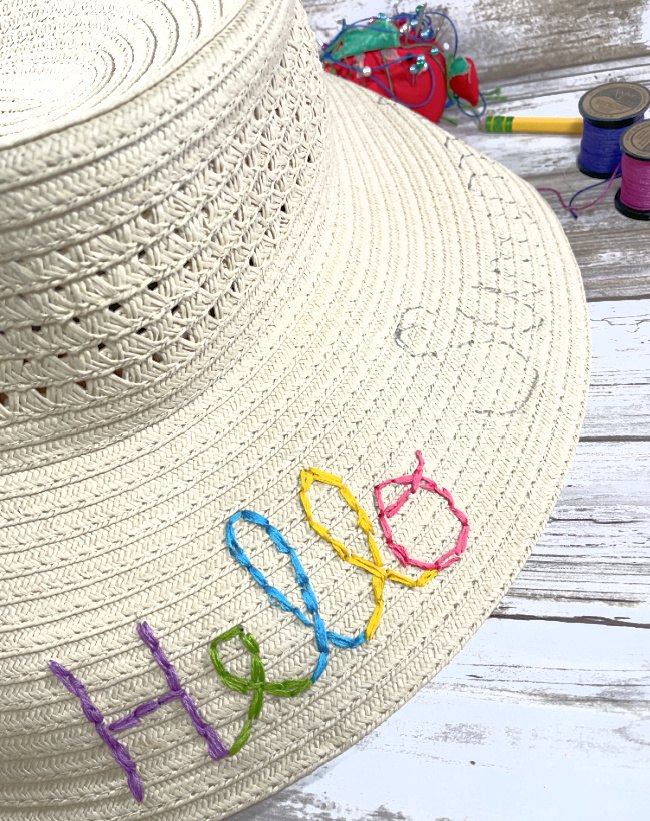
Write your words or message on the straw hat with a pencil. The stitching will cover the pencil marks PLUS they will wear off over time. I think this would make an awesome teacher gift for the end of the year!
Step Two
Choose the colors of embroidery floss that you plan to use and set them out in order for each letter. This could be done is so many creative ways. For example, if the goal is to match a certain sundress or bathing suit – choose those colors.
Step Three
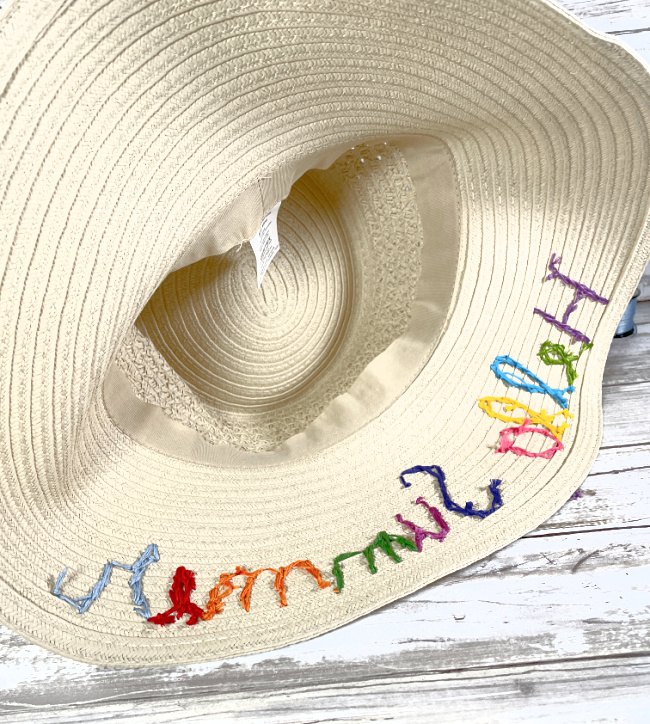
Thread a needle and tie a knot. Make it a double strand so it will be thick. Start on the back of the embroidered sun hat at the beginning of the first letter and pull it through. Stitch that letter in entirety using the basic back stitch. To make the letters thicker if desired, do another set of back stitches right beside the first to double the width of each letter stroke.
Tie off each letter with a knot then pick up the next letter in that same place with the next color of embroidery floss.
Step Four
Cut off any extra loose pieces of floss on the back of the hat. The hat MIGHT be seen from the underside so it is good for this to be cleaned up and pretty too.
No more tangled skeins- floss stays neat and tidy with the new Anchor® Embroidery Floss Spools. The floss rolls smoothly off the spool and doesn’t tangle or knot when pulling out a length to work with. Storage is neat and tidy with spools, no more piles of tangled floss. It can now be found at Michaels and JoAnn Fabrics.
How to reshape a straw hat
More Fashion with Anchor Embroidery Floss
Beth over at Creatively Beth used her embroidery floss to make these totally adorable flip-flop sandals. I think they are so super cute. Go grab all of the details.

This beach bag from Artsy Fartsy Mama would be great with the embroidered sun hat and the flip flops. You can get all the deets for making it over on Lindsay’s blog.

Sharing is Caring! Too busy to make this right away?! Pin it for later! Pin this project to your favorite craft board on Pinterest and it’ll be waiting for you when you’re ready.
This post contains affiliate links. If you make a purchase, it is no extra cost to you but supports me and my small business.
Cheers to Summer and Handmade Fashion!
Laura
The author may collect a small share of sales from the links on this page.


Comments
Join the conversation
So cute☀️