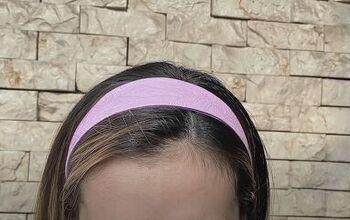
How to Make a Knot Headband Out of Scrap Fabric Pieces

In this tutorial, I'll show you how to make a knot headband. If you’ve got a lot of fabric scrap, one really fun way to use up that leftover fabric is by making a top knot headband.
As opposed to flat headbands this headband is stuffed with all of your fabric scraps, so not only is it super comfortable to wear, it’s a great way to reduce fabric waste and reuse the leftover materials from your last project!
Tools and materials:
- Scrap fabric
- Elastic
- Sewing machine
- Loop turner or safety pin
1. Gather scrap fabric
I already have three strips cut out already, so that’s what I’m going to be using. Each one is about 3-inches wide and 23-inches long.
If your fabric isn’t already split, you’ll need one piece of fabric that is 5.5-inches wide and 3-inches long and another that is 2-inches wide and 20-inches long.
2. Sew your strips together
If yours is currently split like mine, take two of your strips, place them right sides together, and sew along the two longest edges to join them.
Then fold the other strip in half onto itself, right sides facing, and sew to make the elastic casing.
3. Turn inside out
Next, turn your fabrics right side out. Feel free to use a loop turner or a safety pin to do this.
4. Chop up scrap fabric
Chop up your scrap fabric. This is what you’ll stuff the inside of the headband with, so go crazy.
I love using scrap fabric because it’s a creative and useful way of using fabric that would otherwise have gone in the trash.
Cut them rather small so that the headband isn’t too bulky and it’s smooth when you put it on. If your pieces are too large, the headband will be bumpy and won’t look as nice.
5. Stuff the headband
Now, stuff the headband with the small fabric confetti pieces. Don’t stuff the fabric all the way in and completely full as you’ll want it to still be flexible.
I recommend adding more stuffing to the sides and leaving the middle a bit sparse as that’s where the knot will be.
6. Knot the middle
To make the knot, fold the tube in half. Cross the ends over each other, then pass one end through the middle and pull it lightly through.
Adjust as you see fit, making sure the ends of the headbands have the same length and that the knot is positioned in the center.
After you’ve adjusted it as you like, pin the ends so you don’t lose any stuffing.
7. Add the elastic band
Now, add the elastic band into the elastic band casing. Your elastic band should be the measurement of your head starting from one ear to the other ear. Mine was about eight inches in length.
After inserting the elastic band, pin for sewing.
8. Sew the ends
Let’s sew. Secure the ends of the elastic band and the headband with a basting stitch.
9. Attach the elastic band
Place the elastic band on the wrong side of the headband (the side where the knot is flat).
Then, wrap one end of the headband over the elastic band and pin it in place. Sew together with a straight stitch.
Turn the corner over so that the raw edges of the headband cover the elastic band on the inside.
Repeat this step on the other side, and you’re done!
How to make a knot headband
That’s it! This headband is a great way to recycle your old fabrics instead of throwing them in the trash and can also make a great gift for your friends and family.
I hope you liked this tutorial and let me know if you try this DIY knot headband for yourself.
Enjoyed the project?
Suggested materials:
- Scrap fabric
- Elastic
- Sewing machine
- Loop turner or safety pin
The author may collect a small share of sales from the links on this page.


Comments
Join the conversation
Love it!! What a great idea!
Great Idea and your hair would look wonderful all fluffed out behind that lovely band if it is still long :)