An Errand Bag With Style: Nouria Tote From Fibre Mood
I am always looking for a bag to take with me on errands…well look no more!
Introducing Nouria, a new pattern release from Fibre Mood.
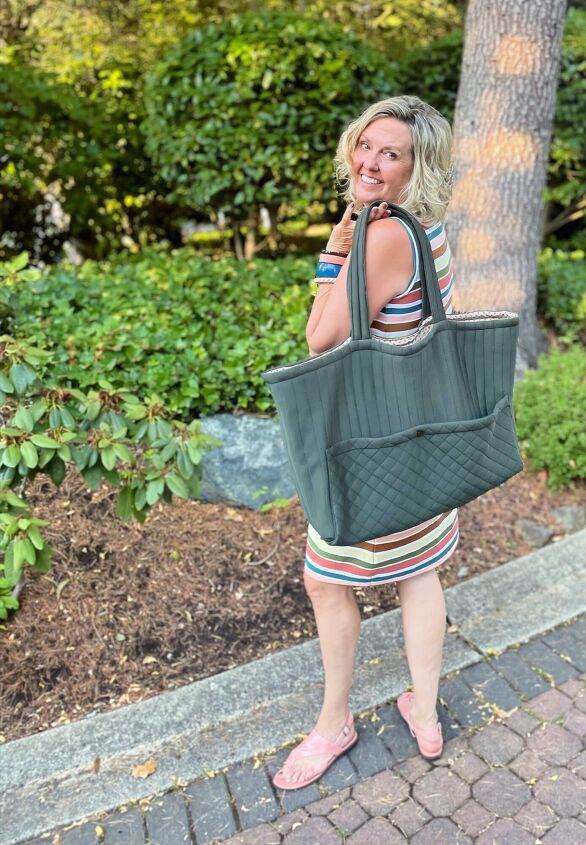
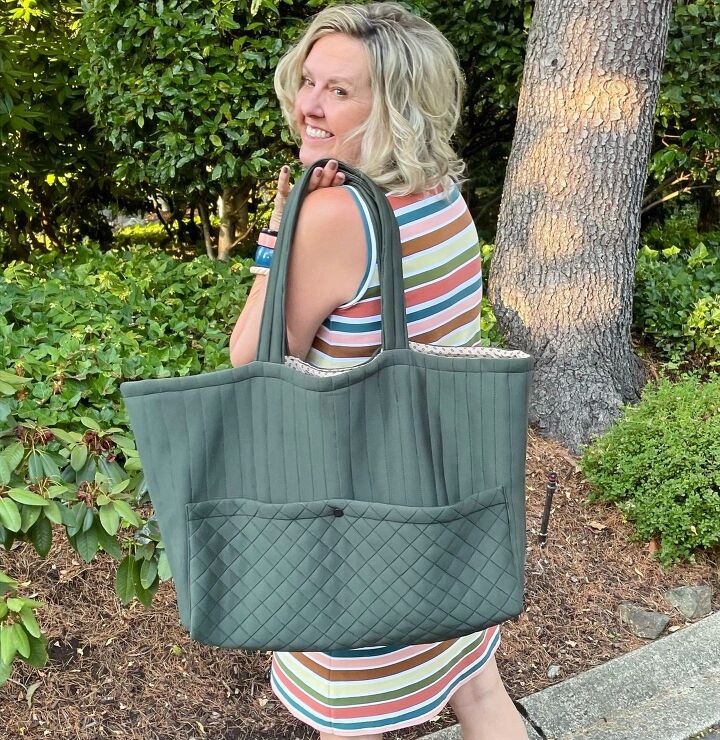
Nouria is a lined extra large tote that features long handles, a handy exterior pocket with a snap closure and matelasse ( hand quilted) fabric. This bag is perfect for carrying “all of the things” AND it keeps you looking stylish. It provides the best of both worlds, offering fashion styling and practicality.
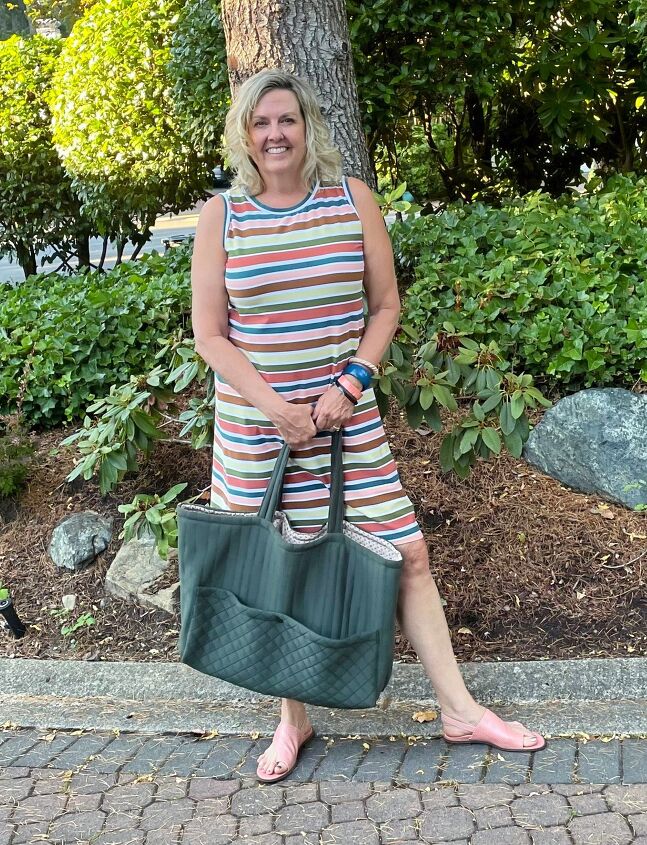
This large tote is based on Fibre Mood’s smaller Celine bag. It is perfect for errands, travel or the beach. Finally one bag that will hold your bathing suit, beach towels, beach mat, hat, book, sunnies and snacks all at once- no more juggling multiple bags.
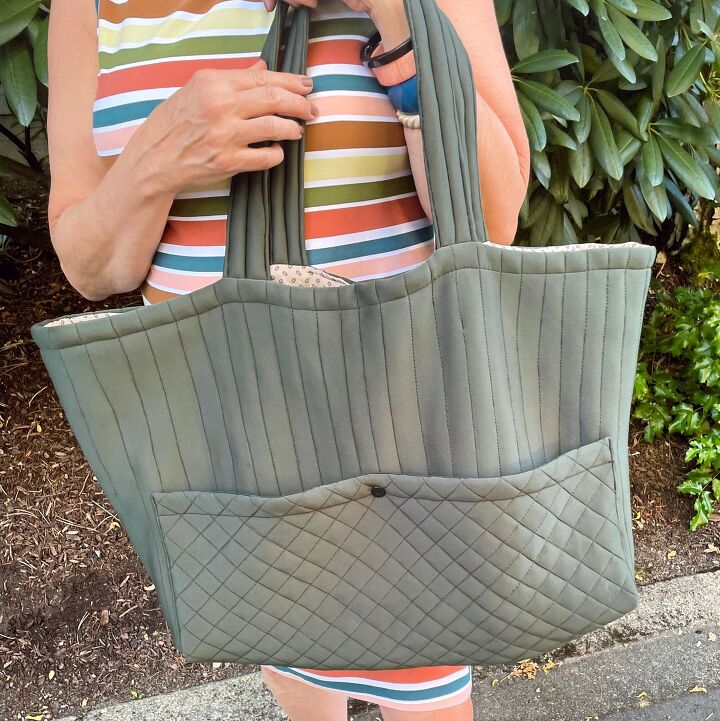
You can make the Nouria Bag from a heavier weight fabric with a coordinating lining and you will have a bag sewn up in a couple of hours. I chose to create the bag using the optional handmade matelasse technique, or hand quilted technique and this wonderful neoprene fabric or scuba from Minerva Fabric.
Scuba fabric is a term commonly used to refer to Neoprene which is a synthetic textile. It was originally created in the 1930's as a substitute for rubber. While Neoprene might be a dream come true for scuba divers due to its waterproof nature it does have to be used thoughtfully in the fashion world. Neoprene isn't breathable at all. For this reason is it best suited to loose-fitting clothing or for parts of a garment that does not cover a large portion of your body. This neoprene is soft and flexible but thick enough to hold its structure and shape, and ideal choice for an oversized tote.
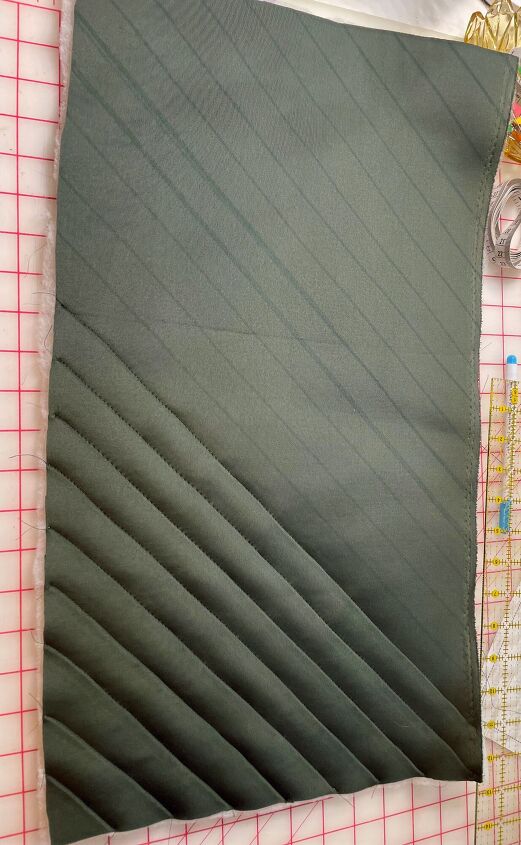
The pattern itself has 3 very basic pieces; a large main tote piece cut on the fold, the pocket piece and handle. If you are going to line your tote you simply cut the tote pattern piece and pocket out of your lining fabric as well. To create a handmade matelassé effect for your tote you need to prepare the fabric before you cut out your pattern pieces. Using a thinner quilters wadding that is 1-2cm thick and spray adhesive, you will have your fabric prepped in no time! Cut a piece of fabric and wadding 90 cm X 150 cm. Mark out the design that you want to quilt on your fabric . I chose to create simple channels for the main part of the bag and to create a 45 degree cross hatch pattern for the pocket as a feature so I cut the pocket piece out separately
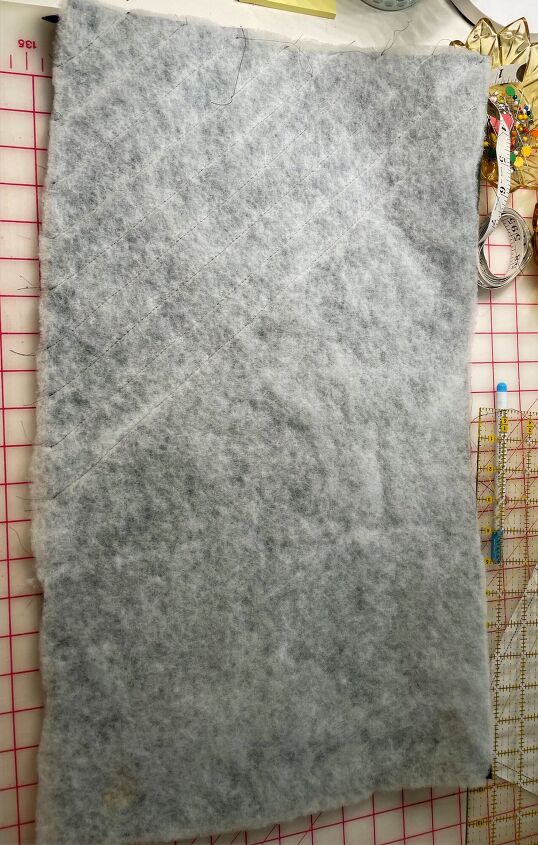
Once you have your quilting lines drawn spray a light coat of adhesive on the back of the fabric and another light coat of adhesive on wadding. I find by spraying both pieces they stick together really well. Laying the fabric piece on a hard surface, place the wadding over top and press it onto the fabric. Pat the wadding in place keeping it smooth without rubbing it too much so that it won’t stretch. Do this for both the pocket and the main body of the tote.
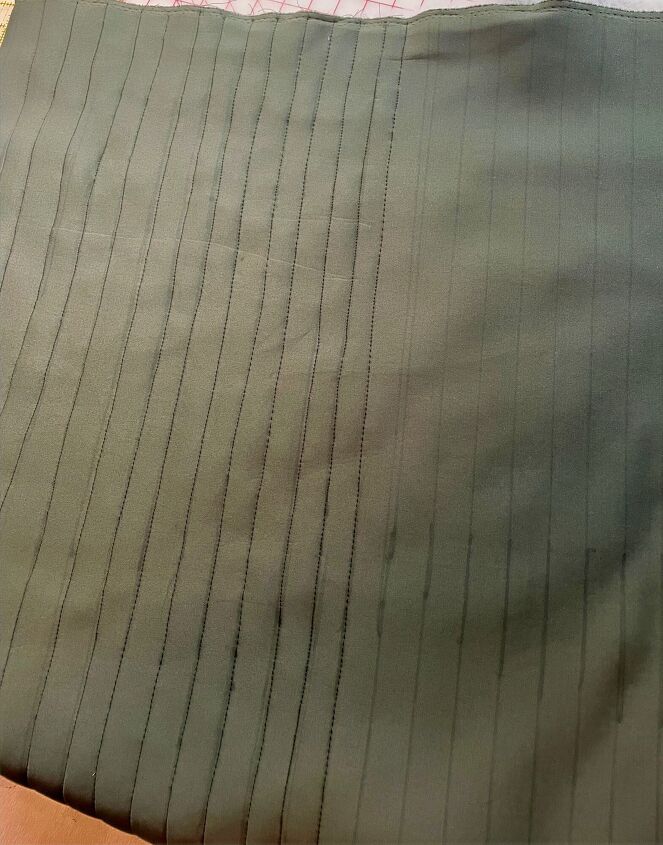
Now you are ready to create a handmade matelassé finish. With the fabric side up, straight stitch along the lines that you have drawn on the fabric. I like to start at the centre line of the fabric and work my way out to the right side, then flip the fabric and work out to the left edge. This helps to keep the fabric secure from the centre out and stops it from ‘creeping’ or bunching up. When you have finished quilting the fabric you are now ready to cut out your pattern pieces.
The pattern instructions are very straight forward at this point. You will attach the lining to the pocket, flip it right side out and secure it to the main tote. The main tote sews together really quickly and you will have the basic shape of the bag in no time. The lining for the tote sews up in exactly the same way. For my lining I used some vintage silk that was gifted to me by a friend. It has a subtle coordinating colour scheme that makes me think of her every time I open the tote.
Once you have both the bag and lining complete you will create the handles for the bag. Use the same matelassé technique that you used for the tote, only this time you attach the wadding to one strap. Once you have sewn the sides of the strap turn it right side out and press. I sewed a quilting row down the centre of my strap as per the pattern instructions, then added an edge stitch on each side as well to help to flatten and shape the strap because the scuba fabric is quite thick.
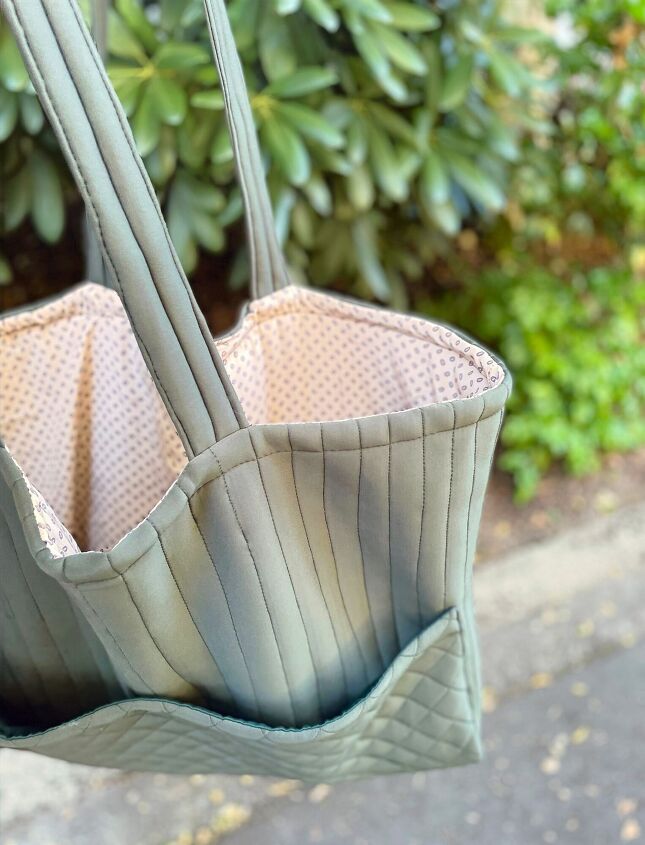
Now you are ready to assemble your tote by placing the lining and tote right sides together and sewing around the top. Make sure to leave a large enough opening so that you can turn the bag right side out, I left the space between the handles on the back of the bag that I machine stitched shut.
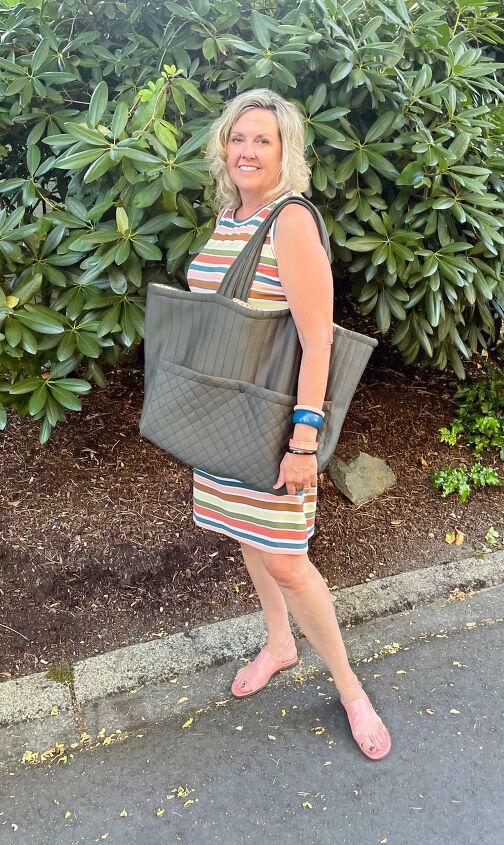
Now all that is left is to add a snap in the centre of the large pocket. The snap was definitely a good final addition as it prevents the large pocket from sagging open.
This is a wonderful tote that will keep you organized and looking stylish. It is a fun bag to sew and there are so many creative ways to piece one together. I can’t wait to make another one from some great upholstery fabric that I have.
After all…. There is Sew Much To Design.
The author may collect a small share of sales from the links on this page.


Comments
Join the conversation