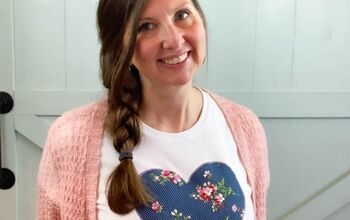
How to Applique on a T-Shirt (with FREE Template)
This tutorial is all about how to make your own applique from fabric scraps and then how to add that applique on a t-shirt to upcycle it – so you’ll wear it more often!
Here is how this started – basically I was binging on the Home Edit on Netflix and dreaming about re-organizing my entire house and I kept finding myself looking at one of the host’s shirts which often had different lightening bolt motifs. I don’t know why but I really like lightening bolts…
Anyway I started googling lightening bolt tops but I didn’t see anything I really liked and then of course it came to me – I could just make my own!
So I pulled out a long sleeved black t-shirt from my wardrobe that I hardly ever choose to wear and got to work upcycling it into my new favourite shirt.

My boring t-shirt before:
I made my own lightning bolt template for this project and you can download it here free.
I love this project as not only did I upycle my unloved T-shirt I also managed to use up some of my fabric scraps from my other sewing projects too!
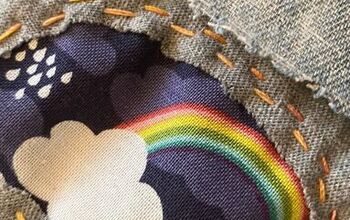
I used a raw edge applique process and I attached my applique with my sewing machine. There are other applique methods – needle turn to be specific – that you can do by hand if you’d prefer to do it that way.
Here is how I did it.
APPLIQUE A T-SHIRT – MATERIALS NEEDED:
- Old T-shirt or sweatshirt that is in good enough condition to continue wearing.
- Heat n’ Bond Lite Iron-On Fusible Adhesive
- Embroidery Stabiliser
- Fabric Scraps
- Lightning Bolt Template – you can download mine here.
- Fabric Scraps
- Contrasting Thread
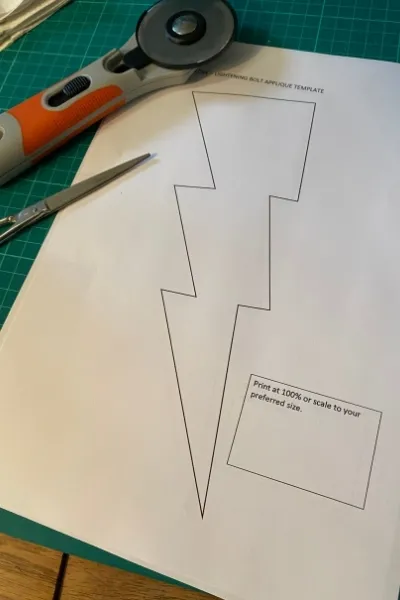
STEP 1: CUT OUT YOUR APPLIQUE TEMPLATE
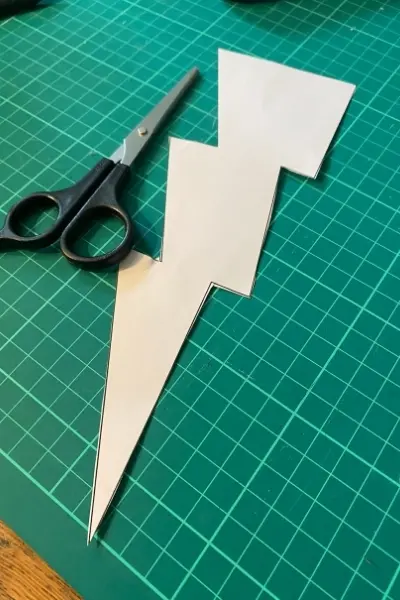
You can make your t-shirt embellishment whatever shape you like really. I went for this lightning bolt design and I created a template for it on my computer and just printed it on regular printer paper.
You can download the same template here.
You can scale your design to whatever size you like before you print it.
Once you’ve chosen, printed and cut out your paper template it’s time to start sewing!
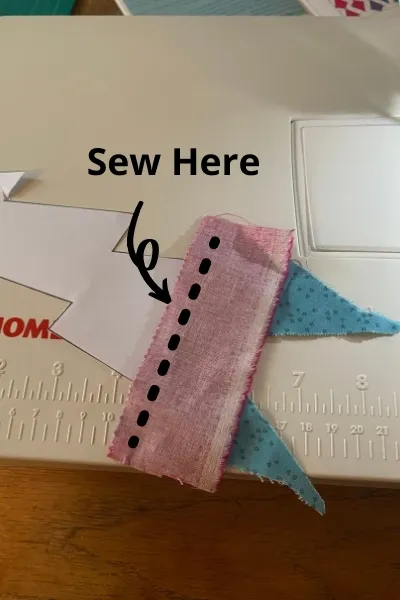
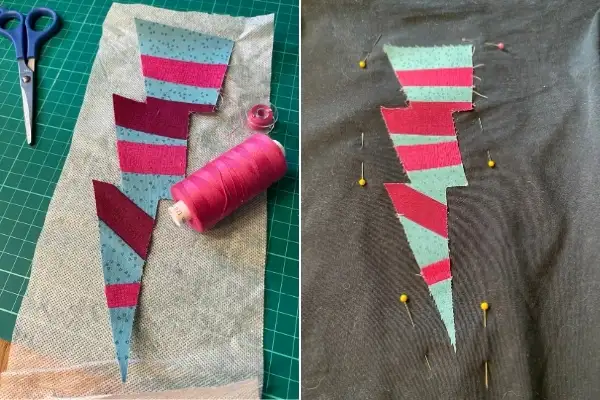
STEP 2: STITCH AND FLIP WITH FABRIC SCRAPS
You could of course just use your template to cut out one large piece of fabric for your applique project. But I liked the idea of using some brightly coloured fabric scraps I had in my scrap bin so I used this stitch and flip method to make my stripey lightning bolt applique piece.

First you want to pick two scraps that are sort of longer than they are high – you want them to be wide enough to slightly hang off the end of your template on either side.
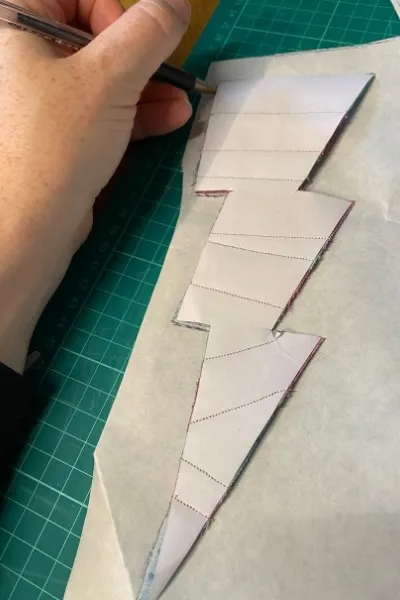
Put them right sides together and stitch along where the raw edges meet – making sure that the bottom fabric piece is big enough that when you flip open the top piece the end of your template is still covered.

And yes – you should be sewing through the paper as well as the fabric.
Machine Sewing Tip: I used a 1.5 stitch length for this to make my paper easier to remove at the end.
Repeat the same stitch and flip method moving down your template, stopping to iron open each time you flip. You can make some of your stripes thin and some larger and you can get creative and angle them too. The only important thing is that you are always covering the template so that when you open up your two scraps you don’t see the white of the template peeking out!
Keep going until your template is completely covered with fabric.
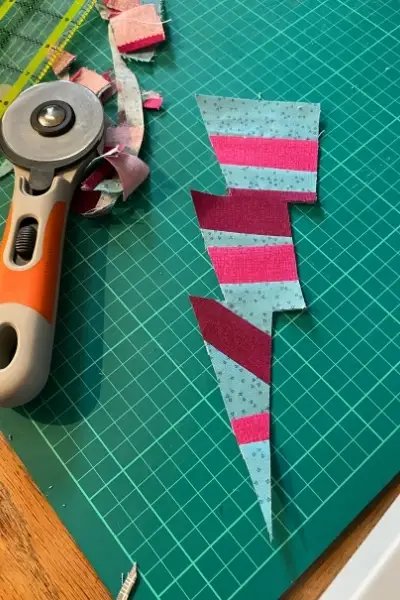
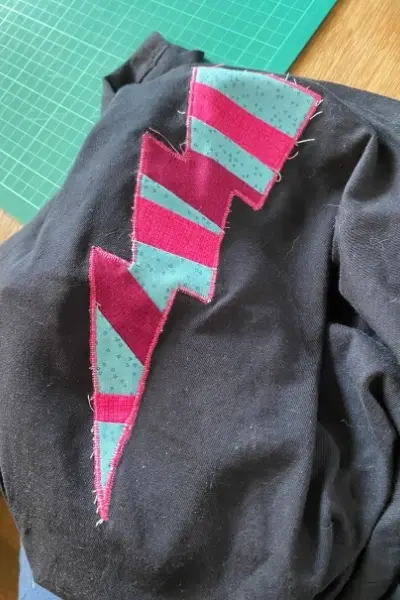
STEP 3: TRIM YOUR APPLIQUE PIECE TO SIZE
Next you need to set your fabric covered template fabric side down on to a cutting mat.
Use a straight edge ruler and a rotary cutter (or sharp fabric scissors if you don’t have a rotary cutter) to trim the excess fabric off of the edge of your template.
STEP 4: FUSE YOUR APPLIQUE ON A T-SHIRT
This is where it starts getting exciting as you can see your design start coming to life.
In order to attach your applique to your t-shirt in preparation for stitching you need to cut out a double sided fusible bonding agent – I use Heat n’ Bond Lite.
Place your applique piece fabric side down on to the paper side of the Heat n’ Bond. Trace around the edge of your template with a pen or pencil. You need to do this fabric side down because you need the Heat n’ Bond to be a mirror image so that it fits properly on the back of your piece.

Cut out your lightning bolt template slightly inside your traced line. You want the piece of Heat n’ Bond to be slightly smaller than your applique piece as you don’t want any of the sticky fusible peeking out the edges.
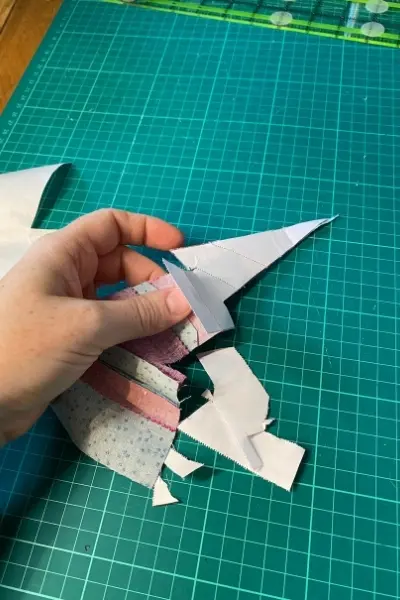
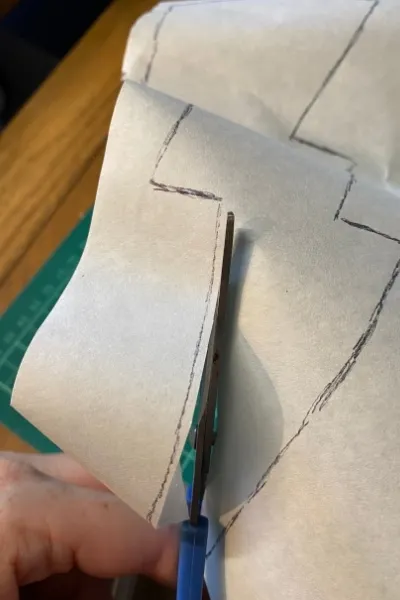
Next remove the paper template from the back of your applique piece – just tear it near the stitch line where your needle has perforated the paper for you.
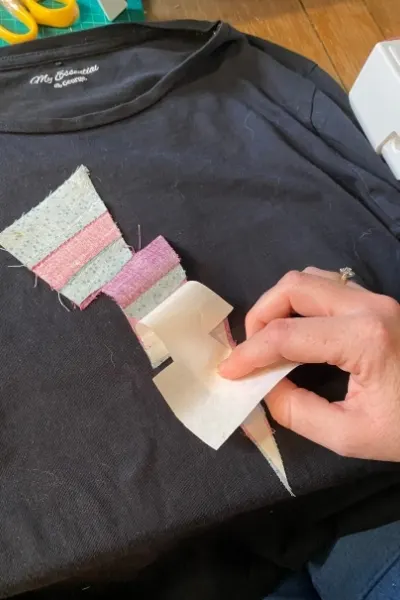
Then place the Heat n’ Bond web side down on to the back of your applique piece. Iron lightly all over to stick the Heat n’ Bond to your applique piece.
Next remove the paper on the Heat n’ Bond, turn the applique piece over, place it where you want it on your t-shirt and iron lightly again on the tip of your applique piece to stick it in place.
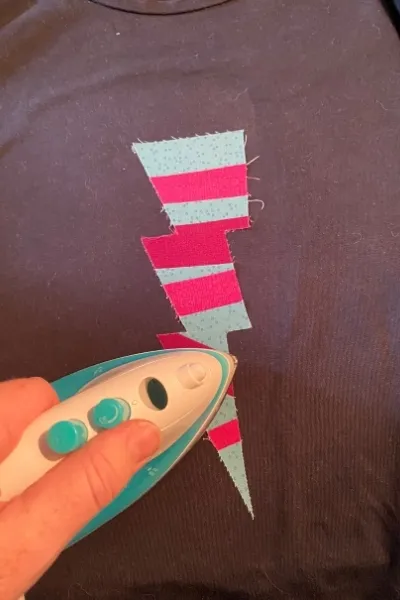
Your applique piece won’t move while you are stitching now – but you can’t just leave it like this as you will end up with frayed edges and it likely won’t withstand the wash.
STEP 5: EMBROIDERY STABILISER
Before you start stitching you will want to add secure some embroidery stabiliser to the inside of your t-shirt (behind your applique piece). This is to make it easier to stitch down the edges of your applique.
Start by cutting out some stabiliser that is slightly larger than your piece. Then pin it in place behind your applique.
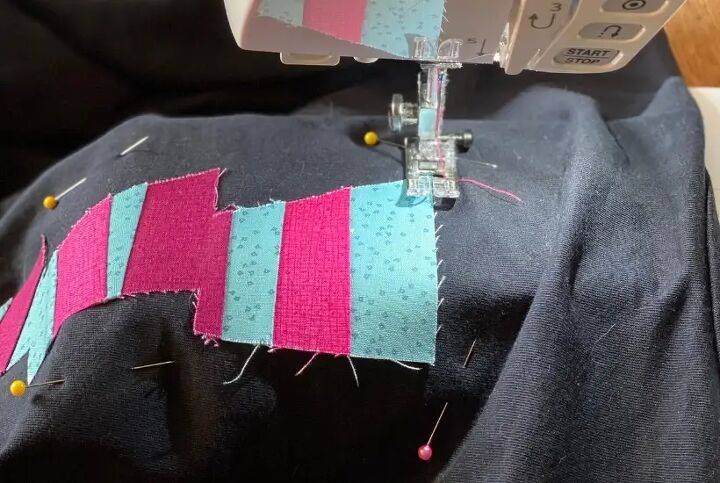
STEP 6: MACHINE STITCHING YOUR APPLIQUE ON A T-SHIRT
Before you jump into stitching down your design. I strongly encourage you to use some fabric scraps to test out different stitches and stitch lengths.
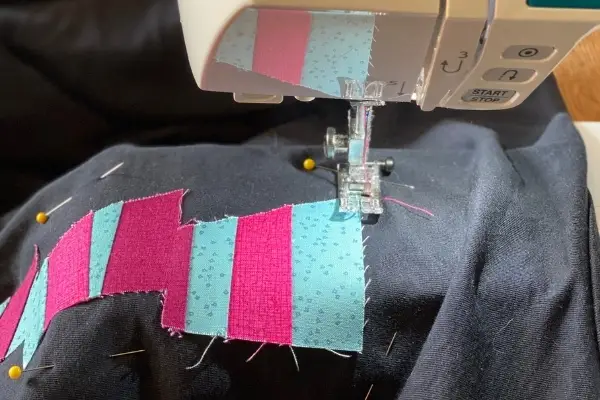
I sometimes use a zig zag stitch for applique and sometimes a blanket stitch. This time I went for a blanket stitch with a slightly shortened stitch length. Choose whichever stitch looks good to you and looks like it will enclose that raw edge of your applique piece nicely.
Start stitching in one corner of your applique sewing relatively slowly to make sure you are catching the edge of your piece with your stitches. Also make sure you are only stitching through one layer of t-shirt and that your embroidery stabiliser is still securely in place.
How you handle each turn you need to make will depend on the stitch you are using, you might need to stitch all the way off your piece or you might need to make sure you keep your needle down within the border of your applique piece as you turn – again experiment with your turns on scraps before you start too!
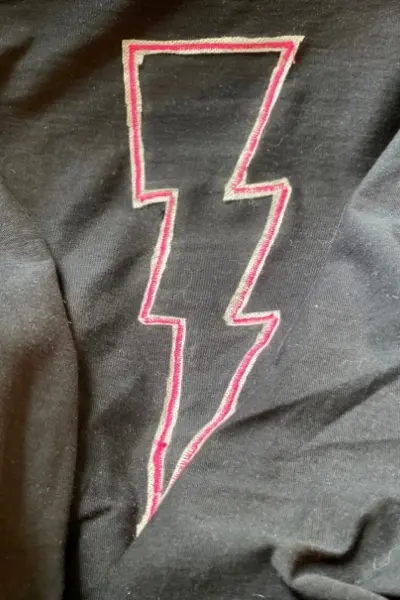
Stitch all the way around and backstich at the end to secure it.
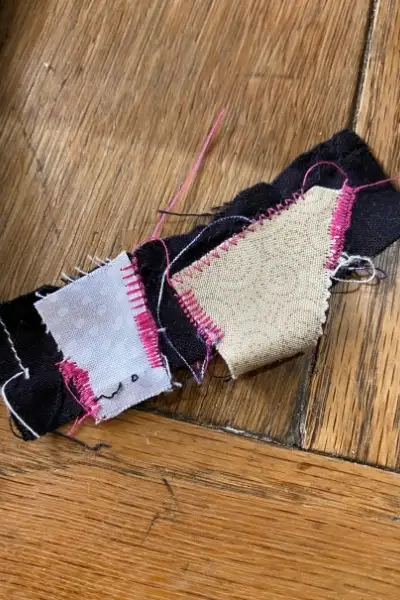
Finally tear or cut away the stabiliser on the back of your design and trim any loose threads around the edges of your applique piece.
My embroidery stabiliser is the wash away kind so those little left over bits will just wash away in the washing machine.

FINISHED APPLIQUE ON A T-SHIRT
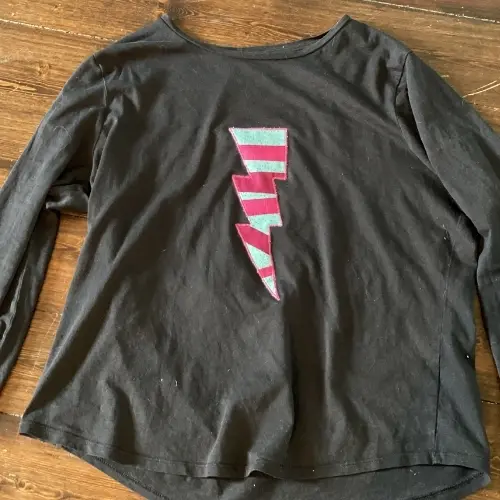
I really like my new embellished t-shirt – even if my sister says it’s very 90’s! Everything old is new again right?

Of course you don’t have to use this applique technique on a t-shirt. You could use the same applique technique for a bag, a pouch or even on a pair of jeans.
If you liked this post and you want to save it for later, don’t forget to pin it to your Clothing Upcycle Ideas Board!
The author may collect a small share of sales from the links on this page.


Comments
Join the conversation