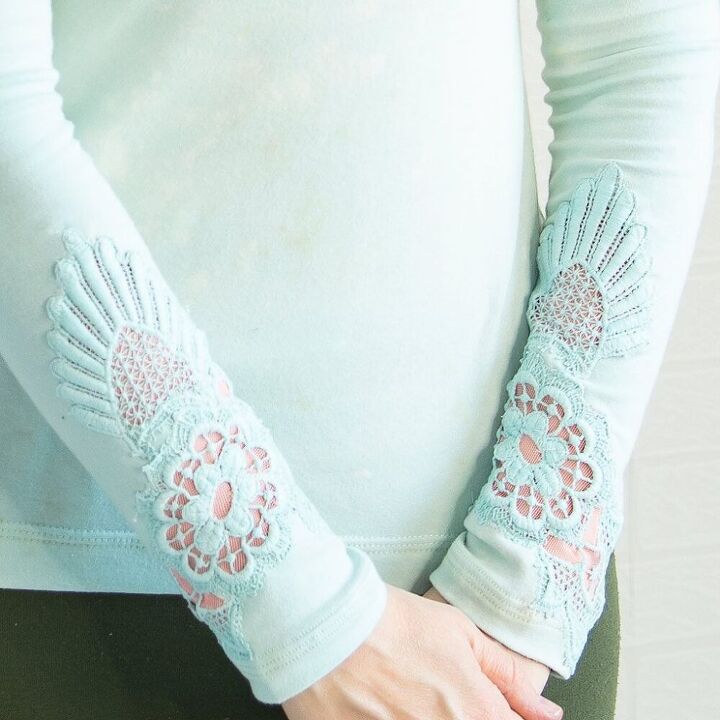
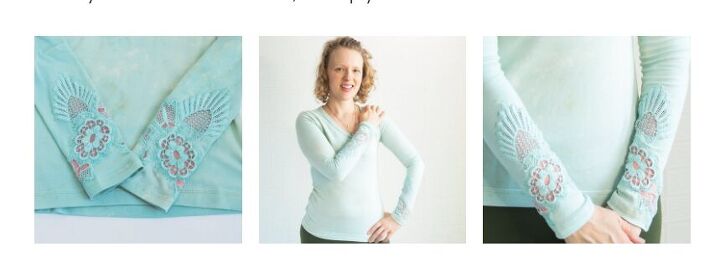
Upgrade a Basic T-shirt Pattern With These Lace Cuffs
I’m always looking for an excuse to use up good lace, and these lace cuffs are a great way!
A basic t-shirt pattern is a blank canvas for so many things, and today I’m showing you how to add lace to the sleeves.
It’s an easy DIY and a fun way to upgrade a simple t-shirt without having to do a lot of fancy pattern hacking. We’ll chat about lace that’ll work for this project, then I’ll walk you through the process of adding lace to your t-shirt.
Off to the cutting table!
- Your favorite t-shirt pattern
- Jersey fabric
- Lace trim or appliques
- Scraps of knit mesh (optional)
- Contrast thread + needle
- Rit DyeMore (optional)
- Thread to match applique
- Stretch or ballpoint machine needle
- Small embroidery scissors
Which works better for lace cuffs: lace trim or appliques?
One thing you’ll have to decide for yourself is what kind of lace to use.
I will always always advocate for you to buy good quality lace. There’s so many cheap laces out there that look tacky. If they feel scratchy or thin, it’s a hard pass for this project.
Look for Venise lace, crochet lace or guipure lace trims and appliques. They all have enough heft for a project like this.
Lace trim and appliques are both good choices. Lace appliques are plentiful and many in shops like Craft Cabaret or Mary Not Martha. One thing to keep in mind for lace cuffs is the size and shape of the applique.
Lace cuffs work well with larger scale appliques, but often the biggest appliques are collars. Look for more oblong shaped appliques. Shapes like feathers or leaves work well here.
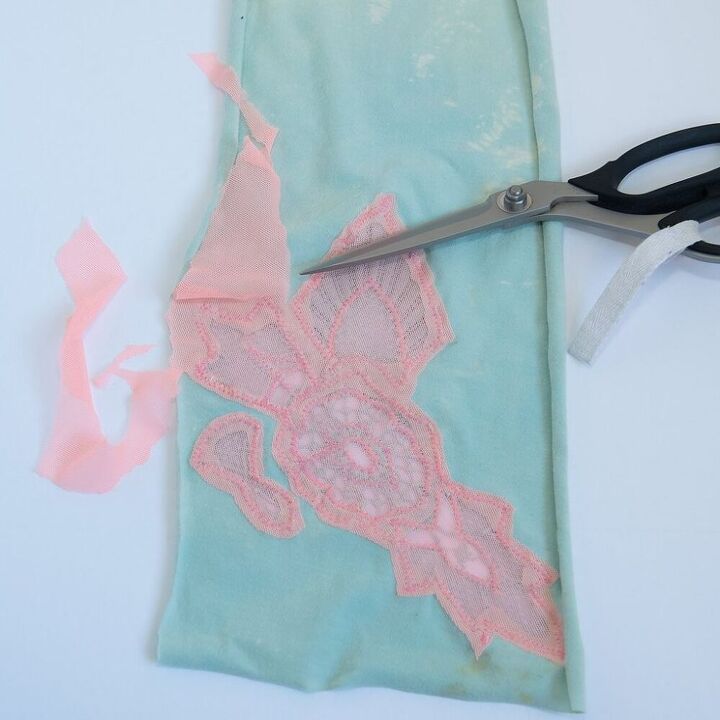
Lace trim is another option. The nice thing about lace trim is that you can cut a custom shape and size from the trim. If you’re using trim, cut out a pair of appliques, cutting between the connecting lines.
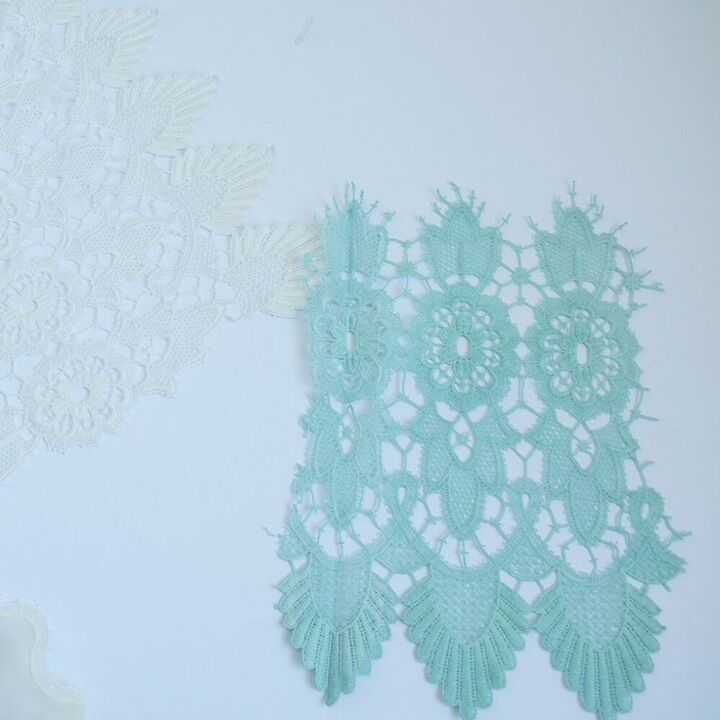
Lace is almost always white or ivory. If that’s your jam, by all means, go with it.
If you want a more custom or just a different look to your lace, grab a bottle of Rit DyeMore. It’s a 3 minute process!
Add about 1/2″ of water to a metal loaf pan. You can pick one up at Wal-Mart for less than $1. It’s my go-to for dyeing small things like appliques.
Set the pan on a stove burner and heat it over medium.
Next, add a little bit of the DyeMore to the water.
Bring the water to a boil, then turn it down to a simmer. Add the lace to the dye bath and stir it with a popsicle stick until the lace has absorbed the color. The lace should take on the dye almost immediately. If you want a stronger color, use more dye.
To finish off, use gloves to pull the lace out of the dye bath. Rinse the lace under cold water and allow it to dry. From there, you’re ready to add the lace to your t-shirt.
How to add lace cuffs to a t-shirt
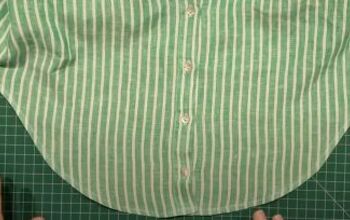
Cut out your t-shirtUsing your pattern, cut out your t-shirt pattern pieces from the jersey. Set aside everything now except the sleeve pieces.
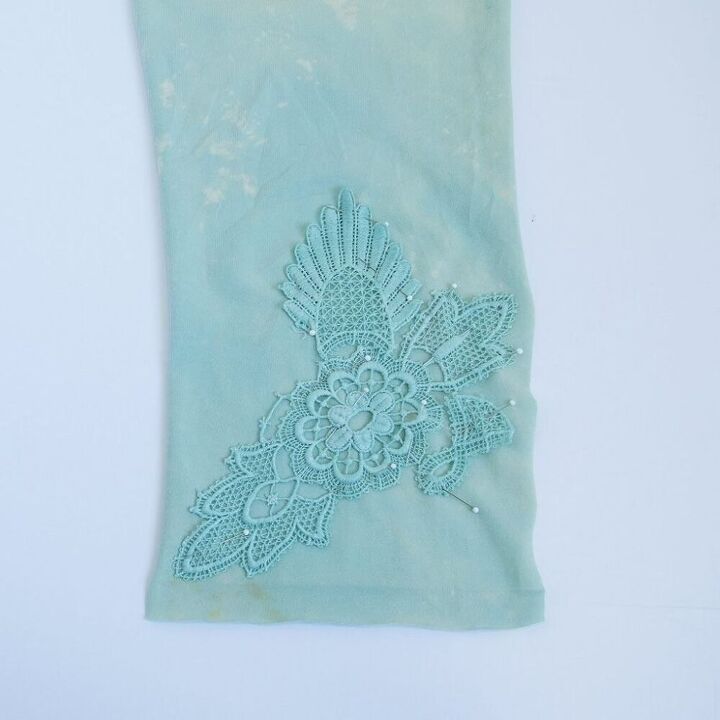
Adding the lace to the sleevesNow it’s time to place the lace on your tee.
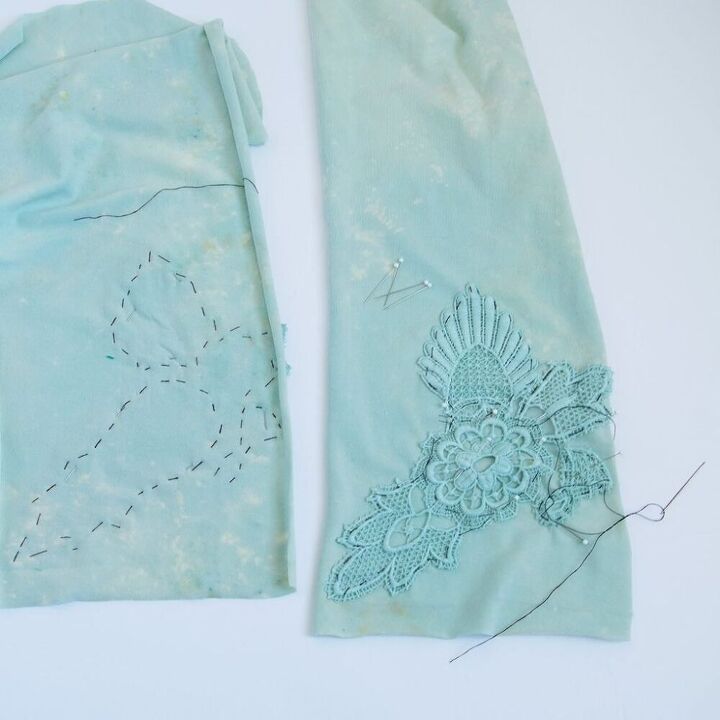
First decide where on your sleeve you would like the applique to be placed. Make sure the lace is placed away from seam and hem allowances.
Pin the lace in place. To check the placement, wrap the sleeve around your wrist. If you like how it looks, go on to the next step.
Repeat the pinning process for the second sleeve. An easy way to do this is to place the second lace applique on top of the first. Place the second sleeve on top, right sides together and flip the whole thing over. Your little sandwich should’ve gotten the lace in the exact same spot.
Do your best to get the lace in the same position on the second sleeve. Keep it symmetrical!
Baste the laceThis is the part where I gush over hand basting. While you could stitch down your applique with the pins, basting the lace to the sleeve by hand is much better. Why?
- You can stitch right over your basting
- It’s faster to remove the basting stitches later than pins
- Best thing: the lace will not shift at all with hand basting.
My plug for hand basting over, thread up a needle with contrast thread. Stitch around the lace with long running stitches. It’s usually enough to stitch around the outer edges of the lace.
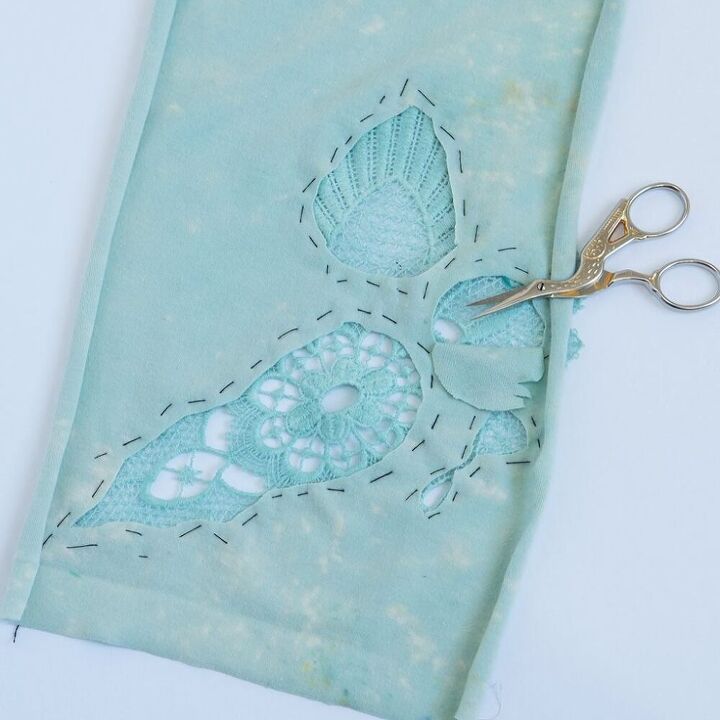
Cut away the jerseySkip this step right now if you don’t want to add mesh behind your lace.
First, pull the lace away from the jersey. Use your embroidery scissors to cut away the jersey on the inside of your basting stitches.
Be careful not to cut through the lace or the basting stitches.
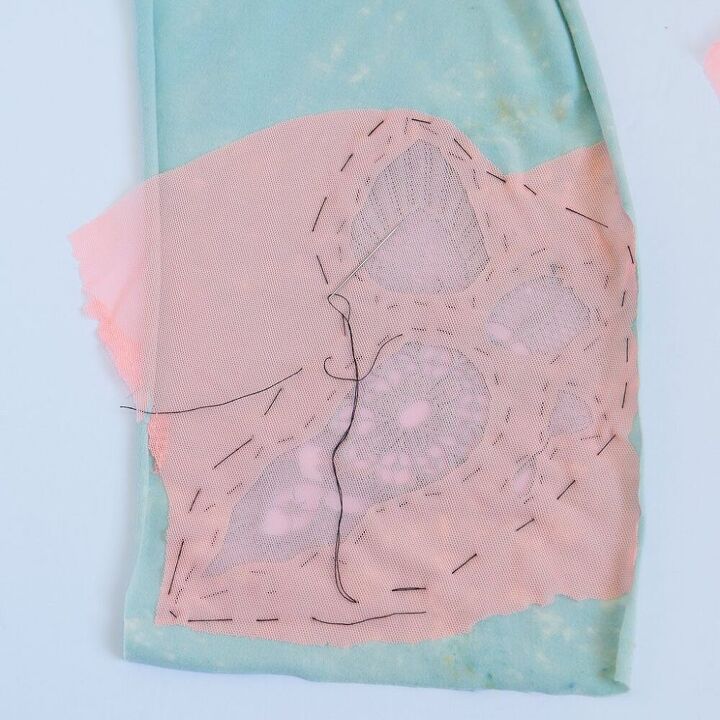
Add mesh if you’re not into ventilated sleeves!If you’d like, you can add a layer of mesh behind the applique. Why would you do this?
The mesh will give the lace some support. We’re also going to be cutting away the jersey underneath the applique. If you’re not into that “ventilated” feeling, the mesh will help keep too much air from getting into your sleeve!
To add mesh behind the applique, cut off a small piece of mesh knit and pin it to the back side of the sleeve. Hand baste the mesh to the sleeve, keeping your stitches outside the lace basting. Repeat for sleeve number 2.
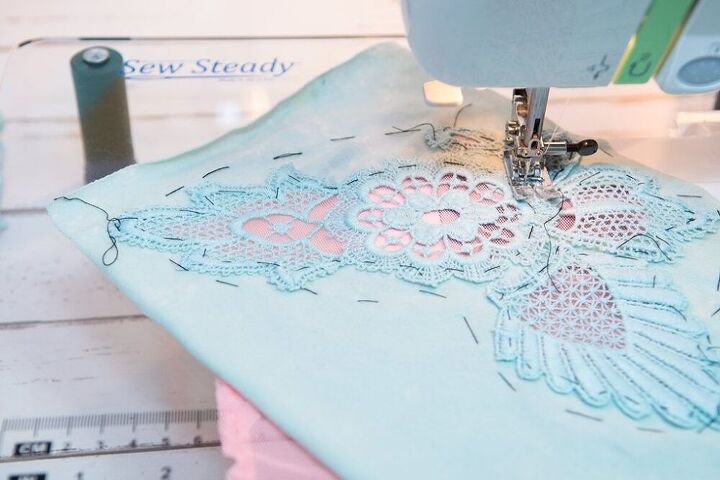
Stitching the lace to the sleevesAt this point, you’re ready to stitch!
Take your sleeve to your sewing machine. Working with the lace on top, use a zigzag to begin stitching the lace to the jersey.
Avoid tugging on the fabric, and keep everything as flat as possible. When you come to a curve, leave your needle down in the lace. Lift the presser foot and pivot the fabric. After that, lower the presser foot and keep stitching.
Continue to pivot and stitch until you have stitched all the way around the lace.
Take out your basting stitches.
To finish off the lace, cut away the excess mesh on the backside of the sleeves. If you skipped adding mesh, instead cut away the jersey on the inside of the stitches from the wrong side.
Finish off your teeWhen your sleeves are finished, sew up your t-shirt as usual.
Be sure to check out my best tips for sewing a t-shirt neckline!
So that’s a simple way to add something interesting to a basic t-shirt with lace cuffs. For more ways to use lace in your projects and other embellishment techniques, check out these posts…
The author may collect a small share of sales from the links on this page.


Comments
Join the conversation
I love your lace inserts and I'm going to get busy and do this! Thanks!😄
Such a wonderful idea. Thanks for sharing