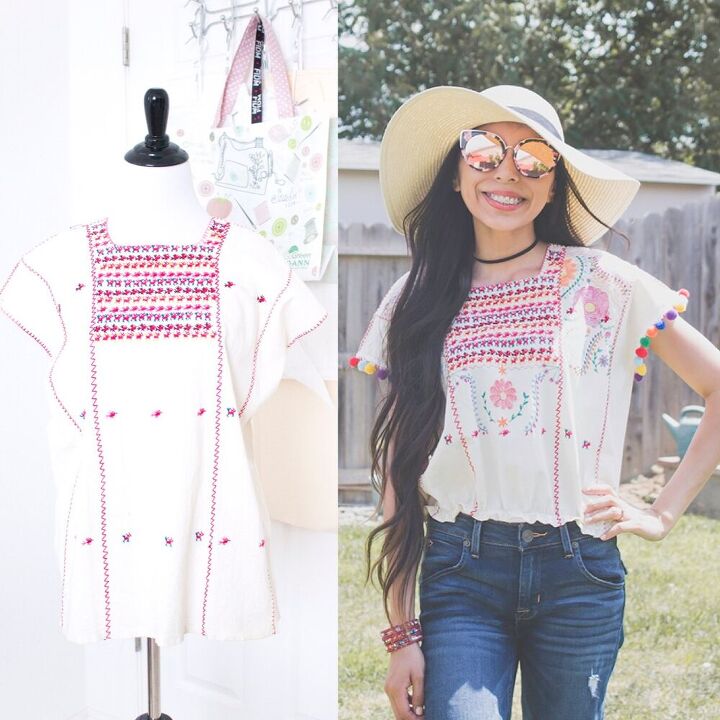
Faux Embroidery Using Fabric Markers

Time for Craft Challenge again! This month I grabbed my fabric markers from my stash. I bought them back in April and hadn't used them. Lately, I've been seeing some cute embroidered tops and I remembered I had this one in my closet. I got it in Mexico back in 2007 (10 years ago!?). I wanted to update the style to make it trendier, and this was the perfect chance to do so. Below I show you what I did to make this top trendier and how I used fabric markers to do "faux embroidery."
STEPS
1. I cut off a piece at the hem. It was too long and "box" like.
2. After cutting a chunk off, I drew on my "embroidered" design. The possibilities are endless! This was really fun. Then, I hemmed the bottom.
3. Close up of my "embroidery." And, to make this little top more colorful, I sewed on some pom-pom trim to the sleeves.
4. Since the silhouette was still too "box" like, I sewed some elastic to the bottom.
5. Elastic sewn in.
TA DA!
Now, check out what the other participants of the Craft Challenge are creating this summer:
Eclectic Soapbox
Enjoyed the project?
The author may collect a small share of sales from the links on this page.


Comments
Join the conversation
I have used fabric markers before and did not like the way they faded when washed. I have never used this brand marker so I am wondering if you found them as brilliant after washing and were there any other steps pre or post design? (OK so after rereading the article, I see that you started with an embroidered top from Mexico as your "base".) This makes more sense as the colors there are much brighter.
Hi Mary this is adorable thank you for sharing. The "embroidery" you chose went well with the original design and really complimented it. PLUS, adding the little Pom Pom edging upgraded the whole look. Great job.