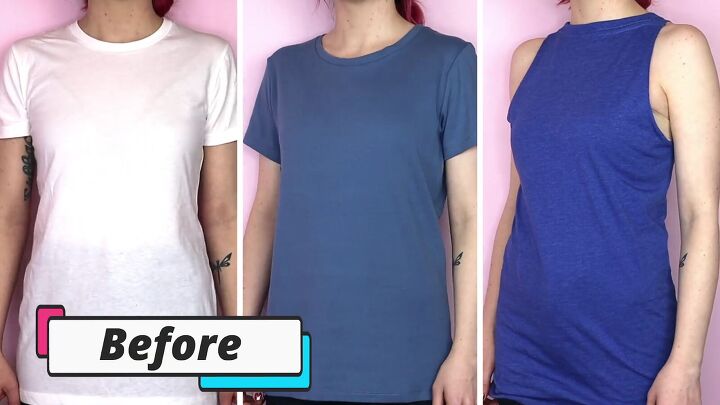
3 Cool T-Shirt Cutting Ideas That Are Completely No-Sew

Do you have a bunch of t-shirts lying around? I’m going to show you three cool no-sew t-shirt cutting ideas!
Whether you want a t-shirt with a chest cut out or an awesome design, I’ll show you some cute step-by-step t-shirt cutting ideas. So, grab your scissors, and let’s get cutting.
Tools and materials:
- Piece of cardboard
- T-shirts
- Ruler
- Marker
- Sharp scissors
T-shirt cutout style 1
The first tutorial is a simple slashed t-shirt. So, put your shirt on (inside out), and make a mark where you’d like the slash to be.
Lay your shirt down flat and use a ruler to straighten your line.
Thicken the line in the center, drawing a long, pointed, thin oval about the length of your line and about an inch thick in the middle.
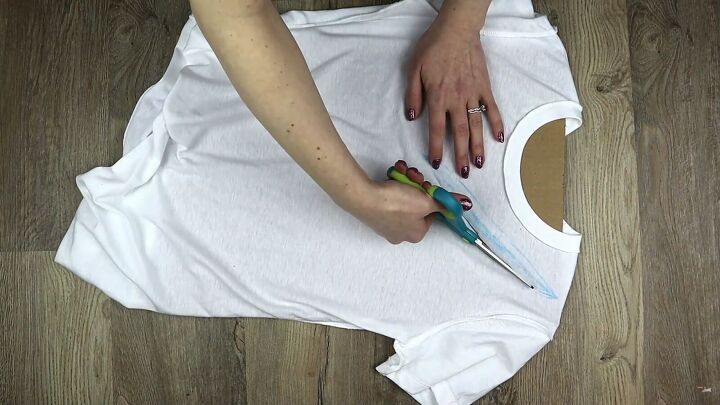
Put the cardboard inside your shirt and carefully cut out your long oval.
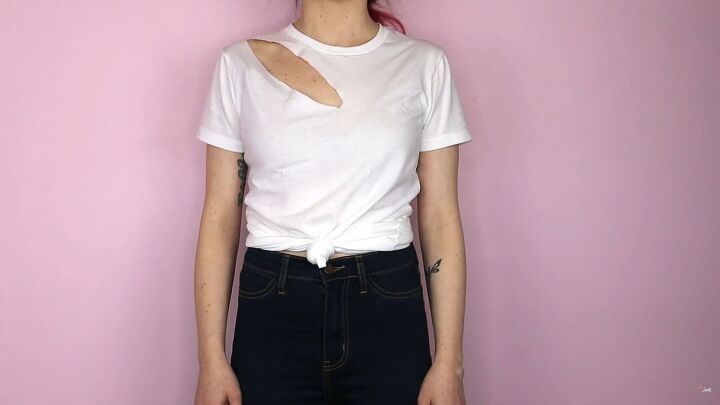
That’s it! What do you think of this cute DIY t-shirt cutting idea?
T-shirt cutout style 2

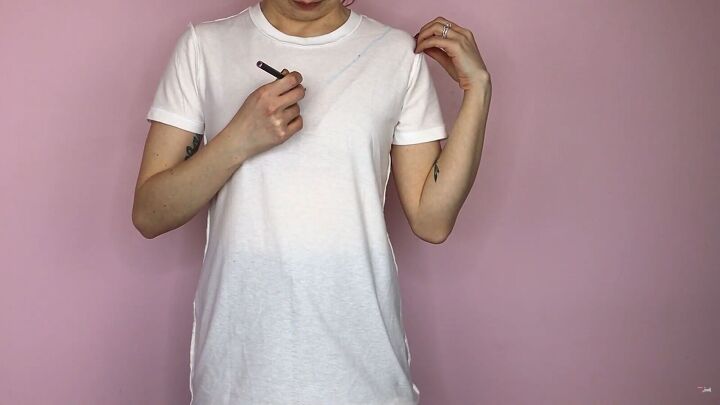
The following design is more of a pattern. So, put your shirt inside out and mark a little higher where you want the opening to be.
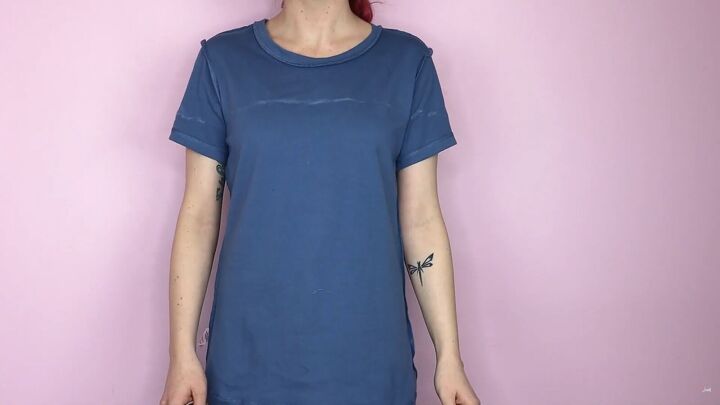
Draw a line across your chest and continue the line across your sleeves.
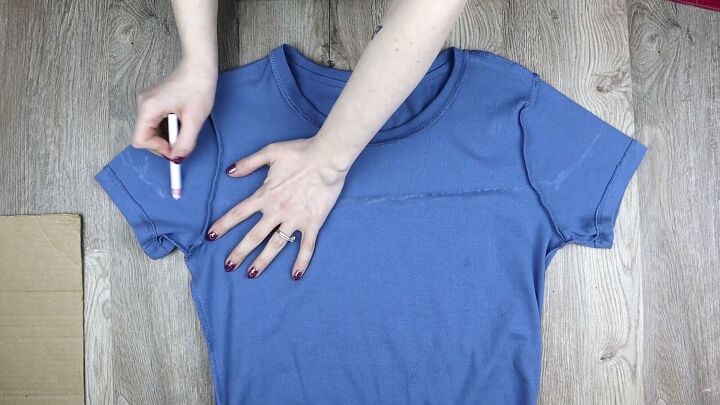
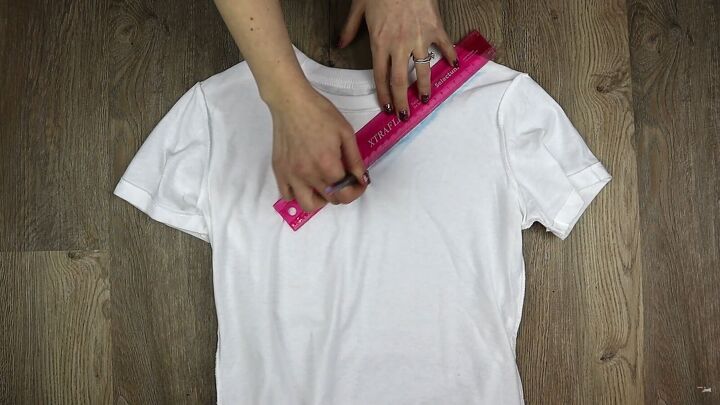
Lay your shirt down flat and straighten your lines. Also, make sure everything is symmetrical.
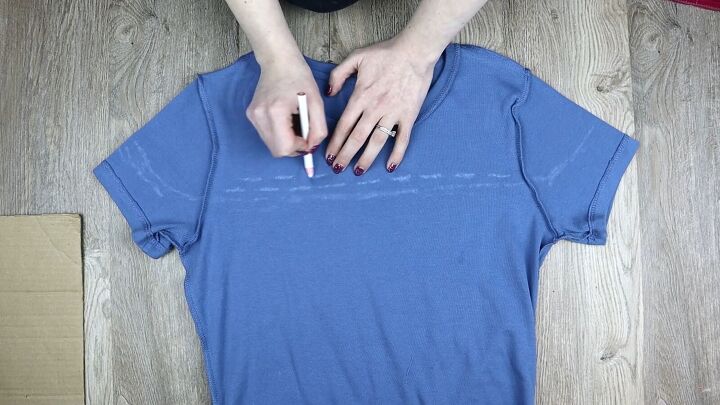
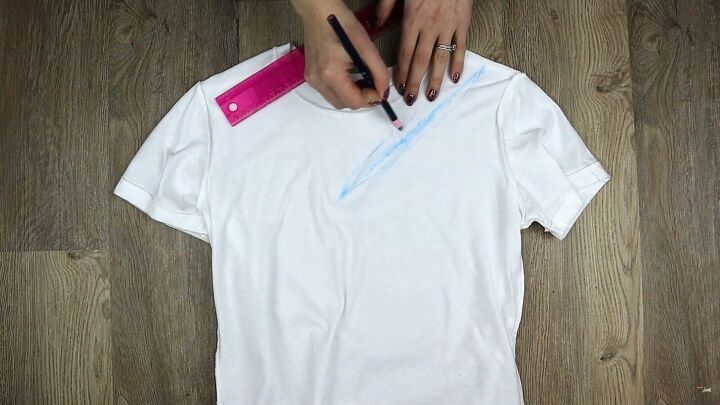
Make a dashed line just above the first one, all the way across the shirt.
Then, draw another dashed line above the first and make them overlap, like bricks.

Continue making dashed lines all the way up to the collar and shoulders.
Do the same thing on the sleeves, but follow the sleeve lines.
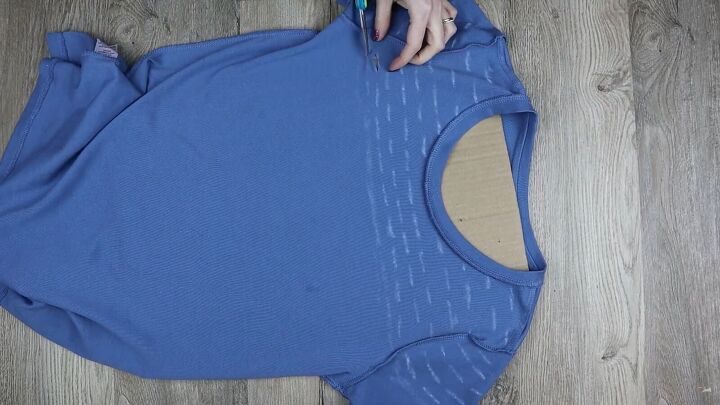
Once you’ve done all of your markings, put your cardboard inside your shirt and start cutting all of the dash marks.
Once that’s done, stretch out your shirt really well. Be careful not to rip it, though.

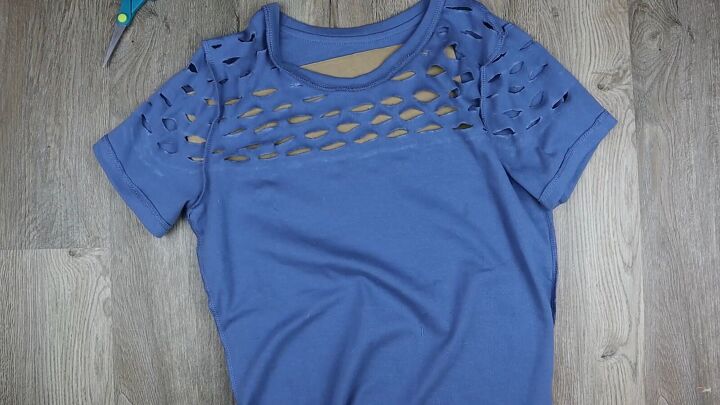
I really love this t-shirt with a chest cut out; it’s so simple to make and looks so funky.
T-shirt cutout style 3
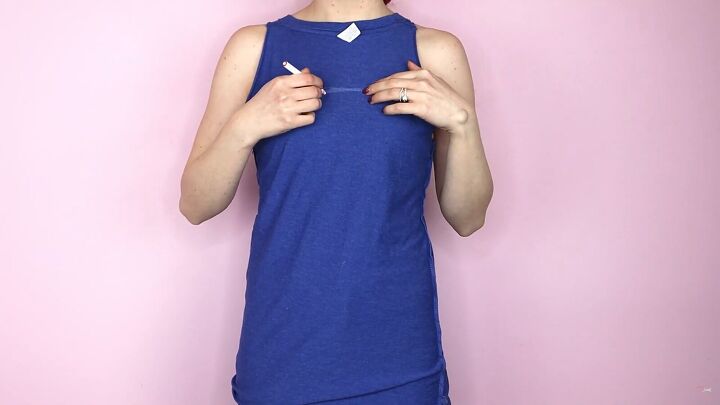
Ok, the last DIY t-shirt cutting idea is on a sleeveless t-shirt. You’ll notice I’m wearing it on the backside, but that’s because I used the front for another design.
Start by marking a little higher from where you want the design to start.
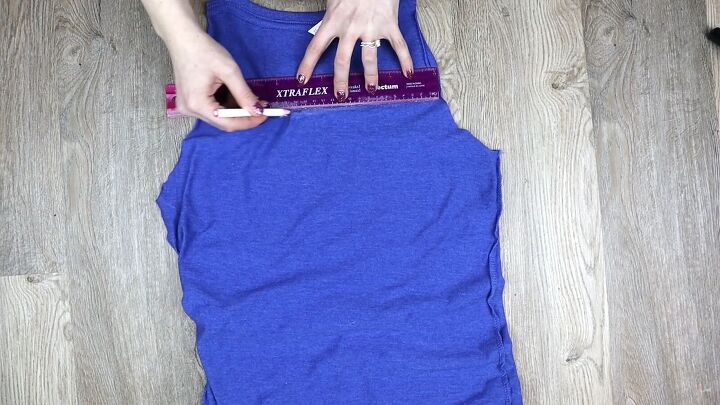
Lay your shirt down flat, with the right sides out. If your t-shirt has sleeves, then go ahead and cut off the sleeves. Then, draw a straight line across using the mark as a guide.
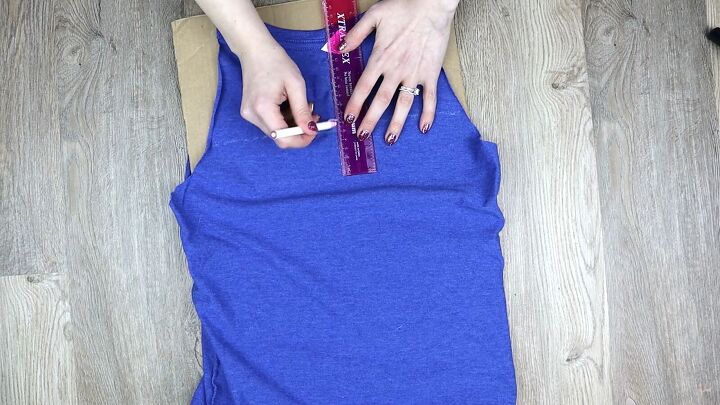
Place cardboard between your shirt, then draw a vertical line from the center of the first line to the collar.
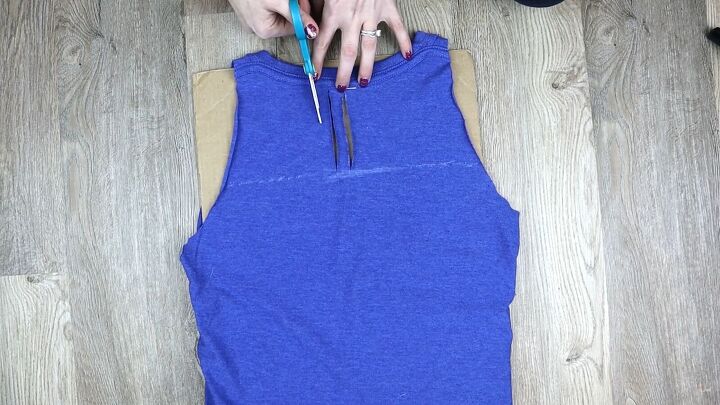
You could draft out all of your cuts with lines, but I was a little lazy. So, I cut out the first centered line and then winged it with the rest.
So, cut out more parallel lines across the t-shirt, spaced about ½ inch apart. Remember to stop at the original horizontal line.
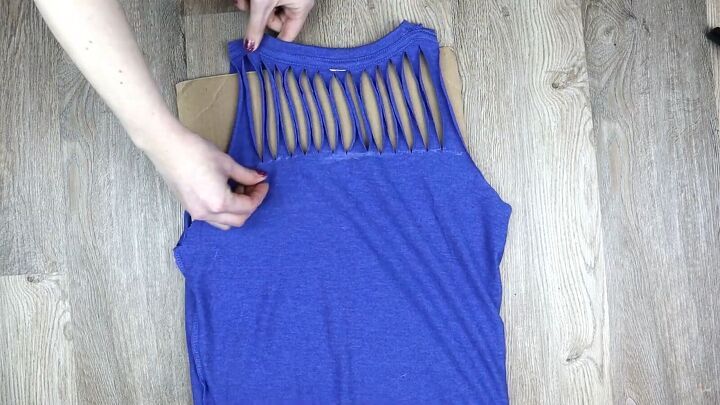
Stretch out your slots lengthwise.
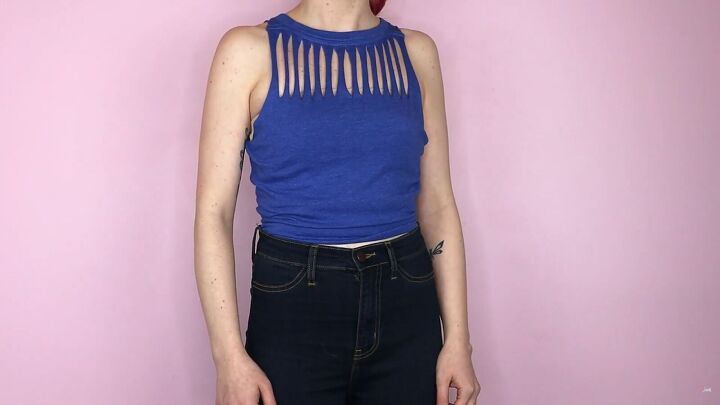
Bam! You’re done! This t-shirt cut out is so easy!
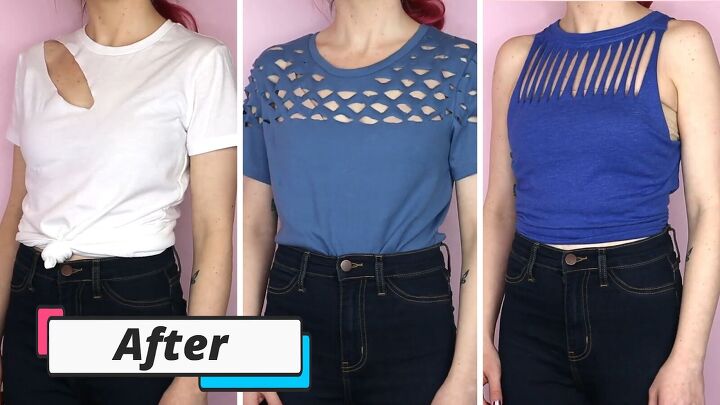
Cool t-shirt cutting ideas that are no-sew
Thanks for joining me on this tutorial; you now have some cool no-sew t-shirt cutting ideas you can easily recreate yourself.
Let me know which t-shirt design is your favorite in the comments below! Happy snipping!
The author may collect a small share of sales from the links on this page.


Comments
Join the conversation
Love the T-Shirt with the horizontal slits. I also like the vertical slit shirt but not so much the lower armhole for me. Thank you for sharing.
I like the second and third one I think number 1 needs something yet
I’m not going to cut even my old T-shirts. There’s a lot of ripped shirts out there. It’s not my style. I work in a retail store with decent clothes to choose from.