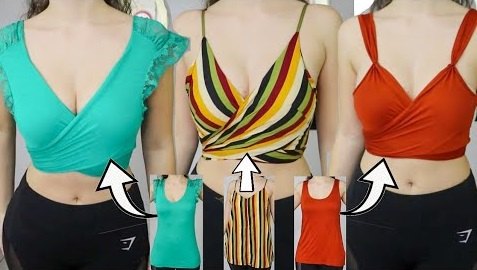
How to Make 3 Fun DIY Crop Tops

I'll show you how to turn any t-shirt into a no-sew crop top shirt, without ruining any of your favorite items. I’ll be using the same process on 3 different shirts.
Tools and materials:
- Shirt to be upcycled
- Sharp scissors
- Ribbon (optional)
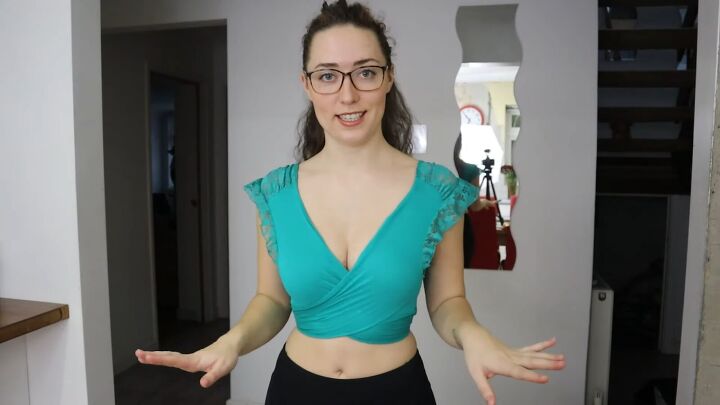
First DIY crop top
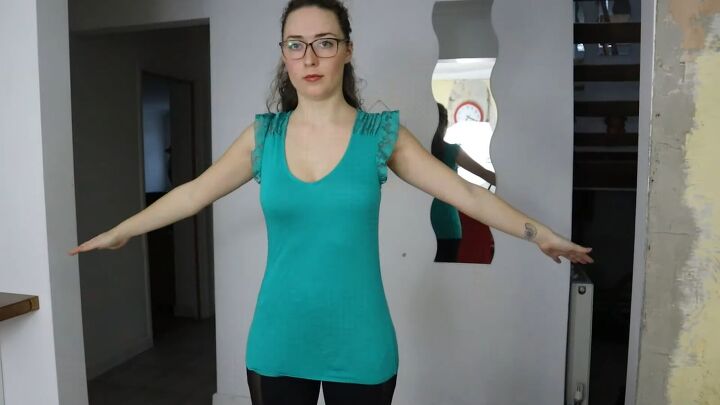
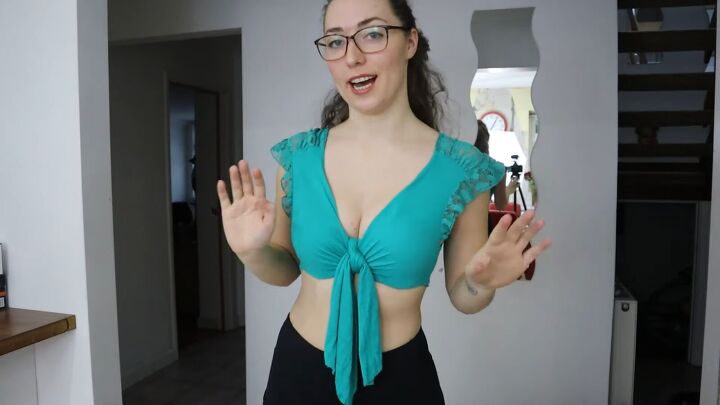
First, we have this blue/green top. It’s a longer fit and it has an elastic bottom.
1. Cut shirt down the middle
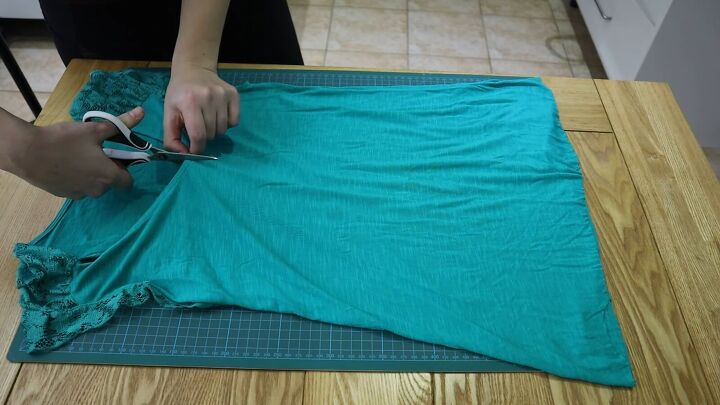
Lay your shirt flat on a surface that’s safe for cutting. If your shirt has an elastic, cut it right off. Then find the center of the front of the shirt and cut from the neckline to the bottom. Don’t worry about it being perfect.
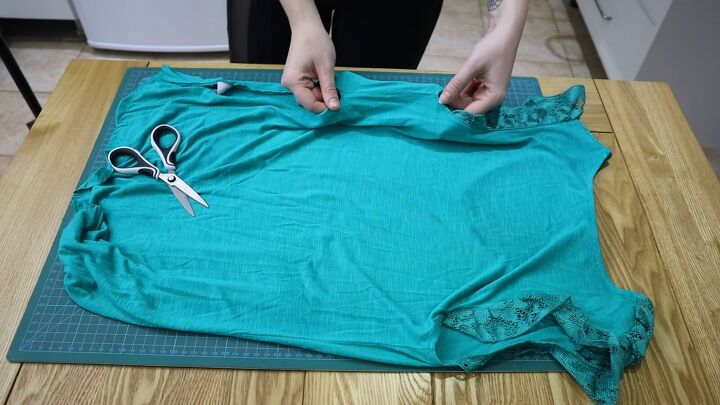
2. Cut the seams
Flip your shirt over. Cut up each seam until about 2.5 inches underneath the armpits. This determines the length of your crop top.
Make sure to cut on the right side of the seam so it doesn’t open up. Then cut the same way up the other seam.
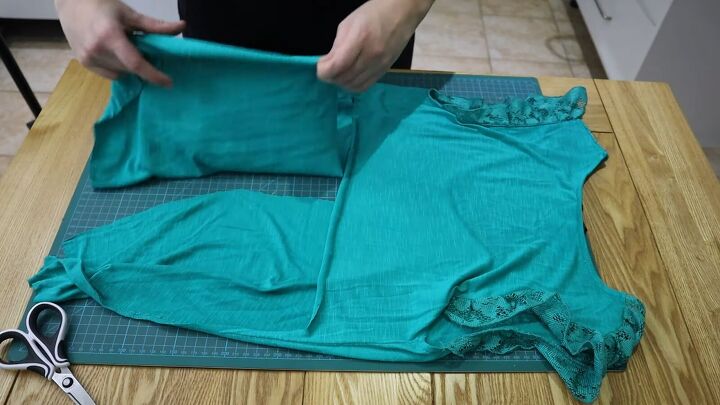
3. Remove the back panel
Next, you’ll cut off the panel in the back, all the way across. Save the excess rectangle in case you need an extension or use it later to make a DIY scrunchie. Cut off any tags that might be in the way.
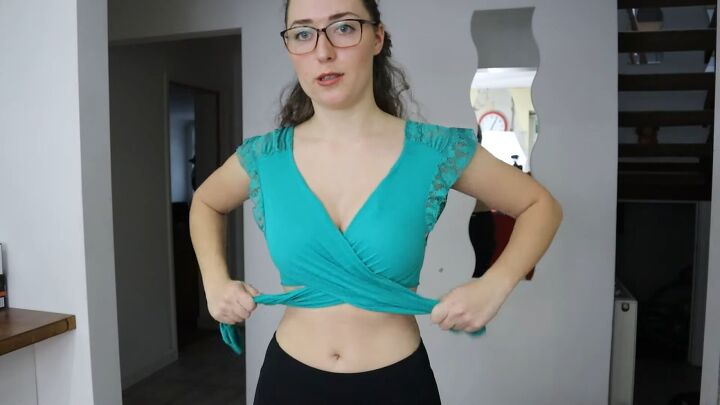
4. Try and tie
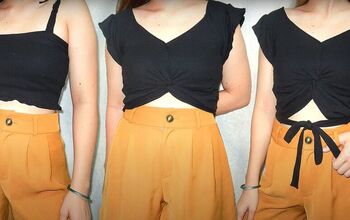
Now it’s time to try on your first DIY crop top! As you can see, I’ve just tied it in the front. Here’s the final result:
If your fabric is long enough, you can also try a criss-cross look.
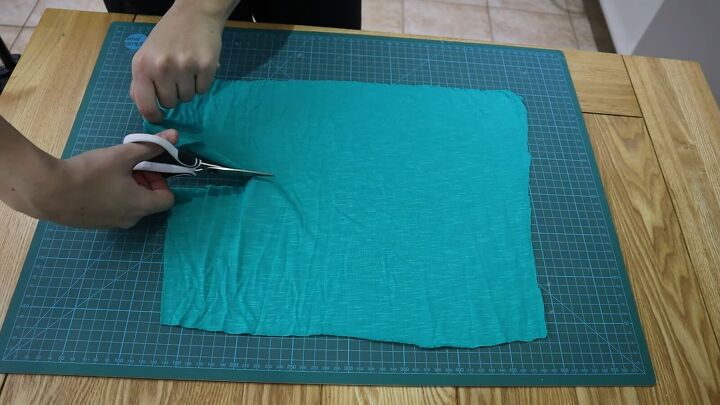
5. Make extenders from scrap fabric
Follow these quick steps if the tails of your crop top don’t reach in the back. We’ll use the scrap fabric to extend the tails. No sewing necessary!
Firstly, lay out the piece of fabric and cut along the longer side, roughly in half.
Then, tie each loose piece to each tail of the crop top. Make sure your knot uses as little fabric as possible, but still secure.
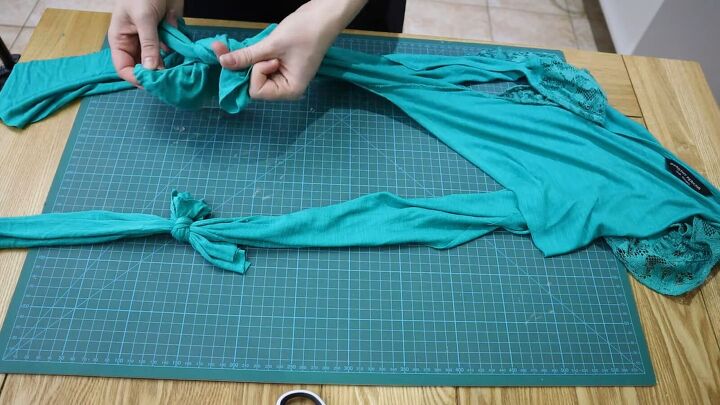
Here’s the final, criss-cross look:
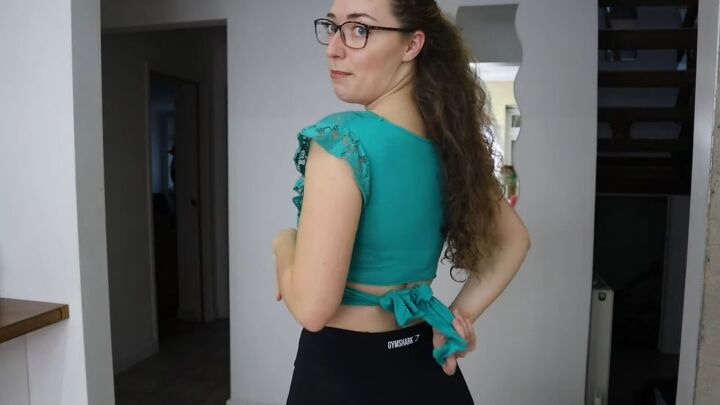
So cute, right? If you have gaping under the armpits, try wearing a nice bralette underneath.
You can tidy up or cut the ends of the extenders if you prefer. Both the front-tie and the criss-cross look are really nice for the summer. Try them out with high-waisted shorts.
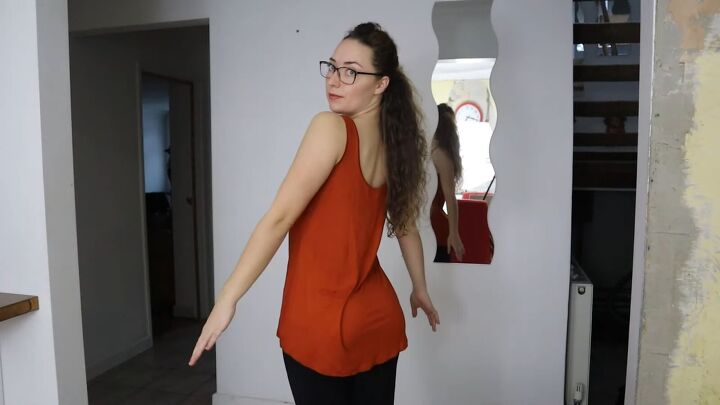
Second DIY crop top
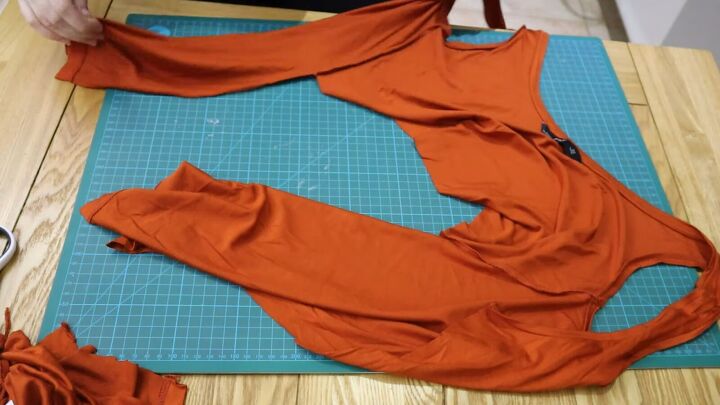
The next top I chose is a bit baggier and stretchier so there’s more fabric to work with. I love the beautiful orange color.
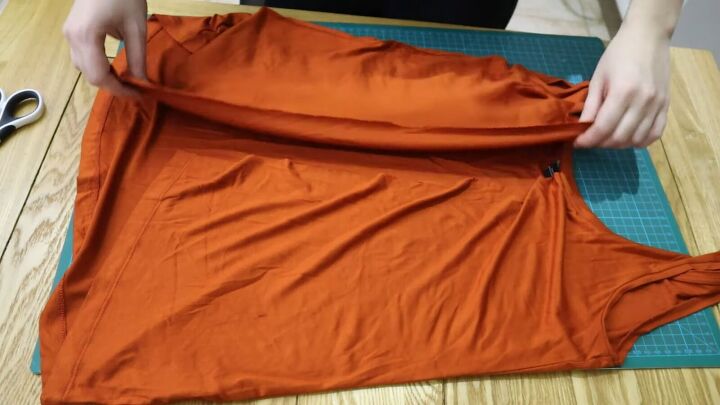
1. Cut shirt down the middle
Lay the shirt on a flat surface for cutting. Like we did before, find the center point on just the front side of the shirt and slice all the way down.
2. Cut the seams
Flip the shirt over and cut both sides at the seams, about halfway down, depending on the length you want for your crop top.
3. Remove the back panel
Then cut across to take out the excess (rectangular piece, like in the first version, and save it for later). You should end up with something like this:
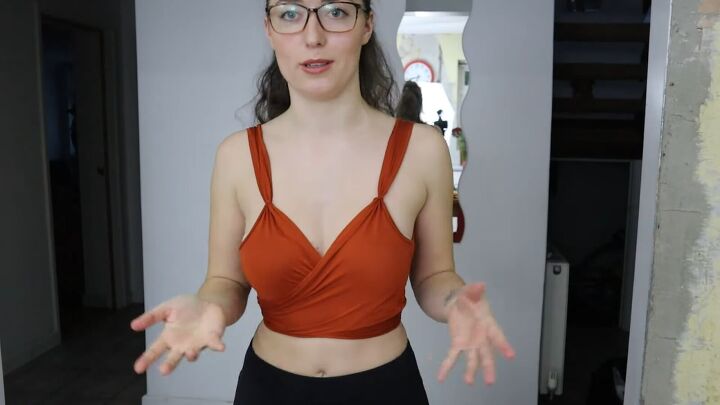
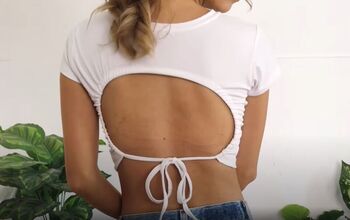
Here’s the look on me:
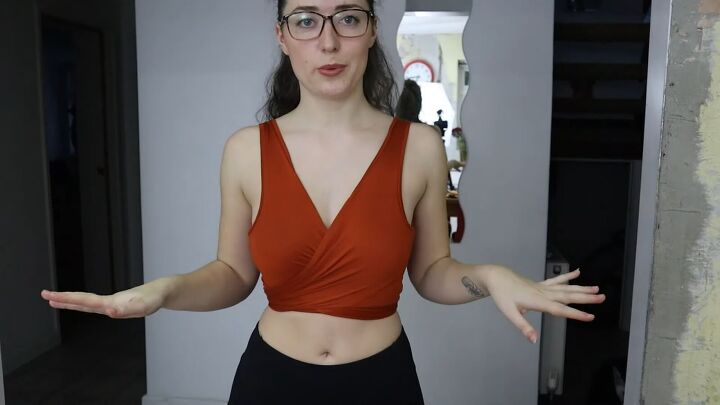
I actually had enough fabric without using the extenders since the fabric was stretchy. The front look is simpler so you can jazz it up by following these steps:
Firstly, clean up the edges. Fold in the raw edges into your bra/bikini.
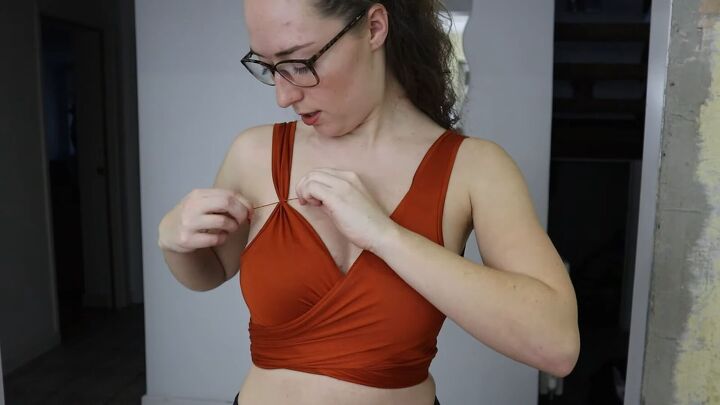
Then, prepare the ties. From your scrap rectangle, cut off 2 tiny pieces like this:
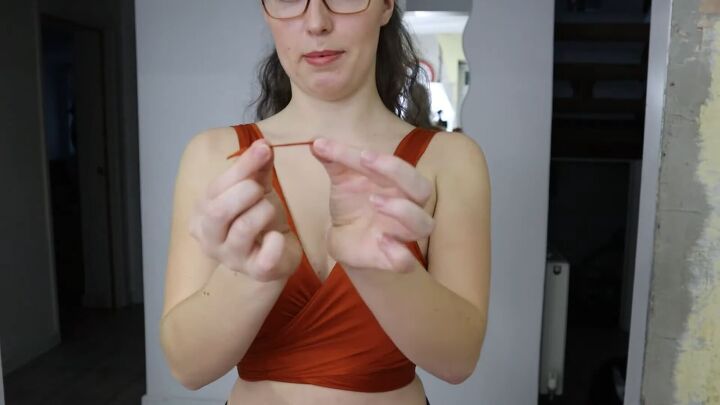
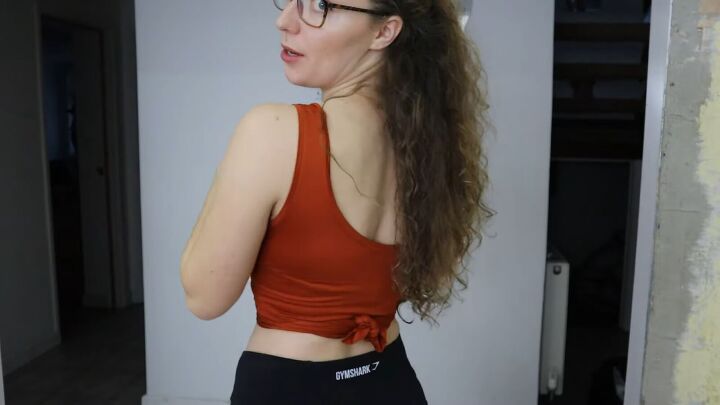
Next, tie to the straps. Tie a double knot with the string pieces for a pinched look, cutting off any excess. The result is a different neckline:
As you can see, it’s gorgeous from the back, and the front has its own style. Each version follows the same process, but the looks change based on fabric type.
Third DIY crop top
The final top I’m going to do with you is this lovely, striped one with a loose fit.
1. Cut shirt down the middle
Like with the other methods, lay your shirt flat and cut down the front layer.
2. Cut the seams
Flip the shirt and cut along the side seams until about 2.5 inches from the armpit (or whatever length you like best for the crop top).
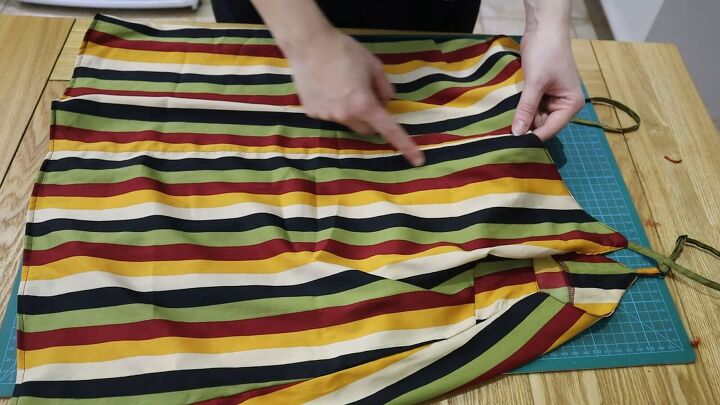
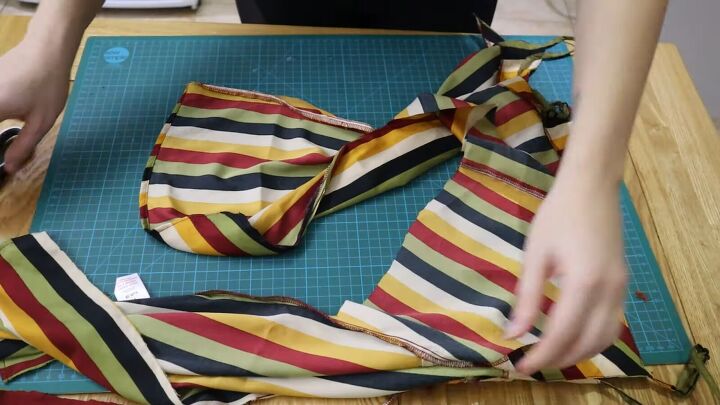
3. Remove the back panel
Cut out any extra tags or hanging seams and keep the off-cut handy.
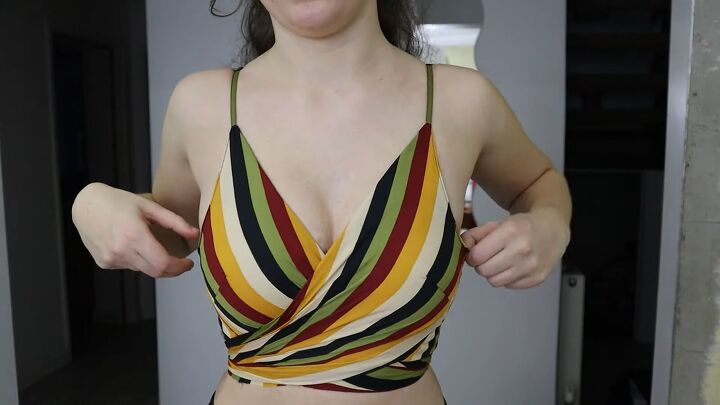
4. Try it on and adjust
Make any necessary adjustments; tuck in extra fabric in the front or add extensions to the ties in the back.
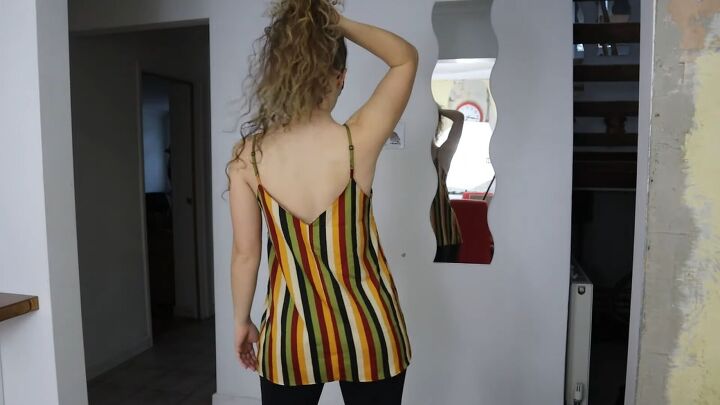
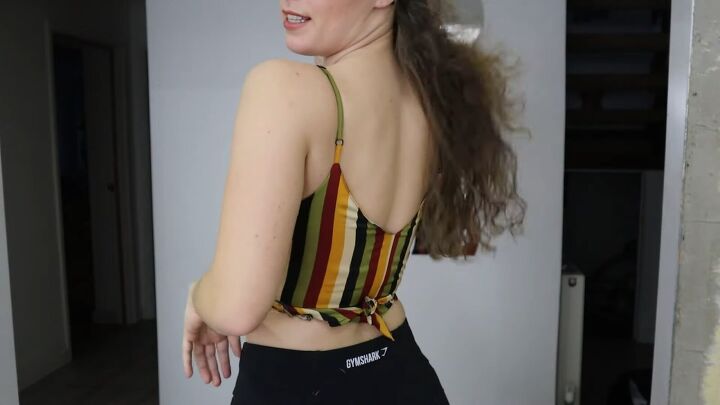
Miraculously, this version fit without any further adjustments. It’s completely trial and error. In the back, there’s the right amount of fabric to be able to tie the ends comfortably. I absolutely love this one. The stripes work nicely and it looks like it was made to be a crop top.
DIY crop tops
I hope you loved these no sew DIY crop tops! Try it out on old shirts or tops you picked up from charity. Don’t forget to show me your creations in the comments below.
The author may collect a small share of sales from the links on this page.


Comments
Join the conversation