Easy Men's Shirt Refashion: How to DIY an Embroidered Floral Top

This is a men's shirt refashion I REALLY enjoyed doing!
In fact, I made it twice. I love how striking the shirt with tassels is and how the embroidery really stands out.
I already had the tassels in my stash, but you will be able to find them in soft furnishing stores or on Amazon.
Tools and materials:
- Men's shirt - oversized
- 1/4 " elastic
- 1/2" ribbon
- 2 tassels
- Iron-on embroidered patches
- White pressing fabric
- Embroidery thread and needle
- Tweezers
- Seam ripper
- Pins
- Measuring tape
- Safety pin
- Scissors
- Sewing machine
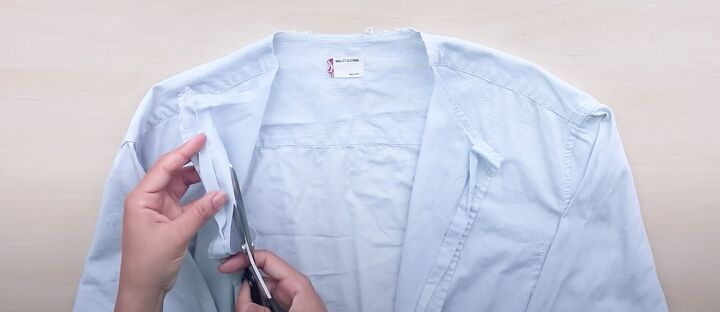
1. Deconstruct the shirt
Use a seam ripper to remove the pocket.
Cut off the collar and the button plackets, cutting as close to the plackets as possible.
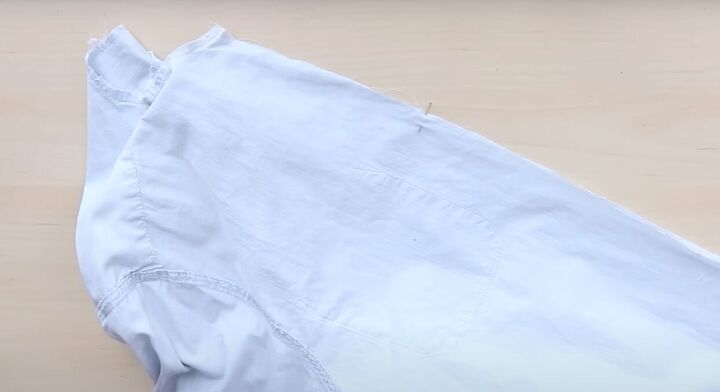
2. Center front seam
Turn the shirt inside out and fold it in half lengthways, with the raw front edges together.
Mark the front edge with a pin, 7 - 8 inches from the neck edge.
Pin and sew the rest of the center front seam, a half inch from the raw edge.
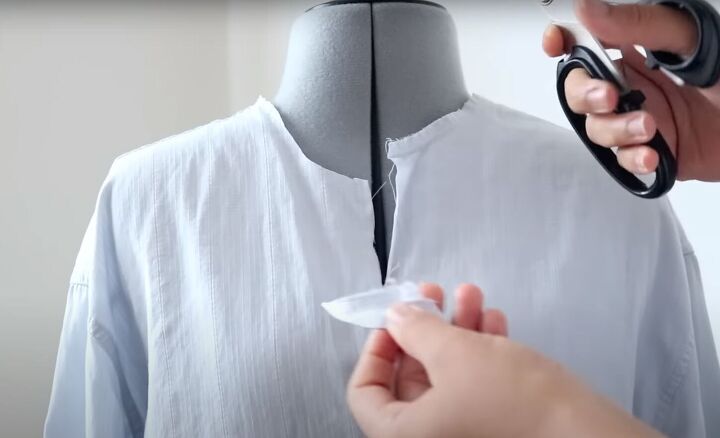
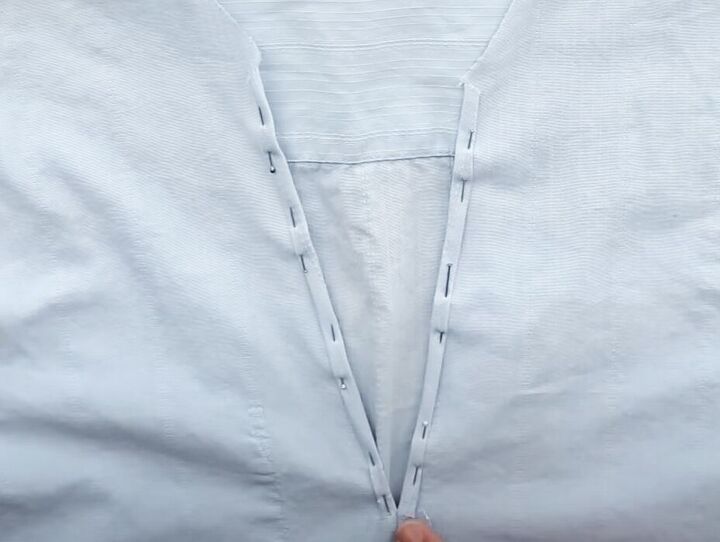
3. Shape the neckline
Lower the neckline by cutting off about 1 inch from the center front on one side, and tapering it off at the shoulders.
Use the piece you cut off as a template for the other side.
Fold under the sides of the opening to form a V and pin and iron them in place.
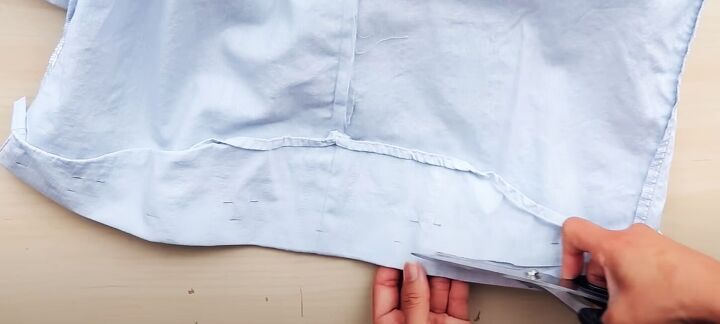
4. Finish the lower hem
Turn up the bottom hem and press it.
Trim off the excess, leaving a half inch all around for the hem.
Turn under a narrow double hem and finish with a straight stitch.
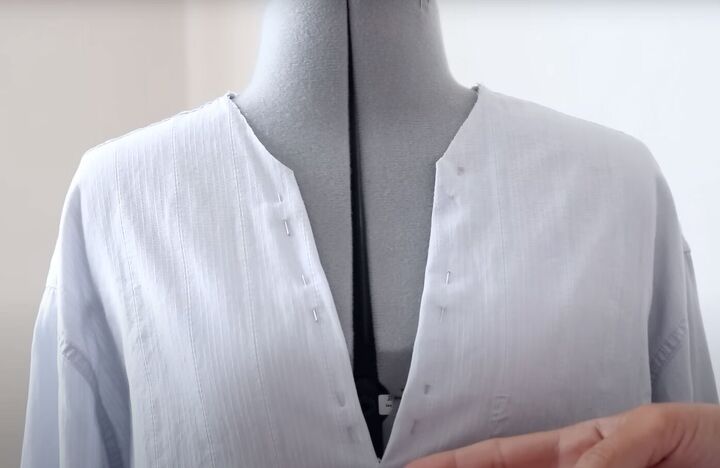
5. Finish the neckline
Cut away the excess from the V neck, leaving a half inch allowance.
Snip into the seam allowance of the center front seam just below the V.
Turn the V neck allowance under twice, and sew.
Measure around the neck edge, from the top of the V.
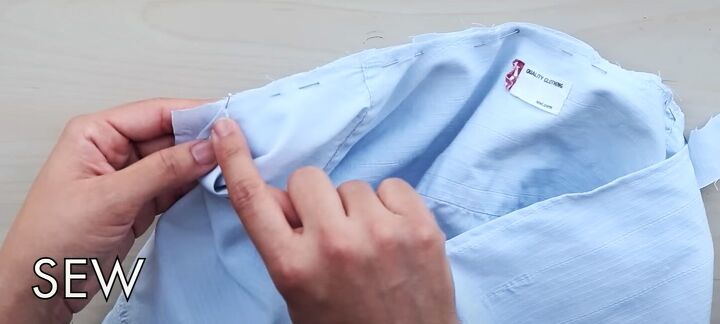
Cut a 2 inch strip of fabric from the hem remnant, the length of the neck edge plus a 2 inch allowance.
With the right sides together, pin the fabric strip around the edge of the neck, leaving an inch of the strip unpinned at each side.
Sew, taking a half inch seam allowance.
Clip into the seam allowance, so the neck will lay flat.
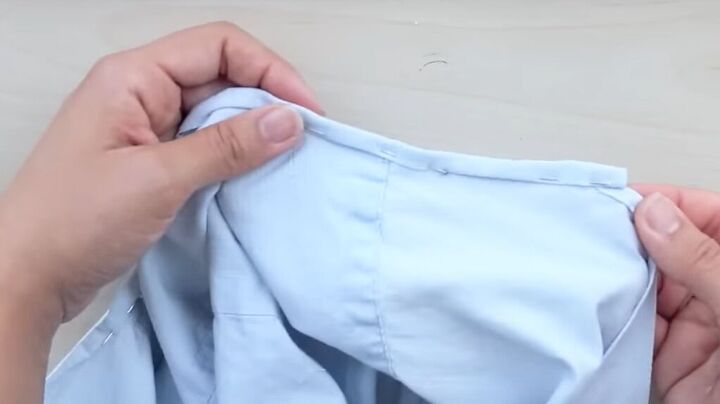
Fold the short ends of the strip inwards, then fold the long edge over twice and pin it to the neck edge. Top stitch on the right side.

Use the tweezers to insert the knotted end of the tassel cord into the open end of the neck binding.
Check that both tassels are the same length before securing the cords with a straight stitch.
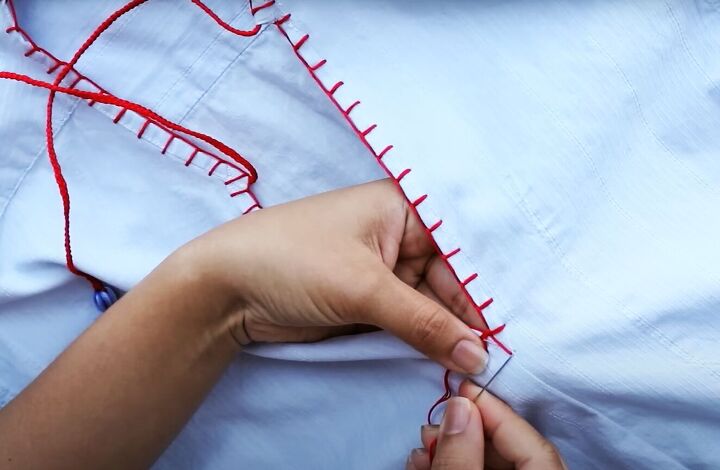
6. Blanket stitch the neck edge
Thread your needle with the embroidery thread and knot the long end.
Bring the needle through at the center of the V from the inside, so the knot is hidden.
Sew blanket stitch evenly around the V neck edge, using the depth of the hem as a guide.
See the video at 6:11 - 7:44 for exactly how I made the blanket stitch edging.
Finish by inserting the needle to the wrong side at the bottom of the V. Cut the thread and knot it on the inside.
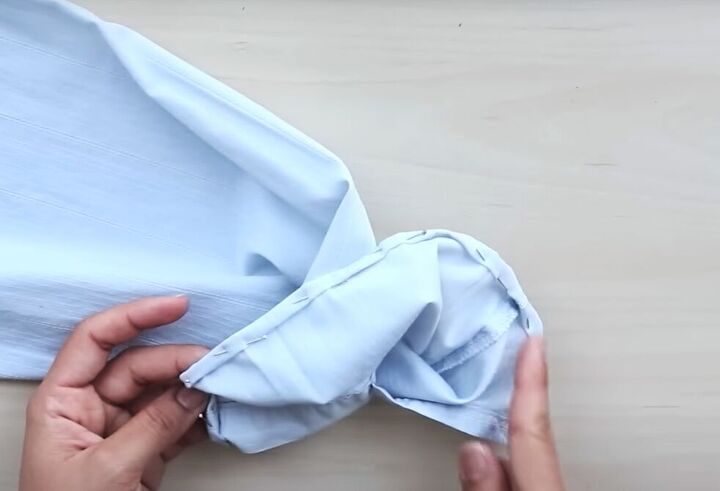
7. Elasticate the sleeves
Cut off the cuffs. Leaving the plackets open, turn in and sew a narrow double hem along the bottom edge of each sleeve.
Turn the shirt inside out.
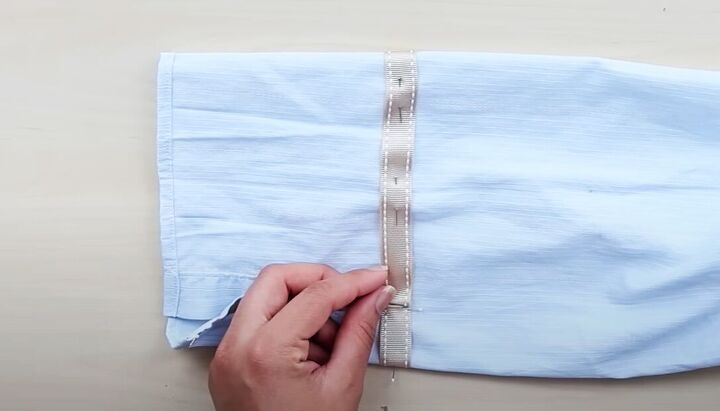
Fold one end of the ribbon under and pin it to the sleeve above the placket.
Continue pinning the ribbon around the sleeve and sew in place along both edges.
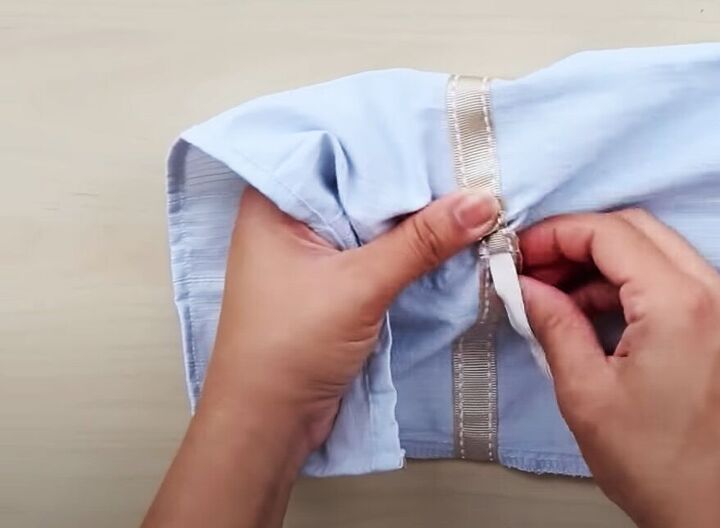
Use a safety pin to feed the elastic through the ribbon casing. Overlap the ends of the elastic and secure them with a zigzag stitch.
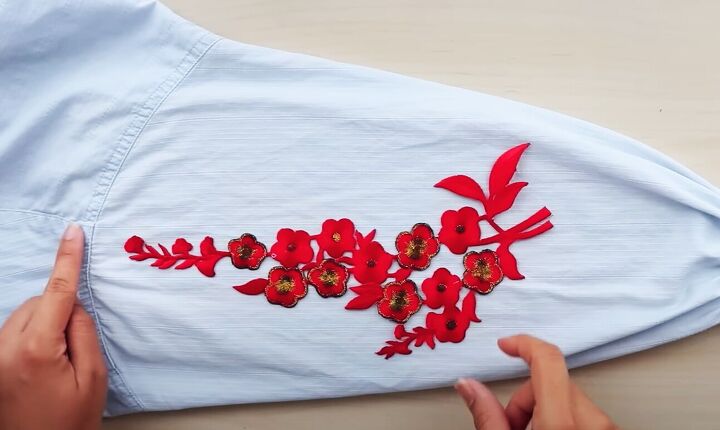
8. Iron on the embroidery patches
Turn the shirt right side out and lay the sleeves on a flat surface.
Position the embroidery patches on to the sleeves, ensuring that they're centered and that both sleeves match.
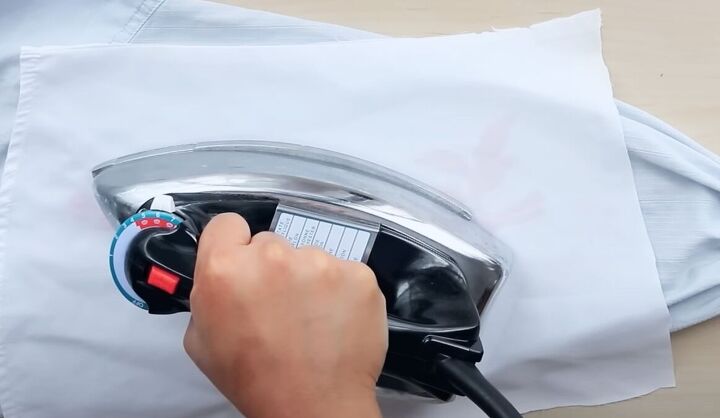
Lay a piece of cloth over the patch to protect it. Use your iron on the highest setting your fabric can take, and without steam.
Press carefully in sections for 15 seconds at a time.
Once the patch has cooled down, you can secure it further with a few tacking stitches.
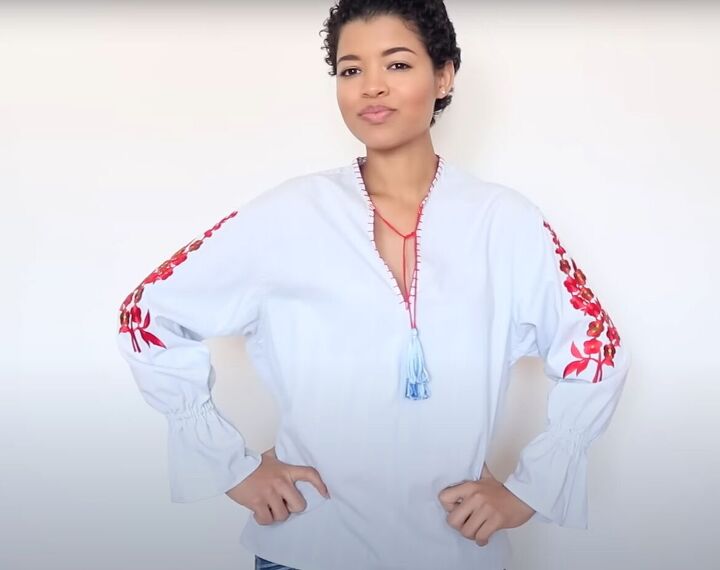

Men’s shirt refashion
I think this is my favorite of all the men's shirt refashions I've done.
I can't decide which version of this embroidered floral top I love the most - the red or the black. What do you think? Drop me a comment below.
Next, check out my post on How to DIY a Super Cute Crop Top and Skirt Set From an Old Curtain.
The author may collect a small share of sales from the links on this page.


Comments
Join the conversation