How to DIY a Super Cute Crop Top and Skirt Set From an Old Curtain

The stiffness of the grommet strip on this thrifted curtain inspired me to make my first box pleat skirt.
I got a crop top and skirt set and a tie belt from a single curtain panel. The pieces look great together and they're so versatile you can wear them separately too.
Tools and materials:
- 2.5 yards medium weight fabric
- 10 - 12 inch zipper
- 1 yard 1/2" Bias tape
- Measuring tape
- Pins
- Ruler
- Scissors
- Fabric marker
- Sewing machine
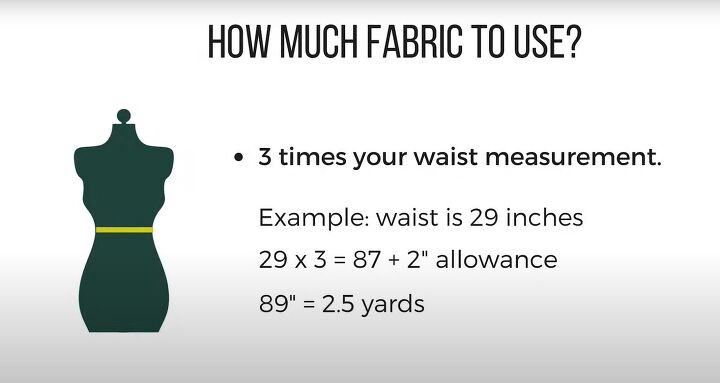
1. Take measurements
Measure the finished skirt length and add a 1.5 inch allowance.
Measure your waist, multiply by 3 and add a 2 inch seam allowance. For me this came to 89 inches or 2.5 yards.
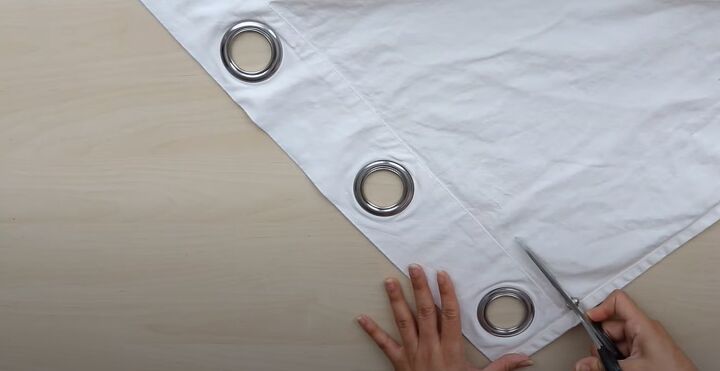
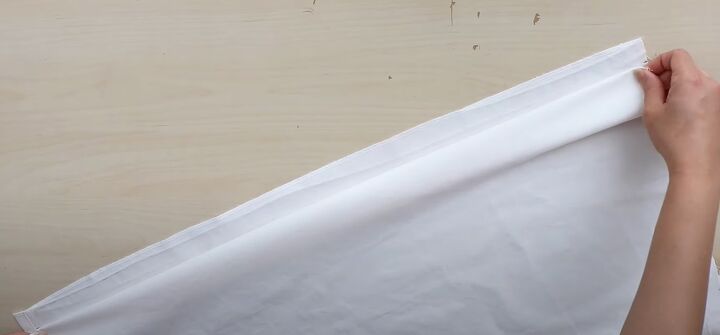
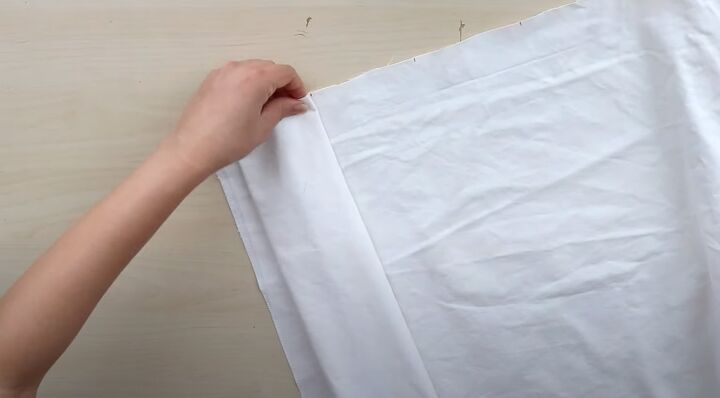
2. Cut fabric
Cut off the grommet strip a half inch from the seam.
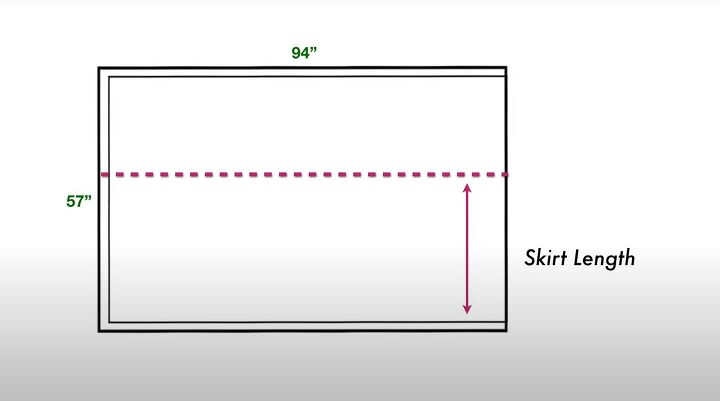
Measure and cut your skirt length across the width of the fabric.
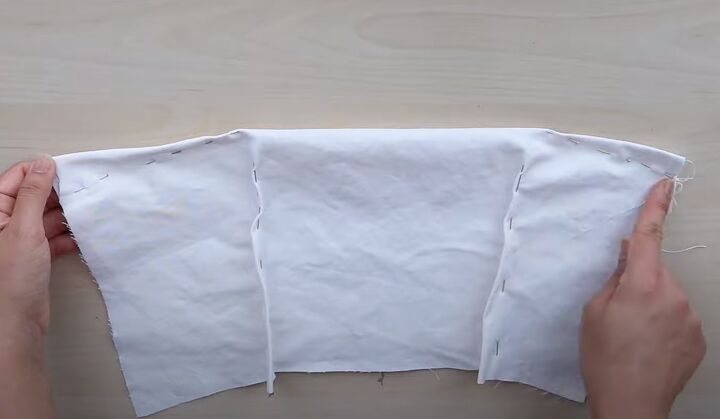
3. Make box pleats
Keep the long finished edge for your hem.
Measure and mark one inch from the side edge for the allowance.
From the 1 inch mark, measure and mark 4 inch sections across the full width at the top and bottom of your fabric.
Pick up the top and bottom edges at the first 4 inch mark. Fold the fabric to the 1 inch mark and pin in place on both edges.
To complete the pleat, lift the fabric at the second 4 inch mark and fold it in the opposite direction to the third mark.
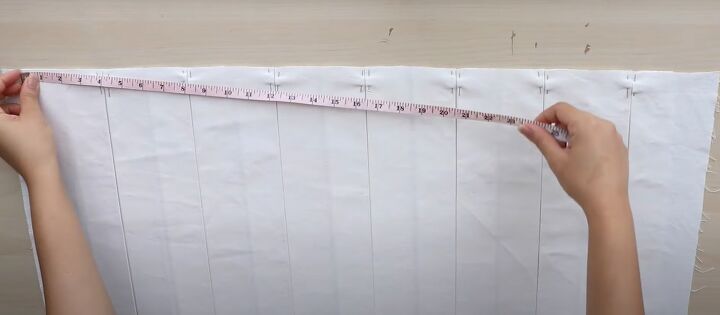
Continue across the fabric, folding each pleat alternately to the left and right, until the width equals your waist measurement plus 2 inch allowance.
Make sure that both ends of the fabric have the same allowance, so that when they're joined together the finish will be seamless.

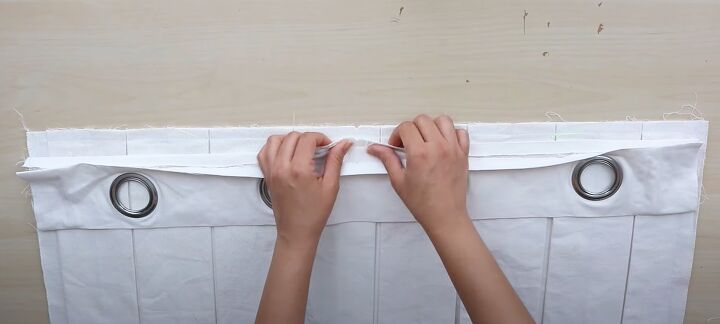
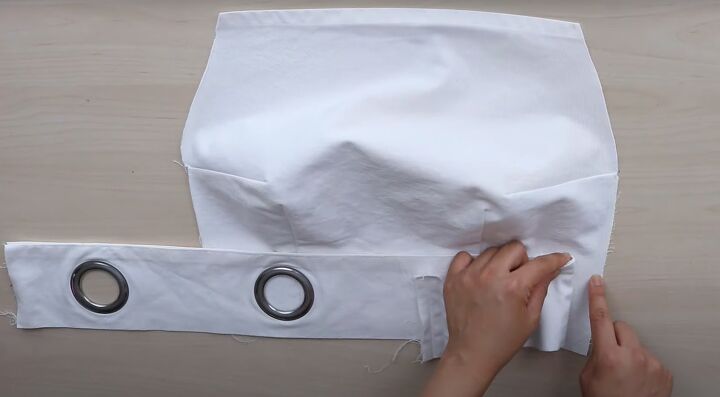
4. Add waistband
Press the pleats so the edges are sharp. Tack the place where each fold meets on the right side and sew across the top to keep them in place.
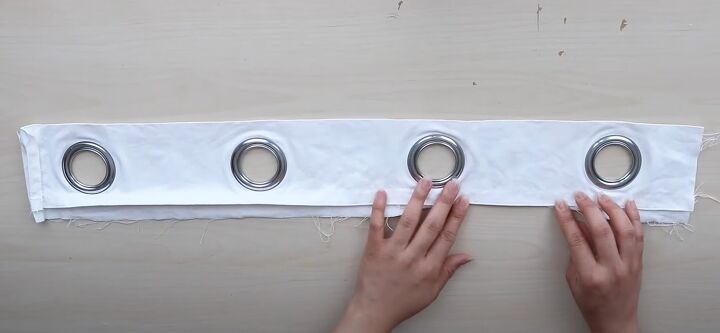
Cut the grommet strip in half widthways. Turn under a half inch allowance on both bottom edges and press.
Mark the center of the waistband and the upper skirt edge.
With right sides together and matching the center points, pin and sew one side of the waistband to the skirt along the seam allowance.
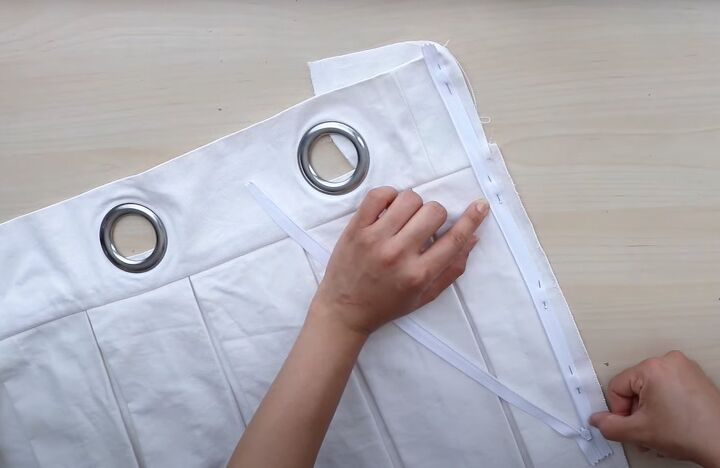
5. Insert zipper
Open the zipper and press it close to the teeth with a cool iron.
With the right sides together, place the top of the tape on the waistband fold.
Pin one side of the zipper tape to the side edge of the skirt along the seam allowance. Sew close to the teeth as far down as possible.
Pin and sew the other side of the zipper tape in the same way.
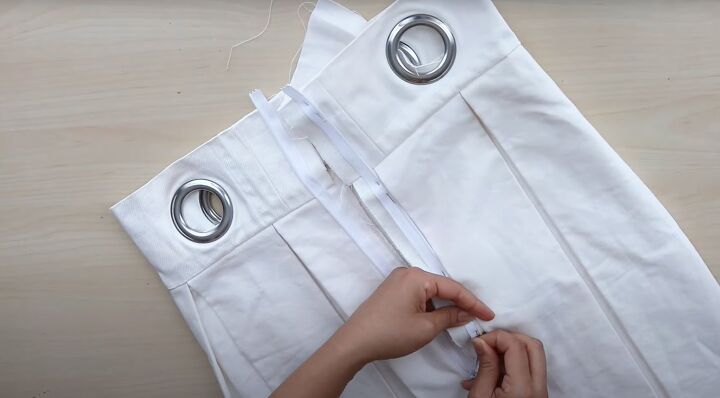
Close the rest of the back seam.
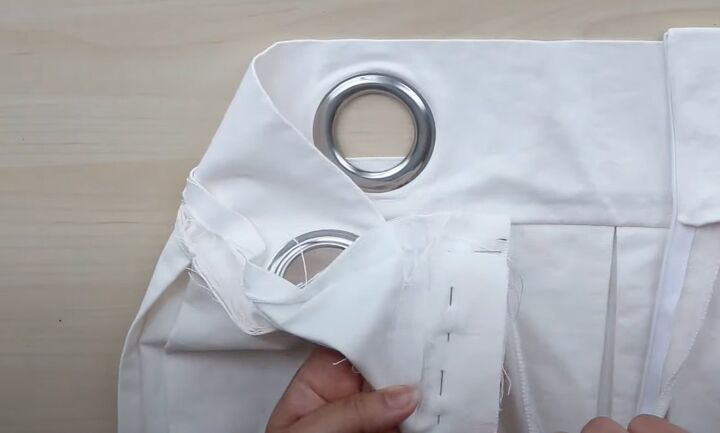
6. Finish waistband
Turn the ends of the waistband inside out and sew them close to the zipper. Trim the allowance and turn the ends right side out again.

Pin and sew the other side of the waistband to the inside of the skirt.
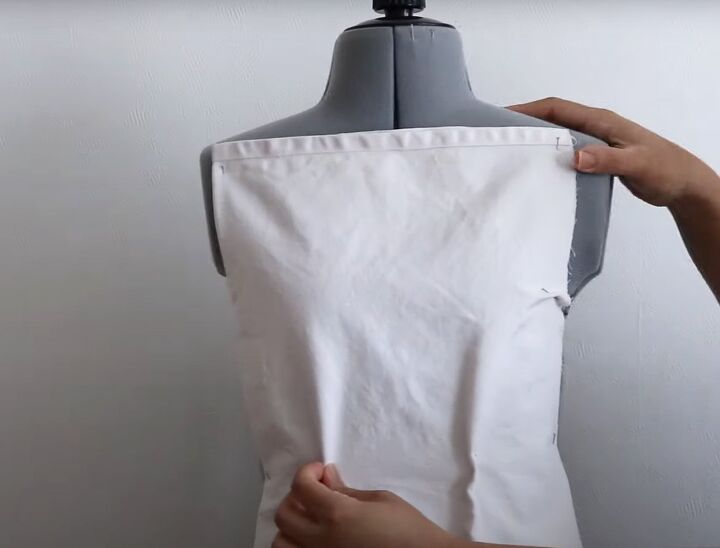
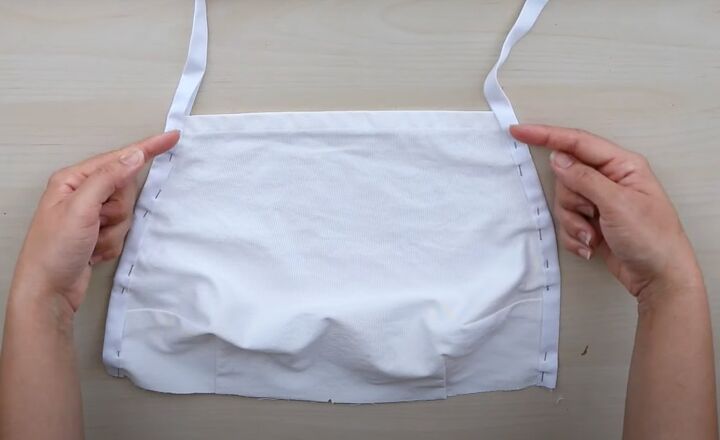
7. Shape top
Cut a piece of fabric slightly larger than your torso and drape it over the front of your body just below your neck.
Pinch the excess fabric to create bust and waist darts on both sides.
Check that the darts are symmetrical, then pin and sew them.
Press the waist darts towards the center and the bust darts towards the waist.
Cut off the lower edge of the top where the waistband will go, leaving a seam allowance.
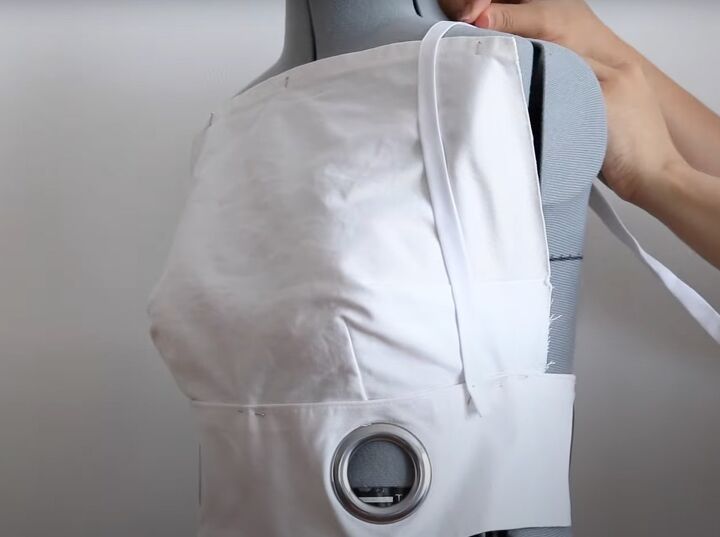
8. Sides and straps
Pin the waistband in position temporarily. Wear the top and pin one end of the bias tape to the waistband.
Take the tape over your shoulder, mark where it attaches to the top and remove the excess fabric.
Enclose the side edges of the top in the bias tape and sew it up to the neck edge.
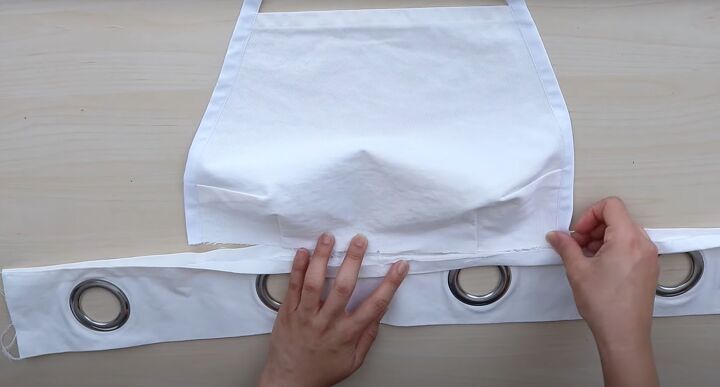
9. Attach waistband
Mark the center points of the waistband and top.
Sandwich the lower edge of the top inside the waistband, matching the center points. Pin and sew the top of the waistband in place.
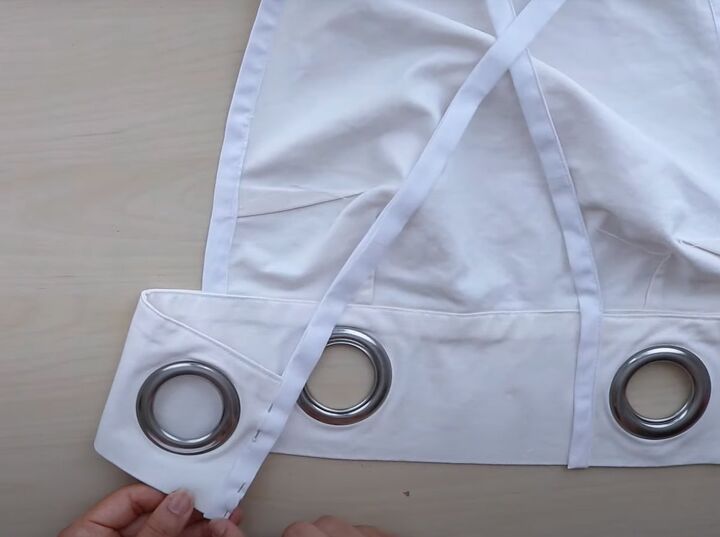
Wear the top to measure the length of the straps. Finish the ends of the bias tape and attach it to the ends of the waistband.
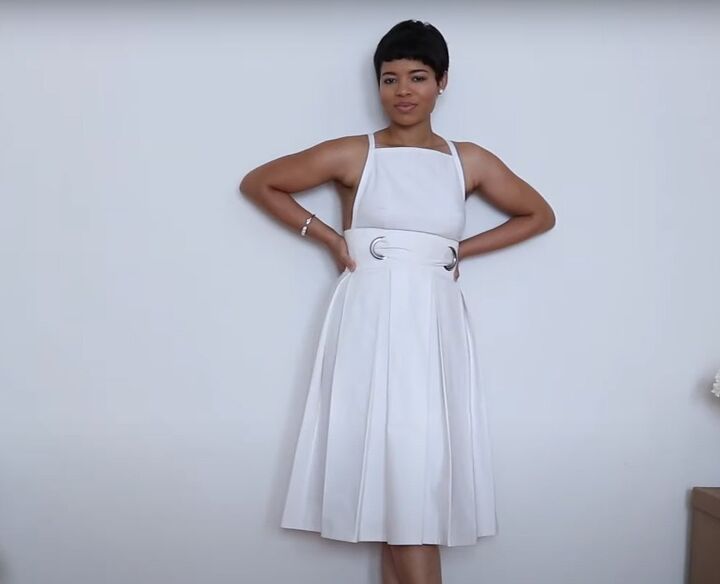
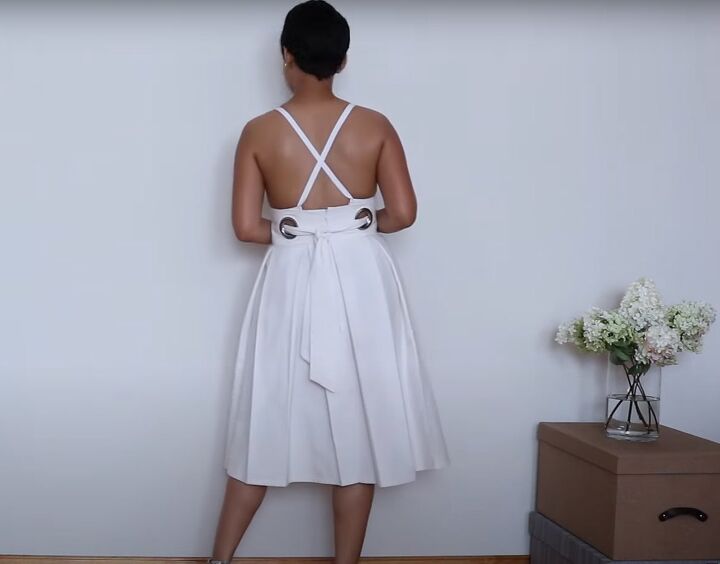
To wear my white two piece skirt set as a dress, I overlapped the waistbands and made a tie belt from remnants of the fabric.
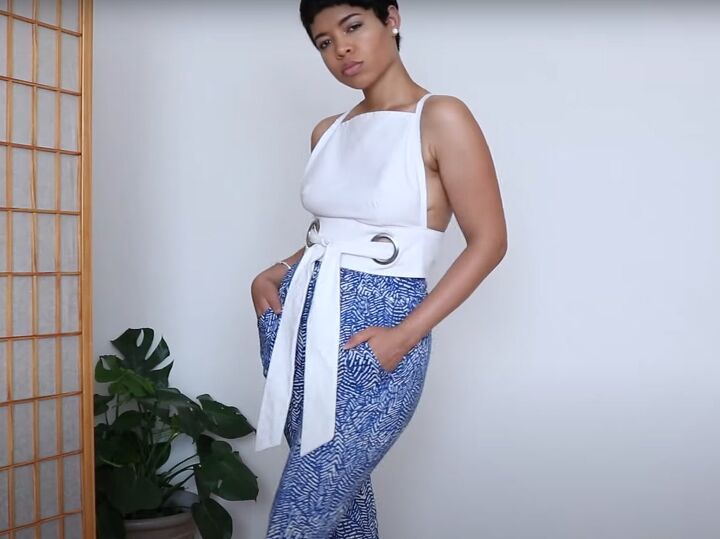
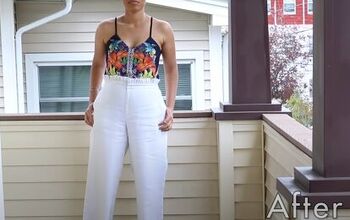
The crop top looks great worn with high waisted pants, with the tie fastened at the front.
DIY crop top and skirt set
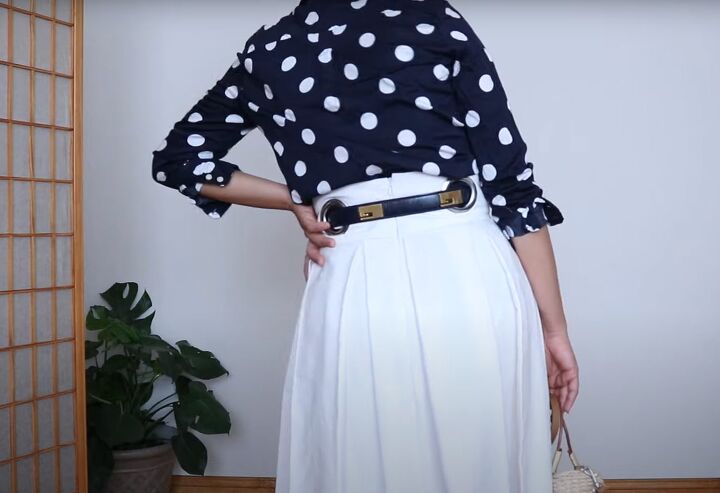
I paired the box pleat skirt with a blue and white blouse and threaded a blue belt through the waistband for another stunning look.
If you enjoyed this tutorial, please let me know in the comments.
For more upcycling content, check out my post on How to DIY an Elegant Wrap Crop Top from Pants.
The author may collect a small share of sales from the links on this page.


Comments
Join the conversation
👍️👍️ simply awesome
How very clever. Looks great! Well done.