How to DIY an Elegant Wrap Crop Top From Pants

I thrifted a pair of pants in a beautiful color that were far too big for me. I'd been thinking for some time that I could probably upcycle the pants into a wrap crop top.
I sketched out a basic pants pattern, turned it sideways and saw immediately how I could turn it into a kimono-style cropped wrap top!
Tools and materials:
- Soft cotton or cotton mix pants to upcycle
- Measuring tape
- Seam ripper
- Scissors
- Ruler
- Design ruler (optional)
- Dress form (optional)
- Tailor’s chalk
- Pins
- Sewing machine
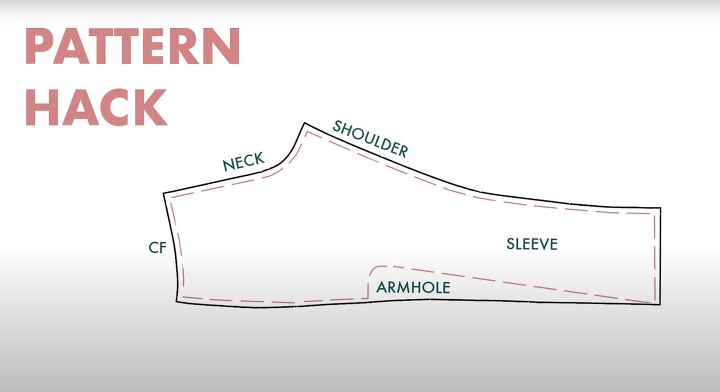
1. Deconstruct the pants
Cut off the waistband leaving 1/4 inch of fabric attached so you can re-use it.
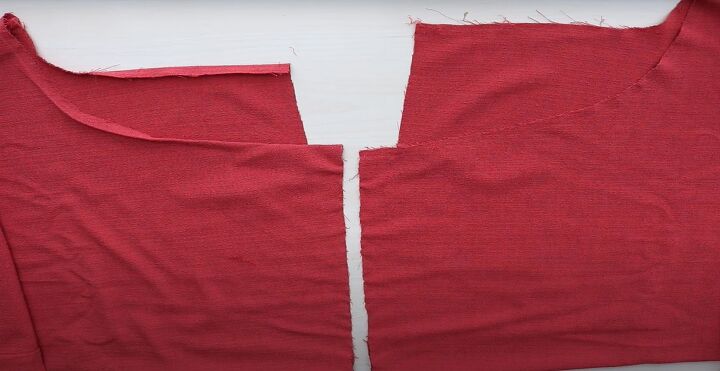
Separate the pants legs at the crotch. I opened half the side seams but later realized I should have opened them completely, so I suggest you do that now. Also remove the pockets.
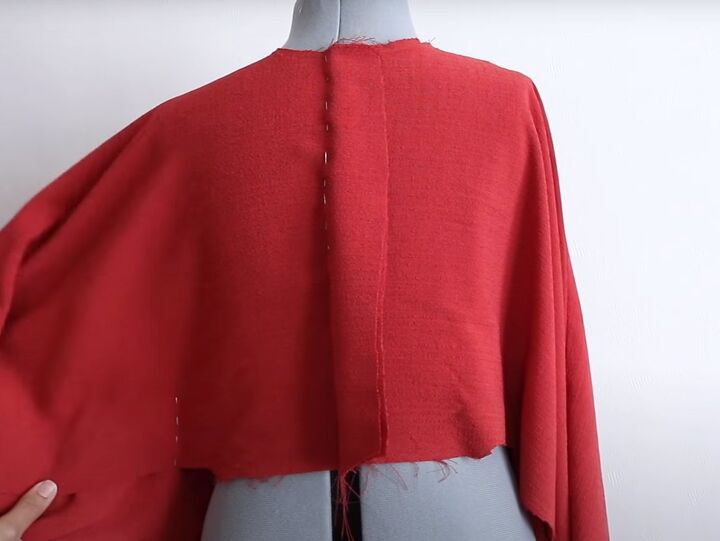
2. Center back seam
Fold each pant leg along the inner leg seam and turn it so the back crotch is towards you and the two waist edges are facing each other.
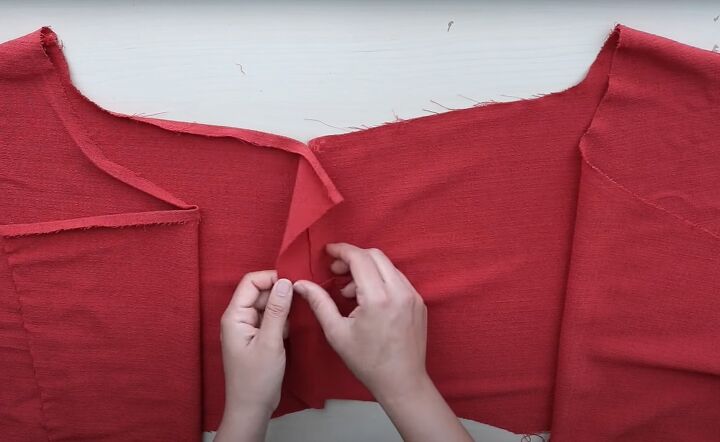
Pin the two sections on the bottom layer together in the center to form the center back seam and neck. Cut off most of the excess fabric.
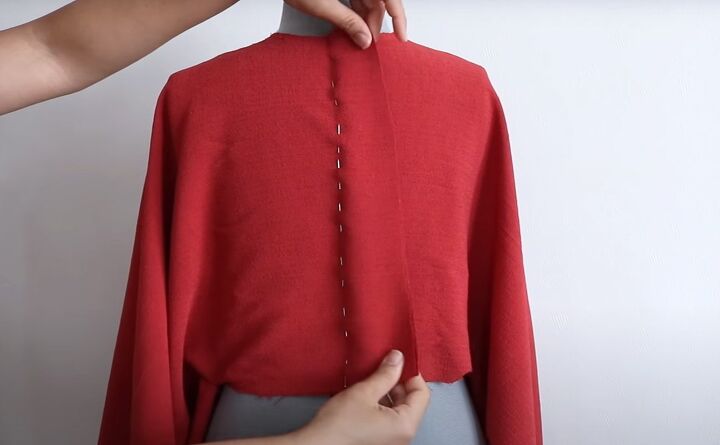
3. Fitting
I used a dress form but of course you could fit this directly on your body.
Pin the front wrap in place temporarily and adjust the center back seam so it fits against your body.
If you haven't already, open the pants side seams completely.
Place a couple of pins at the sides to mark the side and sleeve seams.

4. Cut the sleeves
Lay the top flat with the center front on top.
Outline the curve for the armhole and sleeve. I initially drew the sleeve quite narrow, then decided to make it more like a kimono sleeve, so I redrew the line with pins.
Choose the sleeve shape you like and mark it accordingly.
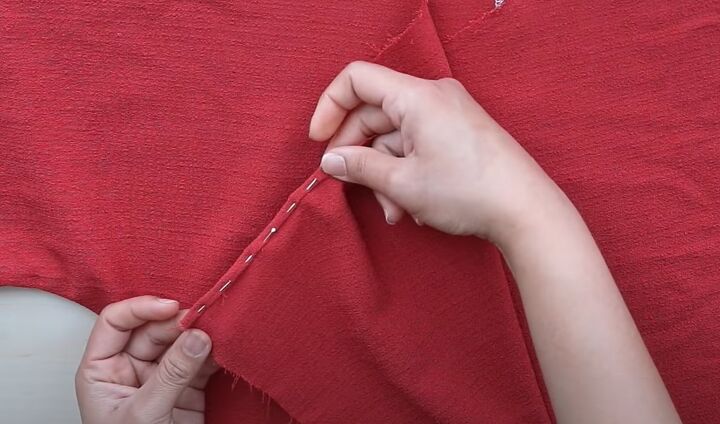
Cut out the sleeve, leaving a half inch seam allowance. Use the scrap piece as a template to cut out the other sleeve.
Unpick the hem end of the sleeve and sew the sleeve seam. Press the sleeve and clip the corners at the armhole.
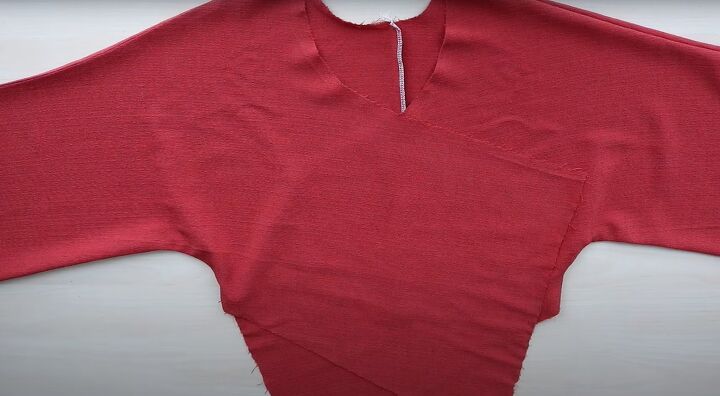
5. Cut the front
In my case, the back of the top was much shorter than the front, so I cut the front on a diagonal to meet the back at the side seam.
6. Finish edges
Close the back seam.
Turn the edge under twice along the front edges, back neck and lower edge and sew in place.
7. Make straps
Make the straps by joining together the leftover fabric scraps. I decided on shaped straps because I felt they matched the overall kimono style.
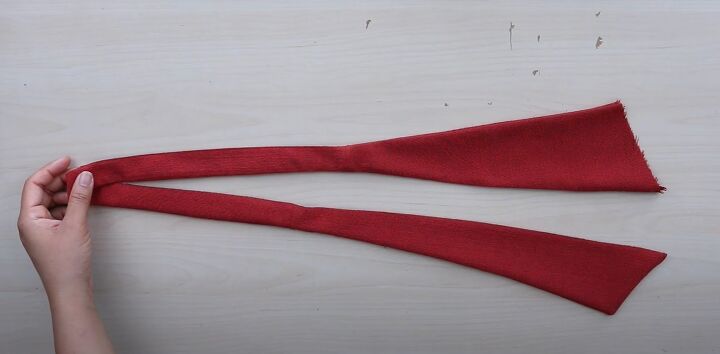
Leave one end of each strap unstitched to attach it to the front of your crop wrap top.
8. Attach the straps
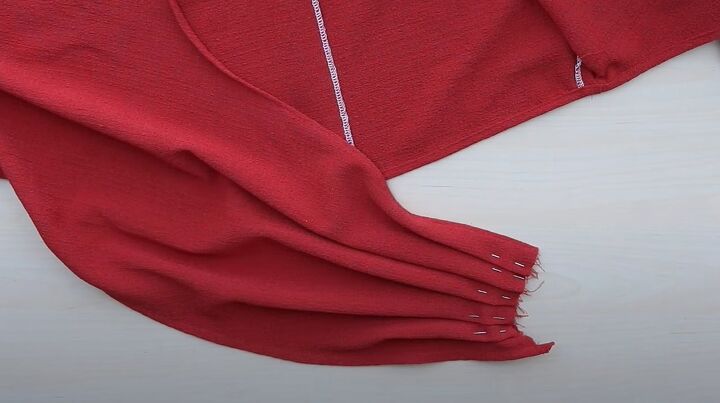
Measure the width of the end of your strap and pleat the raw edge of the center front to the same width.
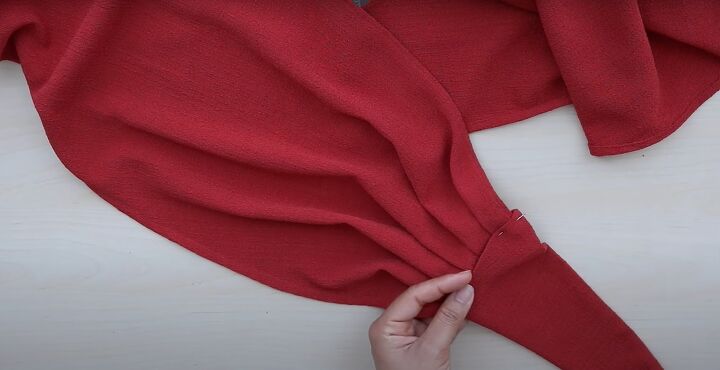
Stitch the pleats in place, trim the edges and insert the pleats into the open end of your strap, so the stitch line is hidden.
Turn in the raw edges of the strap as you go, and sew in place.

9. Finish the sleeves
Even up the sleeve hem if necessary.
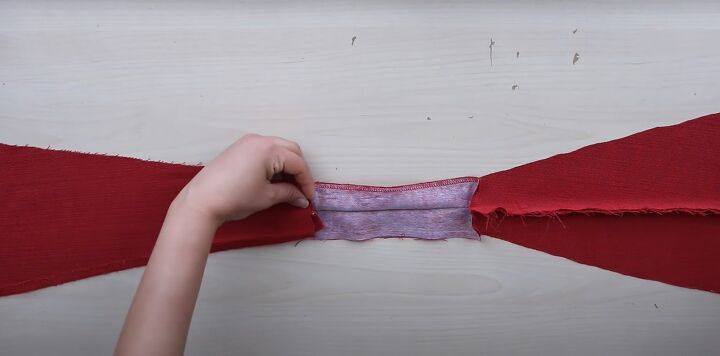
Use the elasticated section of the waistband to make cuffs for the sleeves.
Cut the waistband in half and sew the short ends together on each cuff.
Run 2 rows of gathering stitches around the end of the sleeve and gather it to fit the cuff when slightly stretched.
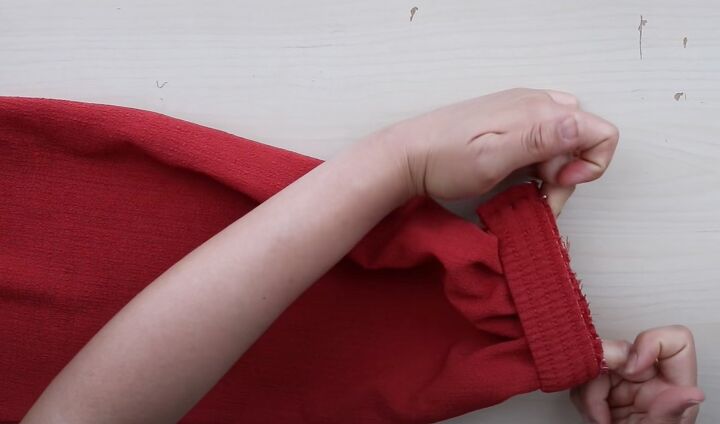
Slide the cuff over the end of the sleeve with right sides together, aligning the seams, and sew it in place.

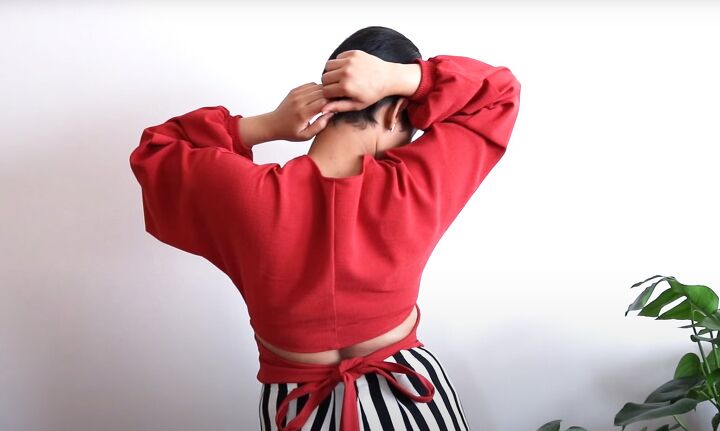
DIY wrap crop top
I think my DIY wrap top is a complete success. I love the shape, the color and how versatile it is.
You can wear it with the crossover at the back or front and tie it in several different styles.
This really was a very easy upcycle to do and I'd love to know what you think in the comments below!
The author may collect a small share of sales from the links on this page.


Comments
Join the conversation
Beautiful remake and you look wonderful in it!