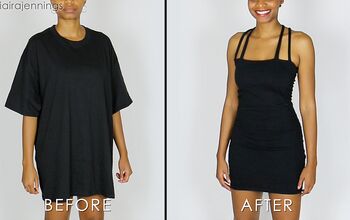
How to Easily Turn an Oversized Men's Shirt Into a Pretty Dress

Come and thrift flip a men’s shirt into a dress with me! When you see the results, you’ll be pretty amazed. I managed to use most of the fabric from the shirt and transformed it into a sexy little number.
So, bring out your sewing machine, and let’s convert a shirt into a dress together!
Tools and materials:
- Oversized men’s shirt
- Pins
- Sewing machine
- Measuring tape
- 1” elastic
- Matching thread
- Scissors
- Ruler
- Marker
- Safety pin
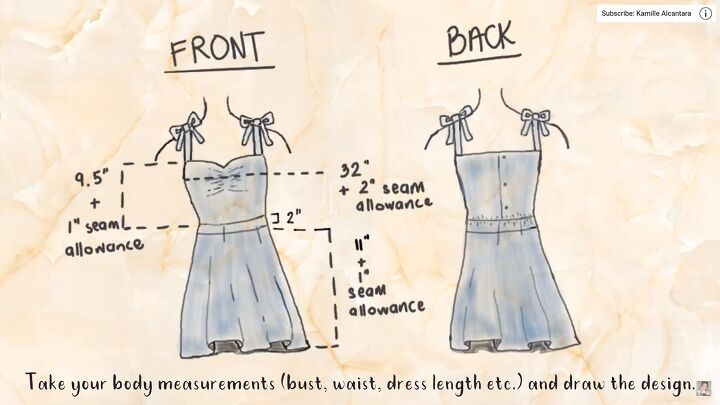
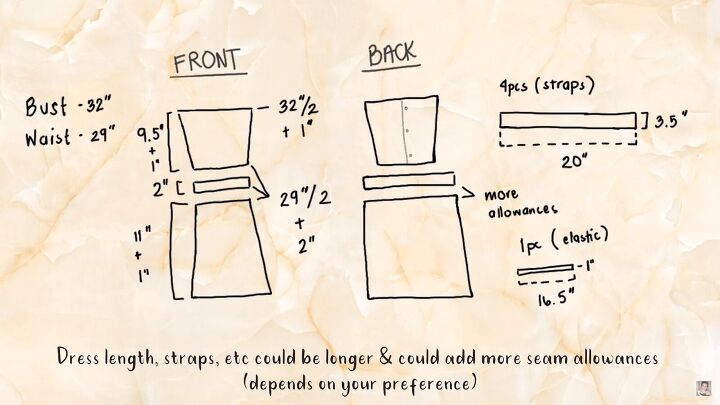
1. General outline and measurements
So, before we begin, I've drawn out the general outline of how I’d like my skirt to be based on my bust, waist, and dress length measurements. Remember to add seam allowance where needed.
Regarding the straps of the dress (and the length), you can add more seam allowance depending on your preference.
2. Make the top pattern
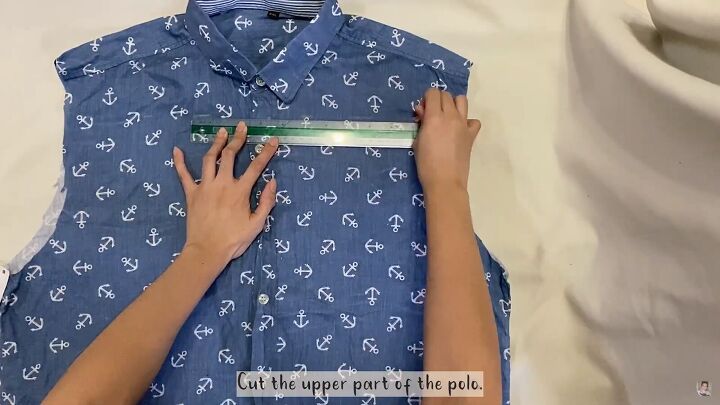
To convert a shirt into a dress, we must first take the shirt apart. Start by removing the pockets, cutting off the sleeves, and cutting the upper part of the polo (a few inches below the collar).
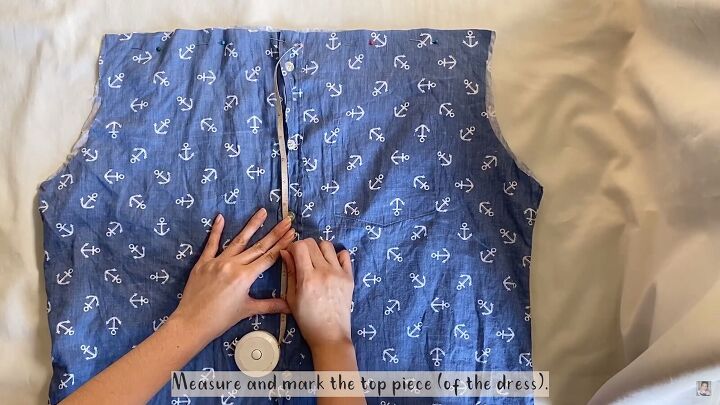
Measure and cut out the top front and back pieces according to the pattern. First, measure the length of the bodice (mine is 10.5inches).
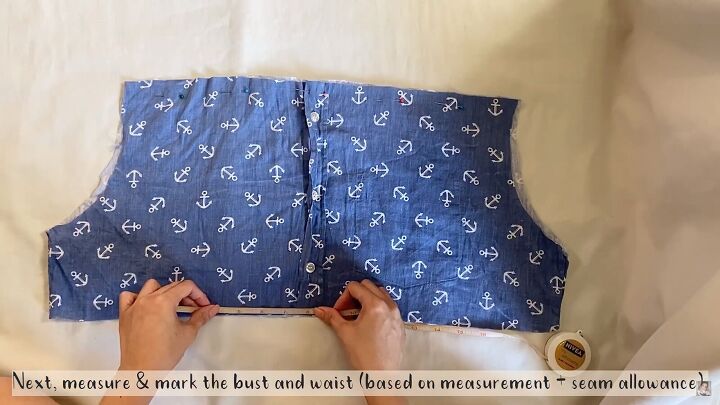
Next, measure and mark the bust and waist at the top and bottom.
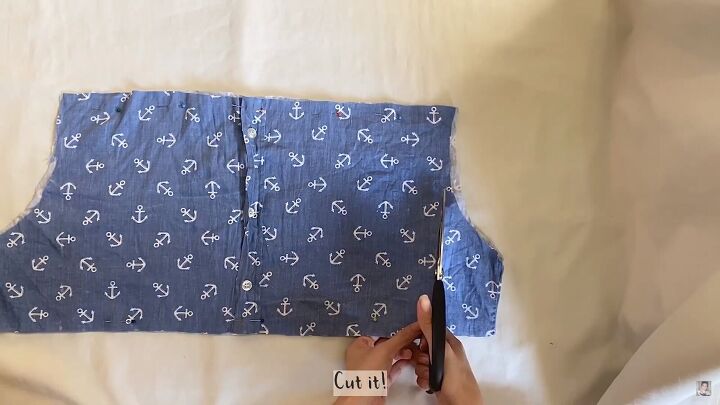
Connect the top and bottom marks with a ruler and cut the sides accordingly.
3. Sew the top section
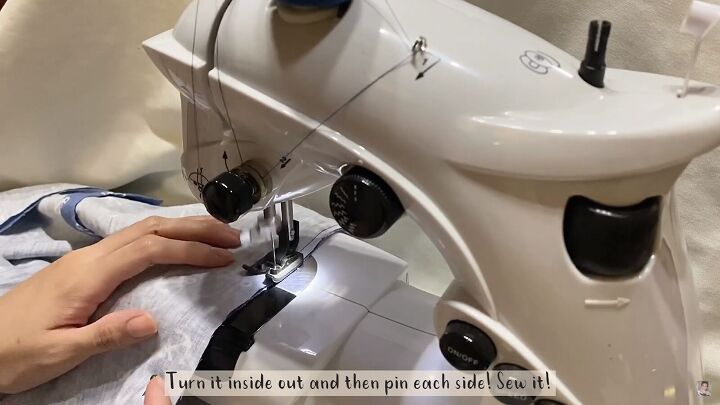
Place the front and back pieces right sides facing, pin the sides, and sew.
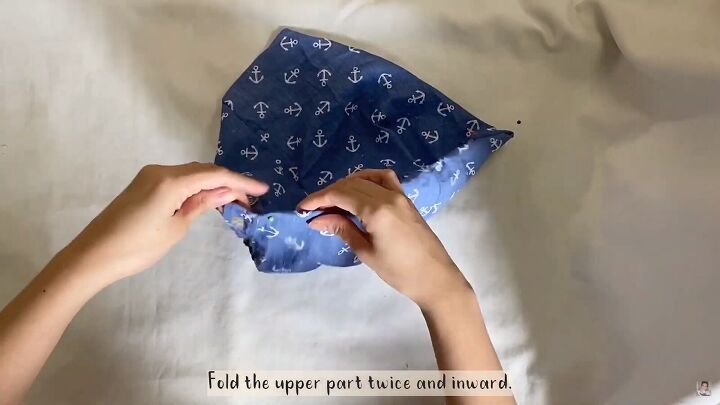
Pin the top edge with a double fold, but don't sew it yet.
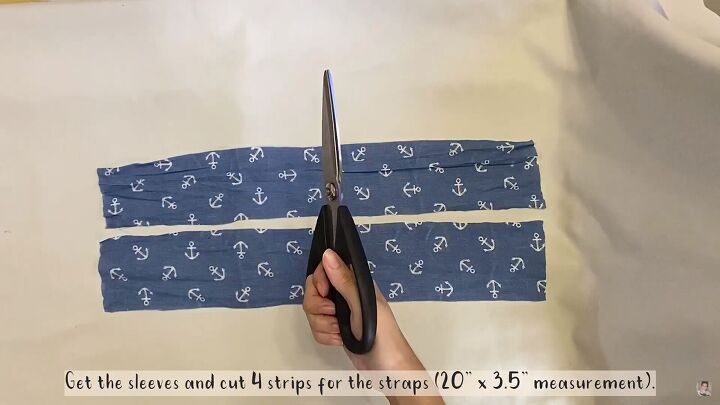
4. Make the straps
Cut four strips measuring 20” x 3.5” from the sleeve fabric.
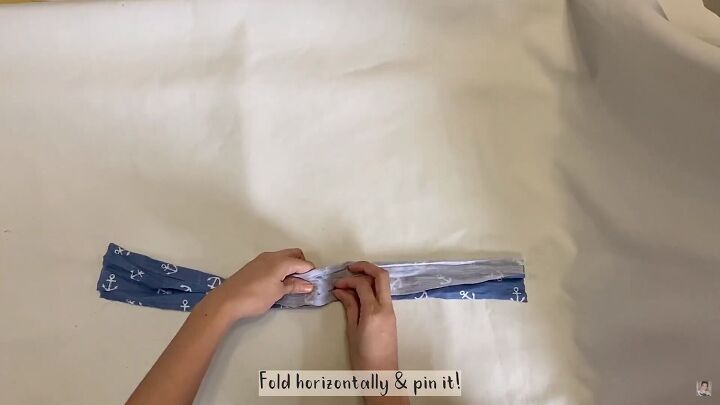
Fold each strap horizontally and pin the raw edges.

Sew to secure. Also, sew one of the short ends.
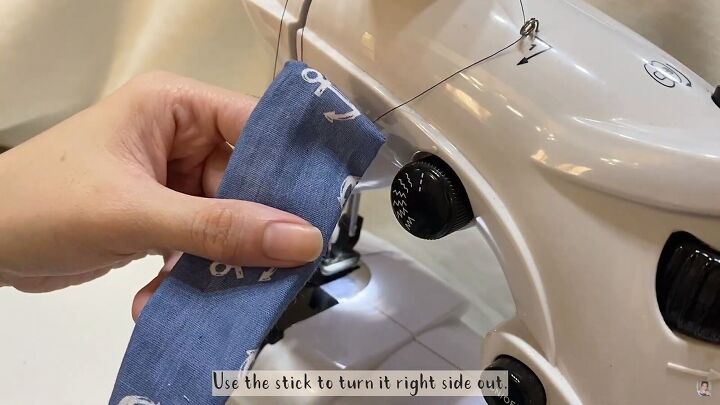
Use a long stick or pencil to turn the strap to the right side.
5. Attach the straps
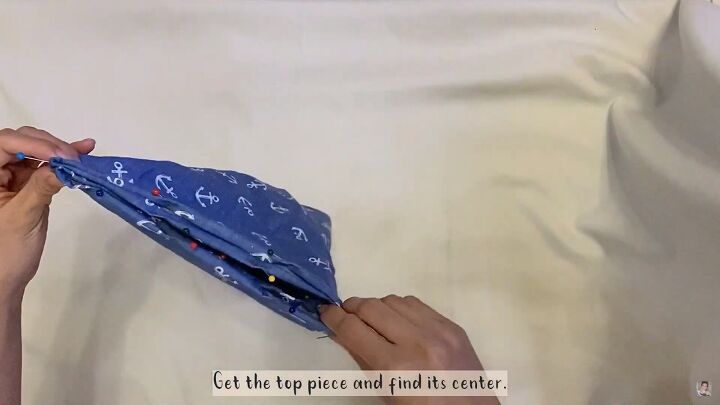
Get the top piece and find its center.
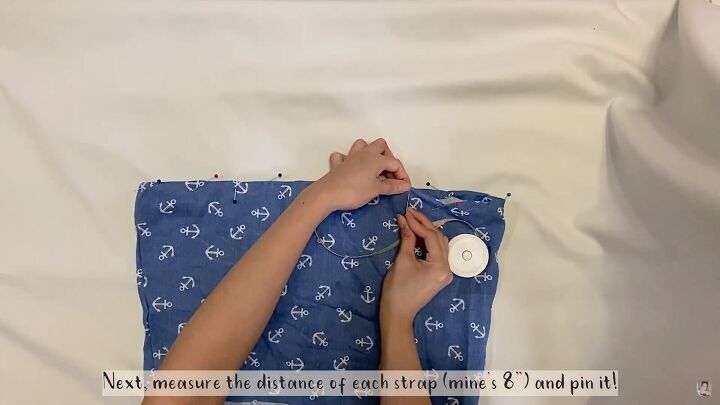
Measure the distance you want between the straps (mine is 8”), keeping the center of the bodice in the middle of the measurement. Mark the sides with pins.
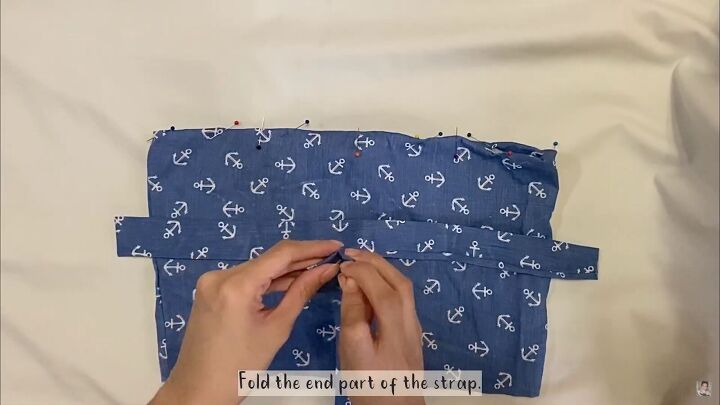
Fold the open end of the strap inward and pin.
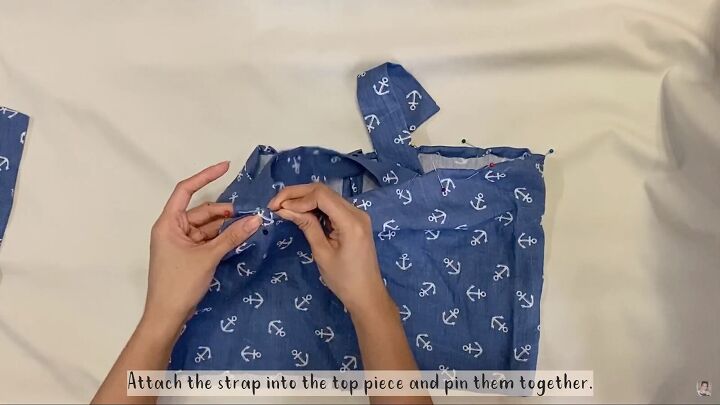
Attach the strap to the top piece and pin it together.
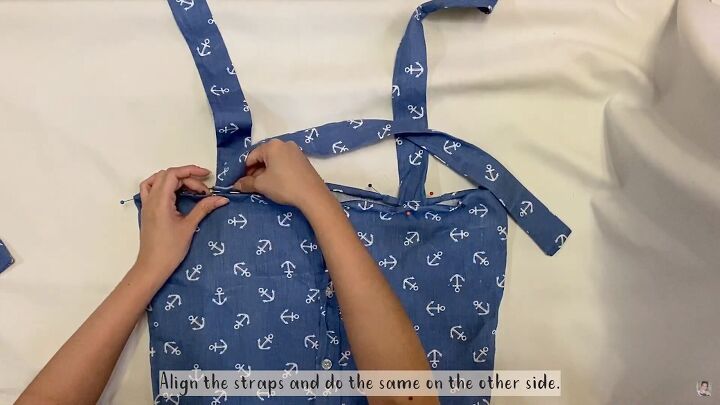
Align the straps and do the same on the other side.
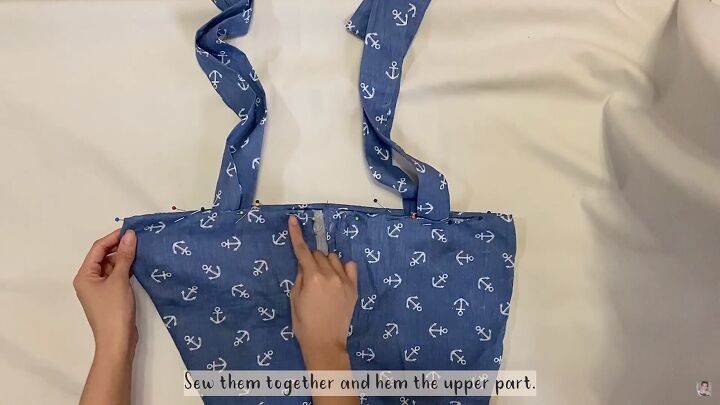
Sew everything together and hem the upper part. Start from the edge of the button placket when sewing.
Note: The side with the button placket will be the back part of the dress.
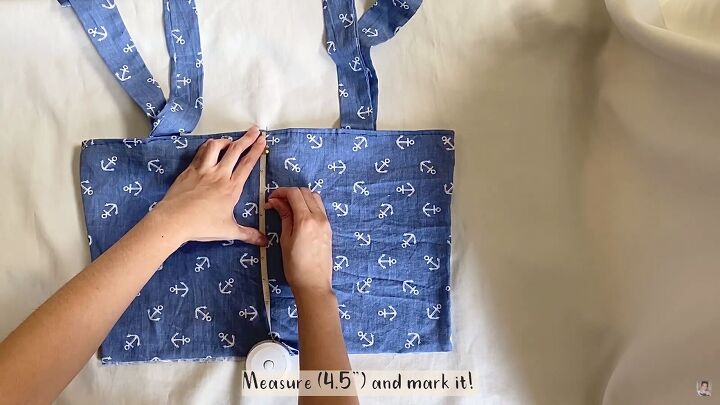
6. Make the front ruching
Fold the top in half and pin the middle. Then, measure 4.5” from the top center and draw a line.
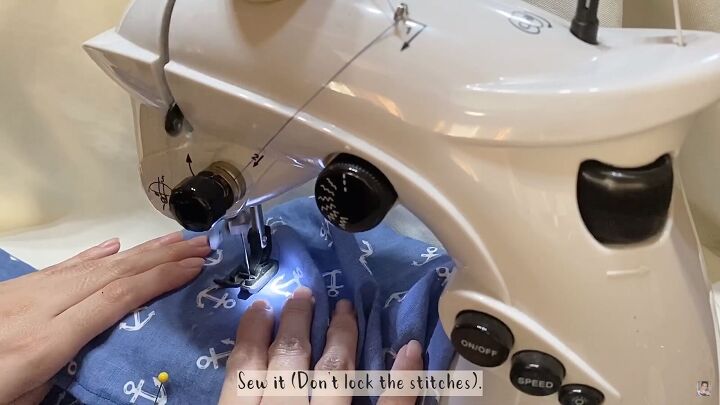
Sew down this line (only on the front layer), and don’t lock the stitches.
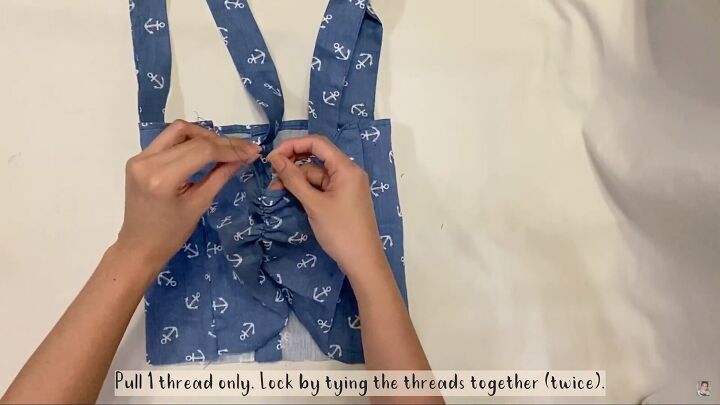
Pull the thread to create a ruffled effect. Tie the threads together twice to lock them in place.
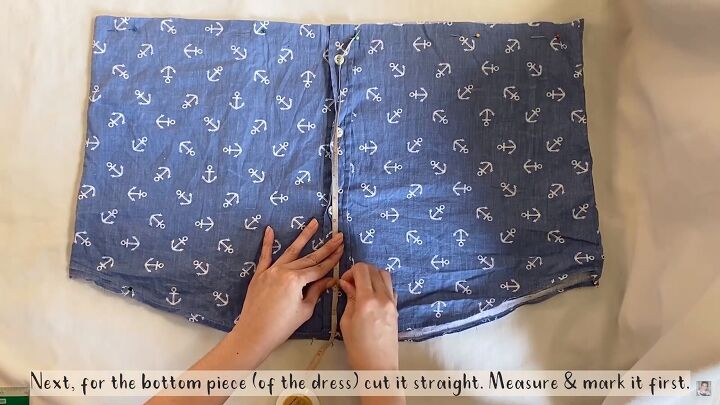
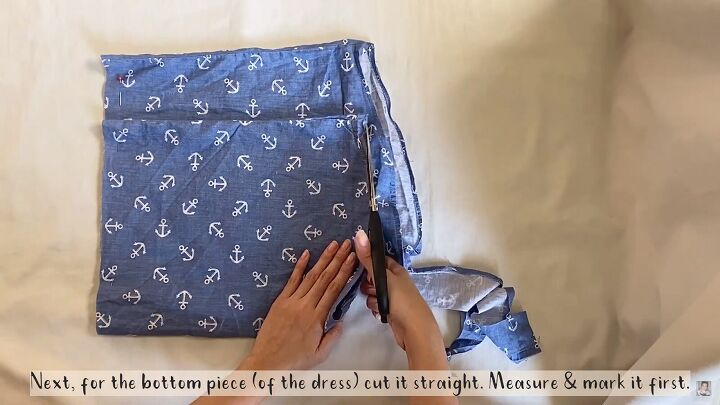
7. Make the skirt
Measure and mark your desired length for the skirt and cut a straight line across.
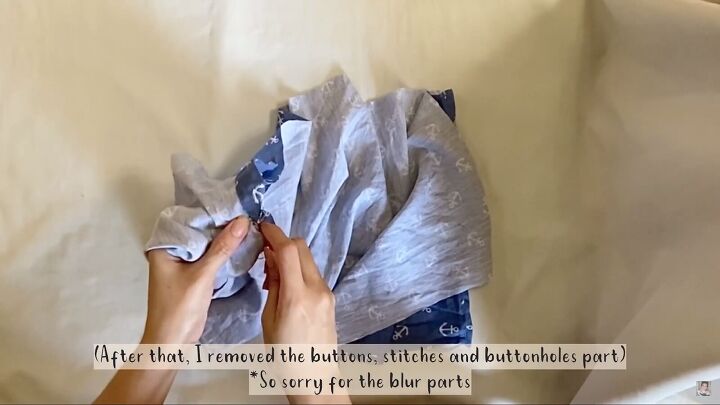
Remove the buttons, stitches, and buttonholes with a seam ripper.
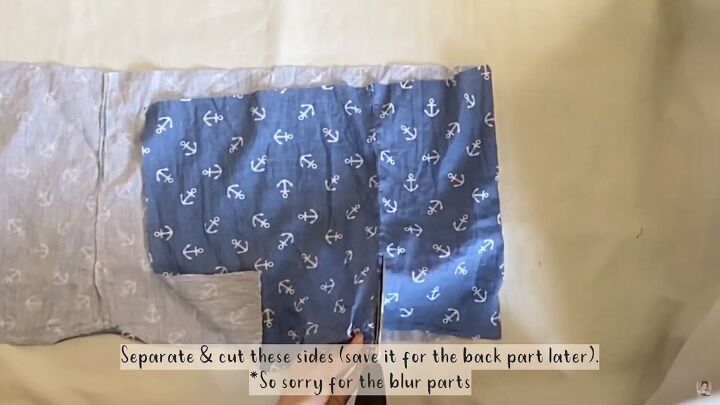
Cut along the side seams and save the sides for later.
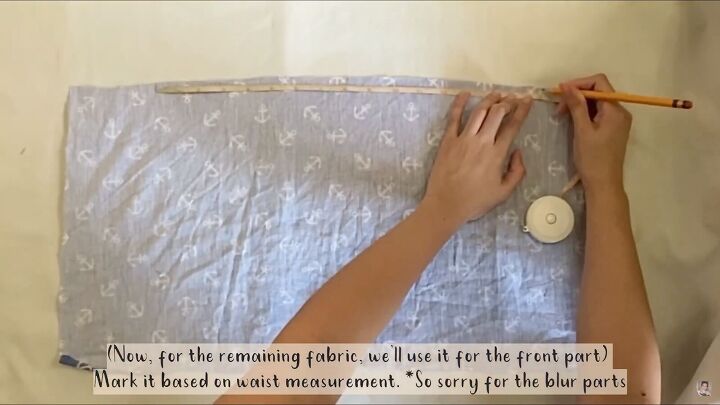
Use the remaining piece of fabric for the front of the skirt. Mark it based on your pattern and cut accordingly.
8. Make the front waistband
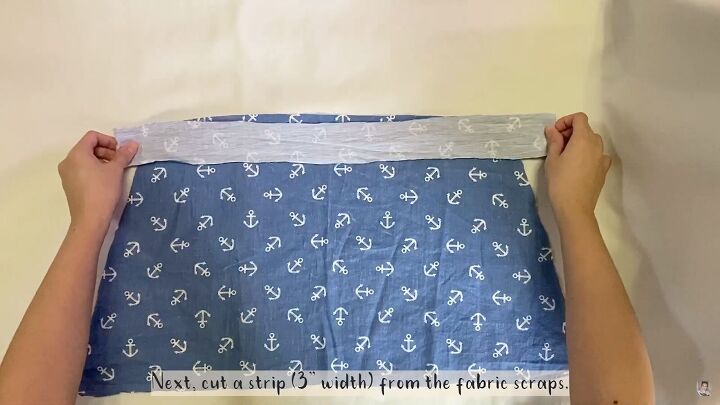
Cut a 3-inch wide strip from the fabric scraps about the same as the waist measurement.
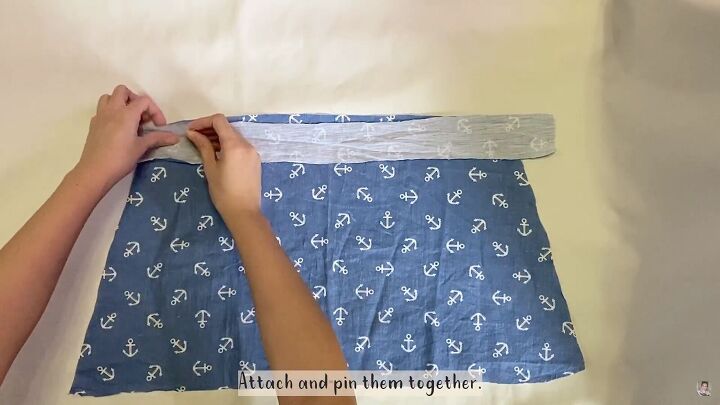
Pin the raw edges together of the waistband and skirt together, right sides facing. Then, sew to secure.
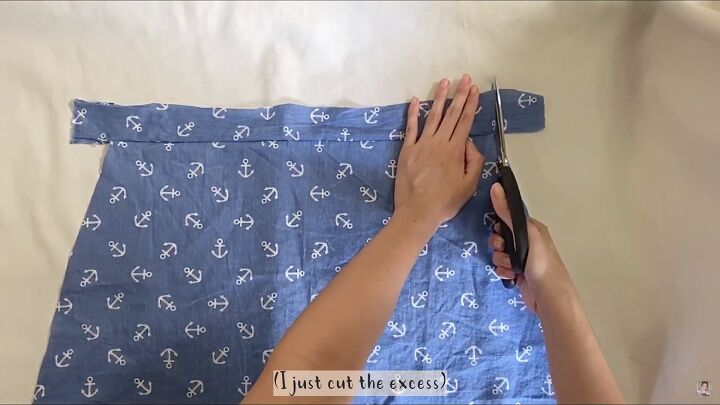
Cut off the excess.
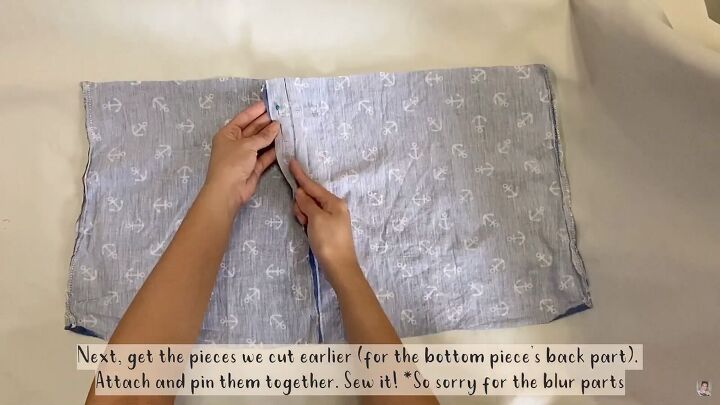
9. Make the back of the skirt
Get the pieces you cut earlier, attach and pin them together (by where the button placket was), and sew. This will be for the back piece of the skirt.
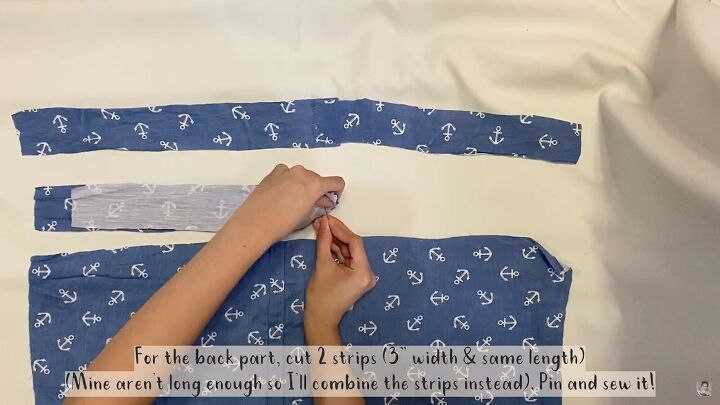
10. Make the back waistband
Cut two strips measuring 3 inches wide and the same length as the waist. Mine aren’t long enough, so I cut 4 shorter strips and combine them instead. If you need to do the same, simply sew two pieces’ ends together.
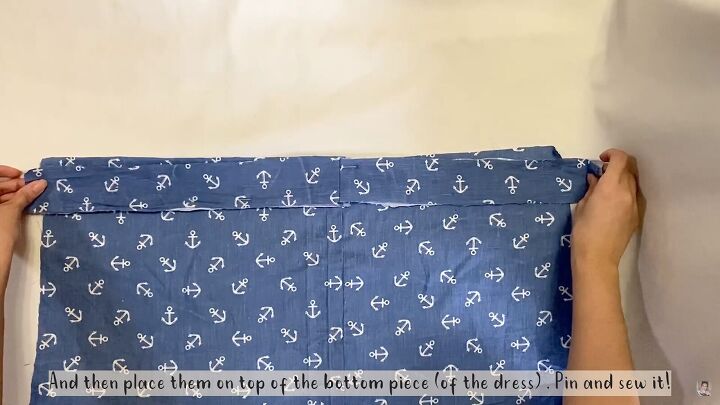
Next, place the waistband on the back piece’s waistline, pin, and sew.
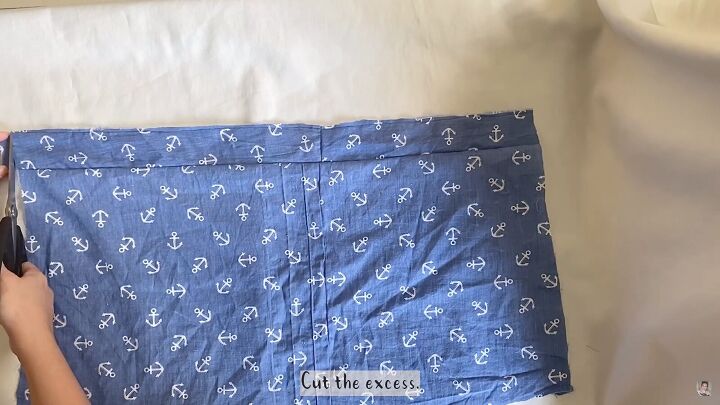
Topstitch the top edge of the waistband and cut the excess fabric.
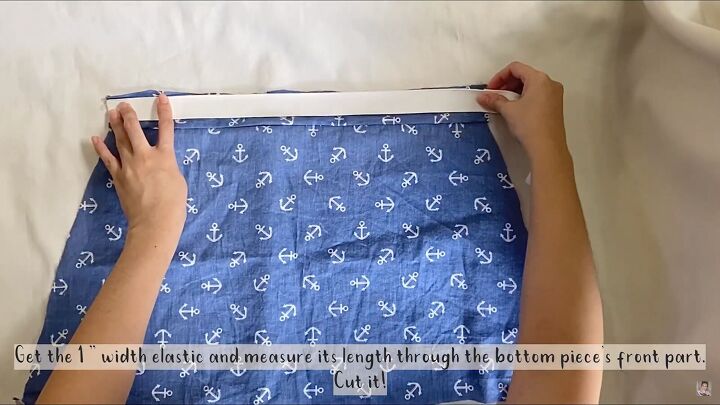
11. Attach elastic
Cut a piece of 1-inch-wide elastic to the length of the waist.

Insert the elastic through the waistband using a safety pin.
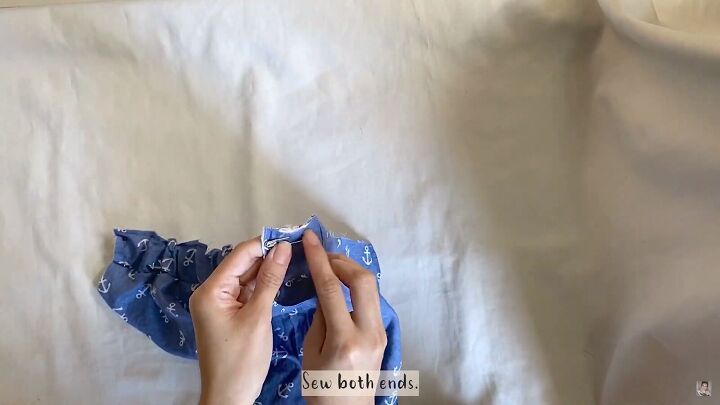
Sew the open sides and the elastic’s end to secure it in place.
12. Assemble the dress
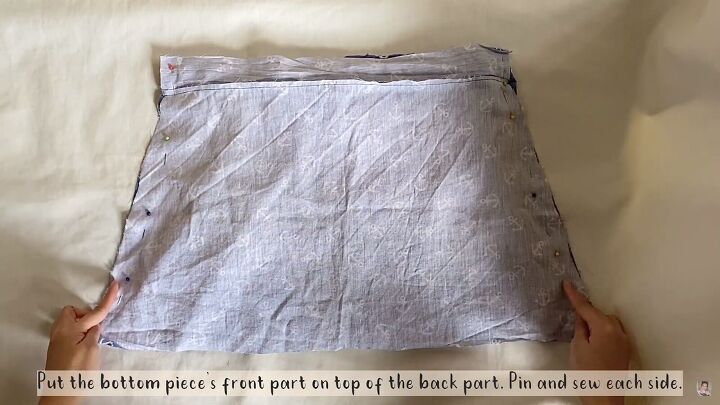
Place the skirt front and back pieces together, right sides facing. Pin the sides and sew.
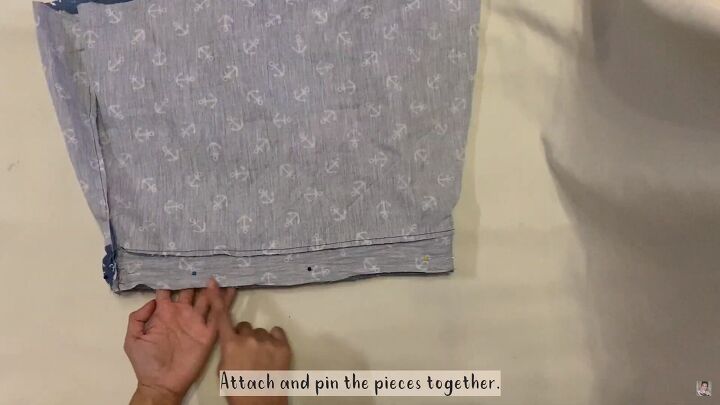
Turn the skirt inside out and place the bodice inside. Make sure the back of the skirt (elastic) is matched up to the back of the bodice (buttons). Align the seams, pin the edges together and sew.
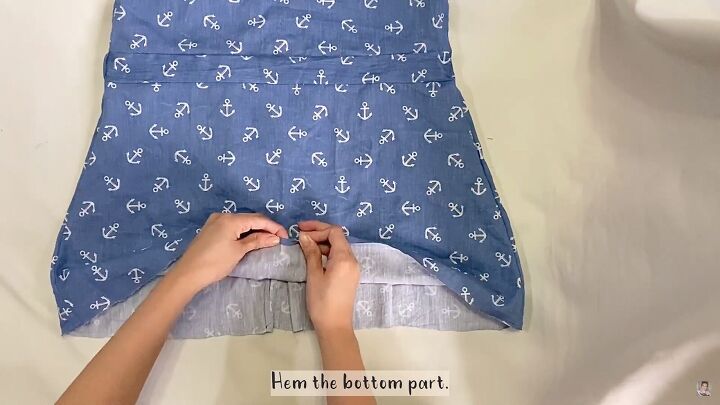
Flip it over to the right side and hem the bottom with a double fold.

Men's shirt into a dress
Here’s the final result! From a boring men’s shirt into a dress - pretty neat, right? Next time your partner, brother, father, or friend wants to discard their shirts, you’ll know exactly what to do by giving it a fantastic thrift flip!
I hope you are inspired by this tutorial on how to make a shirt into a dress. Thanks for joining me.
The author may collect a small share of sales from the links on this page.


Comments
Join the conversation
bravo!!
So love this! Can’t do it, but I love it!!