How to Create a Diamond With T-Shirt Cutting, Weaving & Braiding

Today, I’m going to show you how to do t-shirt cutting, weaving, and braiding. In this t-shirt weaving tutorial, I’ll demonstrate how to create an intricate diamond design using some of my favorite t-shirt weaving techniques.
If you’ve ever wanted to know how to cut and weave your own t-shirt, keep reading and let’s get started!
Tools and materials:
- Cardboard
- T-shirt
- Ruler
- Pencil/Fabric marker
- Scissors
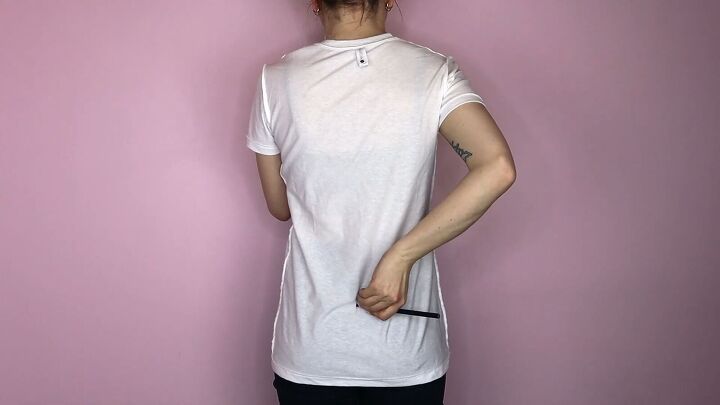
1. Mark the bottom of the pattern
Start by putting your shirt on inside out and marking where you want the bottom of your pattern to be.
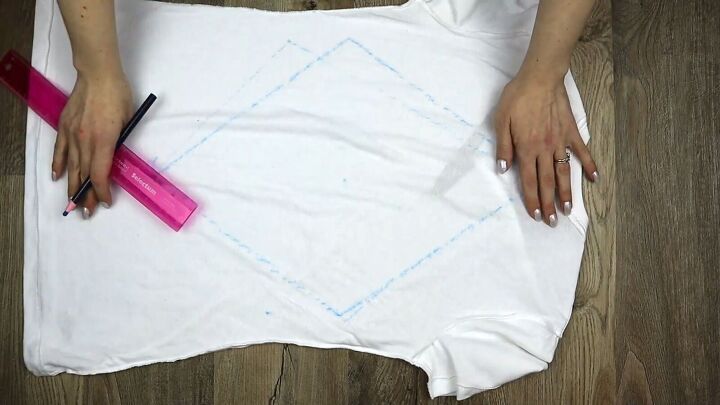
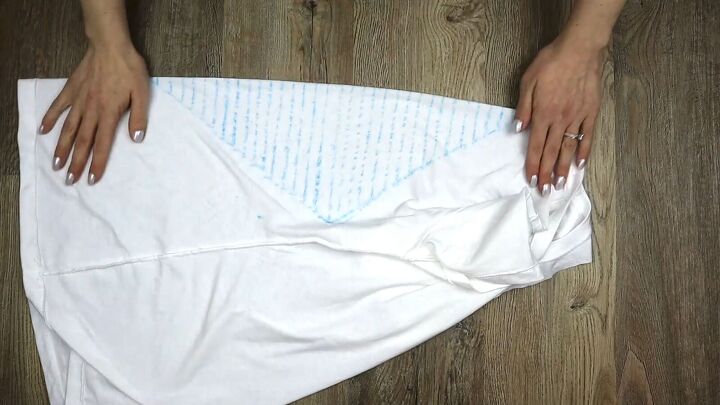
2. Measure and mark out a diamond shape
Lay your shirt down on a flat surface, still inside out. Then, using a ruler and a pencil or fabric marker, measure and mark out a diamond shape.
Be sure to leave a couple of inches of space from the edges and top of the t-shirt, and end at the marked point at the bottom. Don’t worry if the diamond isn’t perfect - just make sure it’s centered on the shirt.
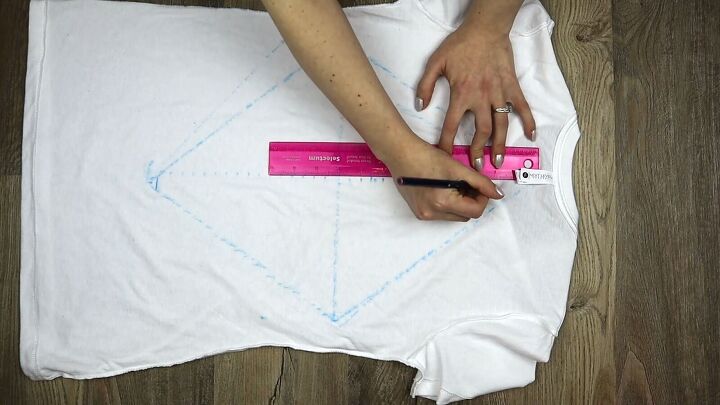
3. Measure half-inch sections
Now draw a line across the center of the diamond. Then, using that line as a reference, measure and mark half-inch sections up and down the length of the diamond.
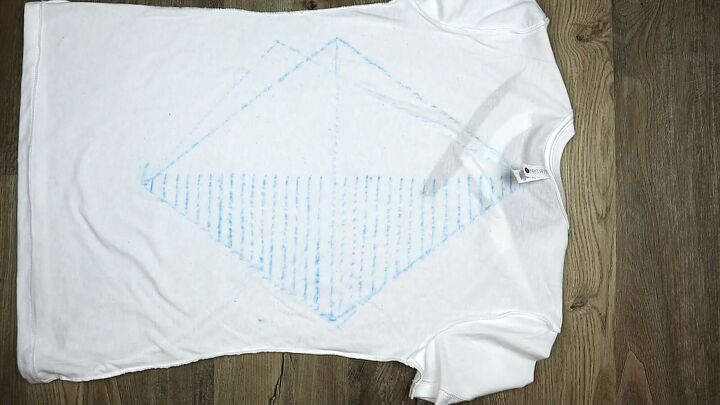
4. Draw lines down half of the diamond
Use the marked half-inch sections from the previous step to draw more lines across the diamond. This time, you only have to make lines down one side as we’re going to fold the shirt in half anyways.
5. Fold the shirt in half
After drawing all the lines, fold the shirt in half so that the side seams are laying on top of each other and facing up in the center. This way, the front of the shirt is on one side and the back is on the other.
At this point, the diamond should now be a triangle and folded so that the side with the lines is the side facing up.
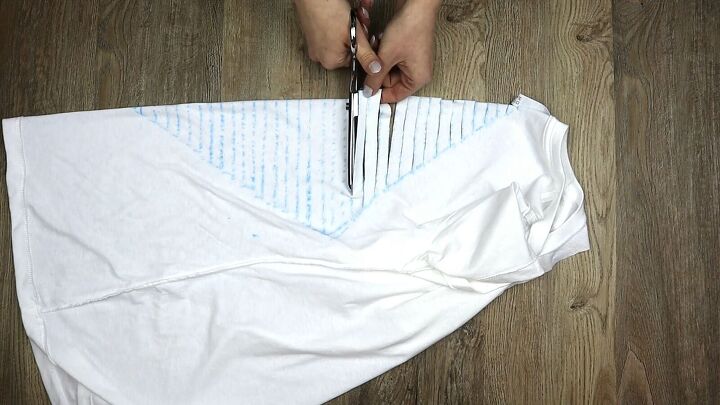
6. Cut along the lines
Grab your scissors and start cutting along the lines inside the triangle.

7. Put the cardboard in the shirt
Unfold your shirt and lay it so the back is facing up. Then, put the piece of cardboard inside the shirt.
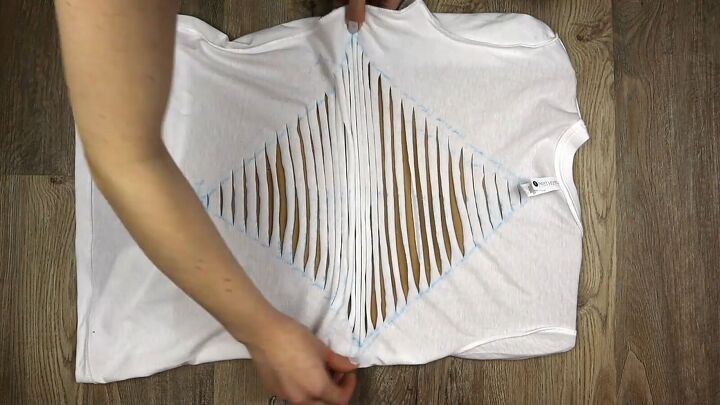
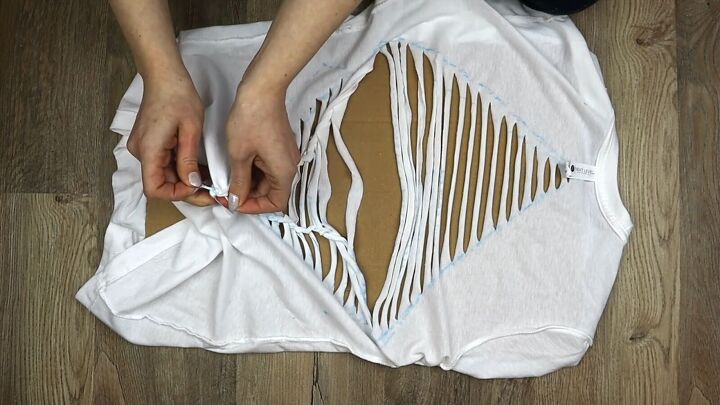
8. Stretch out the strips
Stretch out the strips of fabric. Now, it’s time to weave.
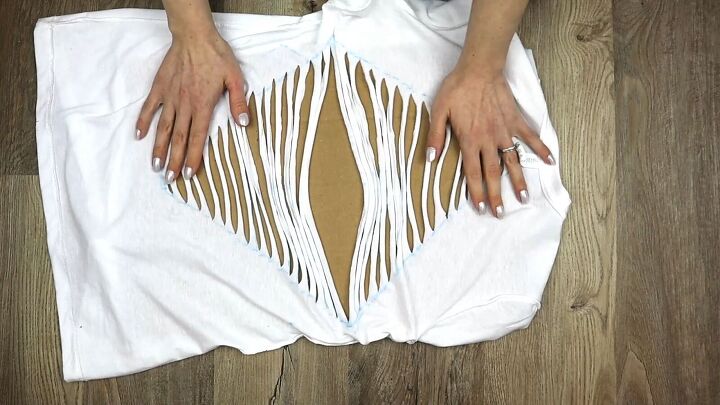
9. Split the strips down the center
Usually, I would turn my shirt back right side out but I like the way the pattern looks when woven on the inside better.
Let’s start our DIY t-shirt weaving by splitting the strips of fabric down the center of the diamond.
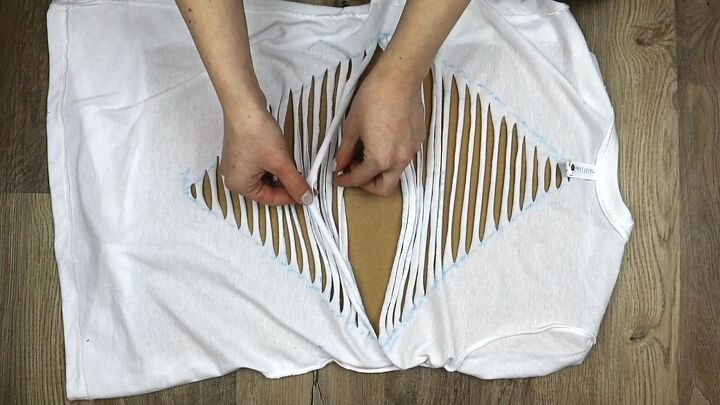
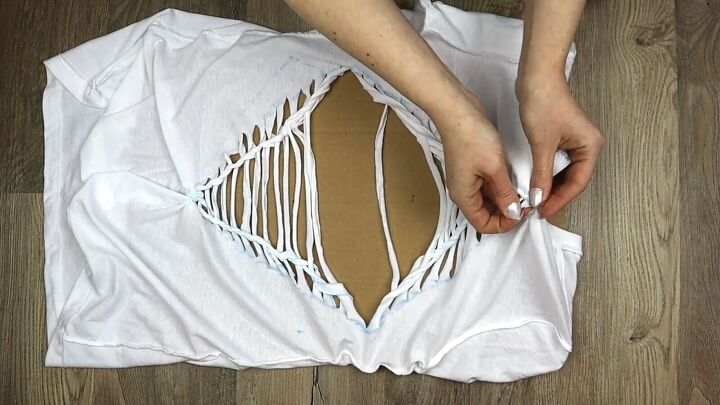
10. Ladder weave the bottom section
We’re going to ladder weave from the center strand down to the bottom. To do this, start by grabbing the top strand and pulling it down. Then grab the second strand and pull it over the first.
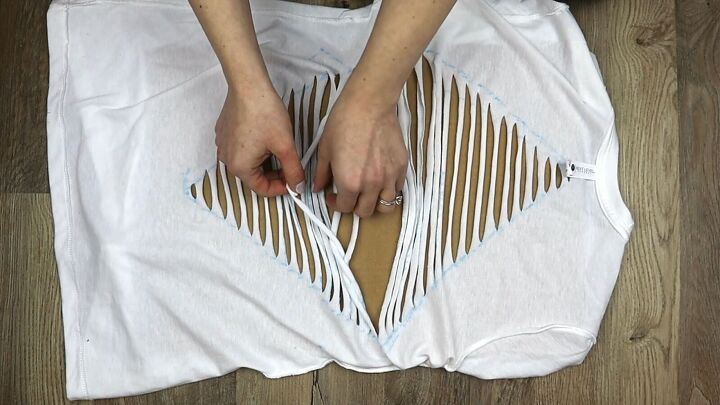
Now repeat, this time pulling the second strand down and grabbing the third, and pulling it over the second.
Continue this pattern all the way to the bottom.
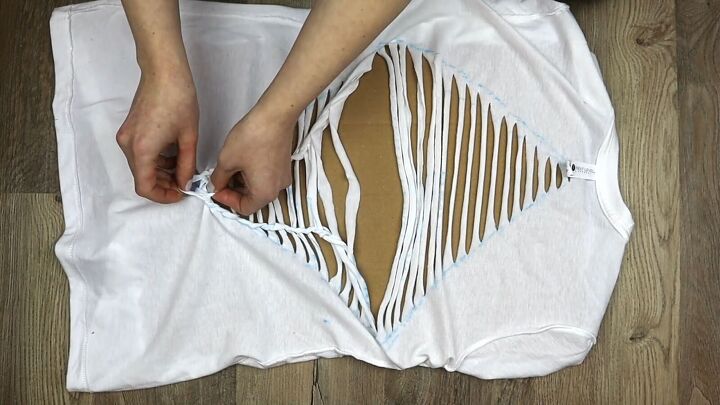
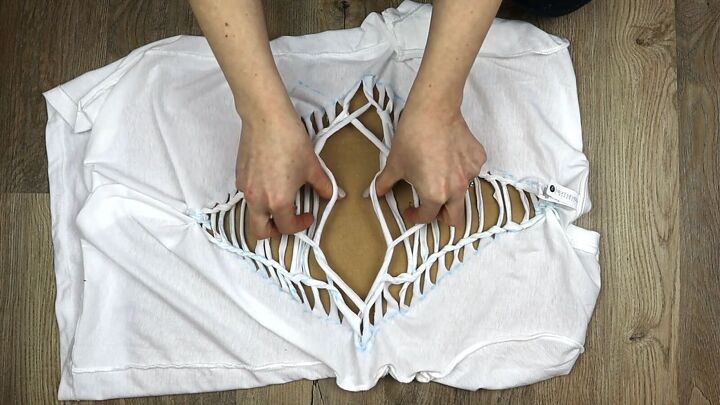
11. Tie the ends together
Once you’re at the bottom strand, cut a small hole under the diamond and cut the bottom strand in half.
Weave one end of the strand out and back in through the hole and tie both ends back together.
Repeat with the top half of the diamond.
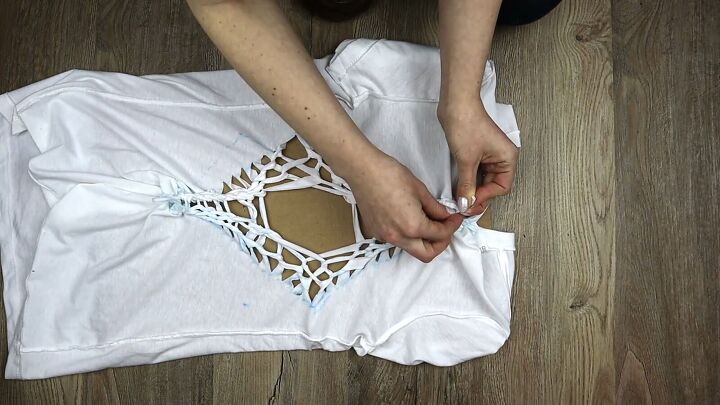
12. Ladder weave both sections with the center strands
Now, we’re going to do another row of ladder weaving, but this time to start, grab the two center strands and cross them, then weave each side.

If you’re uncoordinated like me, do just one side at a time while hiding the other in place.
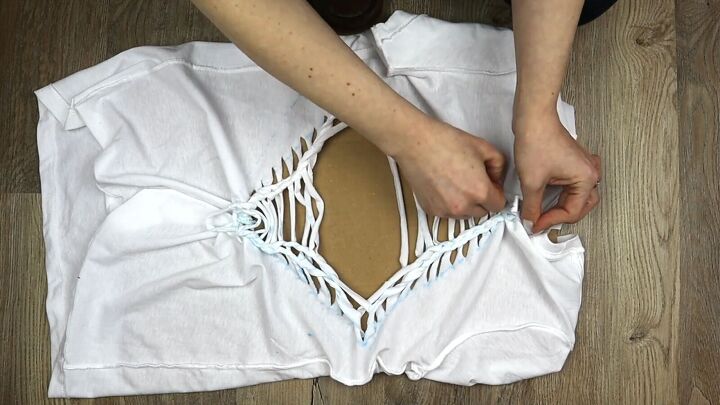
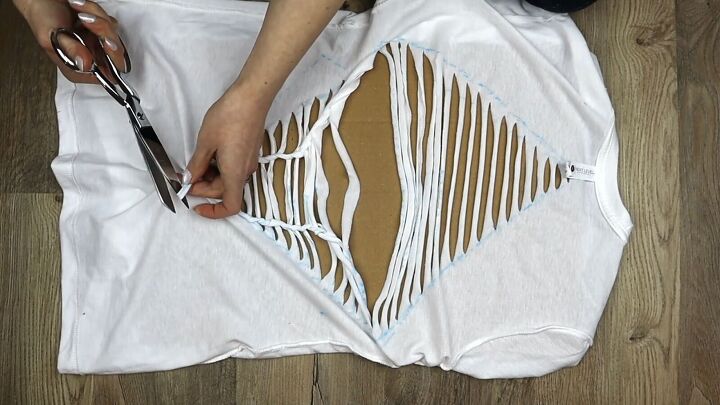
13. Tie off the remaining strands
When you reach the bottom or top, cut the second to last strand and tie it back together around the last strand.
14. Do one more row of weaving, then adjust (optional)
If there’s a lot more stretch left in your fabric, like there was in mine, you can do one more row of weaving exactly like the last one.
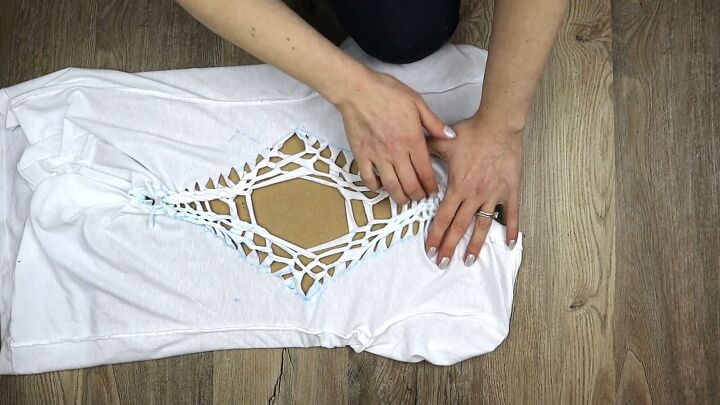
Then get your fingers inside and spread out and adjust your t-shirt weaving design to your liking.

T-shirt cutting, weaving, and braiding tutorial
Turn your shirt back right side out and you’re done! If you liked this step-by-step t-shirt weaving tutorial, be sure to let me know down below. I’d love to know how yours turned out!
The author may collect a small share of sales from the links on this page.


Comments
Join the conversation
cute