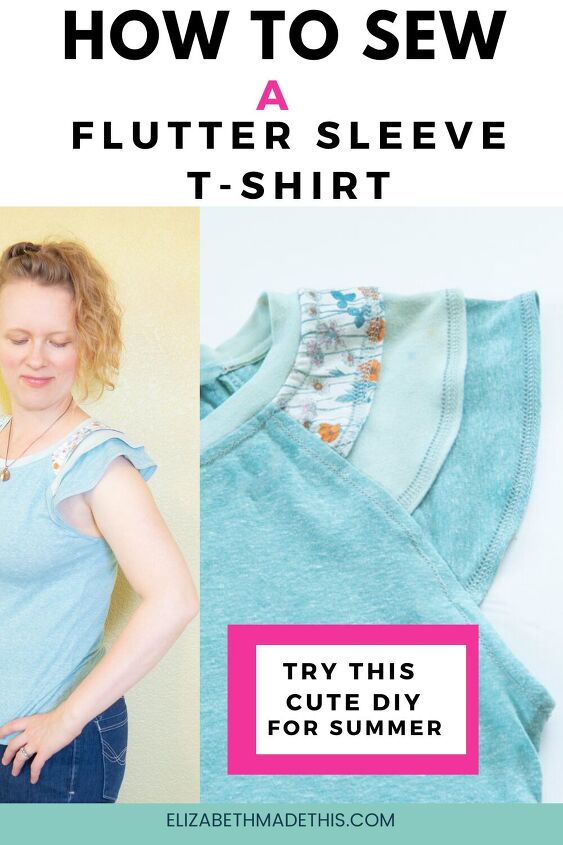
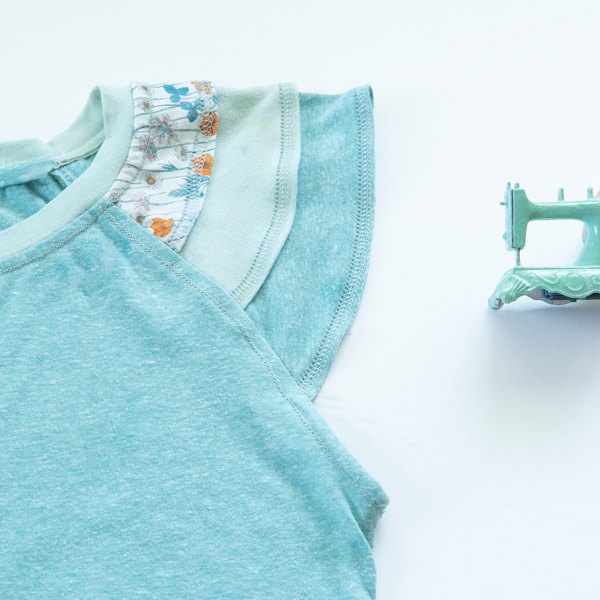
How to Make a Flutter Sleeve T-shirt
A fun t-shirt hack for you today: here’s how to make a flutter sleeve t-shirt.
I love flutter sleeves in the summer. Flutter sleeves are such a pretty look!
Bonus: if you are like me and burn, a flutter sleeve can be a good way to cover your arms but still get some much needed ventilation. Dressing cool in summer is always a win.
In this post I’ll show you how to hack a basic raglan sleeve t-shirt pattern and turn it into a flutter sleeve t-shirt with 3 layers.
This is a great summer look that’ll give you a chance to use up your knit fabric scraps and play around a little with colorblocking.
So grab some coordinating jersey fabrics and let’s make a flutter sleeve shirt.
elizabethmadethis.com is a participant in the Amazon Services LLC Associates Program, an affiliate advertising program designed to provide a way for websites to earn advertising revenues by advertising and linking toSome of the links below are affiliate links. This means that, at zero cost to you, I will earn an affiliate commission if you click through the link and finalize a purchase.
Supplies for how to make a flutter sleeve t-shirt
- quilting ruler
- your favorite raglan t-shirt pattern (Learn how to make a diy raglan t-shirt pattern or check out raglan tee patterns for everyone)
- tape
- 1 yard jersey fabric
- 1/8 yard each 2 coordinating colors jersey fabric (scraps are good here)
- Clover Hot Hemmer or other hem gauge
- pattern paper (this medical exam paper is great)
- 75/11 stretch needle or 80/12 universal sewing machine needle
- Tailor’s Ham (optional but helpful)
What pattern can I use to make a women’s flutter sleeve shirt?
This tutorial for how to make a flutter sleeve t-shirt will walk you through how to modify a standard raglan sleeve t-shirt into a flutter sleeve tee.
You can use any raglan tee pattern you have for this project, but if you don’t have one, check out:
If you would rather make a flutter sleeve tee with a regular sleeve, I have a simple tutorial for a split flutter sleeve tee. Just skip the steps about the split and you can make this same look with a regular t-shirt pattern such as Jalie 2805.
Seam allowances and stitches used for this project
For this project, use the seam allowances from the pattern that you’re using unless indicated. I’m using 3/8″.
Unless noted, you’ll be using a NARROW ZIGZAG stitch for all your construction. To set your machine to a narrow zigzag, adjust the width to 0.5mm, and the length to 2.5mm. This stitch will give the jersey enough recovery that the thread won’t break as your wear your flutter sleeve shirt.
Learn more about the best stitches for knits.
If you have a serger, feel free to use it for the side seams, neckband and the sleeve seams, though I’d still recommend using your regular sewing maching for basting, the armhole binding, and all the hems.
Please note that I’m using a coverstitch machine for the hems and stitching down my bindings. If you don’t have a coverstitch, keep using the narrow zigzag stitch with either a single needle (75/11 stretch or 80/12 universal) or a stretch double needle.
Make your flutter sleeve pattern
First thing we need to do is hack your sleeve pattern to create a flutter sleeve pattern. Once you’ve gotten through this step, your flutter sleeve top will come together in no time.
Trace a sleeve pattern
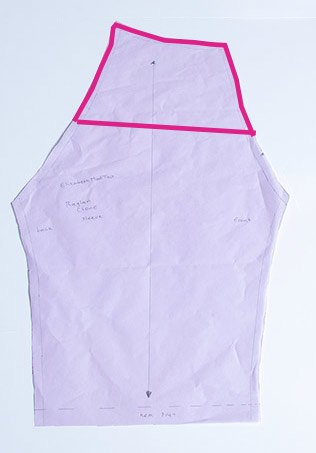
First, grab your pattern’s sleeve pattern. Measure down the front and back armhole about half way, making a mark on the front and back of the sleeve.
Next, lay some tracing paper over your pattern. Trace around the edges of the sleeve and draw a straight line to connect the points that you marked.
Mark your seam allowance along the neck edge of your sleeve.
Slash and spread
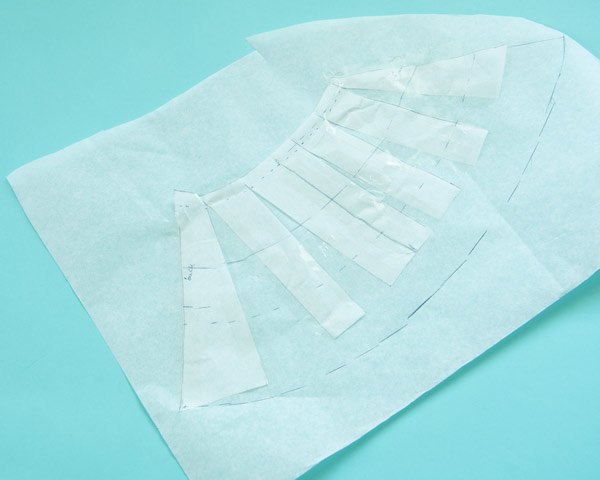
From here, draw several lines parallel to the grainline.
Cut along the lines from the hem to the seam allowance edge. Next, spread the paper open until you like the look. The wider you spread the lines apart, the more flutter your sleeve will have. Try to distribute the fulness among all the lines.
Tape down the flutter sleeve pattern onto another piece of tracing paper.
True up the sleeve pattern
Use your ruler to true up the hem line. The hem should have a bit of a curve to it.
After that, split the sleeve into 3 pieces vertically. Use the bottom hem line to measure up equally to make the next hem line, then measure up again towards the top of the sleeve to make the top sleeve piece.
Label your sleeve pieces A (the top part of the sleeve), B (the top part plus the middle part), and C (the whole sleeve).
Trace off each section.

If you don’t want to have a triple layer flutter sleeve pattern, feel free to only use the largest layer. Or you could use two…etc. You’re the designer here, so make the decision you want to make here.
Figure out your colorblocking plan for the flutter sleeve pattern
Whenever you’re colorblocking, it’s a good idea to spend 2 minutes thinking about how you want to arrange your colors.
A quick sketch here or a visual layout with your fabrics will do.
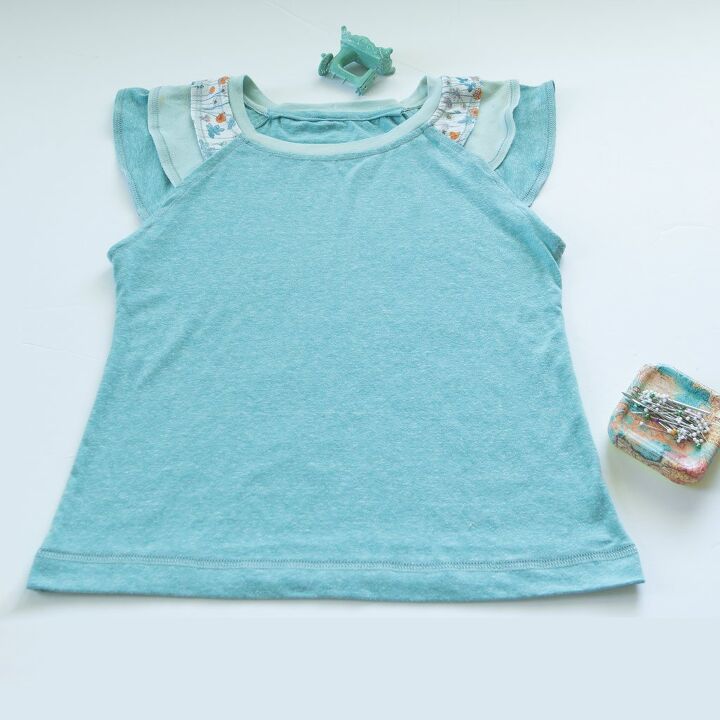
For me, I chose to make my sleeve A (shortest layer) from the floral fabric, sleeve B (middle layer) from my lighter contrast jersey, and sleeve C (full sleeve) from the main fabric for my t-shirt. Figure out how you’ll arrange your own contrast fabrics before you cut.
Cut your flutter sleeves and t-shirt pieces
Now it’s time to cut your flutter sleeve shirt.
From your main jersey cut:
- Front: x1 on the fold
- Back: x1 on the fold
- Neck band: x1 on the fold if your pattern indicates it
- Armhole bindings 1 1/2″ wide x about 12″ cut on the crossgrain: x2
- Sleeve C: x2
- Optional: another piece 1 1/2″ wide on the crossgrain to cover the inside back neck.
From your contrast jerseys, cut 2 copies each of either sleeve B or A.
Now your flutter sleeve tee is ready for construction!
Press up t-shirt hem
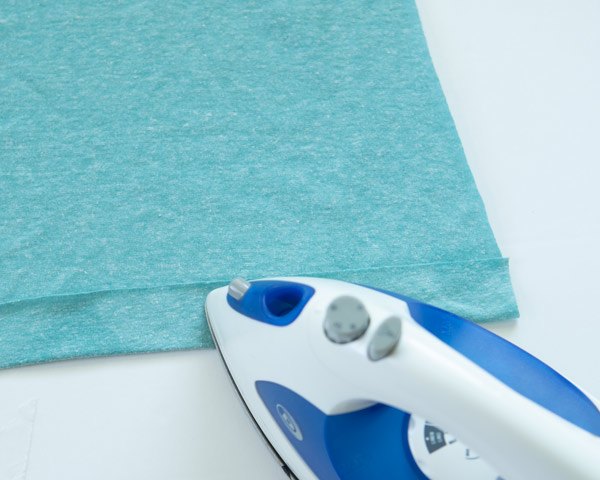
Press up the hem on your front and back pieces. I like to use my Clover Hot Hemmer here because it makes such quick and accurate work of pressing hems. If you have another hem guide, that works too!
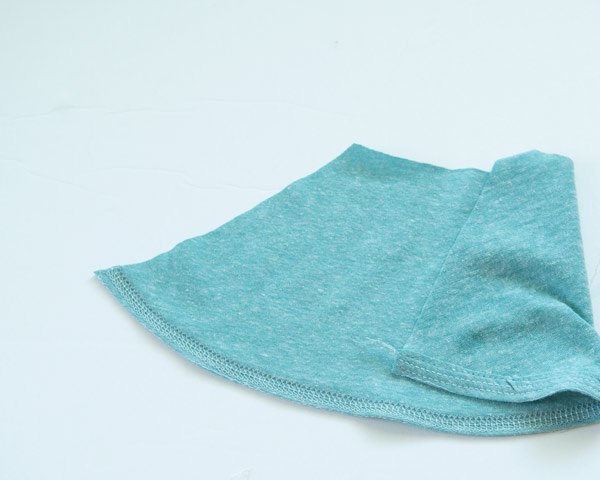
Sew the sleeve hems
Basting and pressing the sleeve hems
Set your machine to a zigzag stitch with a 0.5mm width and the longest length (it’s 4.5mm for zigzags on my machine). Stitch 3/4″ from the bottom edge of each sleeve.
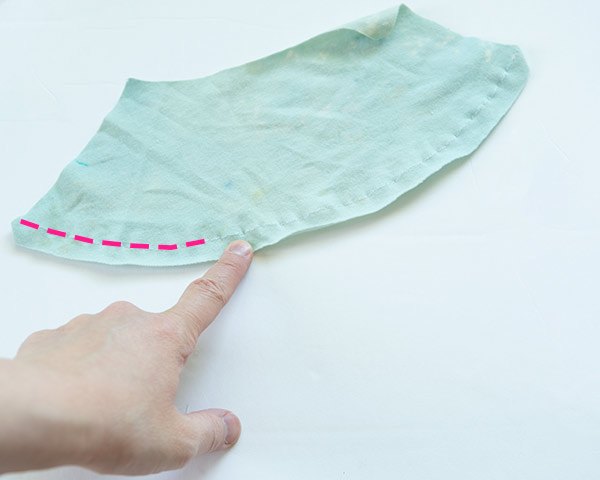
We’re doing this because the curve of the hem will make it very difficult to press up an even hem without the basting first.
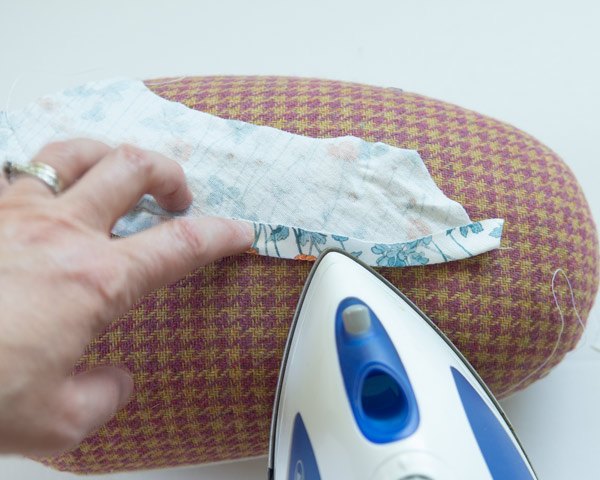
From here, drape your sleeve on top of a tailor’s ham. The curve of the ham will help you press the curve more smoothly.
Fold up the raw edge of the sleeve bottom along the thread line and press.
Repeat for the other sleeve pieces.
Finish the sleeve hems
To finish the sleeve hems, set your machine to a narrow zigzag stitch (0.5mm width, 2.5mm length). You can thread up a double needle here if you’d like, or continue using your regular needle.
Sew all of the hems with this stitch. I used my coverstitch machine here, but a narrow zigzag is perfectly adequate.
Create the sleeves
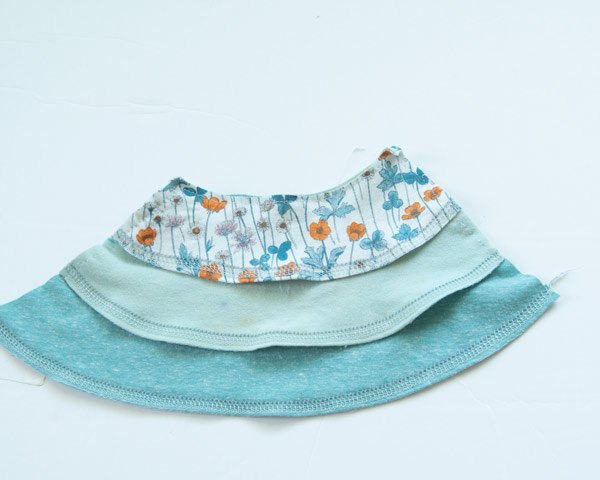
To make each sleeve, stack the pieces on top of each other. Baste the edges together along the sides and neck edges.
Sewing the side seams
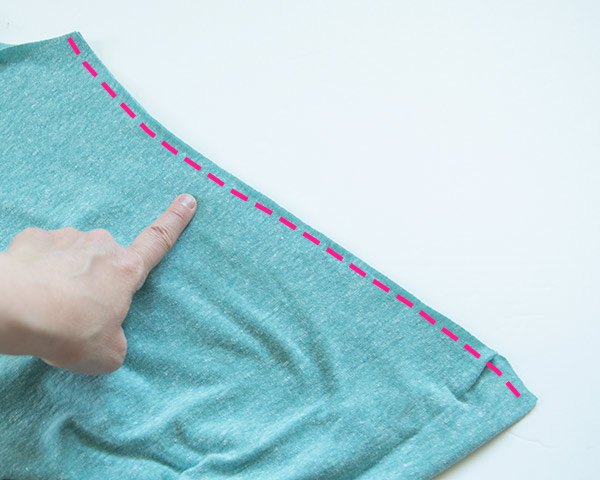
Match your front and back t-shirt pieces together and sew the side seams with the seam allowance indicated in your pattern.
Sewing the sleeves
Now that you’ve made your flutter sleeves, it’s time to sew them to your tee.
Sew the sleeves to the front and back
Match the front of your sleeve to your front piece right sides together. Sew from neck edge to the sleeve hem.
Repeat for the back piece.
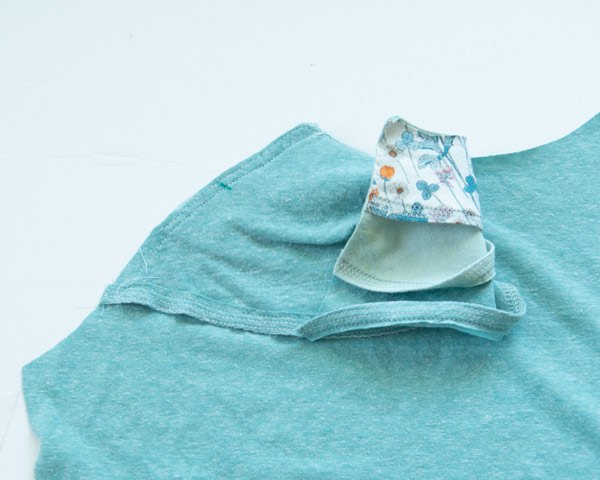
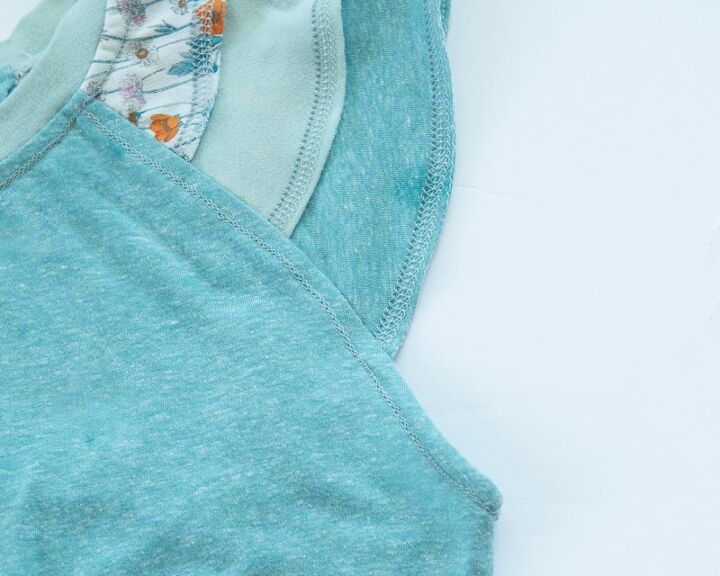
I know what you’re thinking–why is all that raw fabric hanging out there at the bottom of the armhole? That’s what the armhole binding is for!
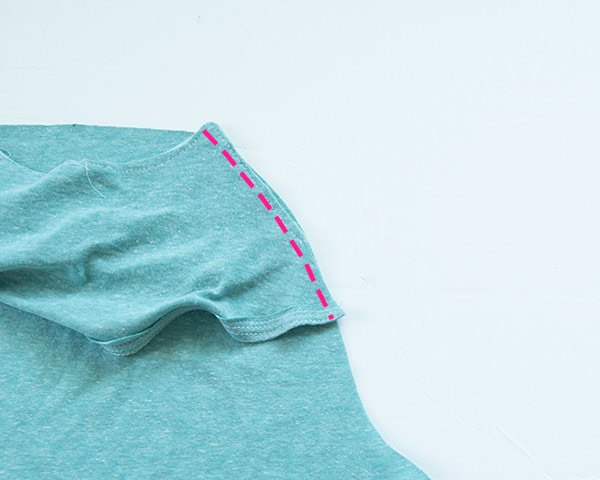
Bind the armholes
Fold your binding pieces in half along the short edge and press. Line up the raw edges of one binding piece with the raw edge of the sleeve, overlapping at the edge of the hem.
Sewing with the binding face up, stitch the binding to the armhole with a 3/8″ seam allowance from sleeve front to sleeve back, finishing by overlapping the back hem with binding. While you do this, stretch the binding slightly. Be sure to only stretch the binding and not the t-shirt body.
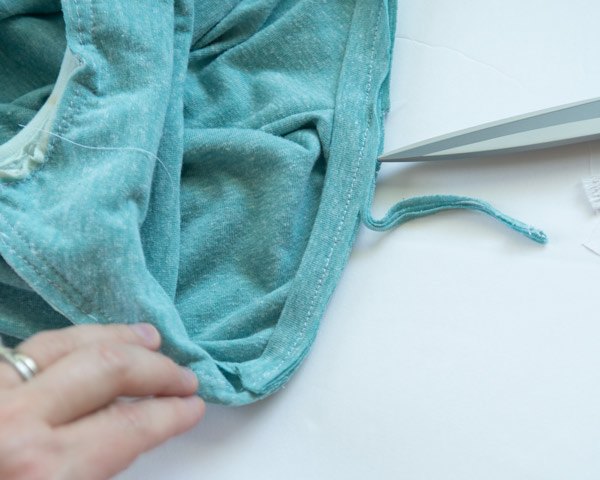
Cut off any excess binding.
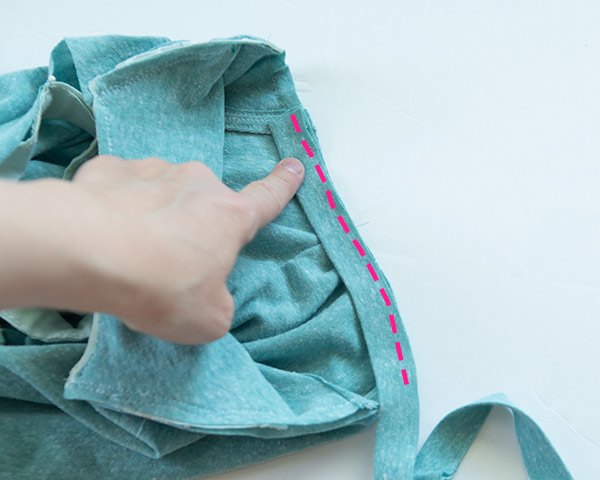
Finishing the binding
Trim down the seam allowance to about 1/4″.
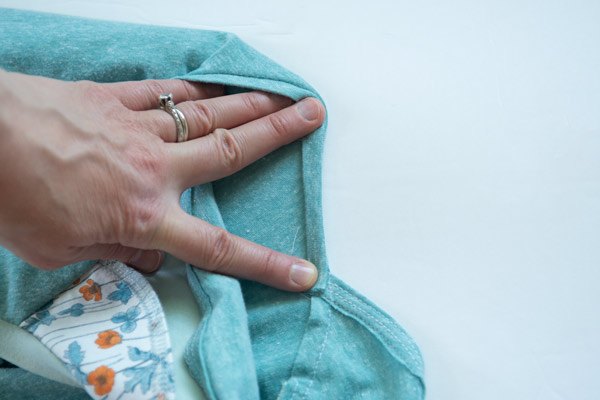
After that, flip the binding to the inside and press. Press the seam allowances on the sleeve as well going the same direction as the binding.
Stitch down the seam allowances and the binding all the way around the sleeve close to the inside edges.
Neck binding
Press your neck binding in half on the short edge, then sew the short ends together. Use pins to quarter the neck and the neck binding, then match the pins together. Sew around the neck, stretching the BAND ONLY.
Press the band towards the t-shirt body.
I’m being brief here, but if you want a more detailed explanation, check out 4 pro ways to sew a t-shirt neckline.
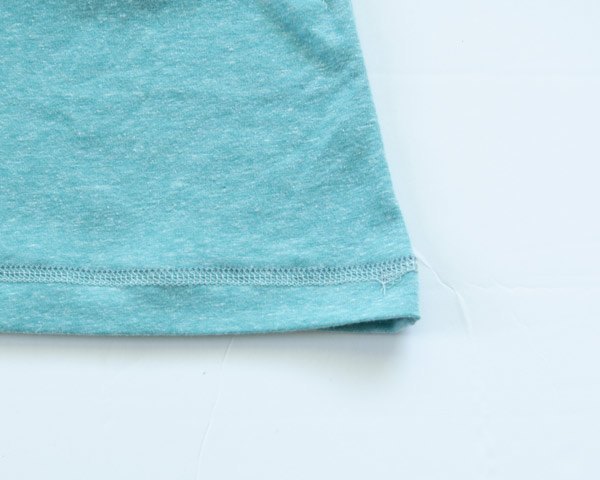
Finish up your flutter sleeve top by stitching the t-shirt hem.

And that is how to make a flutter sleeve top! Enjoy making this fun t-shirt variation for summer!
The author may collect a small share of sales from the links on this page.


Comments
Join the conversation