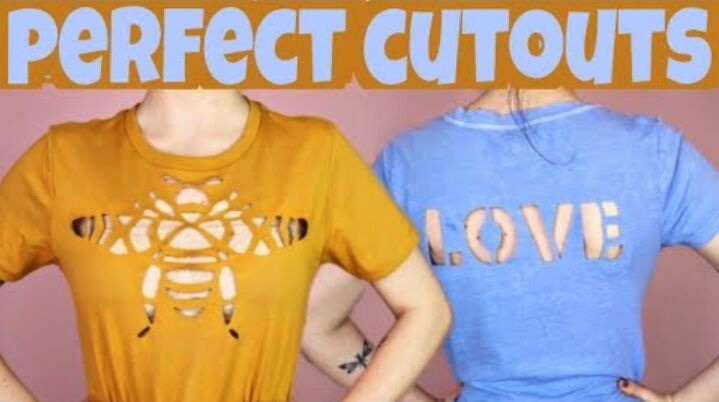
Learn How to Make the Perfect DIY Cut T-Shirt

Hey, dolls! In this DIY cut t-shirt tutorial, I’m going to show you how to achieve intricate cutouts that won’t stretch or curl. Give your DIY cut t-shirt an extra dimension of “wow” by transforming it into something detailed and unique. Are you ready to find out how to make a DIY cut t-shirt? Follow this guide as I show you the best tips and tricks with two lovely tutorials.
Tools and materials:
- Two t-shirts
- Either; Fabric fusion material, Iron-on seam, or washable fabric glue.
- Extra fabric similar to the clothing you’re cutting
- Sharp scissors
- Paper
- Pen
- Chalk
Make a simple design
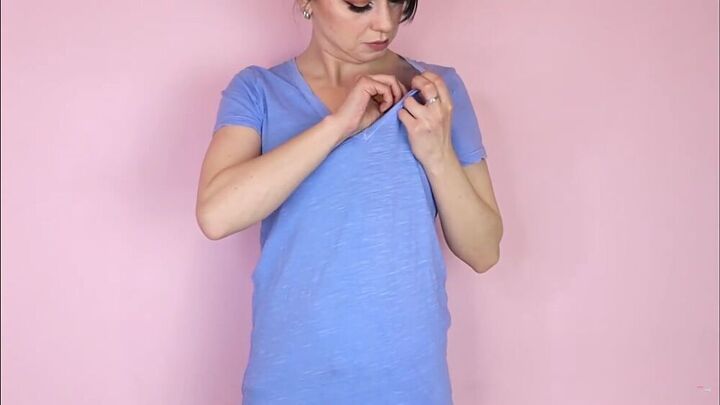
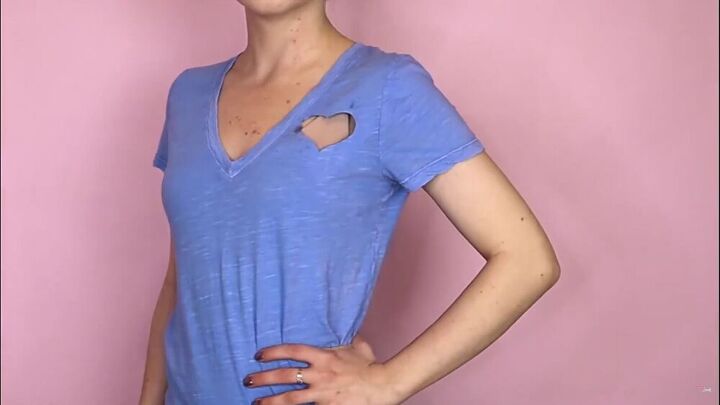
Ok, I will start off this DIY cut t-shirt tutorial by showing you how to use the fabric glue. I personally don’t like it, and you will see how it stains the t-shirt. Wear your shirt and decide where you want the design to be. Then, mark it on the inside.
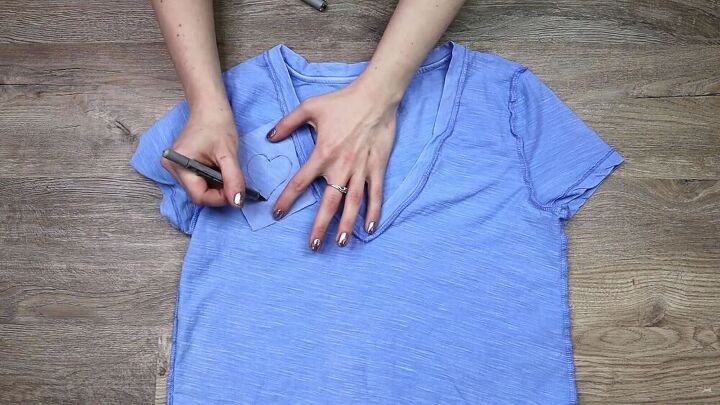
Turn your shirt inside and out and choose your design. I decided on a simple and cute heart design. For something simple like this, you can freehand it, as shown. Draw your design on a scrap of fabric or fusing material.
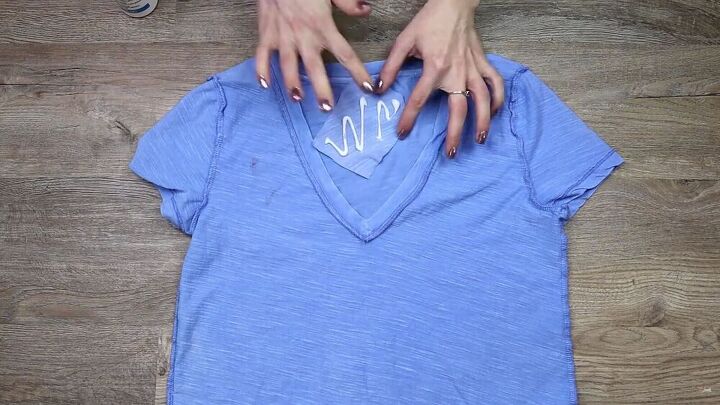
Next, fuse, or glue it to the inside of your shirt, where you want the cutout to be.
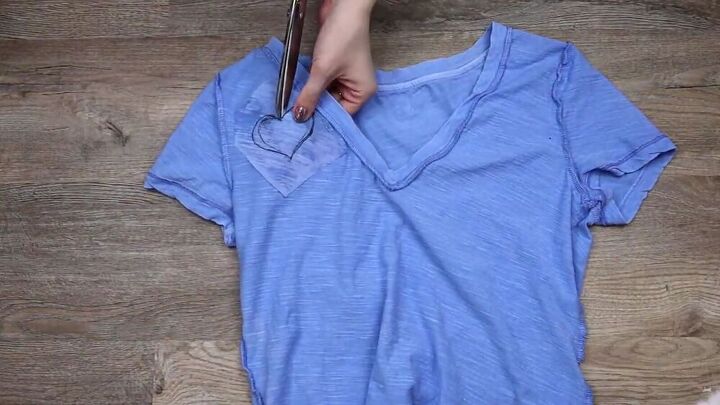
Once the glue has completely dried, cut out your design carefully with scissors. I ended up cutting my heart bigger to try and cover the stain from the glue ( I did warn you about this part).
So, here’s the basic idea. It can get more difficult depending on the complexity of the design of your basic DIY cut t-shirt.
Add letters to your basic DIY cut t-shirt
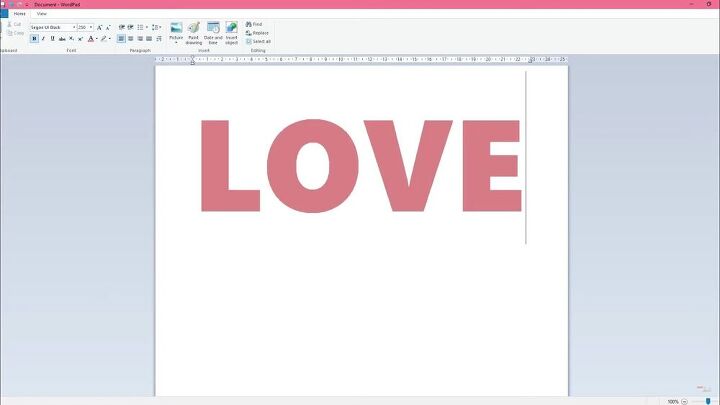
Now, let’s talk about letters. If you want to add letters to your DIY cut t-shirt, the best way to go about this is to print the letters of your choice. Like this, you also get to choose your desired font.
Also, you need to add a lot of connecting pieces to avoid drooping around curves and points. So, once you have printed out your letters, add your connecting pieces, as shown. Draw them out where the curves and mid-points are.
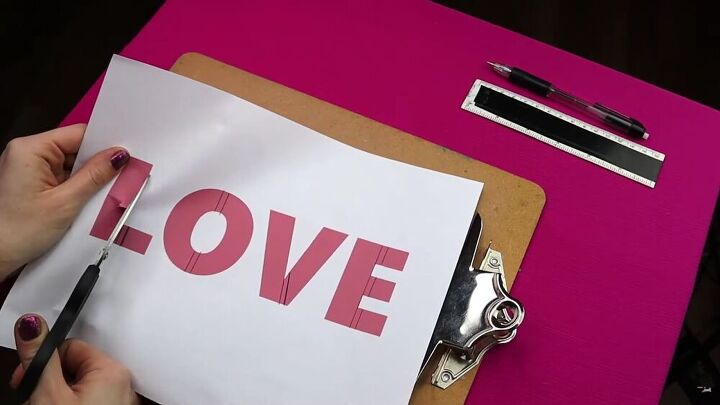
Next, cut out your letters. Make sure you’re keeping the flow of the connecting pieces, too.
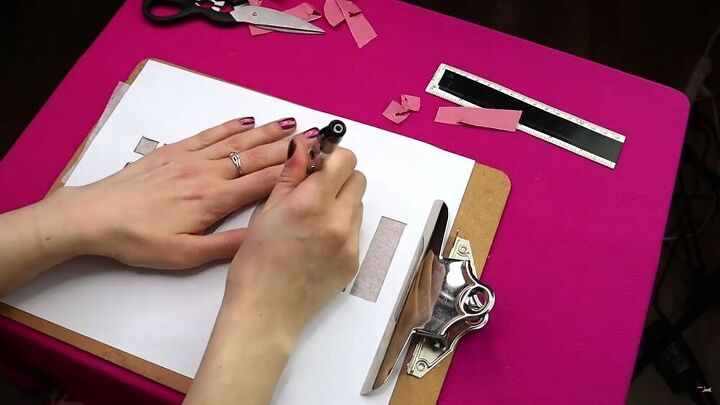
Now, flip the paper so that the design is backward and trace the letters onto your fusing material or scrap material. Basically, what you have now is a lovely stencil!
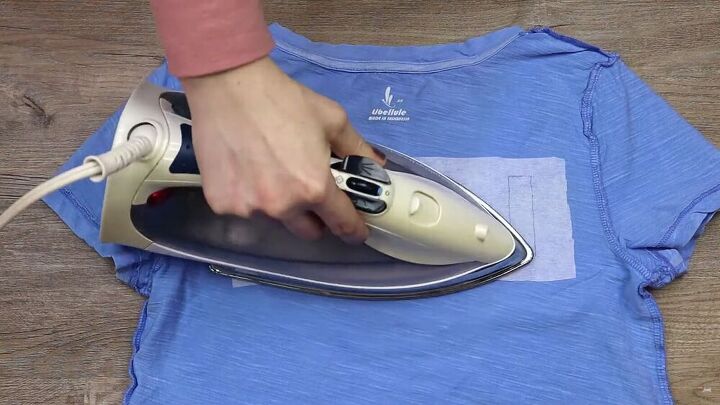
Leave around ½ an inch around the edge of your cutout. Fuse or glue it onto the wrong side of your t-shirt.
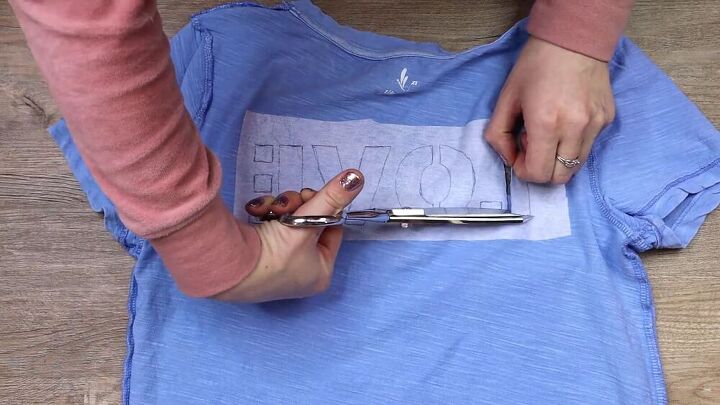
Once it’s dry or cool, very carefully cut out your design.
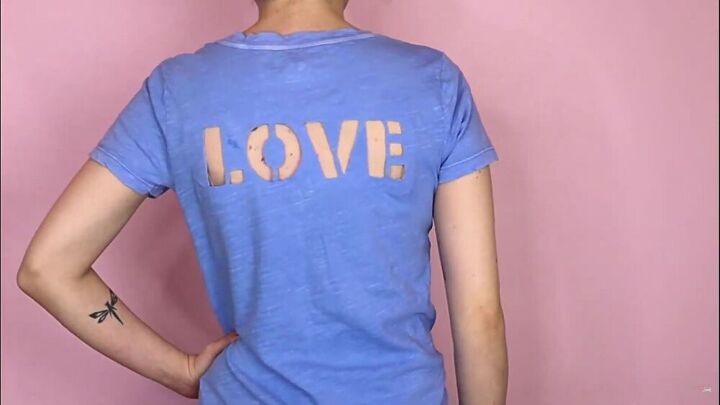
There you have it, some cool letters on your DIY cut t-shirt. I think it’s super cool, but it needs to be done correctly, so nothing flops our droops out of place.
Step 3- Make a more detailed design
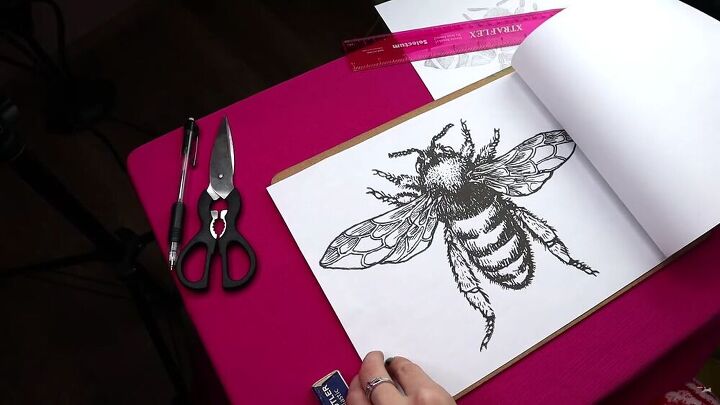
You can get more creative with your designs and take it up a notch by making more complex designs like this bee shirt that I’m about to show you. Here, I used an image of a bee as a shape reference.
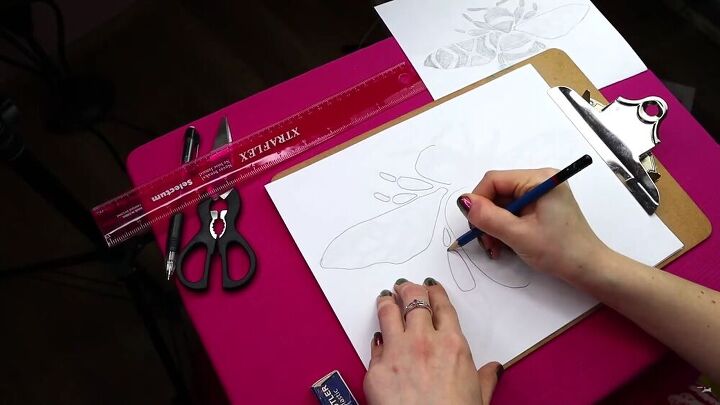
Then, I traced the shape and plotted it out so everything stayed connected but still resembled a bee.
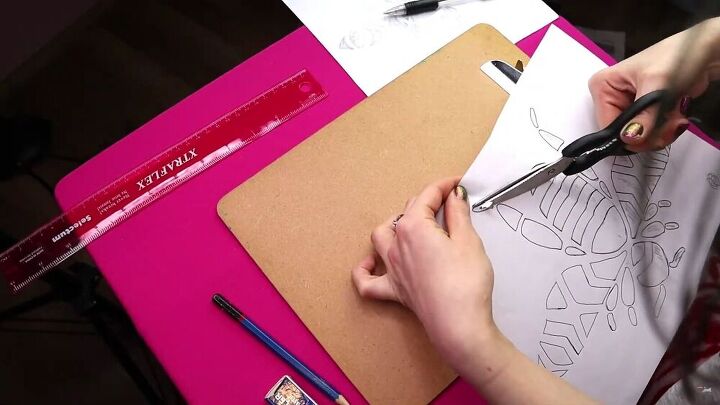
Now, cut out your stencil and trace it onto some fusing material.
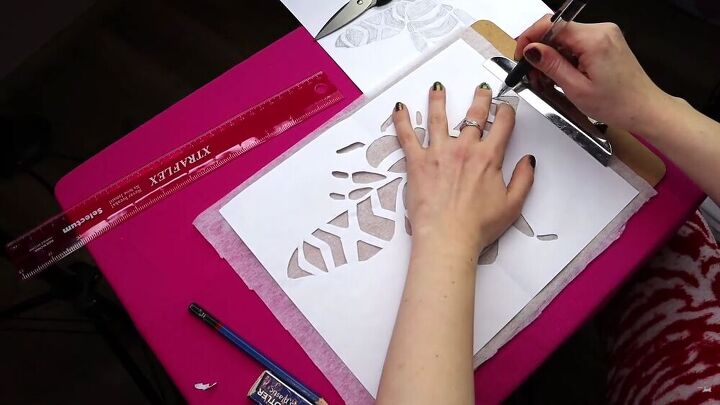
Cut around on the design and fuse it, centered on the inside of the t-shirt.
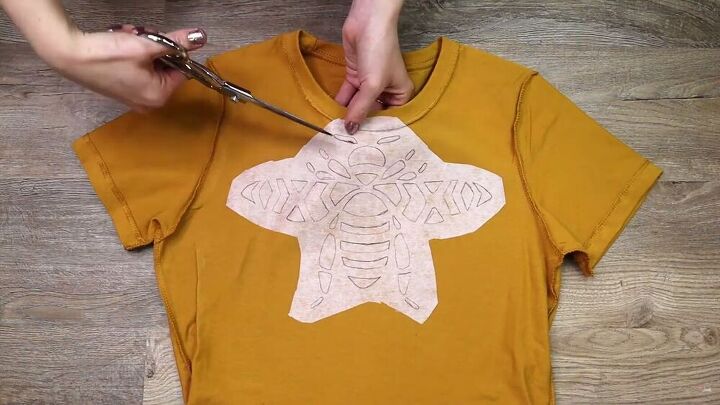
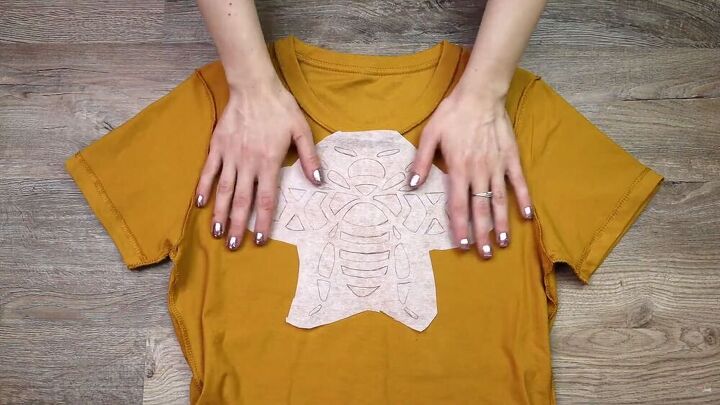
Then, once it’s cooled, cut the design out very carefully.
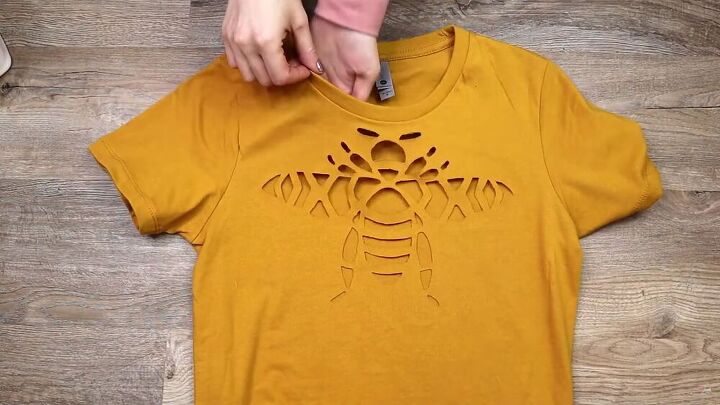
That’s it! Look how stunning and intricate this looks? Sure, it took a little longer, but the result is so worth it. I love how the edges and curves stay in place and don’t flop. I also love where the bee is placed.
You now have three cool design ideas and inspiration to make a DIY cut t-shirt of your own. It’s fairly simple, and the process itself is satisfying. Have fun!
The author may collect a small share of sales from the links on this page.


Comments
Join the conversation
These came out wonderfully, thank you for sharing. If you don't mind I have one suggestion to make. If you aren't used to cutting out detailed paper patterns with a scissor use an X-acto Knife or a smaller sharp scissor. Also I would suggest the smaller scissor for the shirt material too. I was thinking a rotary cutter would work on simple straight lines but not on detail such as the bee. :)
Wow you've got some patience girl. The bee t-shirt is amazing, well done.