How To Embroider a T-Shirt- A DIY Tutorial
Updated: Apr 28
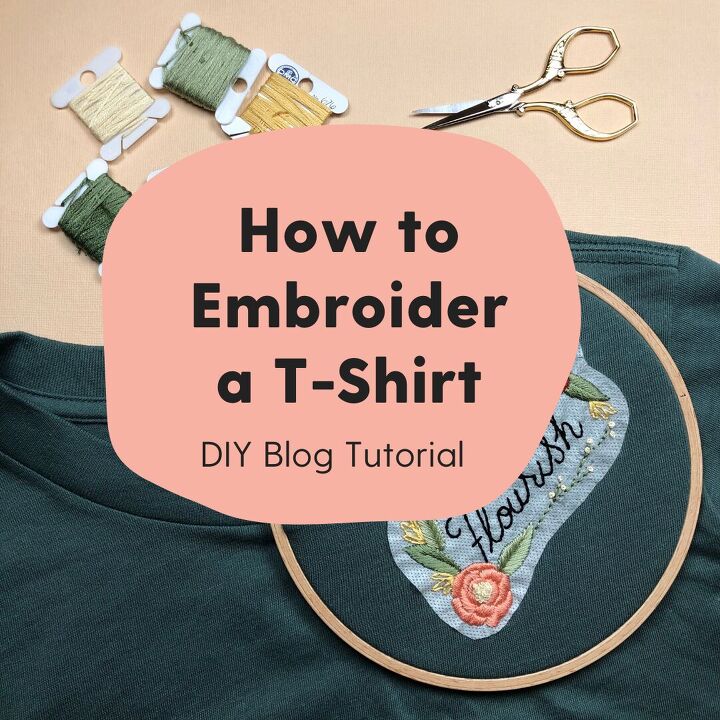
T-shirts have become my go to. I love that you can dress them up or down and wear them for practically any occasion. My favorite t-shirt is one that I had embroidered on a vintage chain stitch machine by Club Chainstitch. What if you want to embroider your own t-shirt? Follow along to learn how to do just that!
Materials:
- T-shirt (thicker material works best)
- Embroidery needle
- Embroidery thread
- Embroidery hoop
- Wash away stabilizer (I like Sulky Fabri-Solvy) or stick and stitch patterns.
- Sulky Soft Touch Iron-On Stabilizer
- Scissors
- Iron
- Warm water
Let’s embroider a t-shirt!
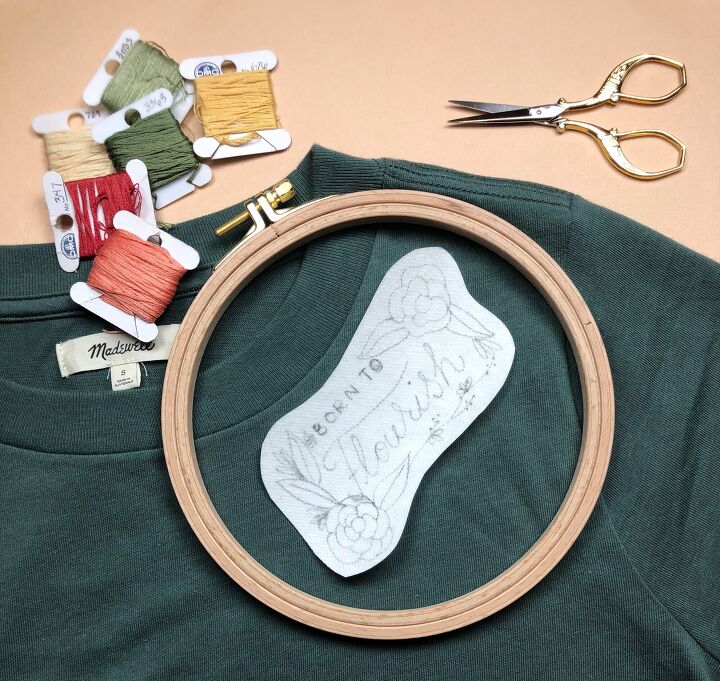
1. Trace or print your pattern on to your wash away stabilizer. Not sure what pattern to use? Try my Peel Stick and Stitch patterns!
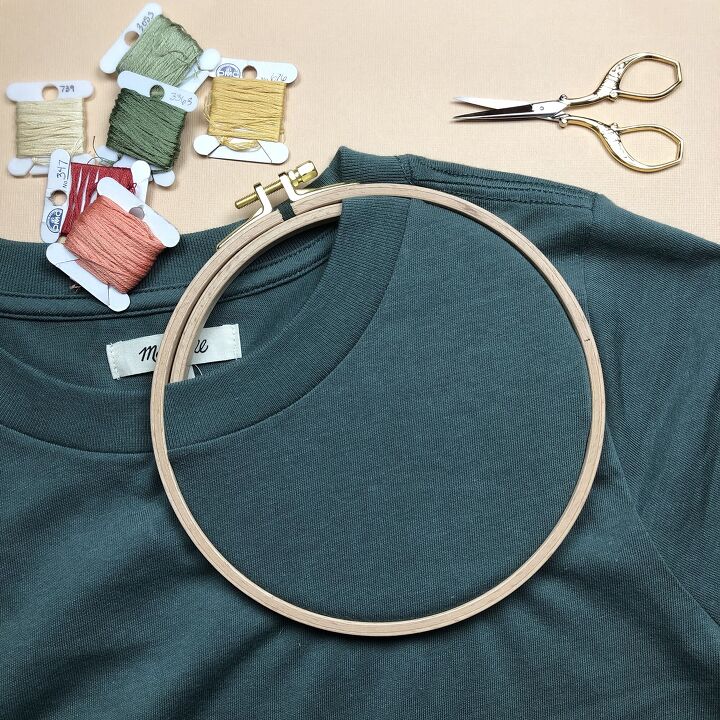
2. Once you’ve decided on the placement of your design, place that section of your garment in the embroidery hoop. Be sure to avoid over stretching your t-shirt in the hoop. Your fabric may be looser than the drum tightness used when embroidering on cotton or linen fabrics.
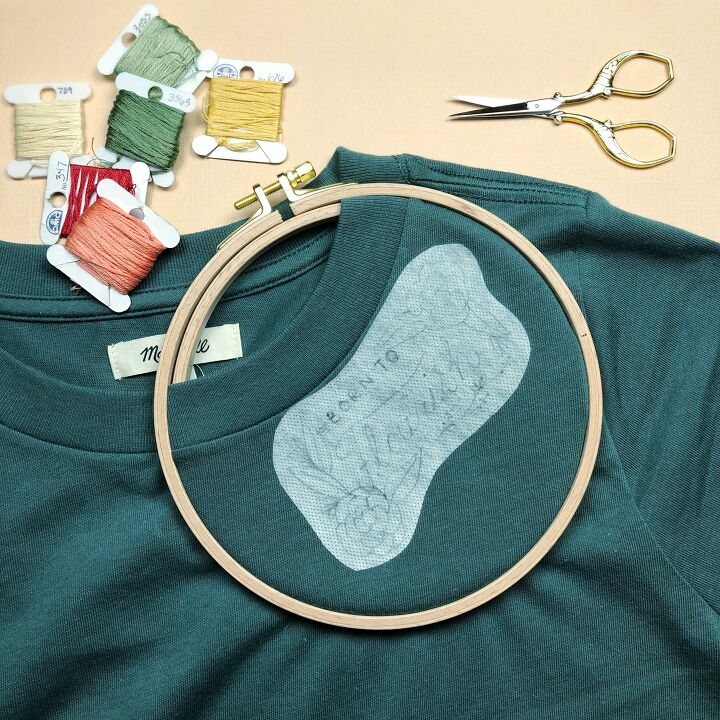
3. Next, place your design onto your garment. The stabilizer will help deter any stretching or distortions of the fabric.
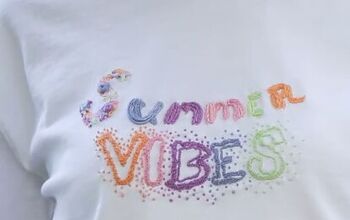
4. Embroider your pattern using short stitches, like the back stitch, long and short satin stitch, or French knots.
- Short stitches are less likely to get caught or snagged during wear and wash.
- Short stitches should be used on the front and the back of the garment, which means you may need to knot the thread and restart more often instead of jumping from one section to another.
- Your embroidery stitches should be flush with the fabric, if they distort the fabric, they are too tight and will add distortions to the finished garment.
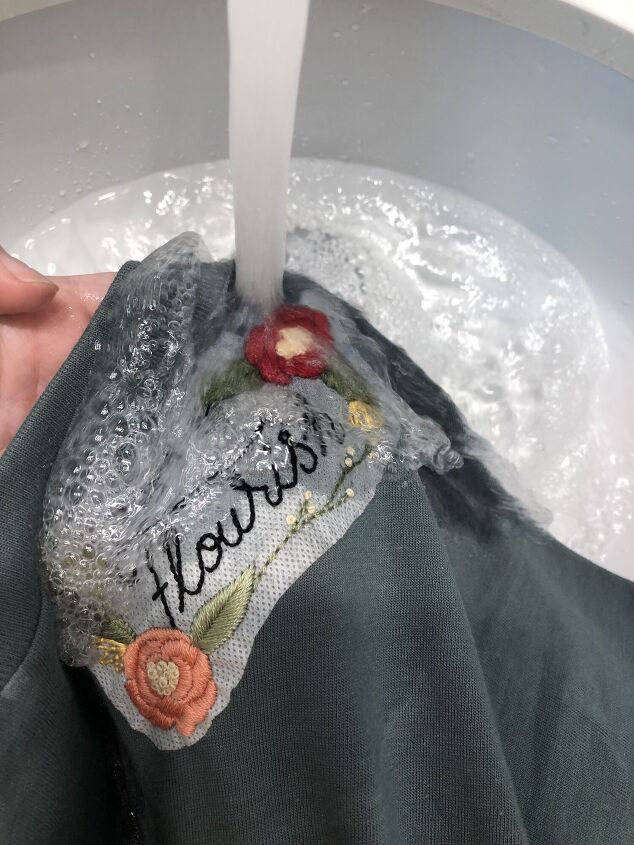
5. Wash away the stabilizer with water and let the garment air dry on a flat surface.
6. Flip your garment inside out. Cut a piece of the Sulky Soft Touch Iron-On Stabilizer to be 1/2 inch larger on all sides of your design. Place the stabilizer rough side touching the back of the embroidered garment. Iron in place with your iron on the wool setting by pressing the iron to the garment for 10-15 seconds.

7. Flip your garment right side out and wear!
Want even more embroidery?
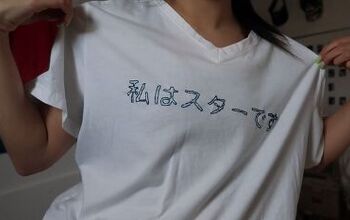
Use MCreativeJ Stick and Stitch patterns to embroider on anything! Simply peel off the backing, stick the patterns in place, stitch over them, and wash them away to reveal your lovely embroidery. It really is that easy.

The author may collect a small share of sales from the links on this page.


Comments
Join the conversation
This is so pretty! It really dresses up the T shirt.