How to Make Ruched Sleeves on a T-shirt
Ever wondered how to make ruched sleeves?
If you love playing with texture, ruching is one of those sewing techniques you should try. It creates beautiful gathers that distribute a lot of volume in a concentrated area making for a distinct kind of look that designers love to incorporate.
In this quick tutorial, I’ll show you how to make ruched sleeves. For my version, I’ll be doing a tiny bit of pattern manipulation, but know that you can make diy ruched sleeves without any kind of pattern work, just with a more subtle effect.
Sew to the end of this tutorial, and you’ll have a fun ruched sleeve top that’ll add something extra to your wardrobe.
Let’s explore some texture!
elizabethmadethis.com is a participant in the Amazon Services LLC Associates Program, an affiliate advertising program designed to provide a way for websites to earn advertising revenues by advertising and linking toSome of the links below are affiliate links. This means that, at zero cost to you, I will earn an affiliate commission if you click through the link and finalize a purchase.

Table of Contents
How to make ruched sleeves supplies
- Favorite t-shirt pattern ( easy to make DIY raglan sleeve t-shirt pattern or Raglan sleeve t-shirts for everyone)
- Elastic thread or clear elastic
- pattern paper
- pen or pencil
- tape
- ruler
- fabric marker
Ruched meaning
When fabric is “ruched”, it is gathered in a small area often with elastic and sometimes strips of fabric to create volume with concentrated gathering. Length is added to the pattern in the area where the ruching is added to create a more dramatic effect.
Ruching can often get confused with smocking. Smocking usually involves several parallel rows of stitches close together with elastic thread in the bobbin, sometimes sewed by hand with decorative stitches in elaborate patterns. Smocking is used to create shape in loose garments in areas like the waist.

Ruching on the other hand is more for creating a focal point and some serious visual texture by manipulating the fabric in the sewing process.
So think ruching: strips of gathering with big volume and texture (depending on the fabric used),
and smocking: rows of gathering.
How to sew ruched sleeves on a t-shirt
Preparing your pattern for DIY ruched sleeves
A note here: you can totally skip this step, especially if you only want to add your ruching partially on your sleeve such as in this sleeve hem. It won’t create as pronounced of an effect, but it’ll still be cool!
How to add length in the armhole area for ruching
First, trace off a copy of your t-shirt sleeve.
Next, draw several rows through the armhole parallel to the grainline. I used 6 here about 1″ apart. More lines means that you won’t have to work so hard to true up the sleeve seams in the end.
Draw a vertical line on a new piece of pattern paper to line up with your grainlines on all your pieces.
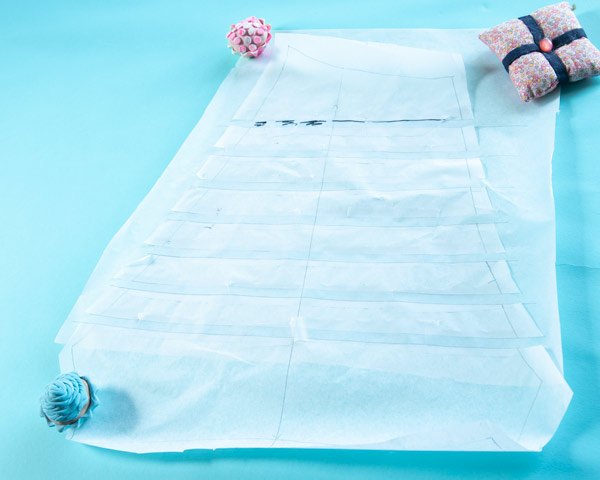
Cut through the first line, then anchor it with tape on the paper, lining it up with your grainline.
Draw another line 1/2″ below the edge of the cut, then tape the next section of the sleeve.
Continue cutting and taping sections of the sleeve spaced 1/2″ apart down the sleeve.
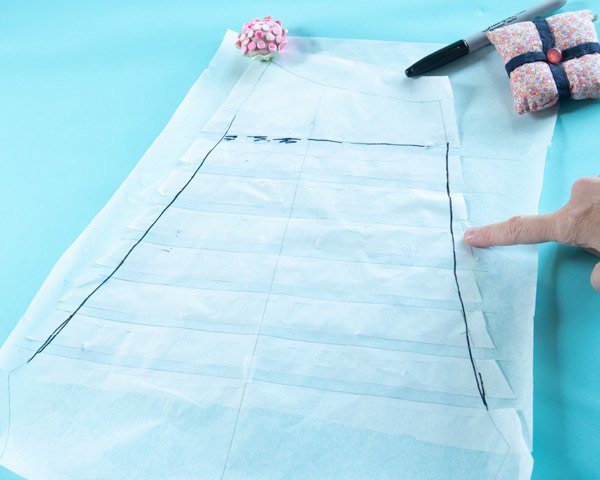
True up the pattern and add placement lines
Use a pen to smooth out the curved lines on the front and back sleeve.
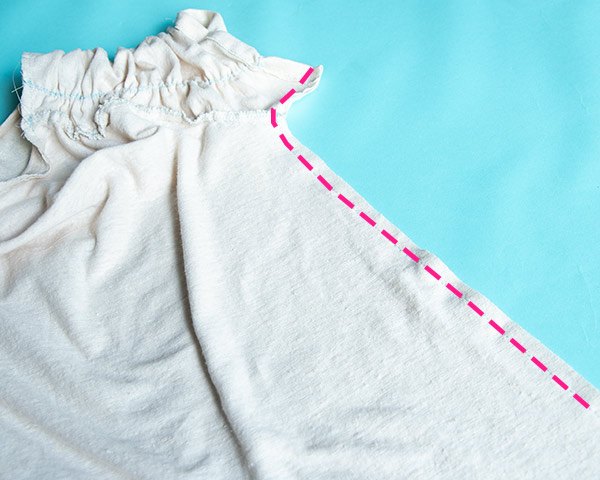
Draw 2 more lines in a different color pen on either side of the grainline. These will be placement lines for the ruching. They can be parallel to the grainline or at an angle. I went for an angle that’s roughly parallel to the angled seams on the raglan sleeve.
You’ll have 3 placement lines: the 2 that you drew and the grainline. We’ll also add ruching on the the front and back sleeve seam as well.
Cutting the pieces
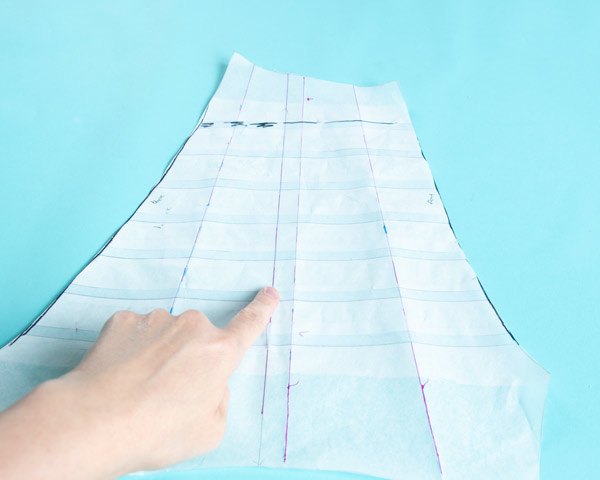
Cut out your pattern as normal, using your new sleeve pattern for the sleeves.
Transfer the 3 placement lines to each sleeve with a fabric marker or chalk on the wrong side of the sleeve.
How to ruche sleeves
Note: I’m using elastic thread here because it’s what I had. Most ruching is done with clear elastic. If you use clear elastic, cut it to the length you want for your finished gathering.
Change your machine to a zigzag stitch.
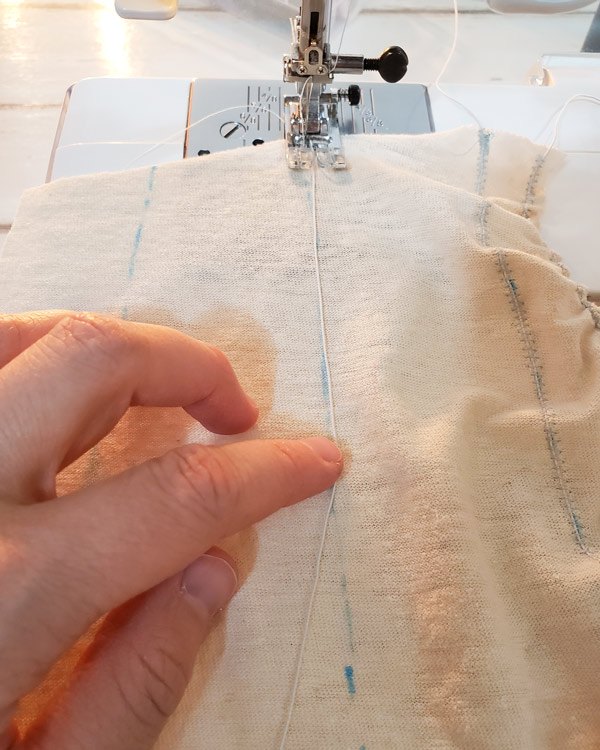
Lay the elastic over the placement line. If you’re using clear elastic, start stitching on the elastic to anchor it, then stretch and stitch over the elastic along the line. Backstitch at the end of the stitching to anchor everything.
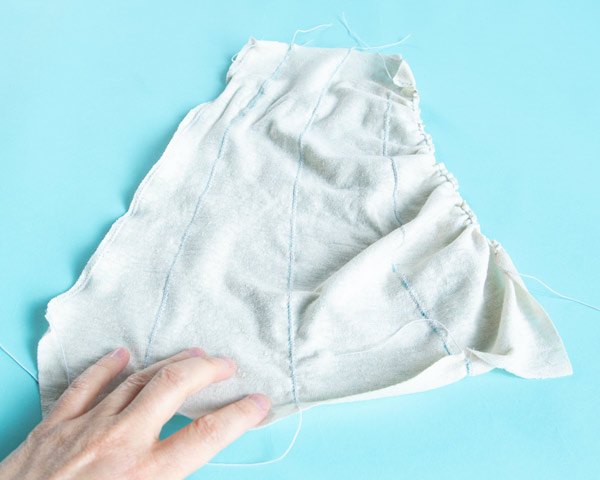
Since I’m using elastic thread, zigzag over the thread, holding the elastic thread along the placement line.
Repeat the stitching on each of the other placement lines.
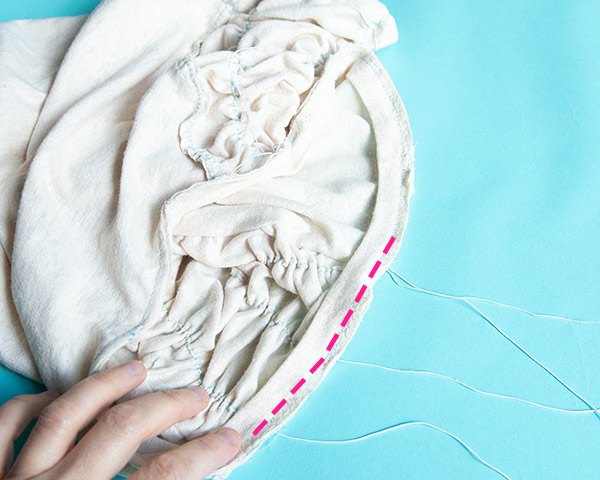
Also add elastic in the seam allowance on the front and the backside of the sleeve.
Gathering the elastic
If you’re using clear elastic, your sleeve will already be gathered, so you can skip this step.

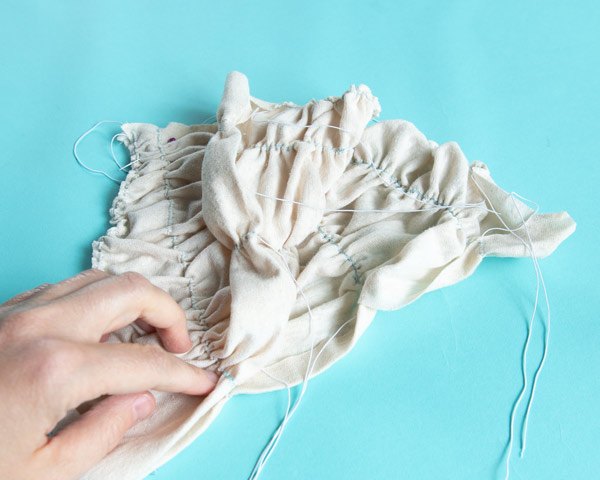
If you’re using elastic thread for the ruching, pull on the threads to gather up the fabric. You’ll need to adjust the gathers to fit into the front and back armhole, but the threads on the inside of the thread. The elastic on the sleeve can be gathered up as much as you’d like.
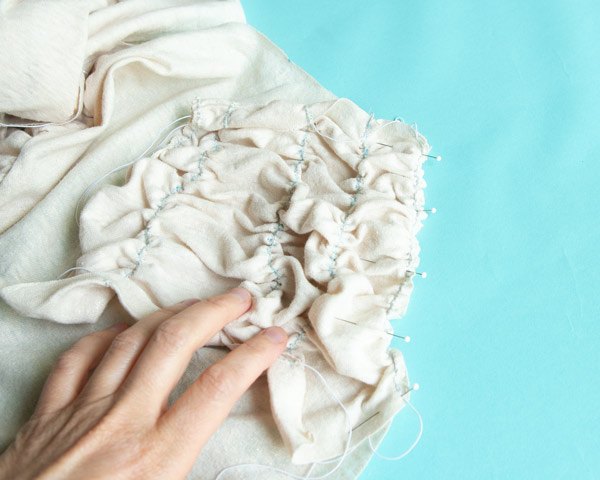
Sew the elastic to your second sleeve. Pin the sleeves together, matching up the edges and adjust the elastic so that they’re both the same size.
Sewing the ruched sleeves to the tee
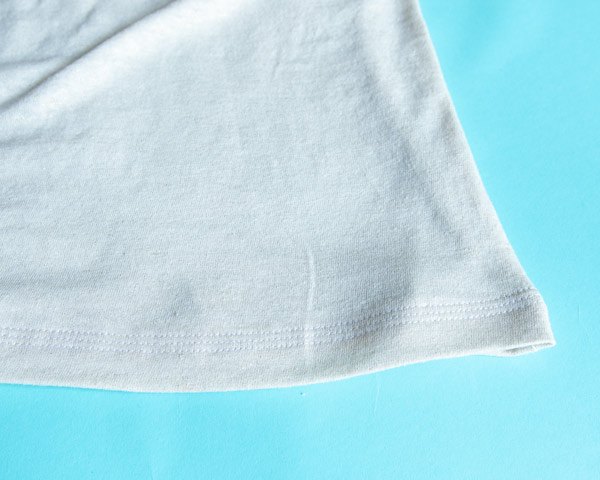
Press up your hems.
Pin the sleeve to the front of the t-shirt. Sew the sleeve to the t-shirt with the front on top using a narrow zigzag stitch (0.5mm width, 2.5mm length). Press the seam towards the sleeve.
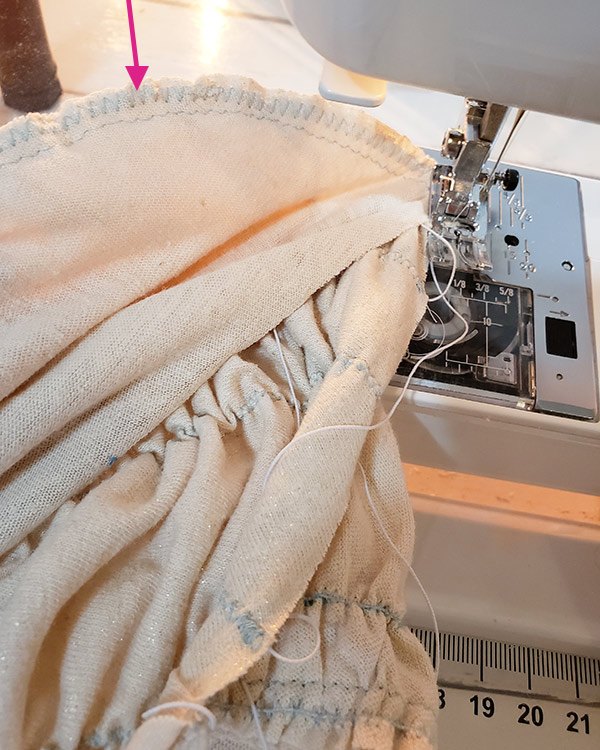
Widen the zigzag stitch and stitch along the sleeve seam to enclose the elastic inside the seam as you finish the seam.
After this, sew the back sleeve the same way.
Pin the t-shirt sides right sides together and sew the sleeve seam and side seam in one long seam. Repeat for the second side of the t-shirt.
Finishing the t-shirt
Sew on the neckband per the pattern. Press the neck seam towards the t-shirt body, then topstitch close to the neck seam to seam. As you get to the ends of the elastic, stitch back and forth over them a couple times to anchor in the elastic.
Cut off any loose bits of elastic in the neck seam.
Sew the hems of the t-shirt and the sleeves. When you’re sewing the sleeve hems, stitch back and forth over the elastic to anchor it in place.


And that’s how to make ruched sleeves on a t-shirt. I love how much drama you get out of this super simple pattern manipulation technique. Go have some fun with ruching!
The author may collect a small share of sales from the links on this page.


Comments
Join the conversation