Super Glam Ombre Chunky Glitter Nails Tutorial

Doing an ombre with chunky dip powder glitters doesn’t have to be hard!
Follow along with this chunky glitter nails tutorial to learn just how easy it can be.
Tools and materials:
- Protective fingerless gloves
- Manicure hand rest
- Cuticle pusher
- Clear base coat
- Orangewood stick
- Milky white dip powder
- Clear dip powder
- Nail brush
- Dip cups
- Nail dip activator
- Chunky foil nail dip powder
- Clear tape
- Wax pickup tool
- Small makeup brush
- Activator gel
- Nail file and E-file
- Isopropyl alcohol spray
- Top coat
1. Prep nails and apply a base coat to your middle fingernail
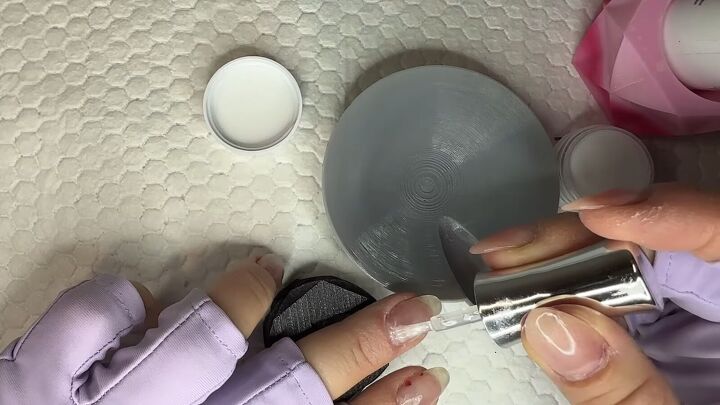
Clean up your nails with a cuticle pusher and then apply a clear, base coat to your middle fingernail.
2. Pour and dip in milky white powder
Tap off the excess, then dip your nail in the powder to fill any holes.
Then clean up around the nail bed with an orangewood stick.
3. Repeat on your ring fingernail
Paint a clear base on your ring finger and repeat–pouring then dipping the nail in the white powder.
Use a nail brush to remove any excess powder and trace around the cuticles with the stick.
4. Repeat
Repeat the process on both ring and middle fingernails.
Then add a 3rd layer on the ring fingernail and cover it with clear dip powder and activate it.
5. Index, thumb and pinky nails
Paint a clear base layer on your thumb nail.
Then dip the wet nail in chunky foil nail dip powder. Clean out the cuticle with the stick.
Repeat for your index fingernail.
Tip: Use clear tape on your middle finger pad on the opposite hand to press the glitter pieces into the nail so they stay put.
Repeat on your pinky nail.
Don’t forget to clean up the cuticle after dipping.
Sweep those newly glittered nails with a nail brush.
6. Second layer of glitter
Shake up the glitter carefully in the dip cup to allow more of the big pieces to appear.
Paint another clear layer on the glitter nails and re-dip into the glitter.
You can move any pieces around to fill in the gaps. You can apply more base to specific spots and use a wax pickup tool or the stick.
7. Glitter ombre
Apply a layer of base on the entire nail, except for the very end.
If you’re ombre-ing at the tip, leave a small area at the cuticle free of the base.
Then pick up the glitter on a small, dry makeup brush and gently tap it above the nail to attach the glitter to the base.
If your tip needs more concentration of glitter, add a little more dip base and apply individual chunks of glitter.
You can also just gently lay that part of the nail in the glitter.
8. Apply clear dip powder, activate and shape
Paint a final layer of clear base.
Pour on clear dip powder.
Press the nail into the clear dip powder for full coverage.
Clean out the cuticles with the stick and then brush off the excess.
Repeat for the other nails (clear coat, then clear dip powder and clean) one at a time.
Apply a coat of activator to all the nails and wait for that to dry.
Then buff and shape the nails.
Spray isopropyl alcohol and wipe the nails and ensure they’re totally dry. Then apply a top coat.
Here’s the final look of this chunky glitter ombre manicure:
Chunky glitter nails
Try out these chunky glitter nails to add sparkle to your look!
Did you enjoy this tutorial? Leave a comment down below.
Next, check out my easy blue marble nails tutorial.
Enjoyed the project?
Suggested materials:
- Protective fingerless gloves
- Manicure hand rest
- Cuticle pusher
- Clear base coat
- Orangewood stick
- Milky white dip powder
- Clear dip powder
- Nail brush
- Dip cups
- Nail dip activator
- Chunky foil nail dip powder
- Clear tape
- Wax pickup tool
- Small makeup brush
- Activator gel
- Nail file and E-file
- Isopropyl alcohol spray
- Top coat
The author may collect a small share of sales from the links on this page.


Comments
Join the conversation