How to Make Your Own Hand Painted Buttons
Maybe you don’t buy nail polish just to make hand painted buttons like I do, but I just bet you love a beautiful button.
The more I look to make garments I really love, the harder it seems to find good quality buttons.
So many buttons these days are just not that interesting! Ah, but friend you can fix that with a little paint and some time. I’m breaking down all the best paints for hand painted buttons and how you can try your hand at making your own custom buttons.
Let’s paint all the buttons!
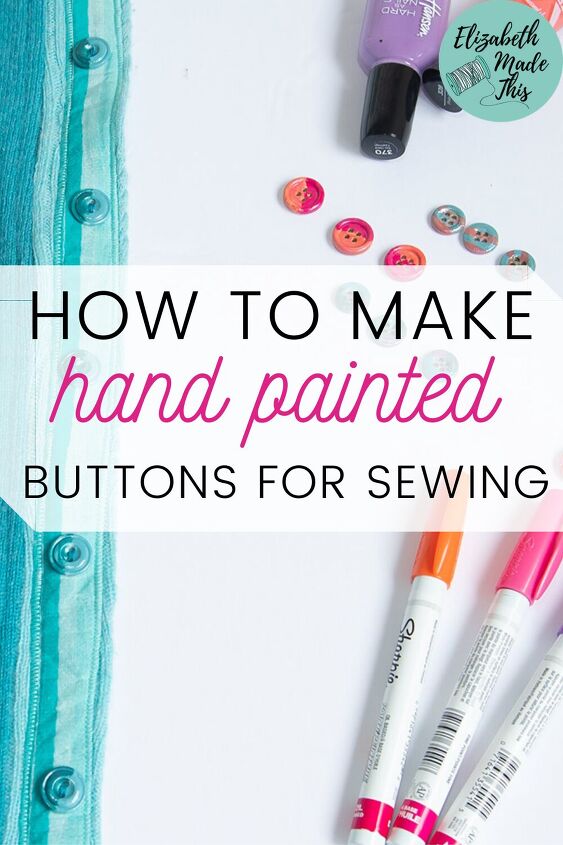
Table of Contents
Supplies for making hand painted buttons
- Wool, plastic, or metal buttons
- nail polish
- nail polish remover
- clear coat
- oil-based paint pens
- acrylic paint
- small paintbrush
- acrylic based varnish
- toothpicks
- seed beads
- Fabric Fusion glue
I gotta ask, why would you bother painting buttons?
Have you ever played “which button looks best with my fabric?” If you have, you know how hard it is sometimes to find the right color to go with your fabric.
And let’s face it, the wrong buttons can really make a garment look less than awesome.
Also, quality buttons can be really pricey. I know because I have garments in my closet whose buttons cost more than the fashion fabric. In all cases they were the right button for the project, but I can’t do that on every project.
Also, you know what’s the worst? Having 8 of the same size and type of button but only 3 of them actually match.
Hand painting buttons is one of the ways that you can make exactly the button that you want for your project without breaking the bank.
You don’t have to be a great artist, and you don’t have to use top quality buttons to get hand painted buttons that are a focal point.
So that’s my why. Here’s the paints and the techniques that’ll get you on the train to hand painted button land.
Universal tips for painting buttons
No matter what kind of paint you choose, a couple things will help you.
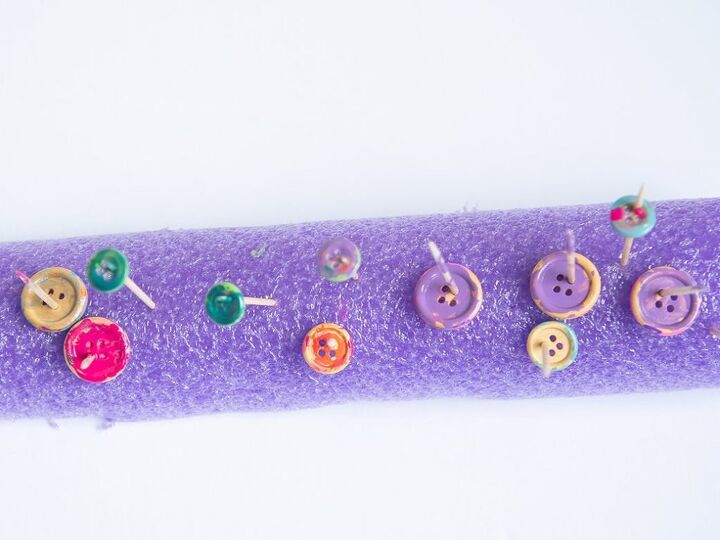
- Use toothpicks: stick a couple toothpicks through the holes. That way you can paint the sides and tops without worry of smudging your work. Toothpicks can even be a good fine point brush for painting tiny details. Poke the toothpicks in something while they’re drying. Styrofoam, a cardboard box, random pool noodle because whatever you have is good here.
- Pick a style and stick to it: let’s say you’re making a shirtdress. That’s a lot of buttons. Yes you can make those buttons unique, but it’ll probably look better if you paint them all the same way.
- Clear coat!: Protect your finished buttons with a clear coat. Whether it’s nail polish, a spray clear coat, or an acrylic varnish, a layer of clear coat + your buttons =longer wear.
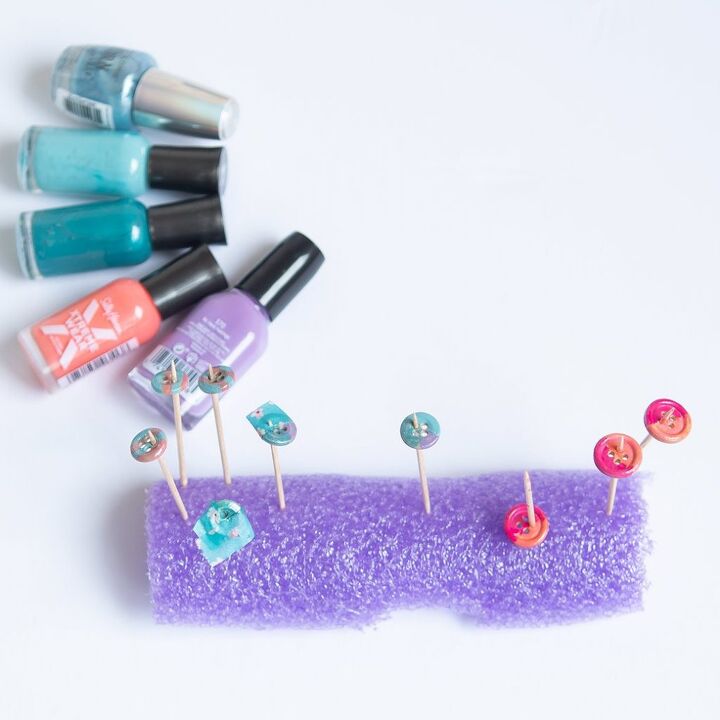
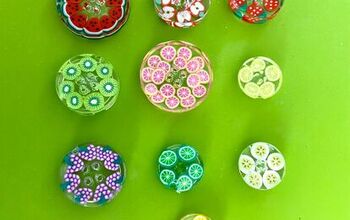
How to make hand painted buttons with nail polish
Nail polish is a simple way to transform some boring buttons into something fun.
And surprisingly, you can get a very washable finish on your buttons.
I’m not fancy when it comes to nail polish. Since I don’t wear it on my hands, I don’t find that it’s worth the investment to buy $10/bottle brands. You can get good results painting buttons with about $3 polish. To be honest, just pick the color you like.
And if you don’t like the color you have, you can mix them! Use a little brush to mix a couple drops in a small cup. If the polish feels thick at all, add a couple drops of nail polish remover to thin it out.
You can use washi tape to make ultra clean stripes. Think of it like mini painter’s tape. Mask off an area with the tape, then paint in between the lines. Let it dry, then peel off the tape.
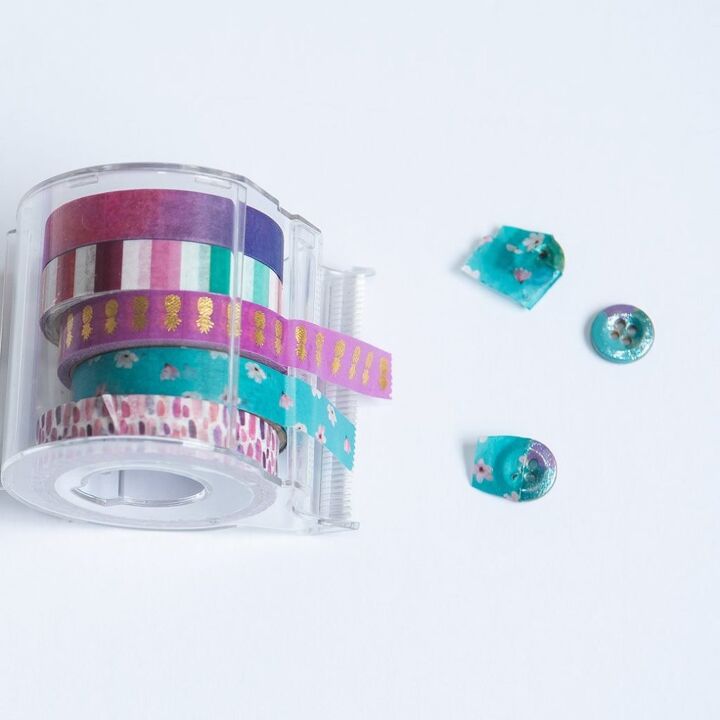
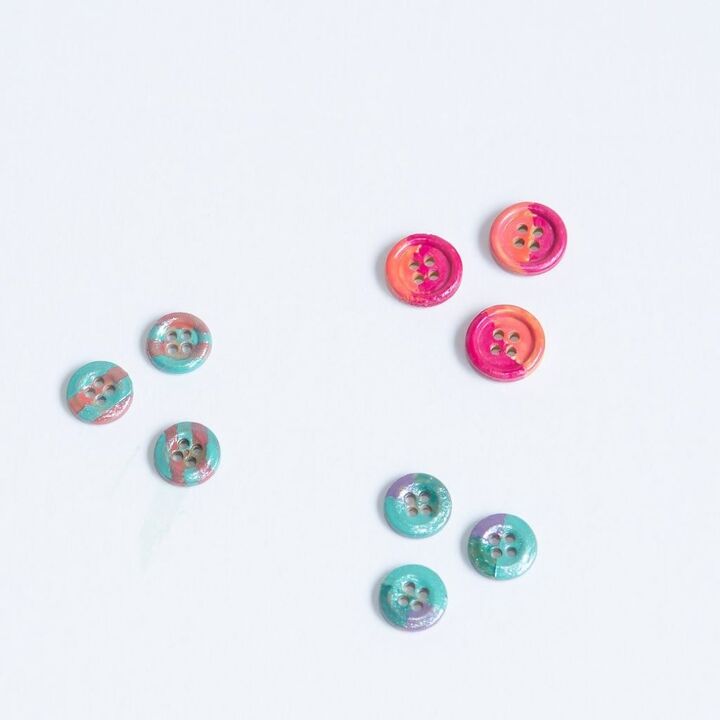
Other ideas for nail polish buttons: polka dots, solid colors, two-tone effects.
When your buttons are dry, add a layer of clear coat over the top for a durable finish.
Making hand painted buttons with paint pens
Paint pens might be the easiest way to get hand painted buttons into your life.
They’re really easy to use, and because it’s just a pen, you don’t need any fancy art skillz here.
I’m using Sharpie paint pens. They’re oil-based, so they’ll be durable. Shoot, people use them to make painted mugs. If you can dishwasher it, you better believe you can button it.
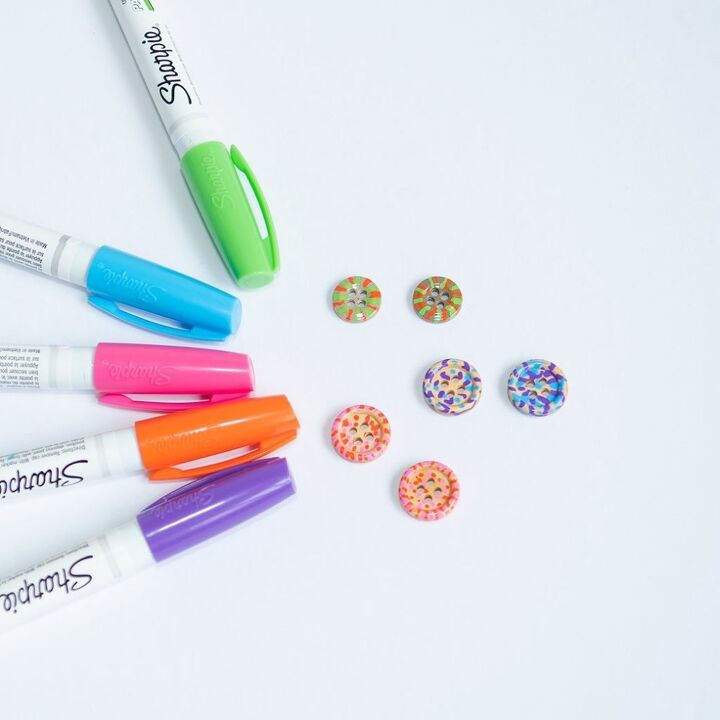
I really like the finish on these. The paint is not thick at all and it just feels nice on the surface!
Draw on your buttons. There are finer tipped markers than the ones I’m using. They would be great for tiny details like flowers.
Let the buttons dry over 24 hours. For extra durability, you can heat set the buttons.
This is where you need to be careful. Plastic buttons can melt or at least get brittle under too much heat. I have a commercial toaster oven that can get down to 100 degrees. I feel completely comfortable putting my buttons in it on a piece of foil for an hour.
Other options are to use a hair dryer over the buttons for about 5 minutes.
Using acrylic paints for hand painted buttons
Another option for hand painting buttons is to use acrylic paint.
I don’t think there’s enough words to describe how much I love acrylic paints. They’re so versatile, cheap, easy to use, and mixable. Custom color is so easy to get with this stuff!
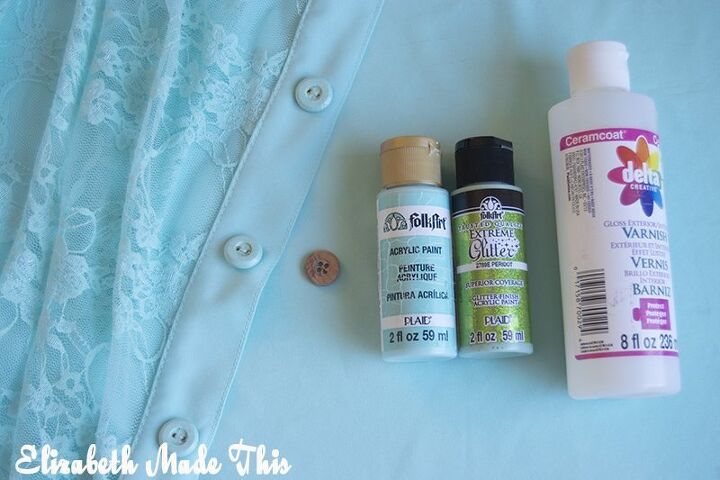
Acrylic is best on wood buttons. You’ll find that you can scrape it right off of plastic, so don’t bother. Acrylic really shines on wood.
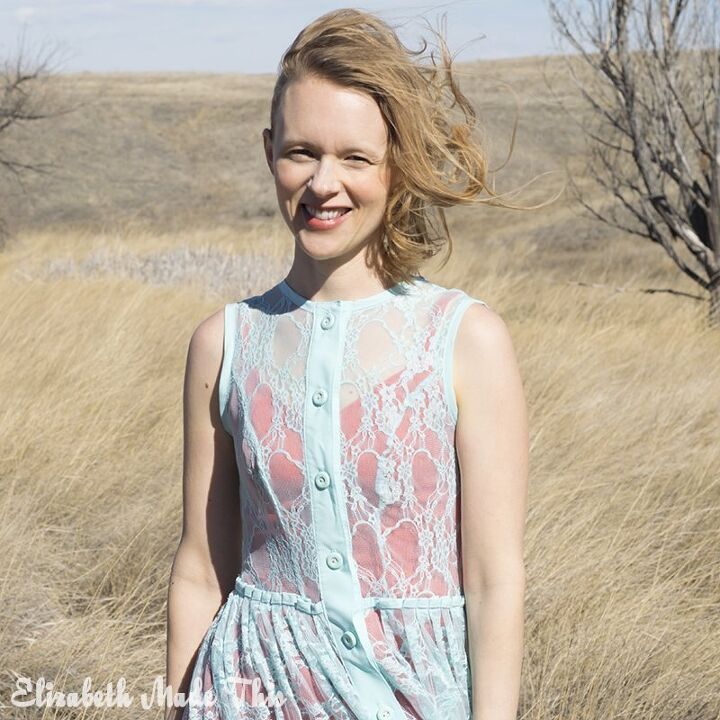
I painted these because there’s literally no buttons that match this lace. That there’s a layer of glitter acrylic makes them extra better!
Notice the original buttons were 4 hole, but the finished ones are only 2-hole. If that’s what you want, plug up the other holes with glue. It totally works!
Finish off acrylic painted buttons with an acrylic varnish.
Other DIY buttons
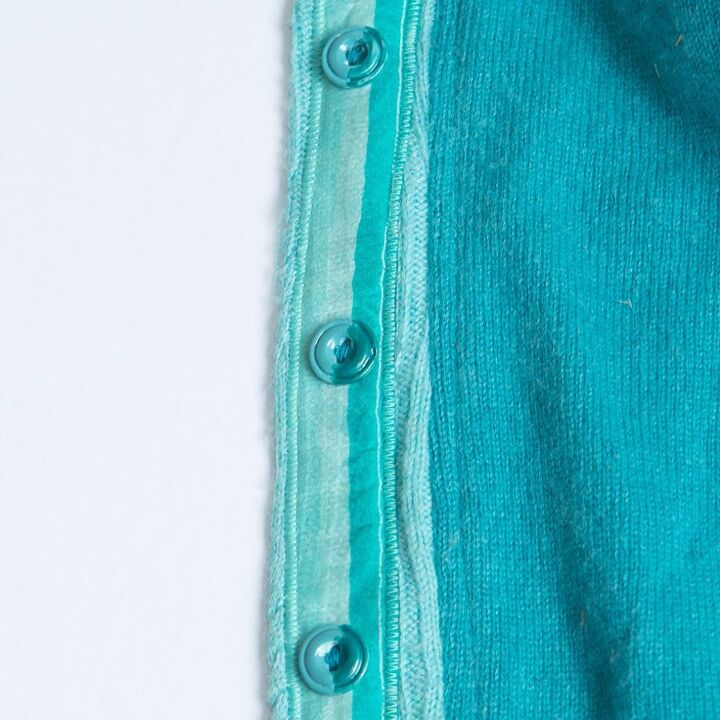
I had to give a shout out to my Mom who totally surprised me with this DIY she did. She thrifted this Coldwater Creek jacket. I don’t know what it is about Coldwater Creek, but I’ve seen several of their things have some nice quality but just wrong buttons. I have a cardigan in my closet from them whose buttons I redid.
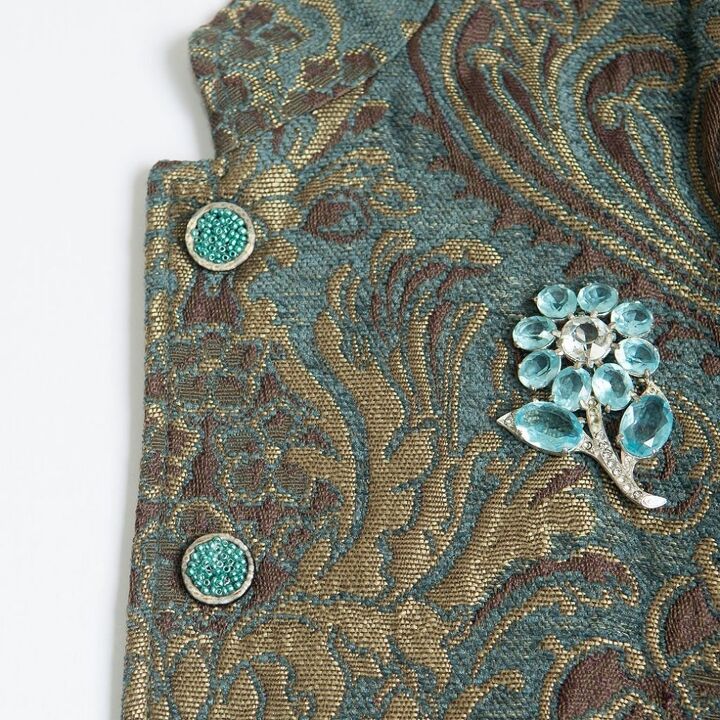
The buttons on Mom’s jacket were a terrible color for the jacket. To make her buttons custom, she added a layer of seed beads with, of all things, Tacky Glue.
Tacky Glue isn’t washable, but Mom figures she’s only dry cleaning this jacket anyhow.
If you want to recreate this look, use Aleene’s Fabric Fusion. Shank style buttons will work better since you won’t have to worry about clogging up the holes with beads.
Fabric Fusion is absolutely washable. I’ve used that on this jacket to hold on studs and it works like a charm.
Have I convinced you to try hand painted buttons yet? All you have to gain is some cool buttons that are all your style. Your next shirtdress or jacket is crying out for something fun, so pick up a brush and give it a try.
Elizabeth Farr is the writer behind the Elizabeth Made This blog where she shares helpful sewing tips, step by step sewing tutorials and videos to help you explore your creativity through sewing. She has written sewing Eguides and patterns, been a featured teacher at Rebecca Page’s Sewing Summit and Jennifer Maker’s Holiday Maker Fest and her work has appeared in Seamwork and Altered Couture magazines. She also created a line of refashioned garments for SEWN Denver. When her sewing machine isn’t humming, she’s playing and teaching violin, and hanging around a good strategic board game with her husband and 4 kids.
The author may collect a small share of sales from the links on this page.


Comments
Join the conversation
What a perfect idea! I use colors of nail polish for disguising a chip on a fav dish, but never thought of changing button colors with it! Brilliant!! Thanks for inspiring!!
Wow. I like the idea