Brocade Bomber

Hello Readers. The cold snowy weather made me want to do a jacket refashion. Luckily I had a jacket in the stash ready to work on. I got it as a hand-me-down last year and NOW is the time.

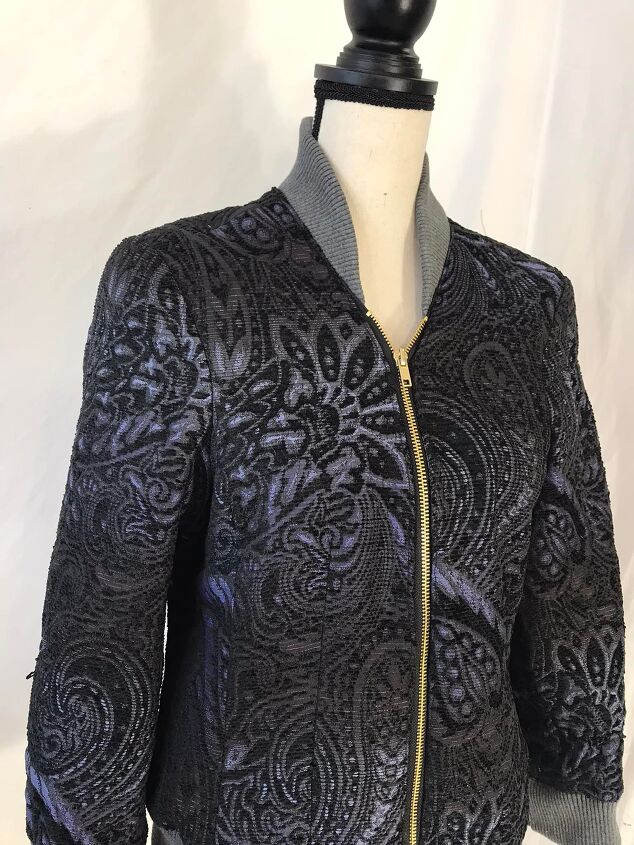
Before and after.
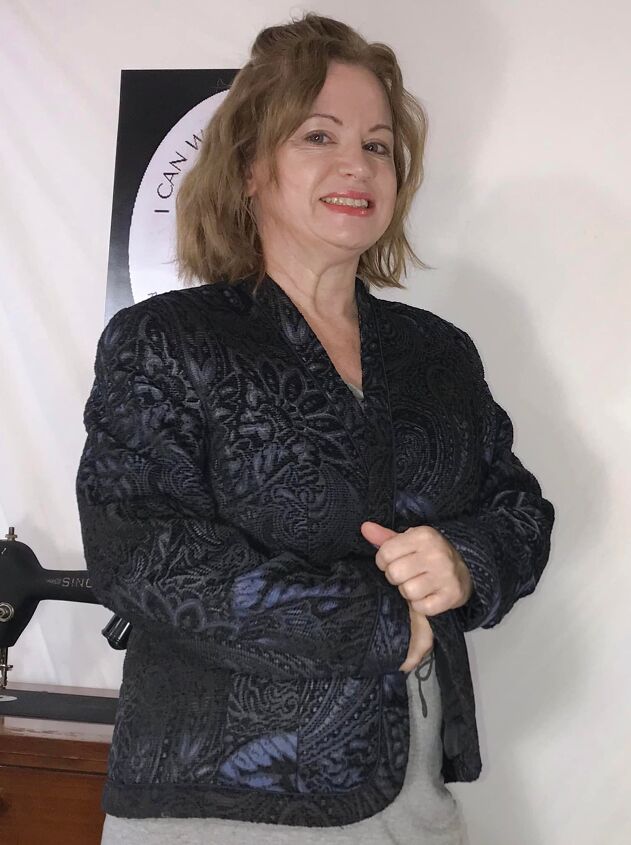
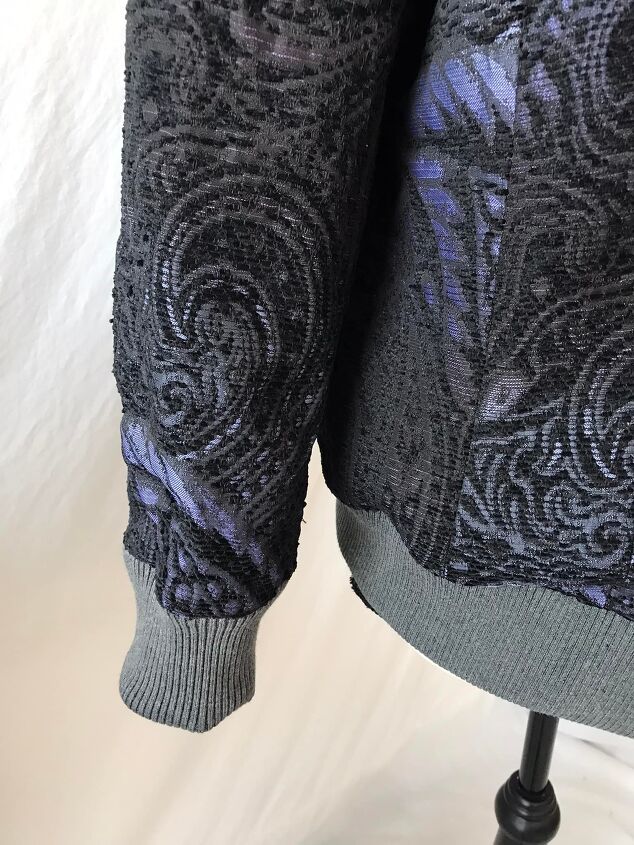
I really liked this brocade jacket. The fabric was so pretty. It fit well enough but it didn't really close. It had one little hook and eye closure in the front and that was it. It wouldn't be very warm like that. I had a plan. I wanted to make a bomber jacket with a zipper and ribbed collar, waistband and cuffs.
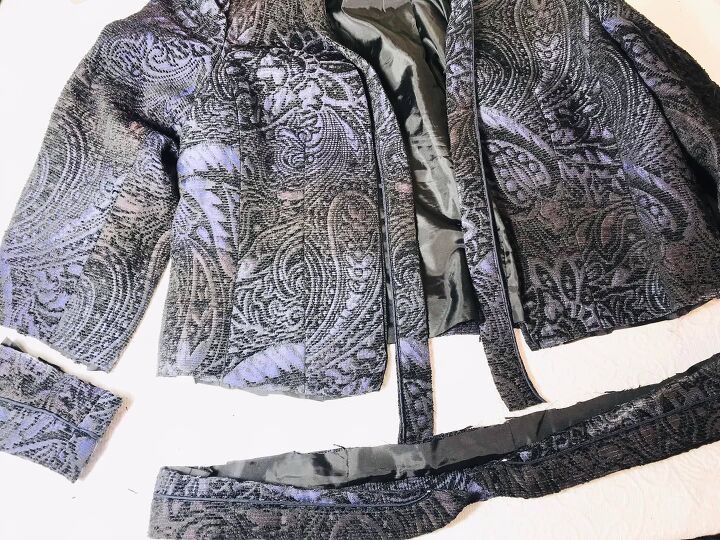
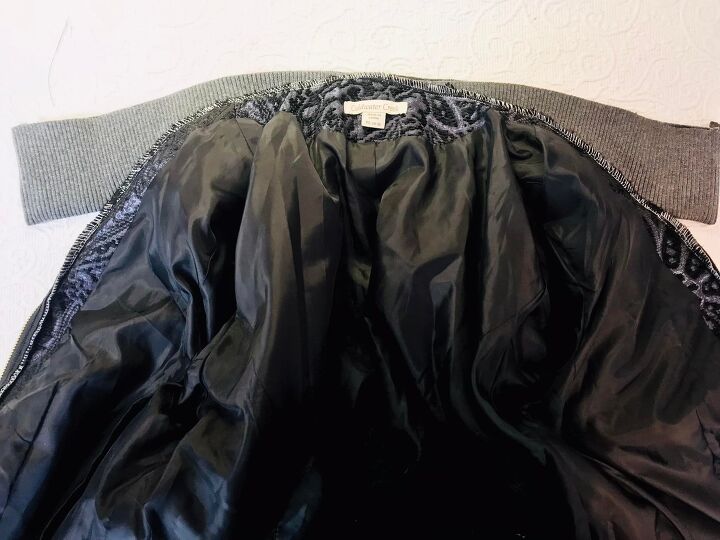
I started by cutting the edge off the entire jacket. It had a nicely finished edge but I didn't think it would go with my new plan.
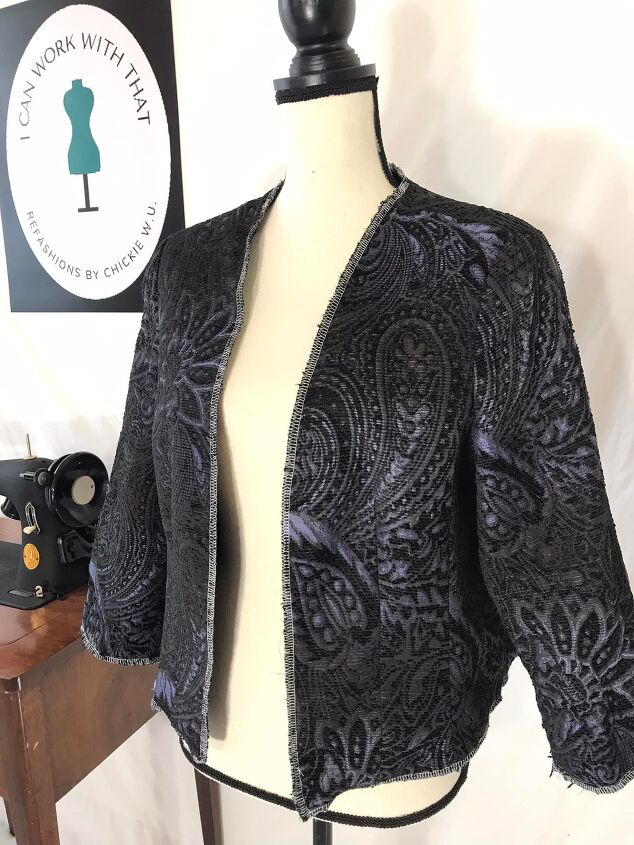
I used my serger to close up all those cut edges. The jacket layers were moving around a lot and it was hard to work with like that. You could also use a zigzag stitch for this project if you don't have a serger.
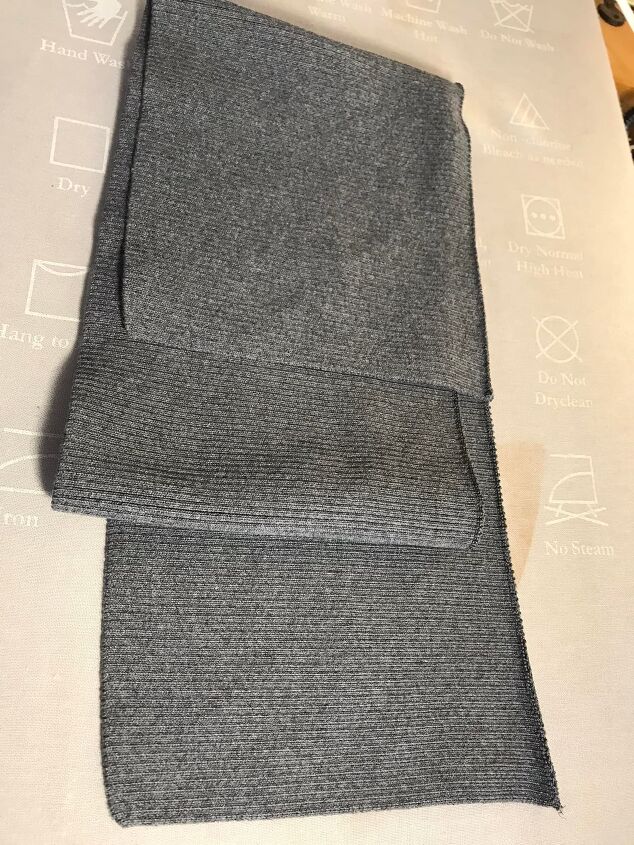
I got my ribbing out and ironed it in half long ways. I bought this just to make this jacket and after a year of not buying anything for sewing it felt very strange to buy something.
I used the serger again to close the ends. This is going to be the waistband.
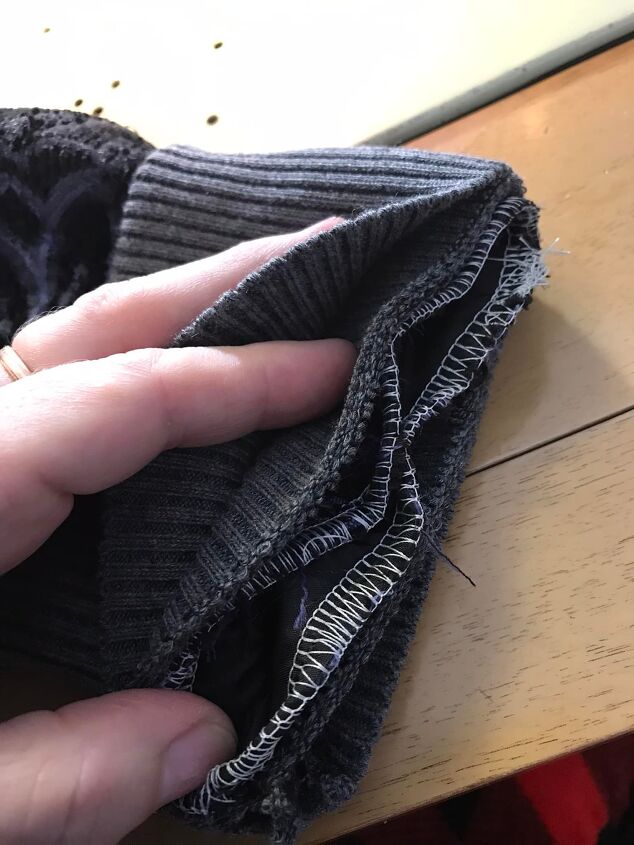
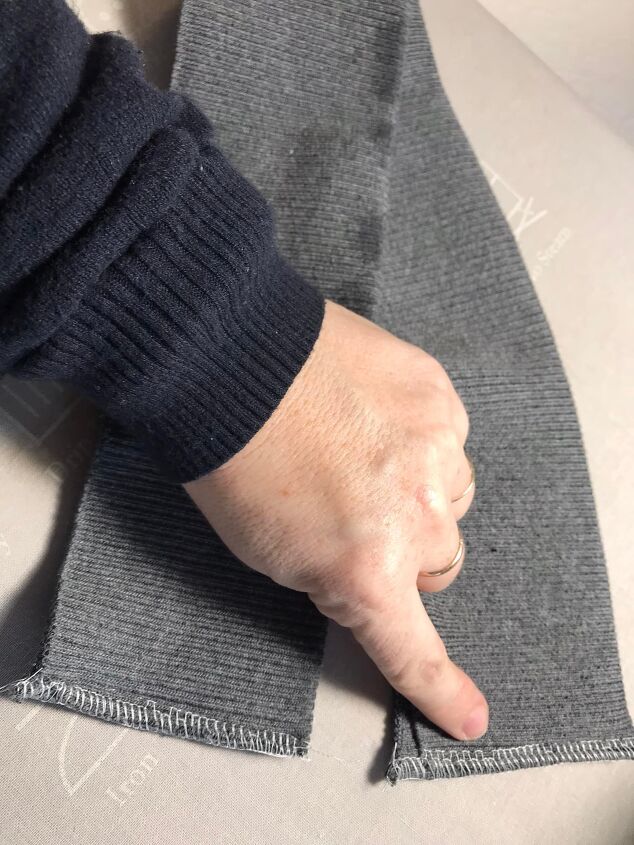
I made cuffs from the ribbing as well. The ribbing was folded in half but the cuffs were connected to make a circle. I attached the waistband and the cuffs to the jacket the same way. I stitched the open side of the folded ribbing to the edge of the jacket. You can see the jacket and the ribbing layers above.

When the ribbing and the jacket were connected on the inside I smoothed the ribbing down. I top stitched the seam so it would lay flat.
The cuffs and waistband were done and looked good to me. Now it was time for the zipper.
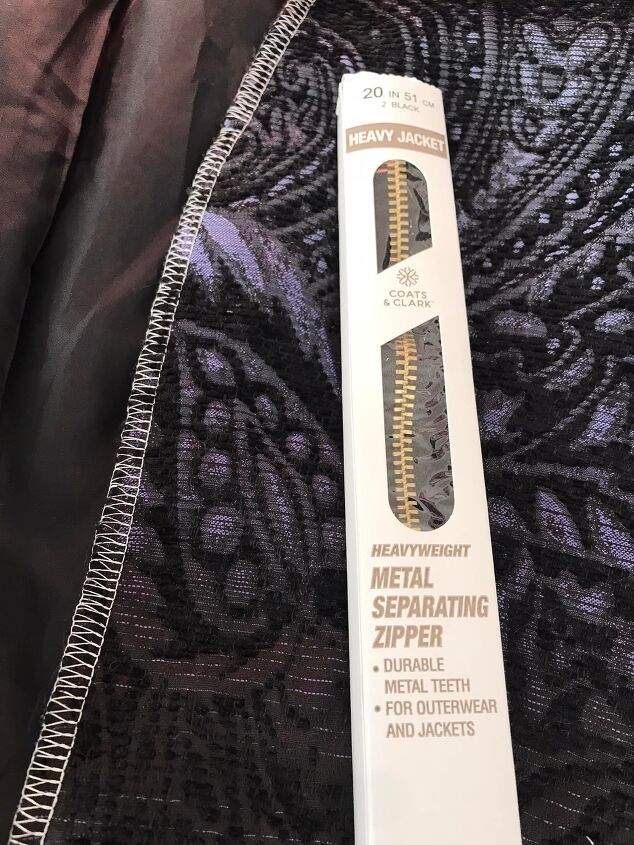
I needed a zipper that opened at both ends for a jacket and I didn't have one on hand. I bought one at my basic sewing supply store.
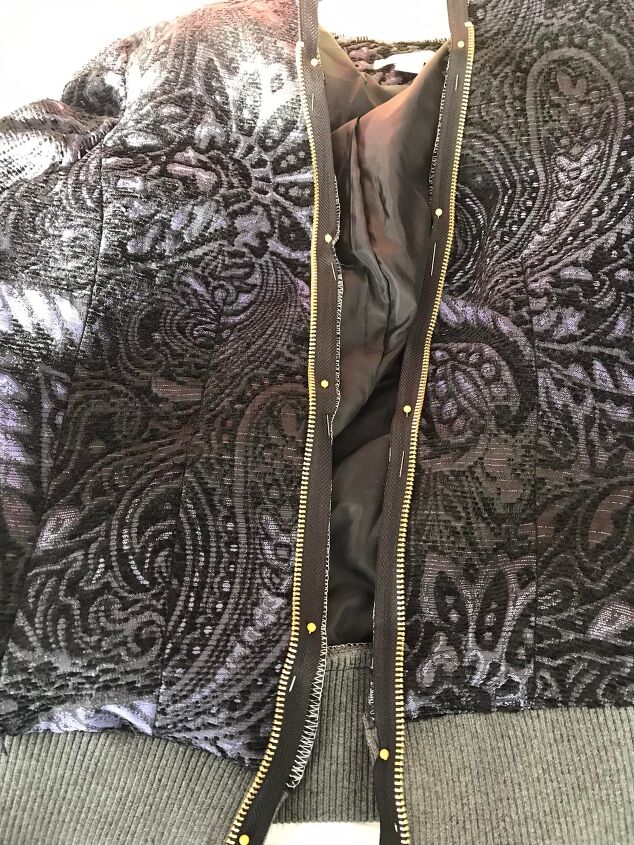
This is only like the third zipper I have ever sewn into clothes in my lifetime. I am afraid of them. The zipper had a lot of instructions that I did not read. I just did what made sense to me. (That is how I live my life, I don't know what to tell you.) I stitched it onto the jacket like you see above.

Then I top stitched it so it would lay flat. This also hid the serged edge from view. Sometimes doing your own thing really works.
I made the collar with folded ribbing just like the waistband. I needed to attach the collar along the neck.
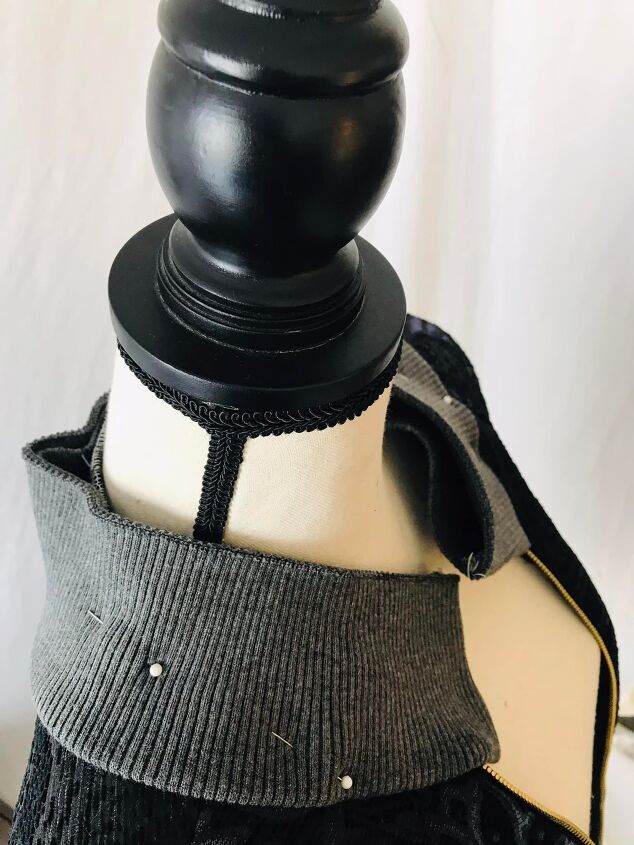
It took some pinning to get the collar on correctly and evenly.
I wanted the collar to taper down and disappear where it met the top of the zipper. I sewed it into the position I wanted the same way I sewed the waistband and cuffs. I had to cut off the excess ribbing after it was attached. Then I topstitched it down.
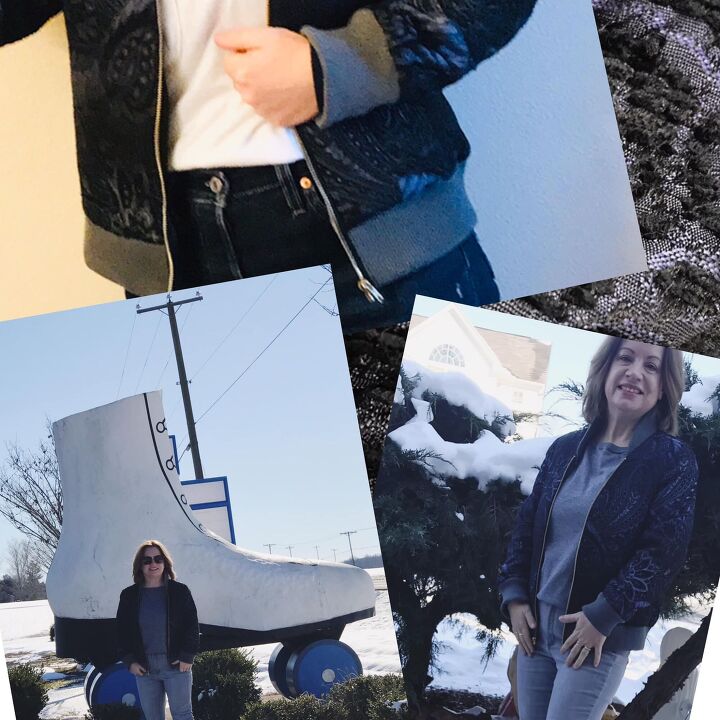
I took this jacket on a little road trip. It was cold and snowy and I saw a huge roller skate at what seemed to be a trash truck repair center on the side of the road. I can't explain it, I just got a picture and went on my way. Thanks for reading along, now go make something fun for yourself.
Chickie
The author may collect a small share of sales from the links on this page.


Comments
Join the conversation
Thanks for the comment! I am glad someone else knows the big skate is real. 😅Your jacket will turn out great.
Chickie
Thanks for the tutorial to change the jacket. I like the collar style. This gives me an idea for making a blouse from knit fabric.