How to DIY a Cute Button Poncho

This button poncho is warm and cozy for winter in a beautiful wool fabric and is straightforward to sew.
I drew the poncho sewing pattern directly on to the fabric. The measurements given are for size 38 - 42, but they're easy to adapt for other sizes.
Tools and materials:
- Wool fabric 63 inch/160 cm wide
- Interfacing
- 3 buttons
- Tailor's chalk
- Pins
- Tape measure
- Ruler/straight edge
- Scissors
- Sewing machine
- Serger (optional)
1. Prepare fabric
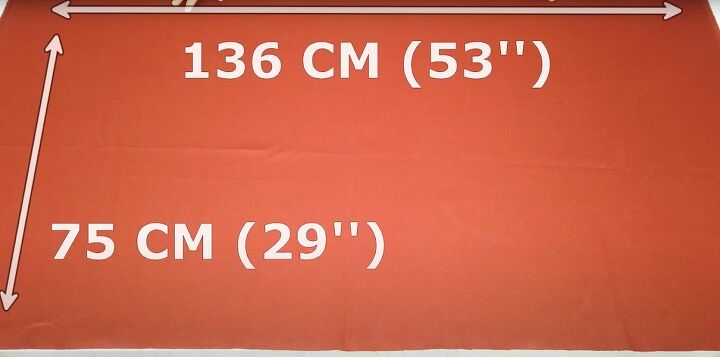
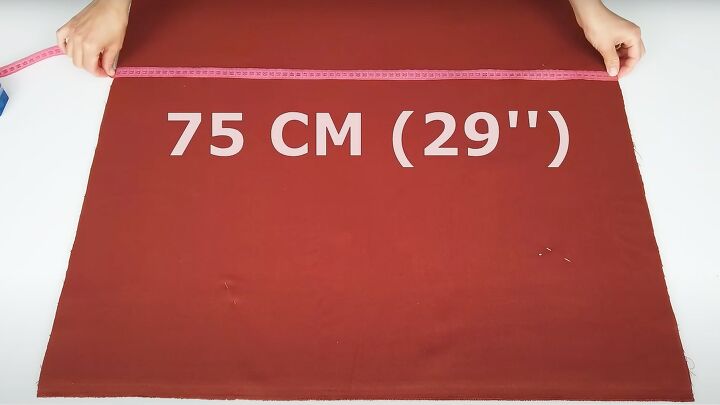
Cut 2 pieces of your fabric, each measuring 53 inches (136 cm) wide by 29 inches (75 cm) long.
Fold them in half with the selvedges together and place one on top of the other, with the folded edges nearest to you and the top piece 0.8 inches (2 cm) lower than the bottom piece.
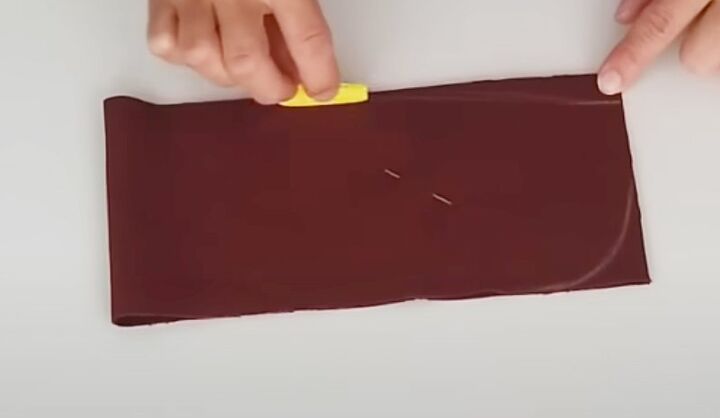
2. Draw pattern
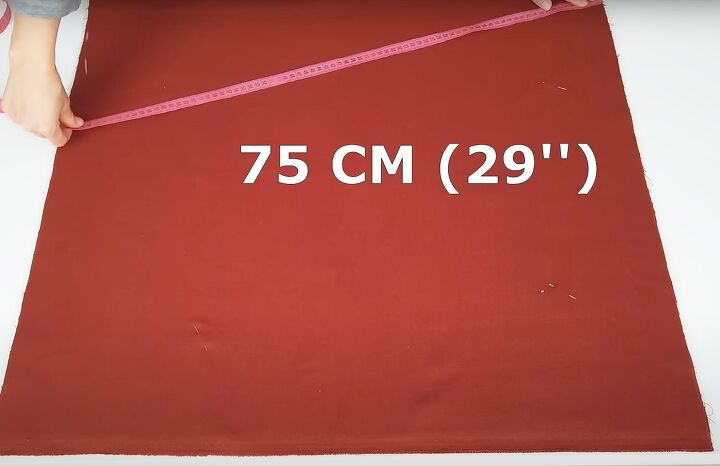
Starting from the corner of the top piece, measure a quarter circle with a 29 inch (75 cm) radius.
On the top folded edge, mark 1.5 inches (4 cm) in from the raw edge and 3 inches (8 cm) down, and join the marks with a curved line.
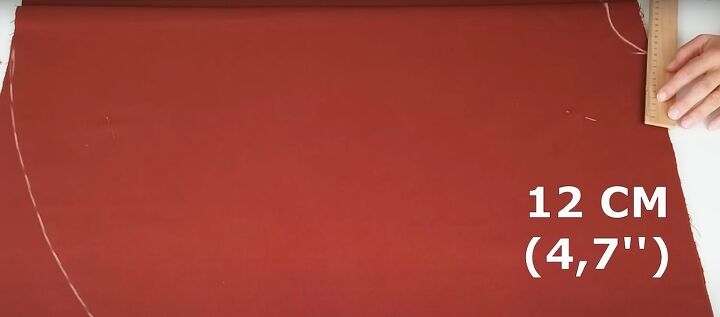
Measure 4.7 inches (12 cm) from the outer edge of the neck down the raw edge, slanting the line slightly for the shoulder.
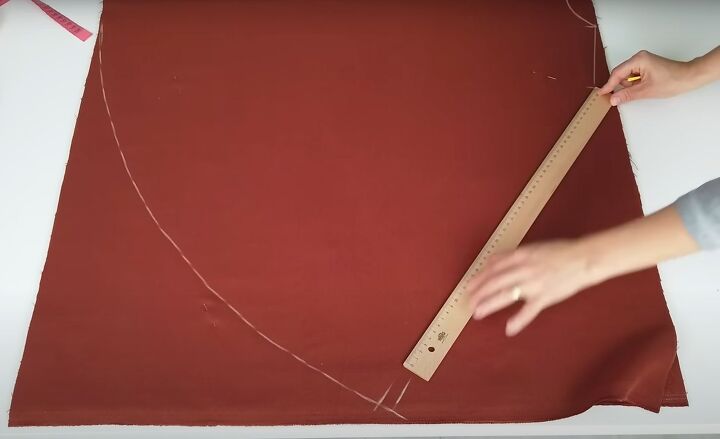
Join the end of this line to the bottom edge of the poncho.

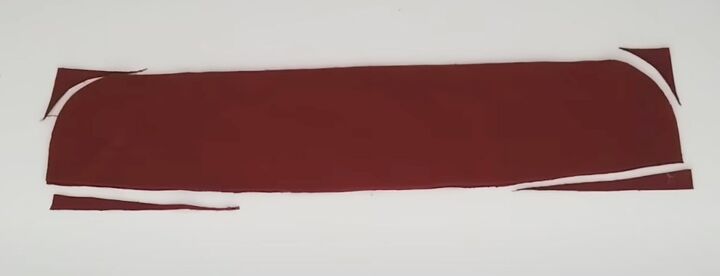
3. Cut fabric
Cut around the marked lines. Cut along the fold of the lower piece of fabric for the front opening.
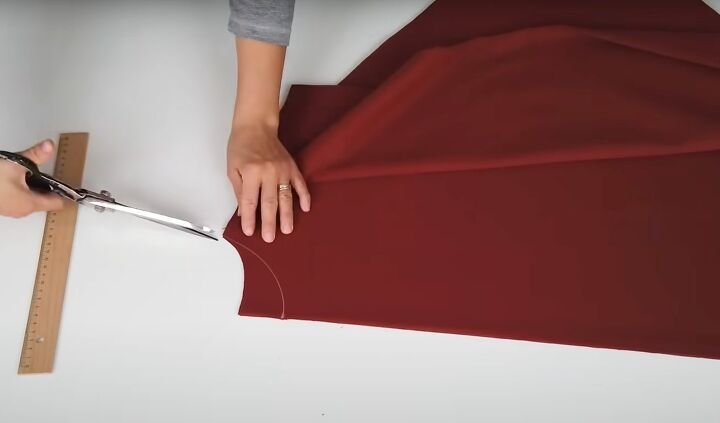
Mark the front neckline 2 inches (5 cm) deeper than the back, redraw the curve and cut it out.
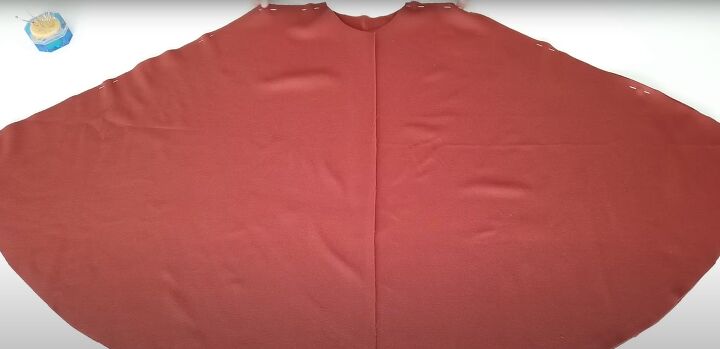
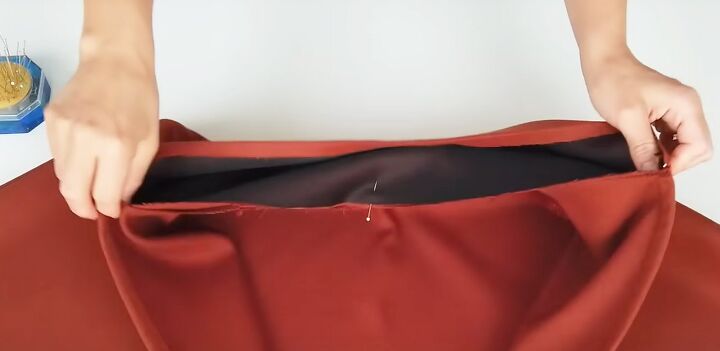
4. Sew side seams
Place the two front pieces on the back piece, right sides together, with the fronts overlapping.
Pin the side seams. Turn in a narrow double hem along both front edges.
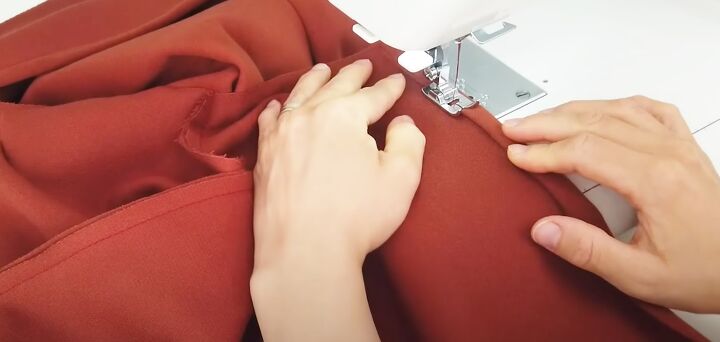
Sew the side seams and front edges on the wrong side.
5. Hem lower edge
Serge the hem of the poncho, or sew a zigzag stitch around it. Turn up a narrow hem and sew, mitering the corners.
6. Make collar
Measure around the curve of the neck edge.
For my size, this was 17.5 inches (45 cm). Cut two rectangles of fabric 18.5 inches (47 cm) wide and 4.5 inches (11 cm) long.
Fold one piece in half widthways and round one of the open corners. Draw a slanted line one finger width from the long edge on the other corner.
Cut along the lines and cut the other collar piece to match.
Cut 2 pieces of interfacing to the same size and iron them to the wrong sides of the collar.
Sew the collar pieces together, right sides facing, leaving the long straight edge open. Turn the collar right side out and press flat.
7. Attach collar
Turn in a narrow hem along one open edge and press.
Match the center of the neck edge with the center of the collar and sew the raw edge of the collar to the neckline with right sides together.
Turn the collar to the inside, enclosing the raw edges, and sew along the folded edge on the wrong side.
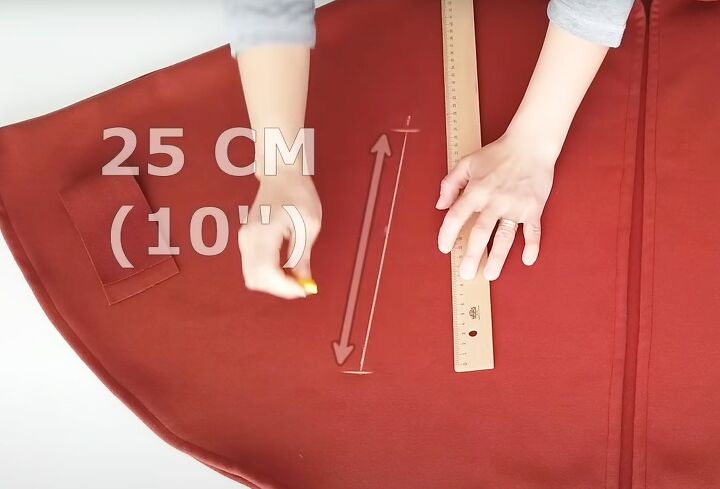
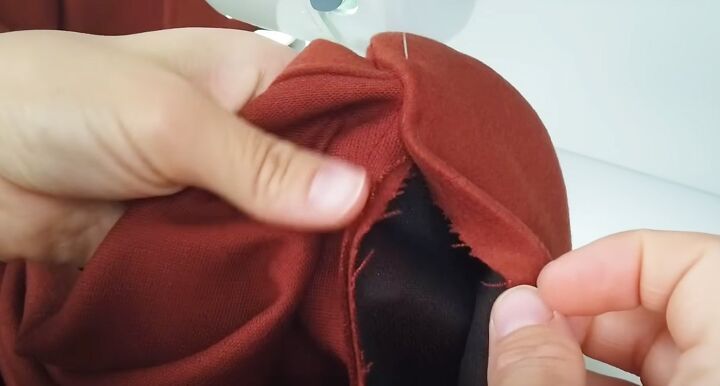
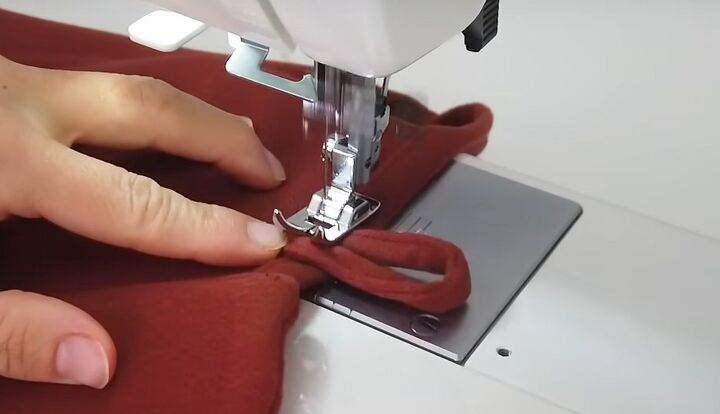
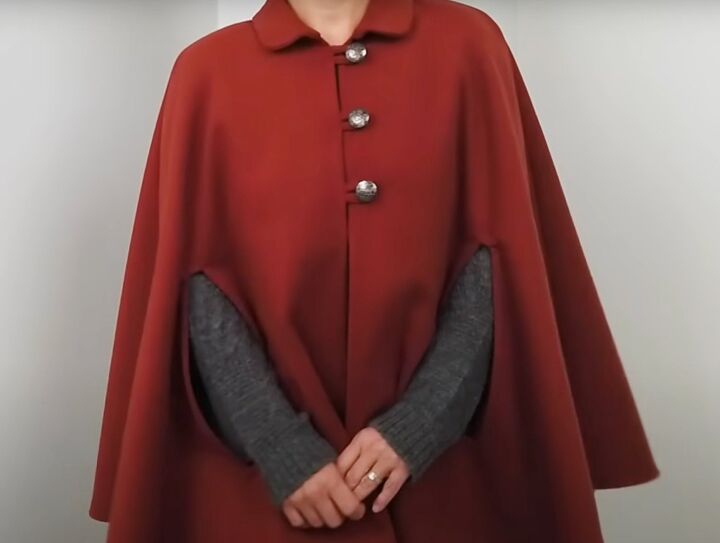
8. Make arm openings
Cut two pieces of fabric 10 inches (25 cm) wide by 2.4 inches (6 cm) long and finish the raw edges.
Measure 10 inches (25 cm) in from the front edge and 16 inches (40 cm) up from the lower edge. Draw a vertical line 10 inches (25 cm) long from that point.
Place one of the fabric pieces centrally over the line on the right side of the front, with the short edges touching the top and bottom marks.
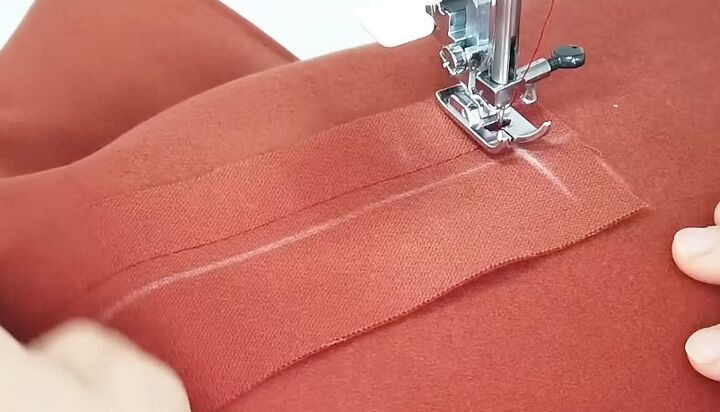
Stitch a rectangle onto the fabric piece around the line.
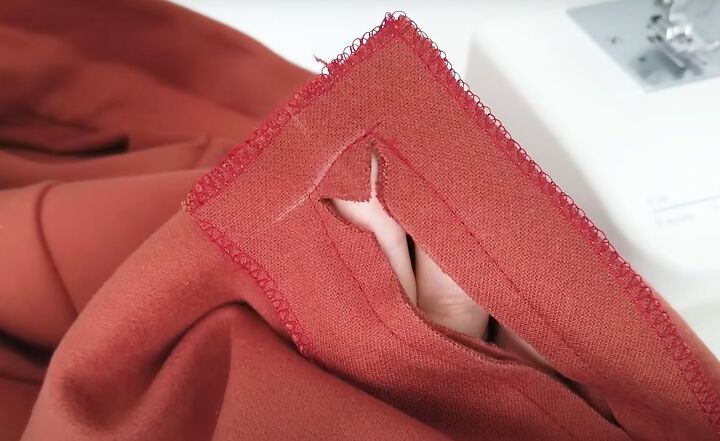
Cut along the line through both layers of fabric and into each corner. Fold the fabric flaps to the inside and top stitch in place.

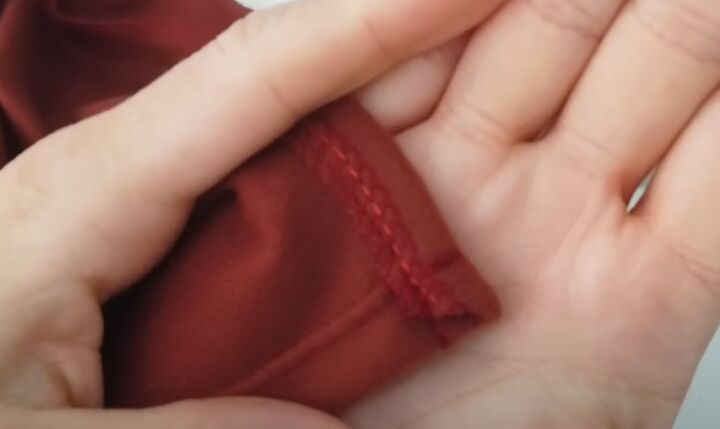
9. Make button loops
Cut a strip of fabric 1.2 inches (3 cm) wide. Fold both long edges towards the middle and fold the strip in half lengthways. Sew close to the edge.
Make a small loop with the piping, large enough to go over the button and attach to the poncho.
Sew the ends to one front edge on the wrong side below the collar, with two rows of stitching. Make two more loops of the same size and sew them to the poncho.
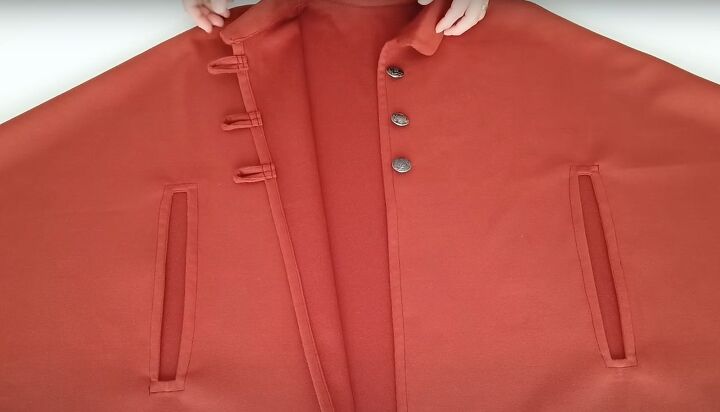
Attach buttons to the other front edge.
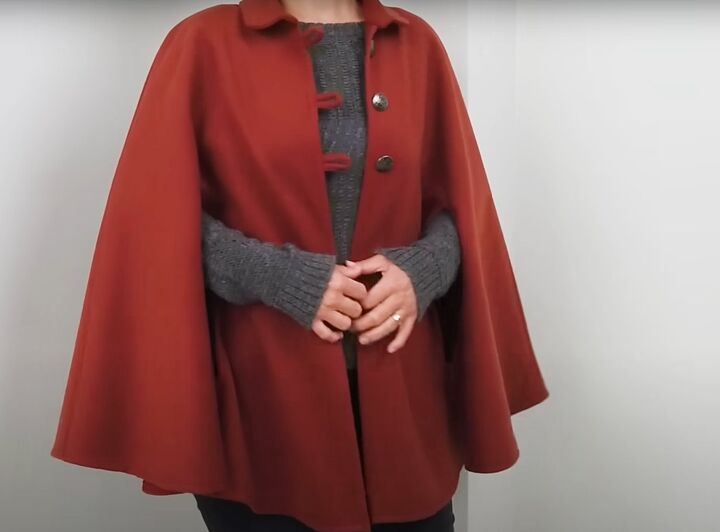
DIY button poncho
This poncho with buttons turned out so well. It has a military look to it that I really like. You could line it in a toning or contrasting fabric for even more warmth.
I'd love to know what you think of it in the comments. For even more great patterns, follow my on TikTok: Tuğba İşler (@tugbaisler).
The author may collect a small share of sales from the links on this page.


Comments
Join the conversation
Very nice. Well done.