DIY Kimono
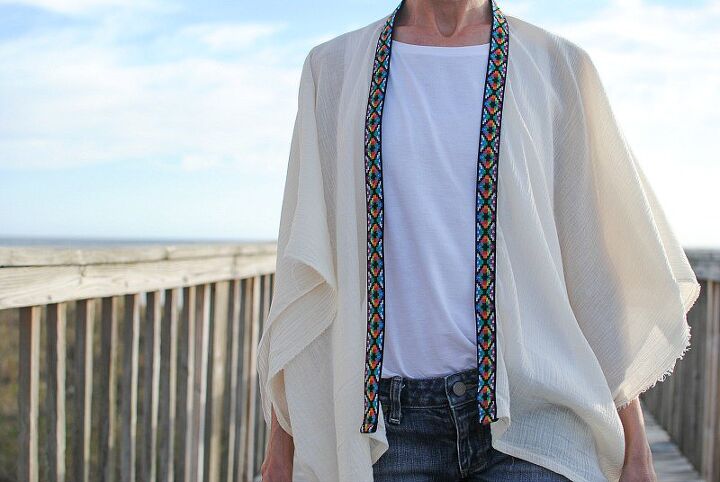
Whenever we go to the beach I notice all I wear is a swimsuit and a cover-up. I typically bring a pair of shorts and t-shirt in my beach bag to transition the kimono from a beach cover up to a lunch or dinner look. This year I decided to make a couple simple kimonos to bring to our yearly beach vacation. I wanted to add a fun boho detail to the simple cotton fabrics I picked out and found these Ikat printed elastics from Dritz. I typically wouldn't think to use this as a trim but it turned out more than perfect. The weight of the Woven Jacquard Elastic kept the drape of the kimono nice and flowy without the wrinkle you an get from a typical trim. I liked it so much I made a gathered version as well with a set of scarves.

Get the details below and make your own.


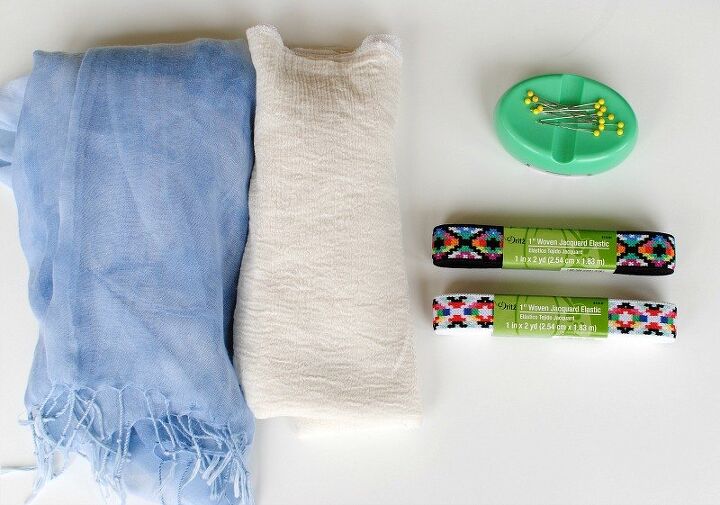
Supplies:
- Dritz Woven Jacquard Elastic 1in Ikat and white version
- 1 yard of fabric (I used a cotton gauze and set of scarves)
- Brother Sewing Machine
- Basic sewing/cutting supplies
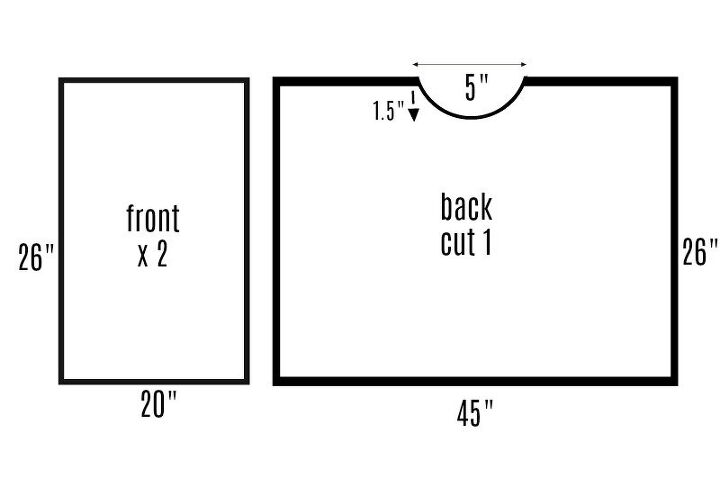
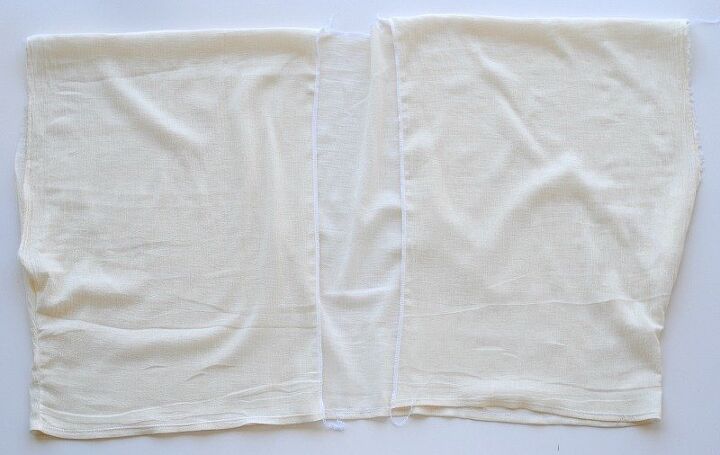
Use the template above for your pattern. Basically you will cut out rectangles and the back piece should have a slant at the center back for the neckline. You can alter the dimensions any way you'd like or adjust with what you have in your stash. For example, I used a set of scarves for the blue kimono and a yard of fabric for the other one.
Place your back and 2 front pieces right sides together. You should have about a 5" or so curved gap in the center.
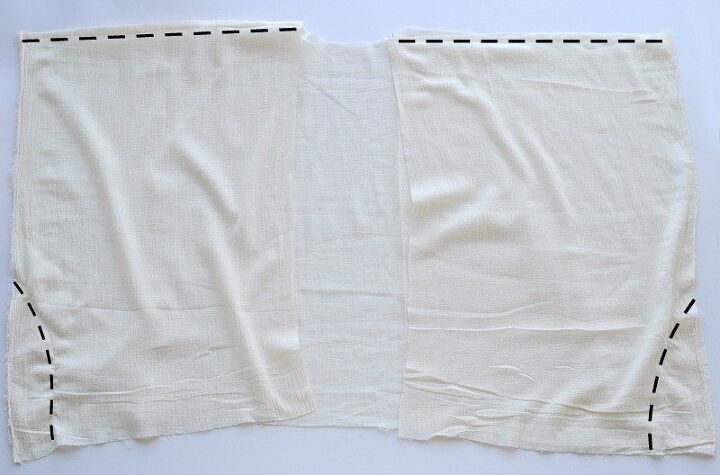
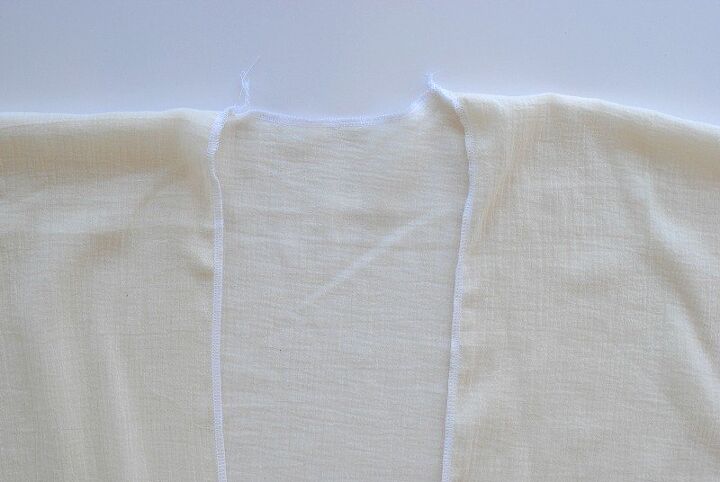
Sew the shoulder seams (sew with a 1/2" seam allowance unless stated otherwise). For the side seams measure off a gap for the arm hole (mine was 13"). When sewing the side seams start about 2" from the bottom edge and sew a slight curve up to the bottom of the armhole opening.
Trim the excess seam allowance. Flip right side out and finish the armhole and bottom hems. I pressed under 1/2" and sewed. I left the selvage edge as my sleeve edge because I liked the finish.
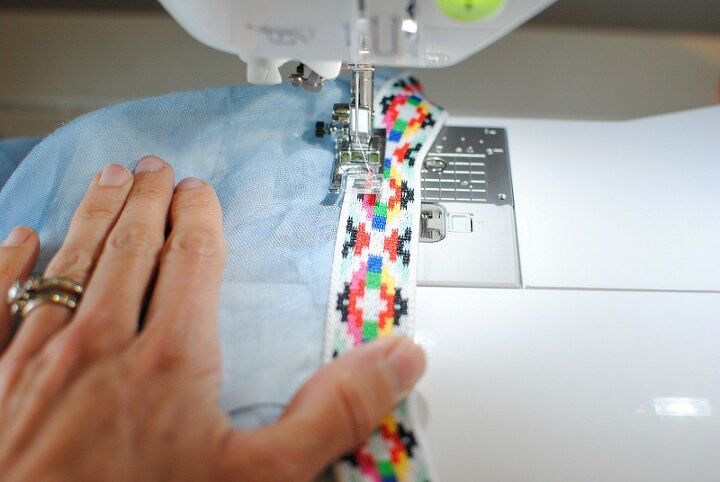
For the center front I added Dritz printed elastic. I did however serge the edge so it didn't fray. You can also press over to the right side 1/4" and topstitch. That way when you sew the elastic trim it will appear as a French seam on the wrong side.
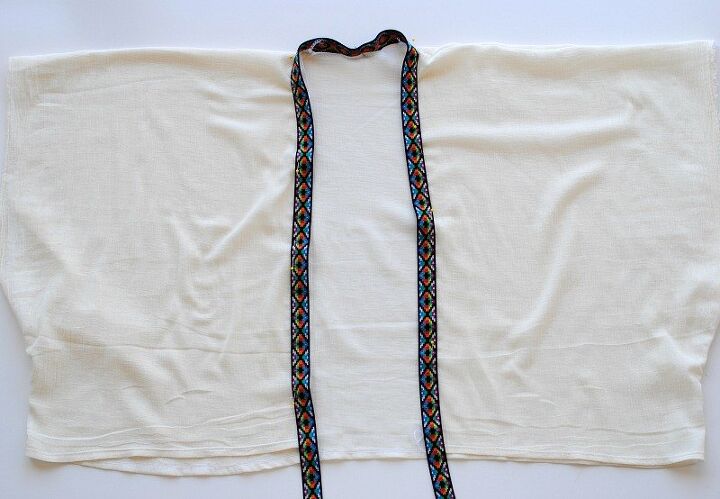
Pin the elastic along the center front wrapping around the back neckline.
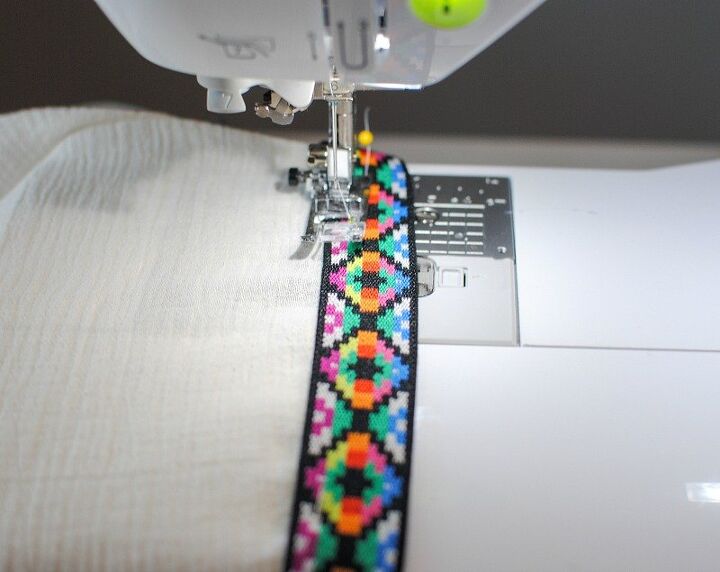
Edge stitch into place on the right side of the garment. When you get to the bottom edge fold the elastic edge under 1/4" and sew under.

For the scarf kimono I sewed the 2 scarves together at the center back. I left the front 5" longer that the back for the shoulder width. I sewed the side seams leaving a 13" opening for the arm holes.
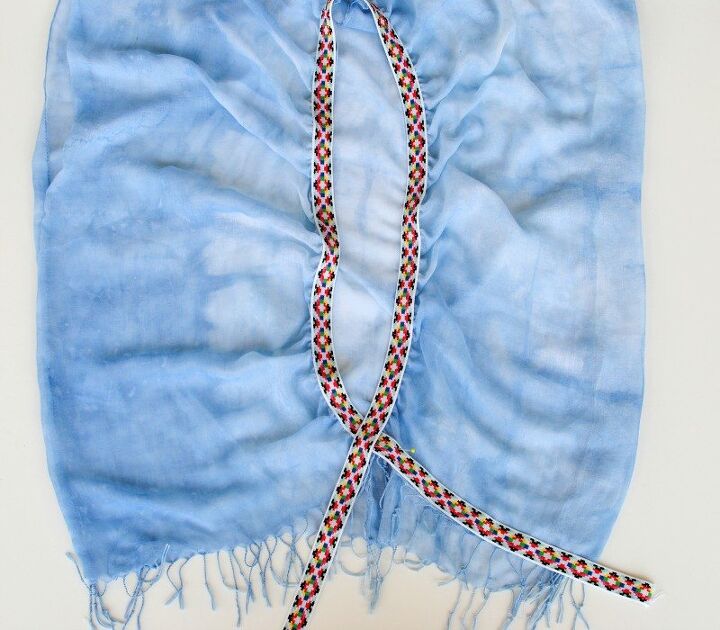
Fold the elastic in half and pin this half point with the center back. For this trim I pulled the elastic as I sewed, I wanted to create a gather. I left 1" from the bottom edge open so I could overlap the elastic to create a twist.
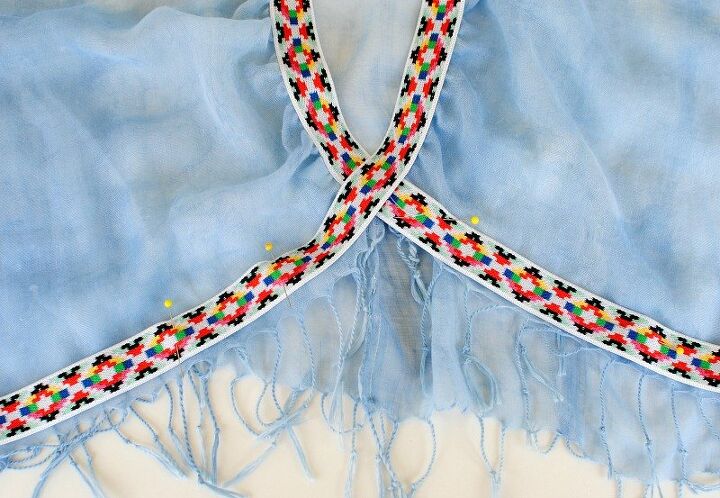
Over lap the elastic and continue to pin along the front bottom edges (where the fringe hangs).
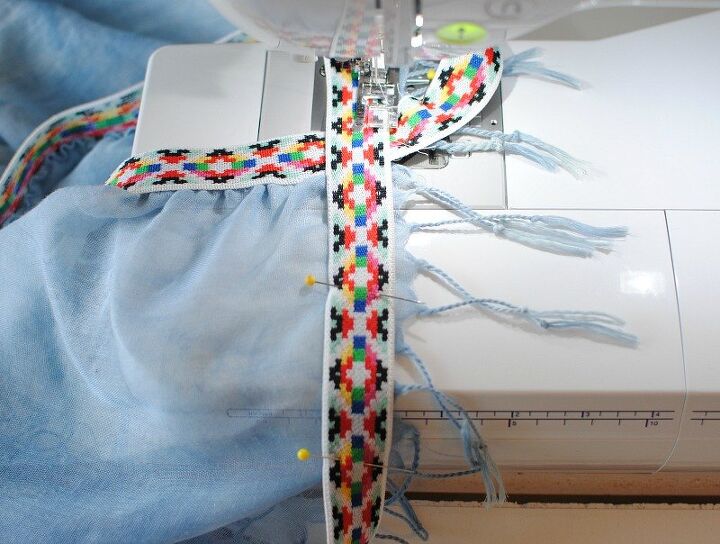
For this portion I did not pull the elastic. I also topstitched both sides of the elastic.

That's it -your kimono is good to go
I love how they turned out all from a yard of fabric and printed elastic.
***In collaboration with Dritz.
The author may collect a small share of sales from the links on this page.


Comments
Join the conversation
SO pretty! Thanks for sharing!