This Jacket Was a Labor of Love....

It seems like I’ve been on a jacket making kick recently. Which is odd considering I only get about 4 weeks of jacket weather. It’s spring/summer the rest of the year. Nonetheless, I made 3 jackets in February. One went to my mom and the other two I put right in my own coat closet. So why not make another one? Butterick B6106 looked so different from the other jackets I made. I was totally up for the challenge.
The Pattern….
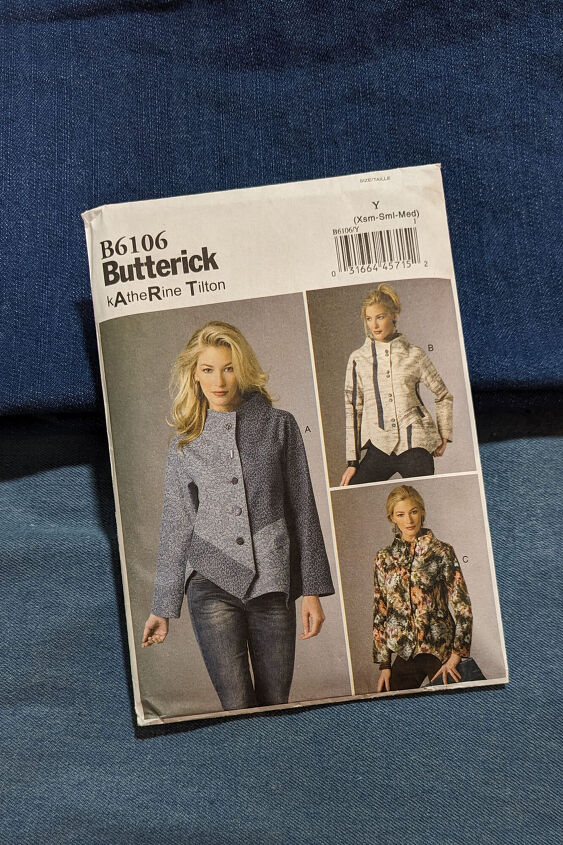
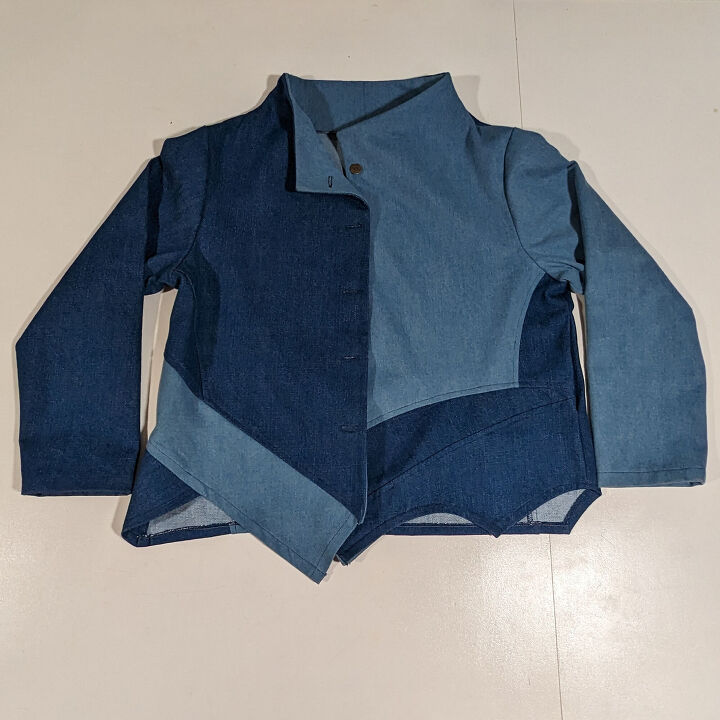
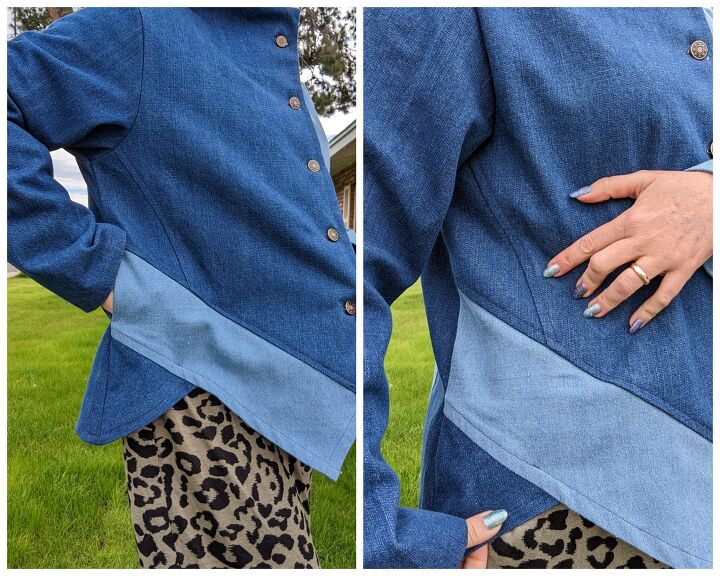
Pattern B6106 is a pattern designed by Katherine Tilton. It caught my eye immediately and I really wanted to make it. It is a loose fitting, unlined jacket. The collar is super interesting as the front and back pieces extend into the wide neckline making the collar. Then it has a facing attached to it to finish the raw edges. It has princess seams into the shaped front bands. The shaped hemline is unlike anything I’ve seen. I loved the look and idea of the contrast in option A with top stitching. Two colors of light and dark denim with top stitching is just what I wanted to do and had the perfect denim and buttons in my stash. This project was going to cost me $0 since Minerva generously sent me this pattern as a gift. Thank you Minerva!! But I would estimate this project costing someone else $25 + depending on fabric choice and notions.

Size, Fabric and Buttons, Oh My!!!
My measurements put me into a size medium. Now that I’ve made it, I think I could have gone down at least one size. For the size medium I would need roughly 2 ½ yards of fabric total, depending on how wide it was. Both my denim fabrics were super wide so I only used about 1 yard of both colors. I had lots of denim buttons too, just had to choose which ones.
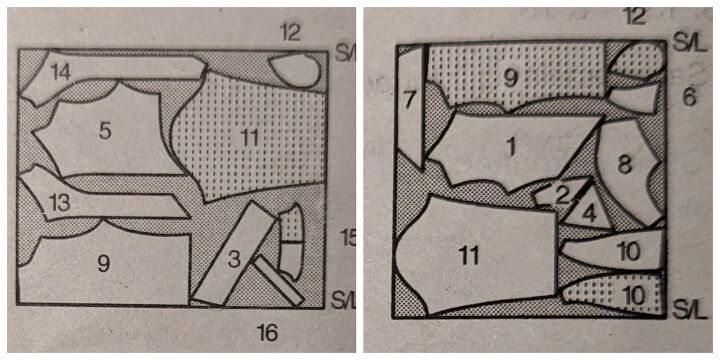
As I started this project, I kind of freaked out a little bit and wondered if I bit off more than I could chew. It was A LOT of pieces to cut out for the contrasting view A option. I kept checking and double checking to make sure I was cutting the pieces out the correct way. Some needed to be cut out face down and some I only needed to cut one of. It was a lot to pay attention to. It took me two days to cut out. But I was doing regular mom things while trying to do it.
When things get WILD….
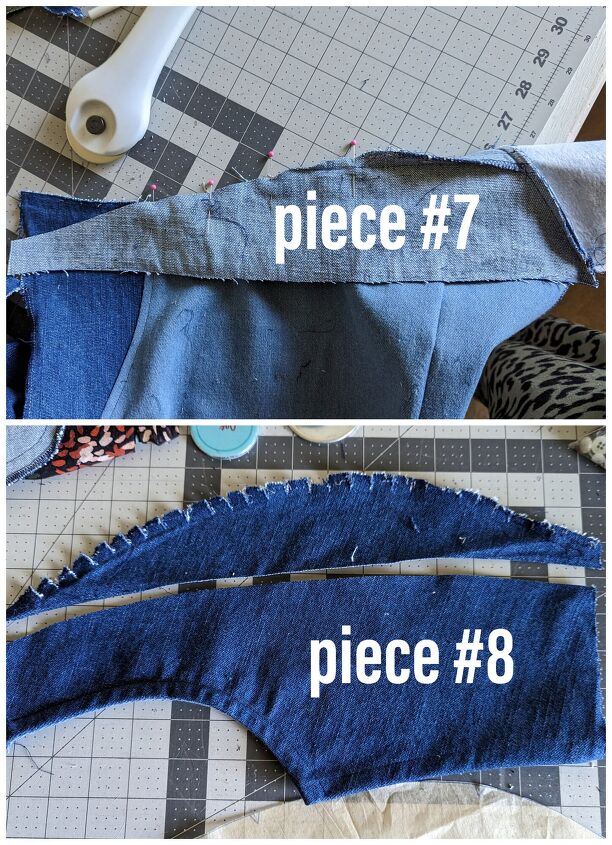
Sewing it together was…. well…. quite the experience. The instructions were just as expected for a commercial pattern; kind of vague, but still easy to follow. However some of the pattern pieces were WILD! Particularly #7 and #8. I had to do A LOT of adjusting there.
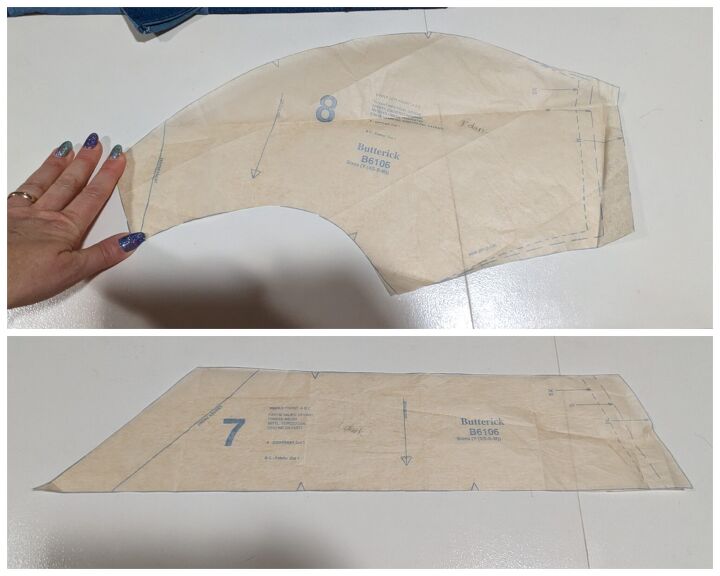
I sewed it all together, doing all the stay stitching that it called for on certain steps. When I got to the front left side, I had to attach pieces 7 and 8. This was just bonkers: #7 was straight and #8 was curved a lot. I attached them and the left side kind of ballooned out.Which I pretty much assumed would happen based on their shapes. It was still so weird! But the picture on the front of the pattern kind of looks weird too. If you zoom in on the pattern pic at the beginning of this post you can probably see it too. This was not something I was willing to overlook in the least.
I picked out the seams in that troublesome area and tried several different things to make it go away: gathering the staystitch more, doing a dart, grading the seam allowance. Nothing worked. Finally I just took the top curve of piece #8 off and then took the top off of piece #7 and curved it a bit. After I did that it finally laid flat at the front left and didn’t protrude out anymore.
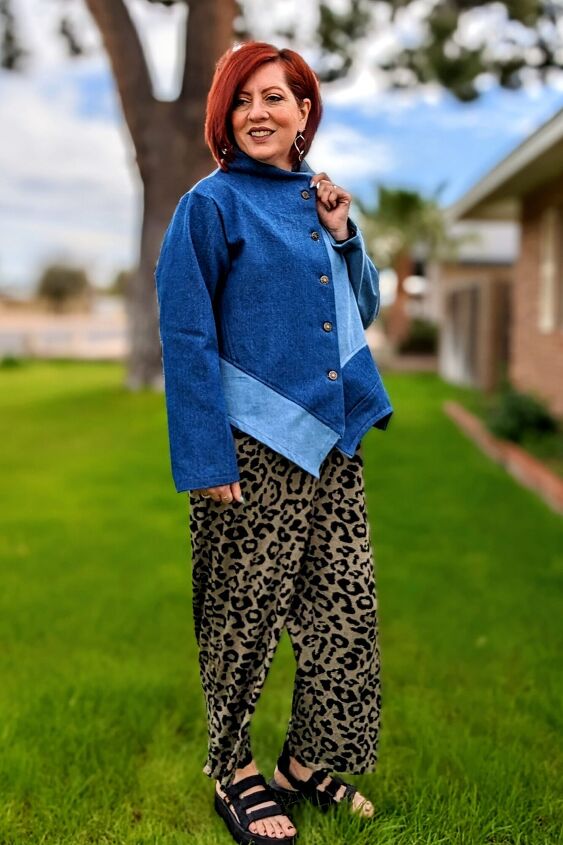
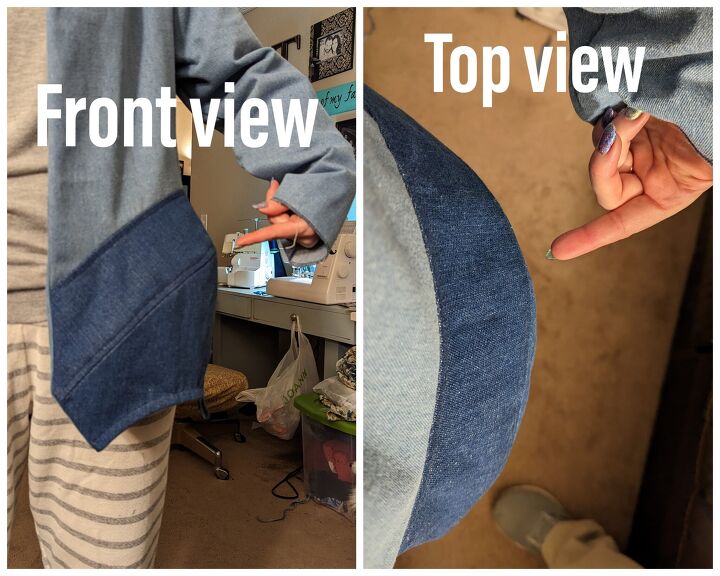
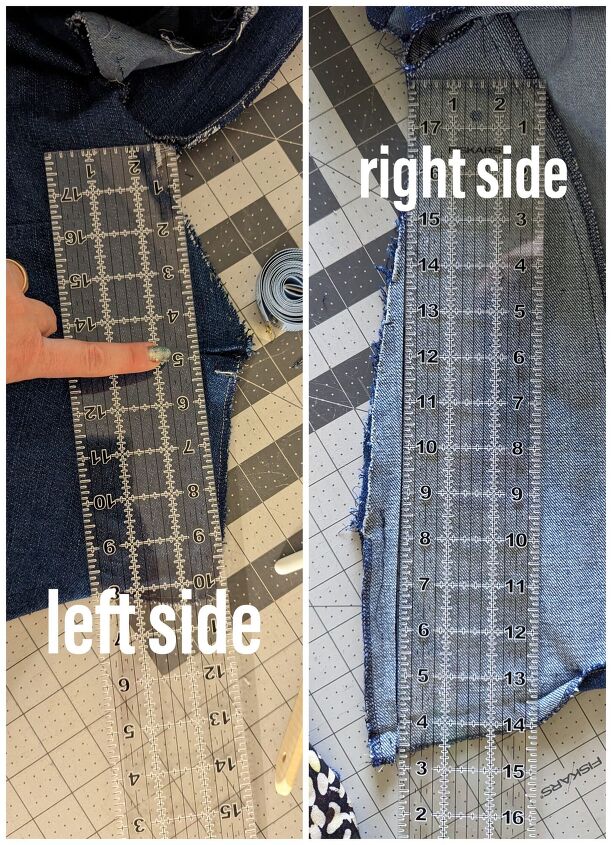
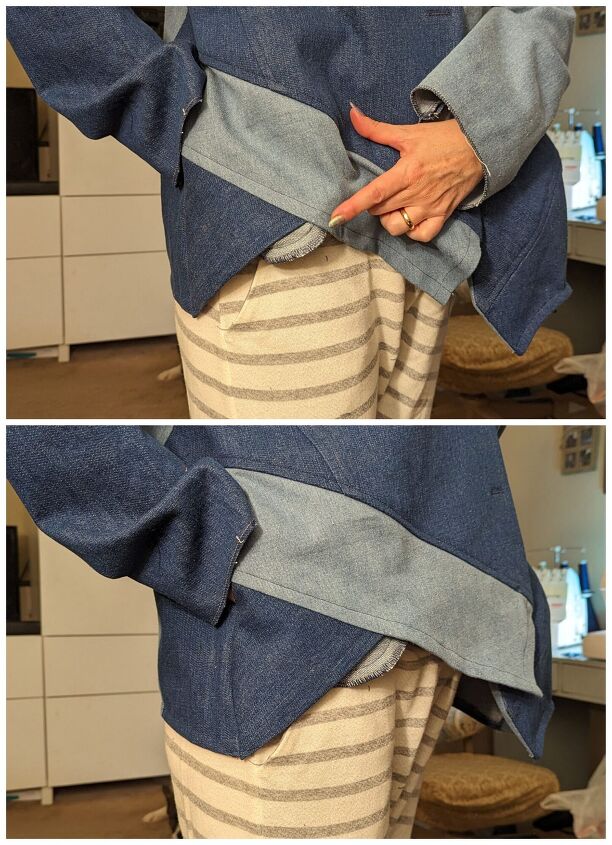
Because I took so much off pieces #7 and #8 the length of the front was shorter than the back. To fix that I just simply curved the back side section into the front, which gave it kind of a double scallop look on my left side, which you can see below.
Figuring out the sides….
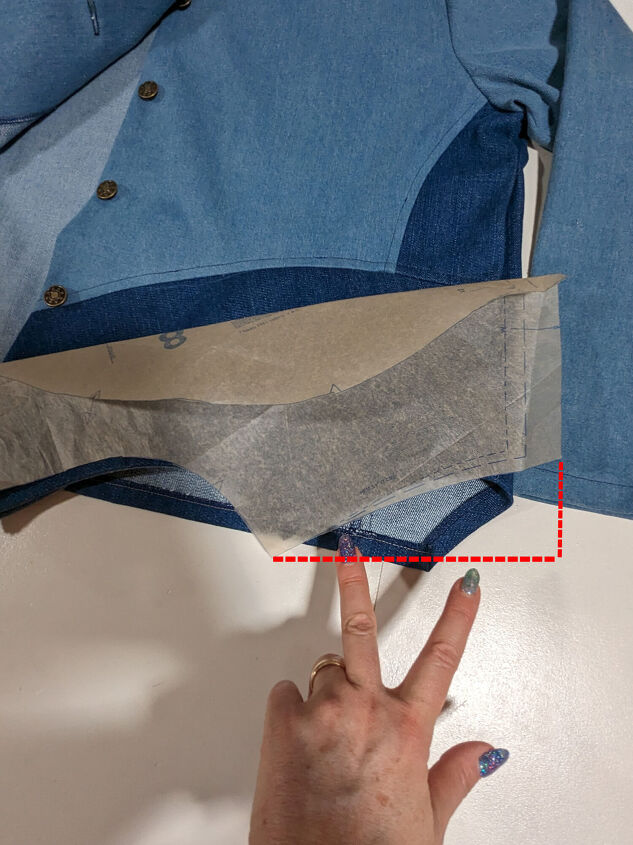
If I make this again I will just redraft piece #8 to not be curved on the top and to be a little longer on the side, filling in that curved area. The more I think about it, I may just redo that whole bottom left piece as illustrated in the picture below. For now it will stay the way it is.
I took some out of the sides too. The right side slanted out giving it an A-line look while the left side did something completely different. I straightened out the right side. Then I took the corners off the left and straightened it out to match the right.
I’ll take two pockets, Please.
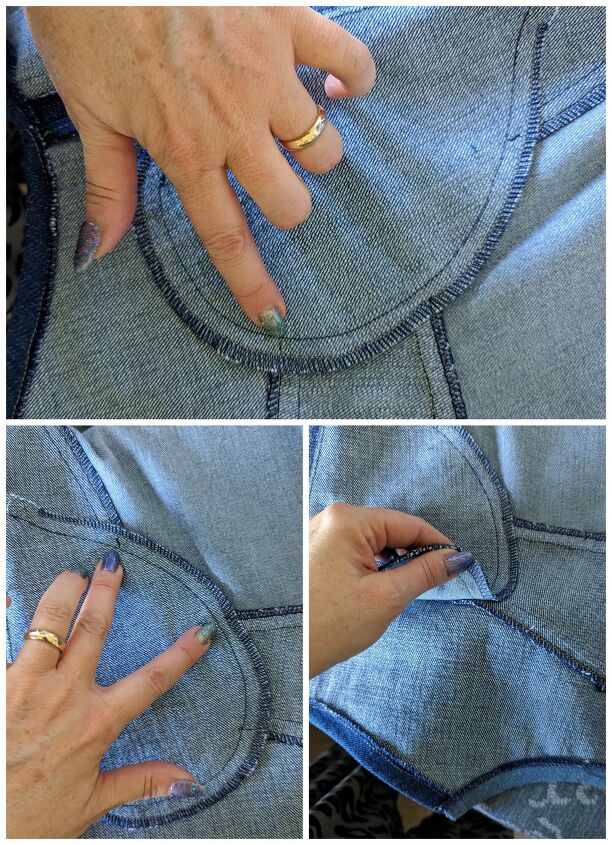
I found it odd that the pattern only had you cut out and gave instructions for 1 pocket. ONE pocket?! That was a no go for me so I did two. The pocket it gave markings and instructions for was too low and hung out from the bottom of the jacket.
I picked it out and moved it up a bit. I made sure the pocket on the other side was even. But the pocket placement is definitely too far to the back, which makes it difficult to use. They should have been moved forward into the princess seam line.
I would have done that but after dealing with pieces 7 & 8 I really didn’t care anymore. I carry a purse/backpack and nearly all my clothes have pockets so I just left them alone. The only thing extra I did was tac the pocket to a few seams so that it would stay in place and not flip to the back or hang too low.
Perfectly “Popped” Collar!
I love the collar. It’s so different and unique. Very easy to assemble and looks great in my opinion. I did tac the facing down at the should and back seams to keep it from flipping up. The buttons and buttonholes kept the front facings in place.

All’s well that ends well....
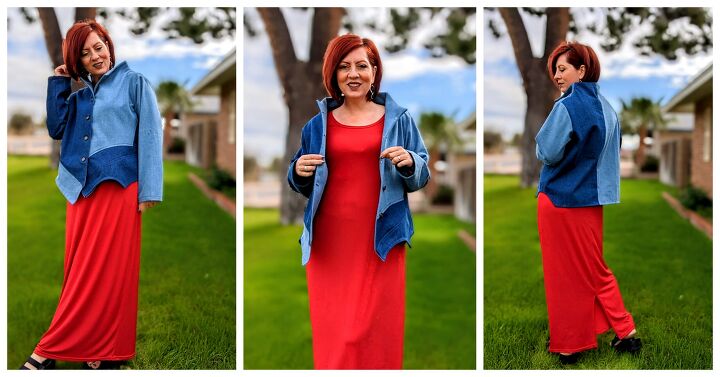
It may sound like I hate the Butterick 6106 jacket, which isn’t the case. The whole jacket was a labor of love. I actually told my mom halfway through that I was just going to give her this jacket. However, once I was done making all the adjustments I really loved the way it looked on me.
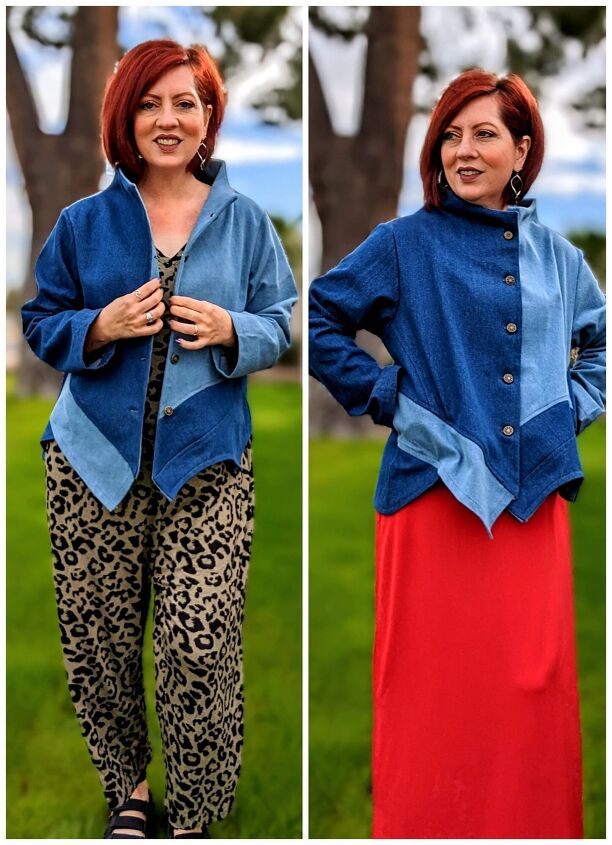
The armscye fits me really well and I didn’t need to do an upper back adjustment either. So it looks like I will be keeping it and wearing it constantly for the next few days while it’s still cool here. I especially like how it looks with my red dress and my leopard jumpsuit. It’s truly an original piece of art.
Let’s be friends!
If you are looking for a pattern suitable for more than one occasion, hopefully this post helps you figure out what will work best with your wardrobe needs. Let’s be friends on all the socials! Come follow along on Pinterest, Instagram and Facebook so we can chat about all our sewing projects!
The author may collect a small share of sales from the links on this page.


Comments
Join the conversation