DIY Soap Sponge: Eco-Friendly Skin Care to Reduce Plastic Waste
Toss that bottle of body wash and try this DIY soap sponge instead. Made using just 2-ingredients, and optional essential oils, this easy melt and pour soap project, lathers better than bar soap and also exfoliates skin. It's also a great way to reduce plastic waste in your home. Then simply use leftover sponges once the soap is gone for grungy cleaning chores around your home!
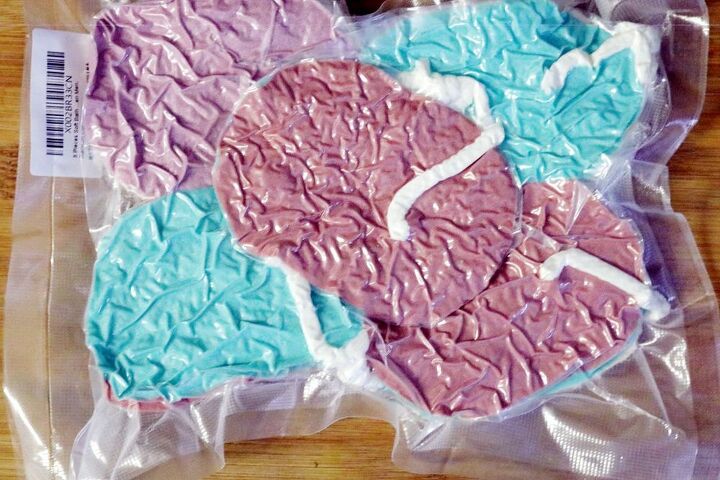
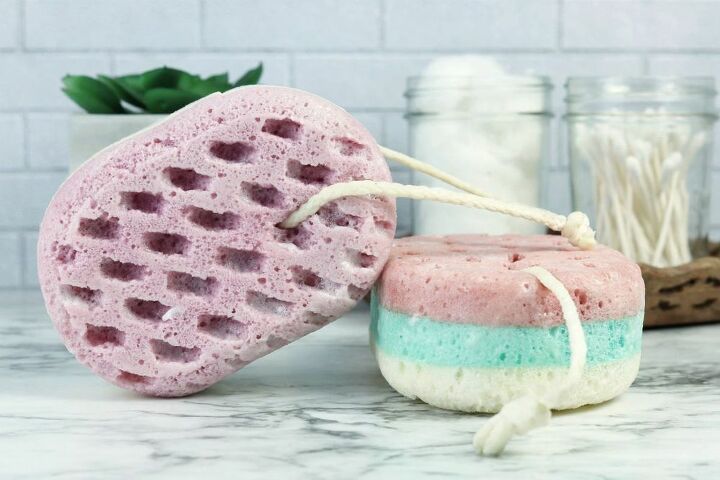
I bought a set of 5 soft sponges to make my soap sponges. They are made with natural fibers and soft to the touch. They also have a rope in them so you can hang the sponges to dry after you use them. The look kind of crazy when they're shipped, but they come out just fine once you remove them from the packaging.
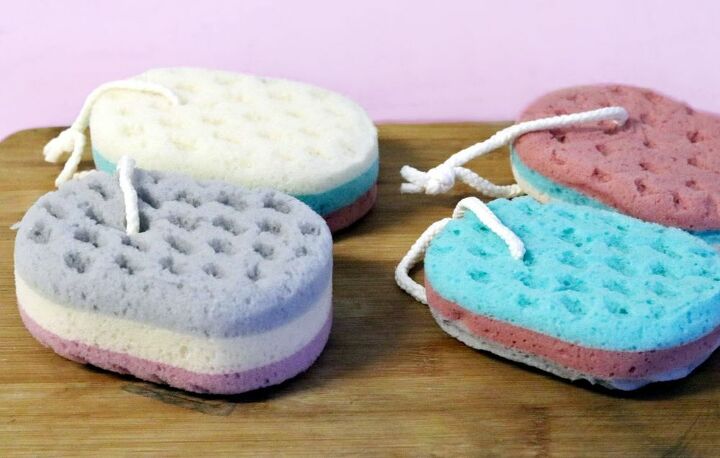
I recommend using sponges with a rope in them, like the ones I used for this soap making project. That makes it easier to dry your DIY soap sponges after you make them. It also allows them to dry out completely between each use.
You should use heat proof gloves and eye protection when making soap sponges. The soap is hot and it can splatter. I recommend gloves are PVC coated and liquid and heat resistant.
To make 2 DIY soap sponges, use a knife to cut 8 oz. of melt and pour soap into one inch cubes. Then melt the soap in the microwave in 30 second bursts until melted. Stir between each heating.
Once melted, remove the soap from the microwave. I recommend using a tea towel to handle the container as it may be hot. Then, if desired, add 1/2 teaspoon of your favorite essential oil blend to the melted soap. I used a Happy Joy blend which smells amazing!
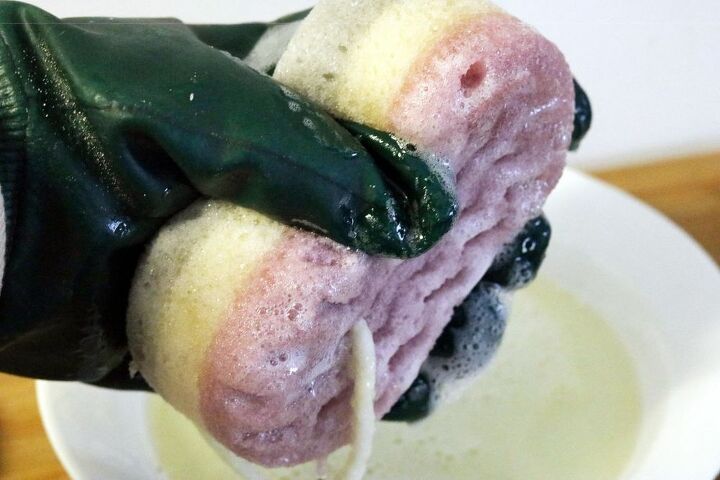
While wearing heat resistant gloves, dip each edge of the sponge into the melted soap. Then dip the top and the bottom.
Repeat the process until the sponge will no longer hold any additional soap. Each sponge should soak up about 4 ounces of the melt and pour soap base.
If necessary, gently reheat the soap if it starts to solidify during the process.
Once you’ve completed making a soap sponge, hang to dry.
Your DIY soap sponge is ready to use once it’s cooled and hardened completely. However, I recommend waiting a day prior to use.

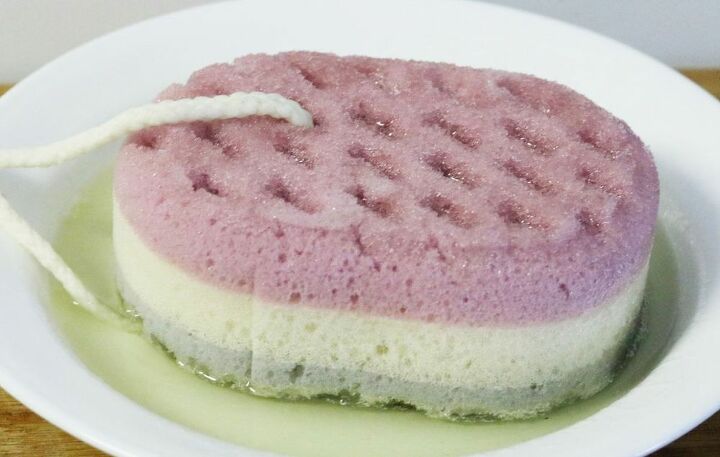
The soap sponge isn’t a solid piece of soap, so it feels more like a sponge than a bar of soap. To use, just wet it and squeeze it to make a lather. Then use it like you would any soap.
Resources for this project:
See all materials


The author may collect a small share of sales from the links on this page.


Comments
Join the conversation
I use my grungy kitchen sponges for cleaning spots off the kitchen floor. I sometimes do it with my foot. Hard to bend over when you are 78 and 25 lbs overweight.
The fact that it lathers better and exfoliates the skin is a total win-win. It's great to see people coming up with creative ways to reduce plastic waste in our homes. By the way, have you ever thought about adding essential oils to your soap sponge? They can have some fantastic benefits for the skin, like soothing dryness or even promoting relaxation. Just be sure to check the product composition before. Sometimes, I even use therapeutique-dermatologique to check out the components I don't know. You could create a spa-like experience right in your own bathroom! I'm definitely going to experiment with different oils and see which ones work best for me.