How to Make Giant Puff Sleeves - Fun Oversized Gathered Sleeve Hack

This tutorial will teach you how to make giant puff sleeves on an existing dress and how to add a color block to sleeves to make them even larger. These types of sleeves are chic and ultra-comfortable; they work best on oversized garments with a dropped shoulder. Let’s get started!
Tools and materials:
- Fabric
- If doing color block, additional fabric in a different color
- Sewing machine
- Serger or overlock machine
- Scissors
- Seam ripper
- Ruler
- Clips or pins
- Iron
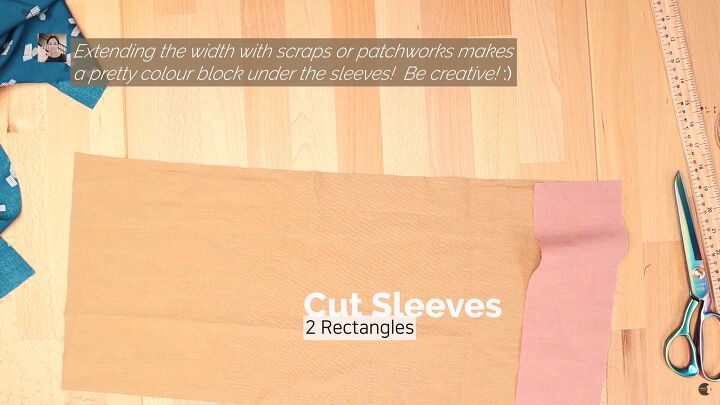
1. Cut rectangles
If you’re making a giant puff sleeve, cut two rectangles. If you’re making a large puff sleeve with a color block, cut 2 thinner rectangles.

2. Sew the sleeve
Fold each rectangle right sides together. Sew and serge the ends. Set aside. If you’re making a color block sleeve, sew the color block to a rectangle first. Then sew and serge the ends. Set aside.
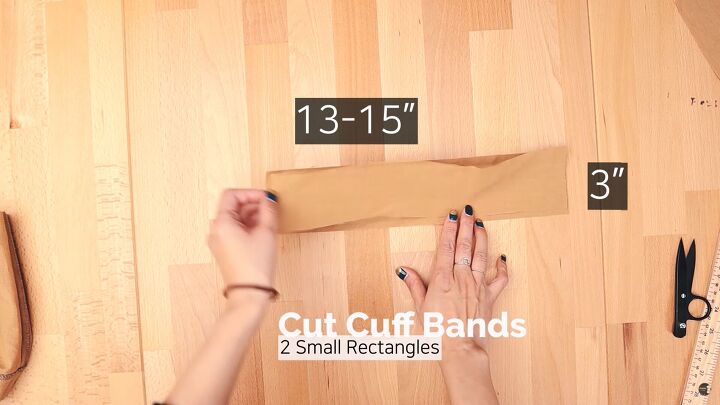
3. Make the cuff bands
Cut 2 smaller rectangles. They should be about 13-15 inches by 3 inches.
When you’re changing the sleeves on an existing dress, this is how to add a giant puff sleeve to refashion your old clothes.
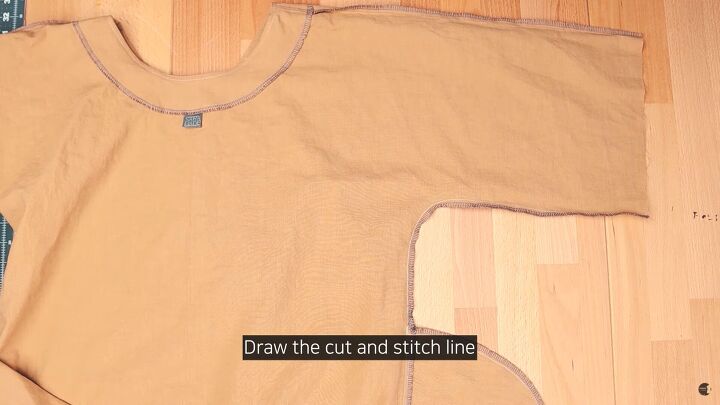
4. Mark up your old dress
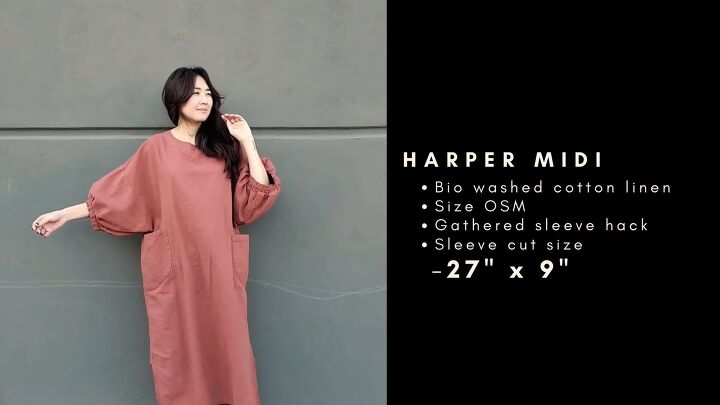
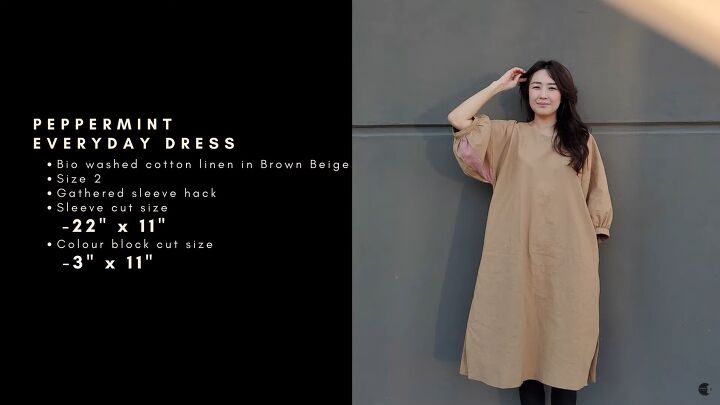
The dress I am using to demonstrate how to add the big puff sleeve is the Peppermint Everyday dress. I am going to work only above the sewn-in pocket.
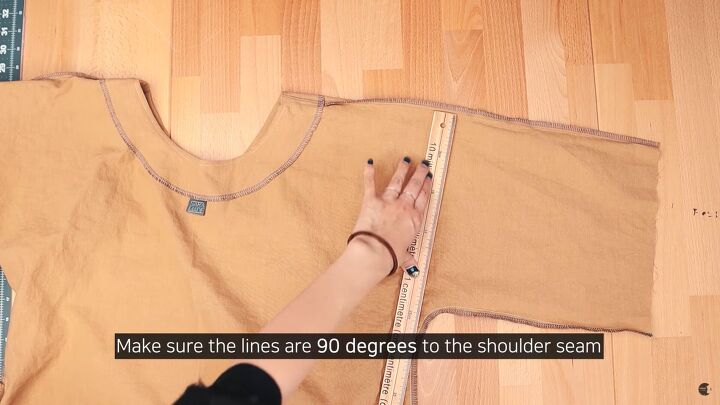
Draw the cut and stitch line with the ruler. Measure and mark. Make sure the lines are 90 degrees to the shoulder seam.
Having it at 90 degrees will make sure the drop is straight at the arm opening. This allows the sleeve to lay properly for sewing and wearing. Add a ½-inch seam allowance.
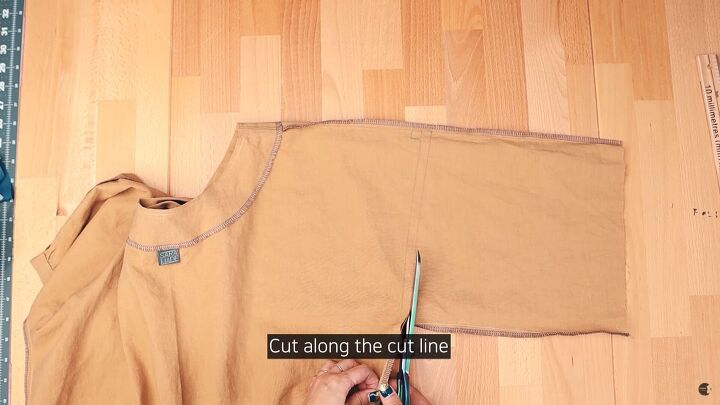
5. Open the dress
Cut along the marked line.
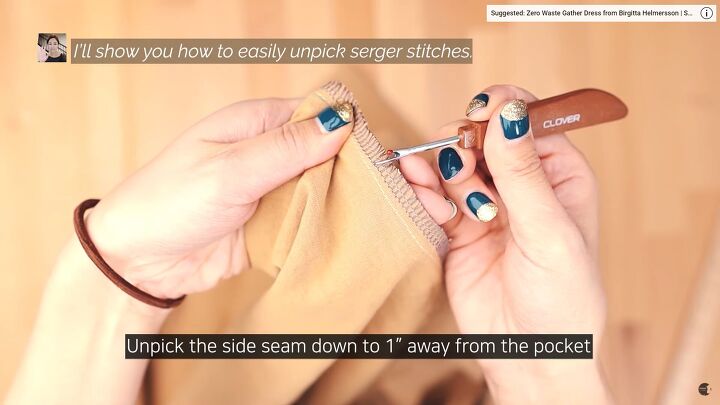
This is how to open up serger stitches: Unpick the side seam to 1 inch away from the pocket in the dress. There are 2 straight stitches. Unpick the outer one first. Cut a few threads and pull the threads out. It should come out easily.
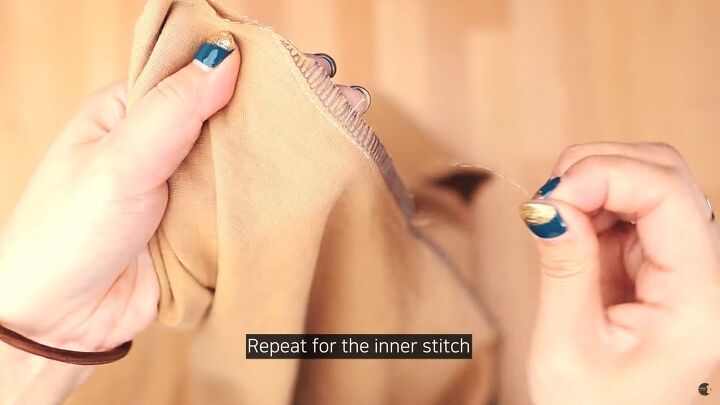
Then do the inner stitches and pull out the long stitch. This is so easy and satisfying to do!
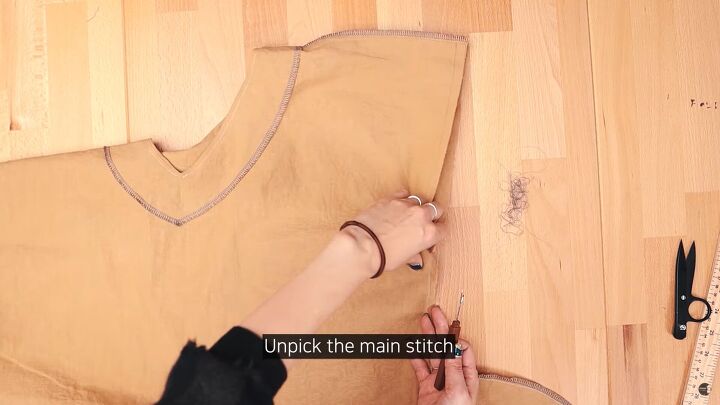
Unpick the main stitch. That’s all there is to it!
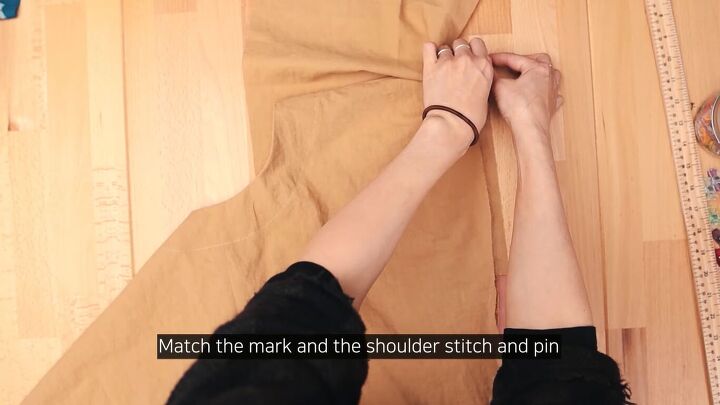
6. Attach the sleeves
Match the mark and the shoulder stitch and pin in place. Sew along the stitch line we drew. Serge the sewn area.
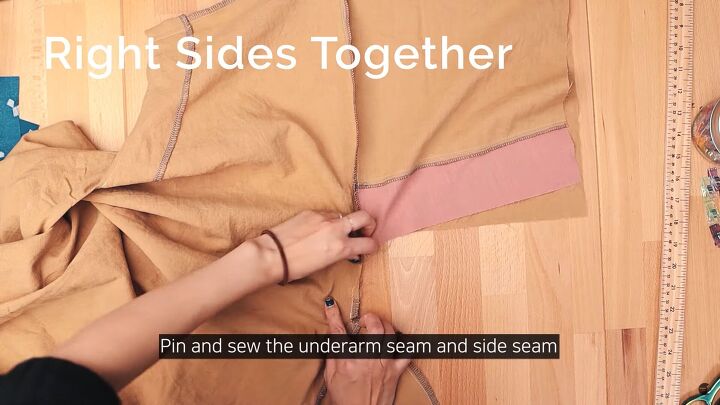
Pin and sew the underarm seam and side seams of the dress.
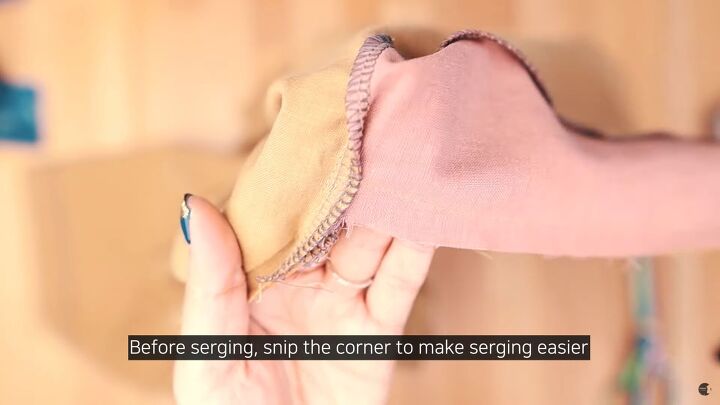
Before serging the seams, snip the corner to make serging easier. Serge all the raw edges.
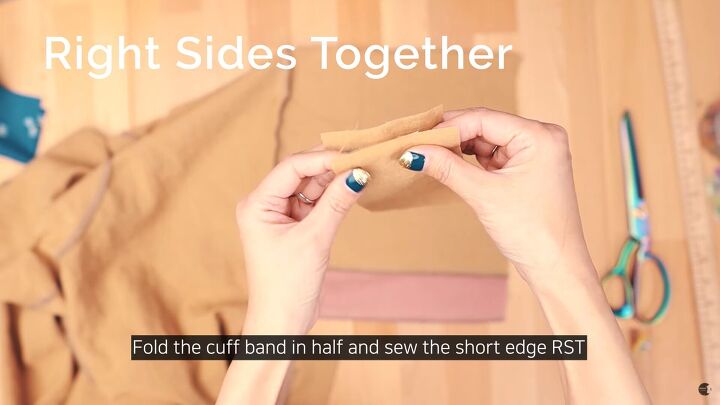
7. Attach the cuffs
Have the smaller rectangles right sides together. Fold the cuff band in half. Sew the short edge with a ½-inch seam allowance.
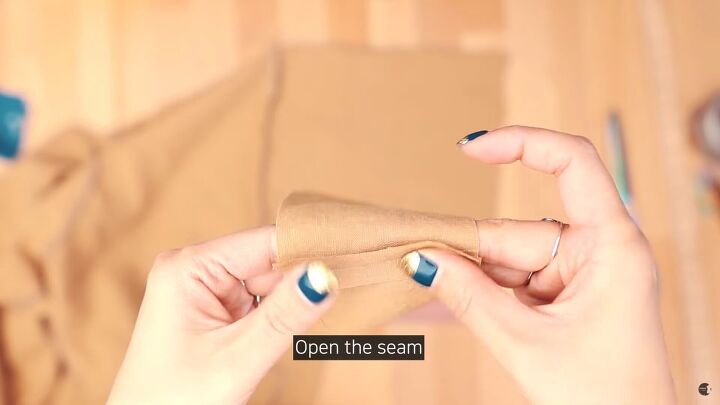
Open the seam allowance and press it with your fingers.
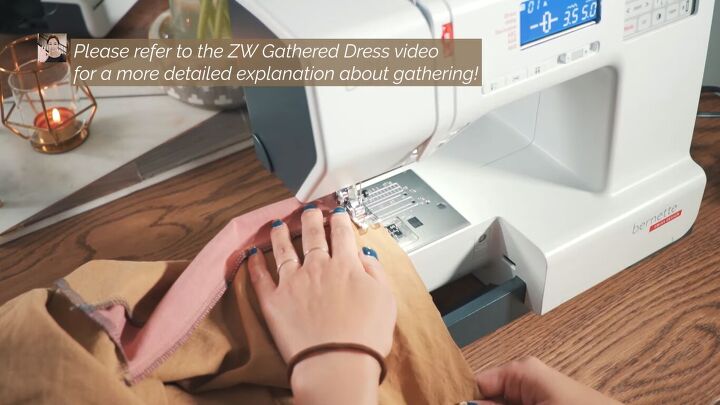
Create gathers by sewing a basting stitch over the ends of the sleeves, then pulling on the gathering stitch to create ruffles.
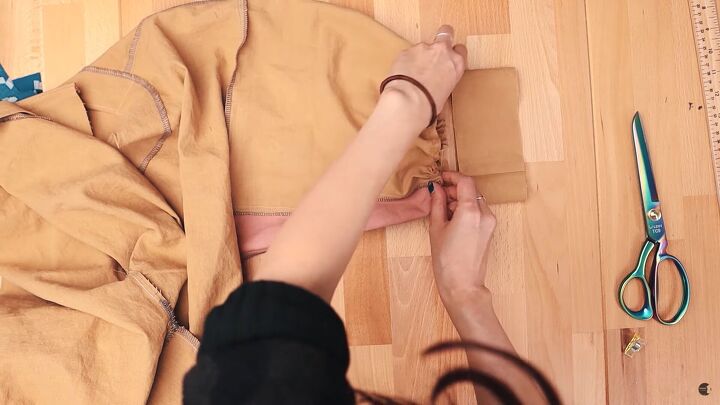
Once the sleeve is gathered, turn the cuff so the right side is facing out.
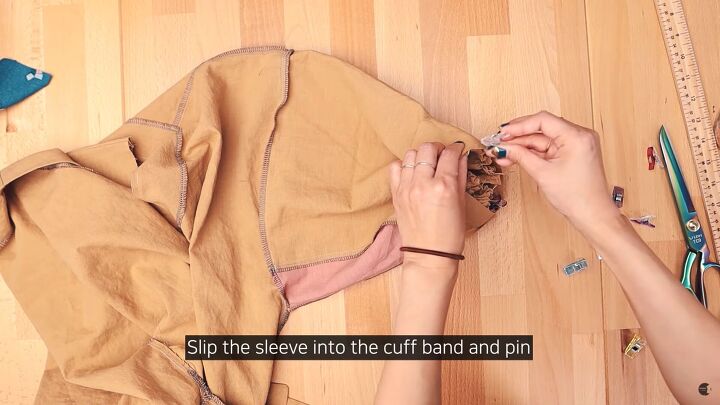
Place the sleeve into the cuff band and pin or clip in place. Sew it together. Once the cuff is sewn, iron the cuff band towards the seam.
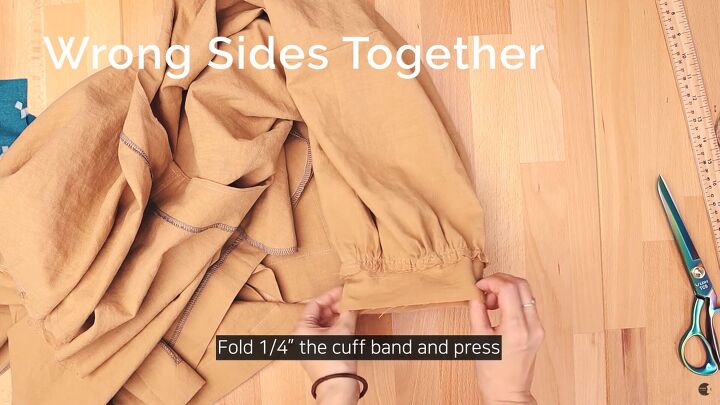
Fold the cuff by ¼ inch and press the wrong sides together.

Fold in half again.
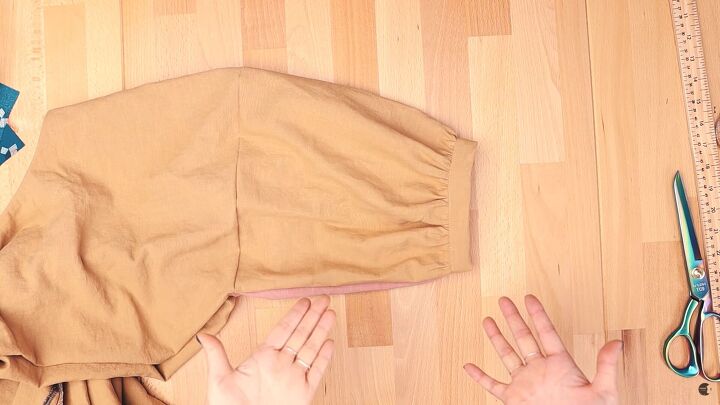
Cover the stitch line slightly and edgestitch or topstitch to finish the cuff.

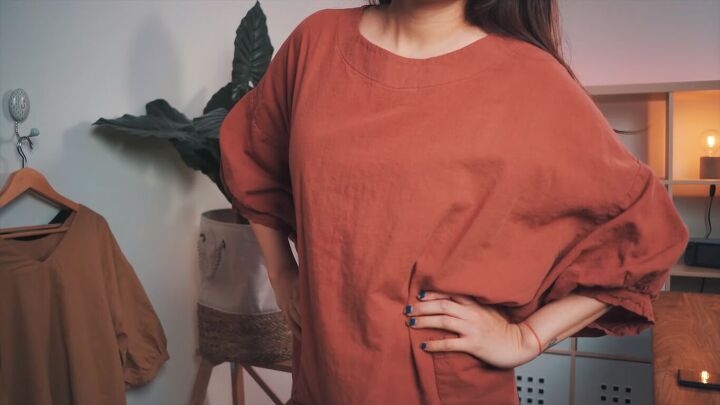
How to make giant puff sleeves tutorial
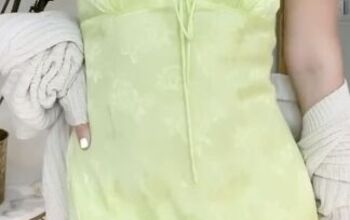
See how simple it is to attach a giant puff sleeve to oversized garments? Here are two dresses I used this modification on; one with a color block and one without.
Dramatic sleeves add so much character to clothes. I hope you love them as much as I do! Now that you’ve seen it, which pieces will you modify? Please let me know in the comments!
The author may collect a small share of sales from the links on this page.


Comments
Join the conversation
Beautifully put together :)