How to DIY a Super Cute Bandana Dress

There are so many DIY things to do with a bandana. Today I'm going to show you one of them: a DIY bandana dress. I think you'll enjoy it so let's get started.
This post was transcribed by a member of the Upstyle Editorial team from the original UpstyleTV episode.
Tools and materials:
- Bandanas
- Ribbon
- Elastic
- Scissors
- Pins
- Fabric chalk
- Sewing machine
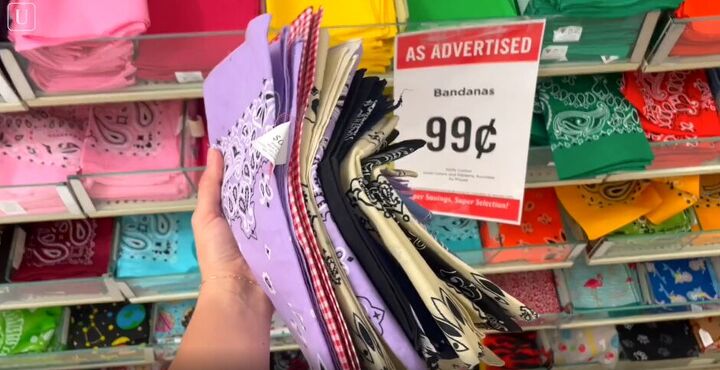
I bought a bunch of colorful bandanas at a sale. Your choice of size and style will determine how many you purchase to make the dress.
1. Make the skirt
My first step is to lay out the bandanas and visualize the pattern I want to create, as well as measure the width and length of my skirt.
I made a long-flared skirt but go with whatever looks good on you.
I decided to cut these bananas down into quarters.
After ironing the bandanas, I folded them in fourths and cut.
Now I had a bunch of little panels to put together to make a front piece and back piece. I began by laying the panels out in a pleasing pattern.
I then pinned them, right sides together, in vertical rows.
Sewed those pieces together to make three vertical panels.
After sewing I pressed my seams flat.
Once sewn, I pinned them together, right sides facing, to make the horizontal rows of my skirt.
Then I sewed them closed.
I ironed the seams flat.
Repeat the steps above to create the second piece to end up with two rectangles.
I want to give my skirt a bit of shape, to do this I folded one of the pieces in half.
I measured how wide I want my waist to be.
I also measured how wide I want the bottom opening to be.
For the flared look, I connected the two measurements using a ruler and chalk, making a line from the skirt opening and tapering it down to the waist.
Cut along the line.
I used this piece of fabric as a template to cut my second piece.
Once I had the two skirt pieces, I pinned them together, right sides facing.
And sewed the seams.
To cinch the waist, I used a half-inch elastic and cut it to the width of my waist.
I folded the elastic in half.
Marked the halfway point.
Then folded it in fourths and made marks at those points.
Next, I lined those marks equidistant around the skirt and pinned the elastic around the waist and it was ready to sew.
To get that nice, cinched look, I used a zig-zag stitch and pulled on the elastic as I sewed.
And here is what it should look like.
2. Make the bodice
Moving on to the bandana dress's bodice, I started by folding a bandana in half.
Ironed it flat.
Then, I measured the length of my bodice piece.
I decided to make mine 9 inches long.
I marked 9 inches across and cut off the excess fabric.
Then, I measured the width.
And cut off the excess.
I repeated the above steps for the back piece using my first bodice piece as a template.
I used these two blue bandanas for my sleeves. I folded and pressed them with an iron and lined them up with my bodice.
I wanted the neckline of my bodice to be 7 inches wide.
So, I measured across the bandana.
Marked out the middle point.
Then, I used the midline to mark 3.5 inches on either side of it, to give me a neckline of 7 inches.
I then pinned the sleeves onto my bodice using those marks as a guide. I also pinned them about 3 1/2 inches down.
Once I pinned the sleeves to the front bodice piece, I needed to do the same with the back piece.
I flipped over my pinned pieces and layered the back bodice over the front.
I then folded the sleeves over the back panel.
Pinned them down.
And sewed.
Our sleeves are nearly done.
I placed the bodice and sleeves right sides together and pinned them along the sleeves.
I attached a sash to the bodice.
I measured the length of ribbon I wanted and cut out 2 pieces.
I sandwiched these in the bodice side seams and pinned them down.
Next, I sewed along the sleeves and sides of the bodice.
3. Attach the bodice to the skirt
I flipped the bodice inside out and tucked the ribbons inside it.
Then, I turned the bodice over.
Placed the skirt inside it with the right sides facing.
And lined up the waistline of the skirt with the bottom of the bodice.
Then, pinned all along that waistline.
And sewed the pieces together.
4. Hem
To hem the bottom of the dress, I folded the raw edges in and ironed across to flatten the seam.
Pinned it.
And sewed it closed.
Completed bandana dress DIY
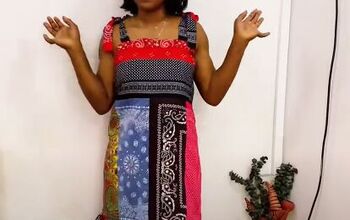
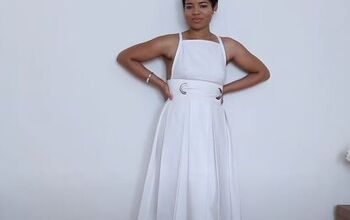
Here is my final dress.
I cannot believe how cute this DIY bandana dress turned out, not to mention the dress is really comfortable.
I hope you go pick up some bananas and try this out. Remember to share what you make. I love seeing other people’s creations!
Enjoyed the project?
Suggested materials:
- Bandanas
- Ribbon
- Elastic
- Scissors
- Pins
- Fabric chalk
- Sewing machine
The author may collect a small share of sales from the links on this page.





Comments
Join the conversation
Love it ! So cute & didn't cost a lot ! You can be sure no-one else will have one exactly the same !! Well done !
beautiful dress. looks cool for the summer. easy cover a swimsuit. like using the bandanas and can make so many color combinations. mix solid cottons with the bandana squares. Thank you.