Thrift It, Flip It: DIY Mini Dress From a $3 Blazer

I found this incredible blazer at my local thrift store for only $2.99! It has such a fun print, but unfortunately is not the best fitting blazer and I knew it was just screaming for a thrift flip! Check out how I created a cute mini dress out of a thrifted blazer below!
Tools and materials:
- Thrifted blazer
- Sewing machine
- Iron
- Scrap fabric
- Interfacing
- Paper
- Parchment paper
- Ruler
- Fabric shears
- Sewing pins
- Safety pins
- Invisible zipper
- Bias tape
- Thread
- Scissors
- Measuring tape
- Fabric marker
- Seam ripper
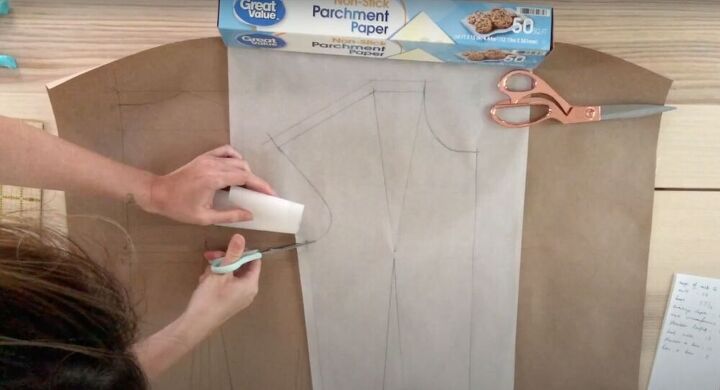
Create your pattern
Following the steps in the video (starting at 1:35) create the pattern for your mini dress. I went ahead and created a mockup before attempting the real thing. This lets me check the fit and lay of the piece, without using up my fabric. (And, it’s a good thing I did, because the darts were way too high and definitely needed adjustment).
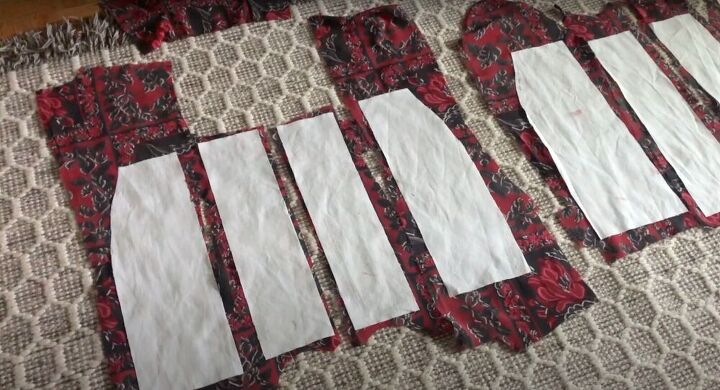
Cut out your fabric
Once you’ve finished your pattern, start preparing your fabric by seam ripping the blazer and separating the fabric from the lining. Once your fabric is separated, lay it flat, take the pattern pieces you cut out (from the mock-up), lay it on your fabric to map it out, and cut out the pieces you need. To do this, I laid all the separate pieces of the blazer on the floor and tried to fit all the pieces in like a puzzle. I then drafted a pattern for my skirt and repeated it, but you can also simply trace out a skirt you already love the fit of!
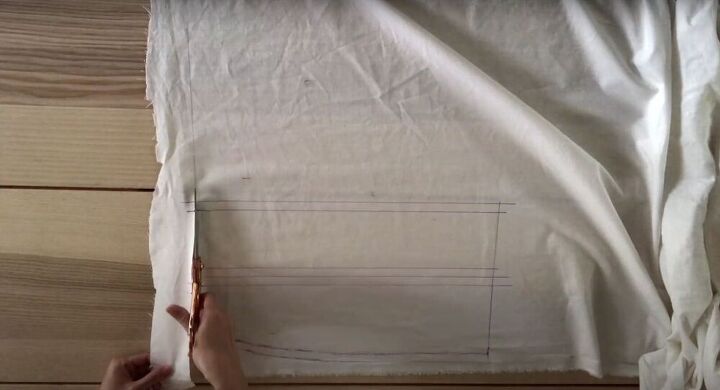
However, if you are hell-bent on drafting a pattern, start by drawing the waistline. Then, take a skirt that you know fits well and place it along the waistline. Trace out a curved side seam. Next, make sure the seams align with the top. Take the pattern panels from the top and trace out the widths, marking them along the waistline. Use a ruler to draw a line from the waist to the hem (by the panel), leaving a half-inch seam allowance. Draw your hemline and add seam allowance to the side seam as well. Draw a second seam allowance beside the first so that the middle panel will have seam allowance on both sides and trace out your second panel, repeating all the seam steps. Next, cut out your pattern pieces, create two mirror pieces until you’re left with four finished panel pattern pieces. For the back of the skirt, repeat the same steps. However, add in a diagonal line after your panels. Make a mark along the hem about half an inch away from the drawn edge of your panel and trace a diagonal line front there towards the top.
Iron on your interfacing
After you’ve cut out all the fabric pieces you need, cut out and iron on the interfacing to the fabric (wrong sides together). The interfacing gives the dress a little more structure so that you don’t have to line your dress later on.
Connect your dress pieces
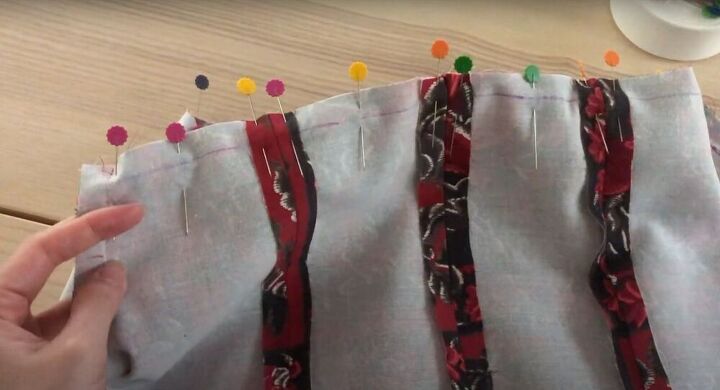
Take your top pieces and sew them all together, repeat with the skirt pieces. Now, turn your completed pieces inside out. Place your top piece inside the bottom piece (right sides together) and align the seams. Pin to secure. Sew the dress together! Remember to insert your invisible zipper on the left side of the dress and to secure the right side seams.
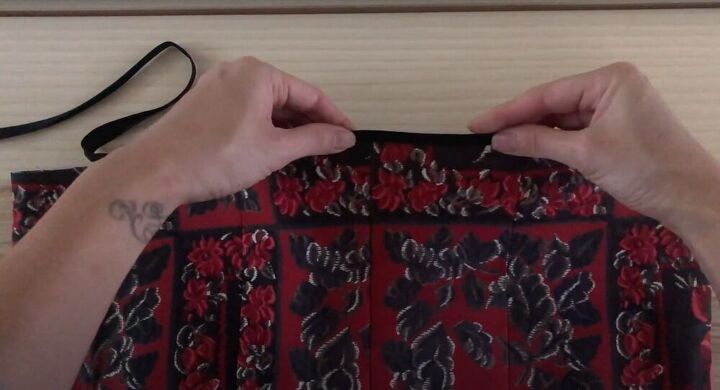
Add your bias tape
For the hem, use bias tape to secure the raw edges. To do this, unfold your bias tape and sandwich your hem in between it. This will secure and hide your raw edges. Sew along the edges to secure. Do this both on your bottom hem as well as on the top exposed edges of your dress. Make your bias tape extra long along the top, because the excess fabric will become the straps.
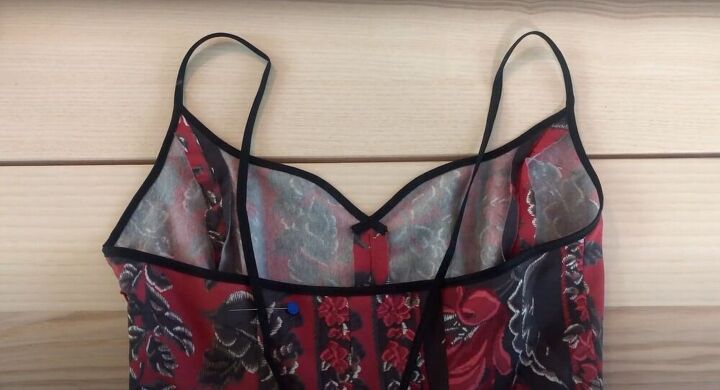
Make your straps
To make the straps, make sure your bias tape is hanging off the edge and long enough for you to adjust. Then, measure out how long you want your straps to be. Saw them down on the back (the points where they meet the bias tape hem) and you’re all done!

This upcycled DIY mini dress is a complete success if you ask. I love how it turned out and can’t wait to wear it. Remember, just because you don’t like something one way, doesn’t mean it doesn’t have the potential to be turned into something amazing!
The author may collect a small share of sales from the links on this page.


Comments
Join the conversation
So creative! Love it!!💕. Sure wish I could sew😌
That is amazing !!! I love it and I love the style of the front of it ...GREAT JOB !!!