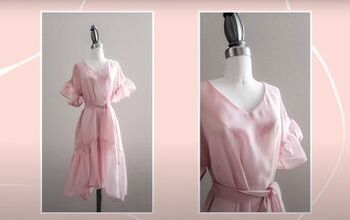
How to Make a Simple & Versatile DIY Slip Dress From Scratch

In this tutorial, I’m going to show you how to make a DIY slip dress with side slits. Sewing a slip dress is not a complicated project, and even beginners can achieve this.
Besides that, you can wear this gorgeous dress during all seasons, with a bit of layering where needed. Let’s get the show on the road!
Tools and materials:
- 1.8m linen fabric (2 yards)
- Sewing machine
- Pins
- Matching thread
- Paper
- Ruler
- Chalk
- Pencil or marker
- Measuring tape
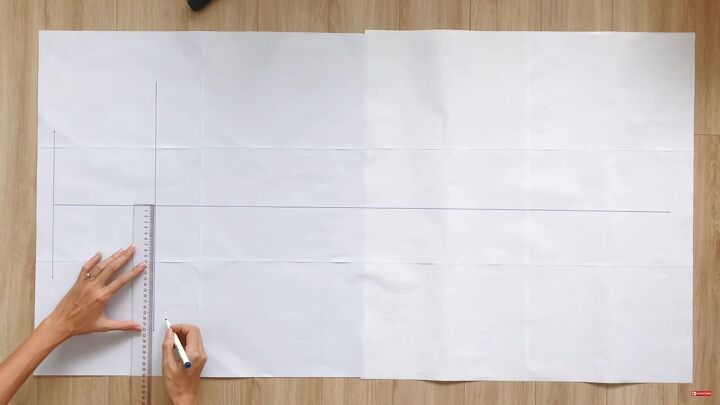
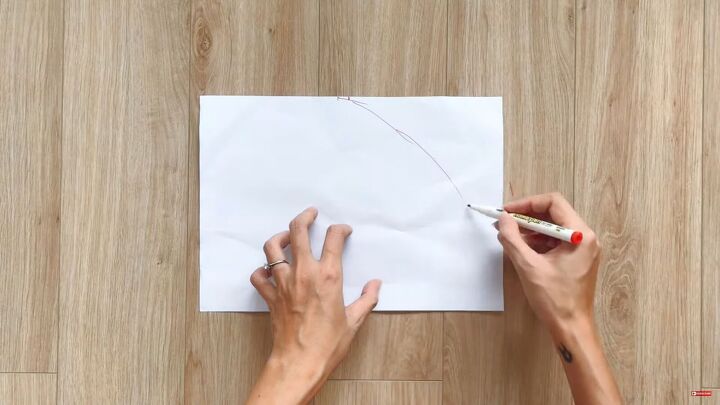
1. Make the front DIY slip dress pattern
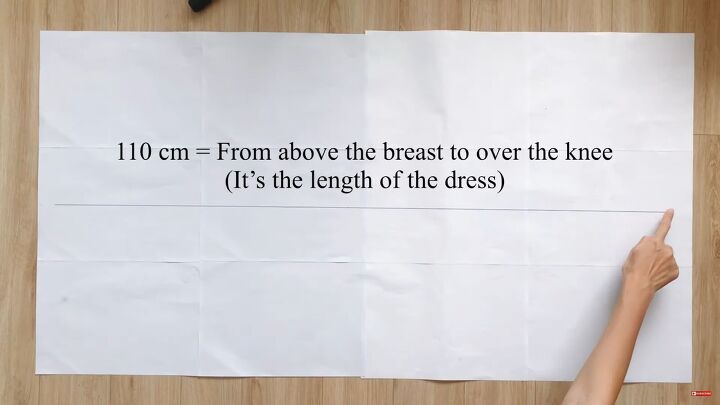
Measure from just above your bust to over your knee for the length of the dress. Mine was 110cm (43.30”).
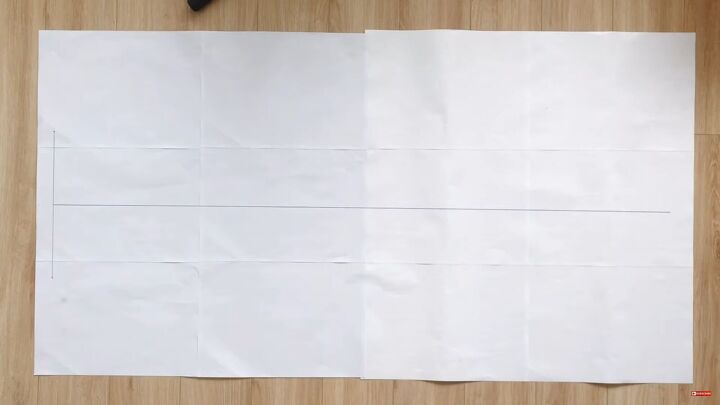

At one end of the horizontal line, draw a 13cm (5.11”) vertical line on either side. This is the width of your chest, in between your shoulders + 2cm (0.78”). My measurement was 26cm (10.23”).
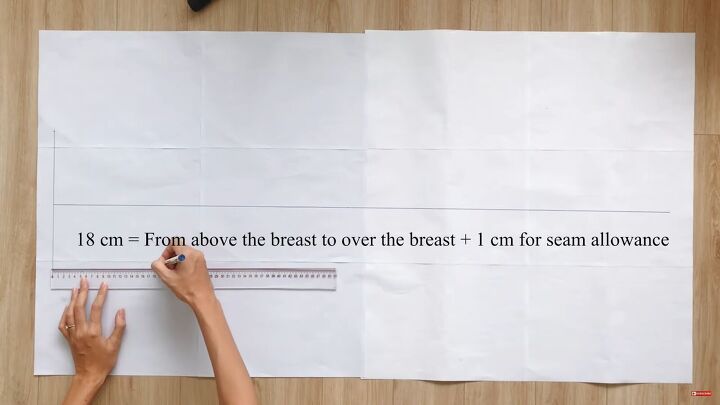

From one point of the vertical line, measure 18cm (17.08”) and mark accordingly. This is the area from above to over your bust. Also, add 1cm (0.39”) for seam allowance.
Then, draw a 22cm (8.66”) line on either side (from the cutting point of the 18cm [7.08”] lines). The measurement should be half of your bust size + 3cm (1.18”) for seam allowance.

Connect the first straight line to the second, as shown.
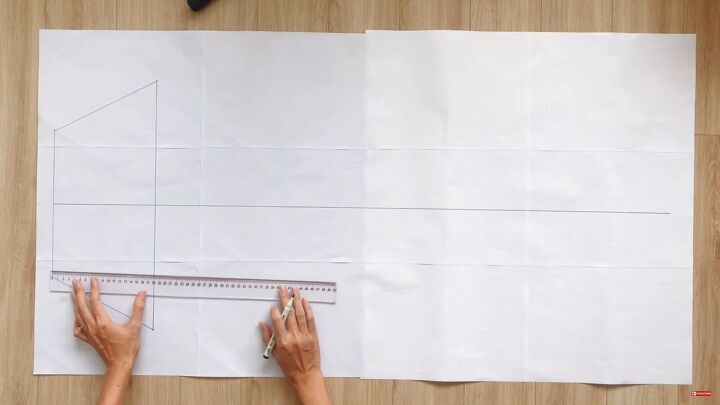

Next, measure from just above your bust to the middle of your backside. Mine measured 50cm (19.68"), and I drew this from the first straight line.
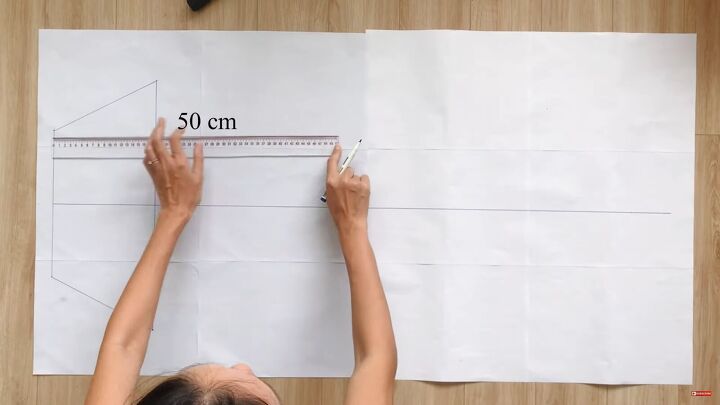
Draw these lines on either side.
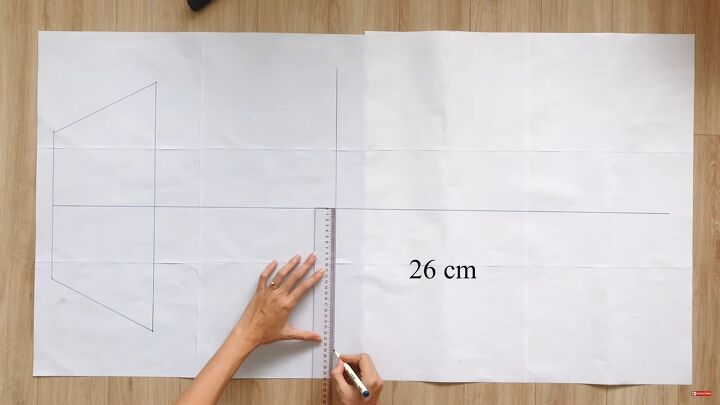

From that cutting point, draw another straight line measuring half of your hip size + 6cm (2.36”) from that cutting point. Mine was 52cm (20.47”) (26cm on each side).
Tip: If you want a loose fit, you can make this part bigger.
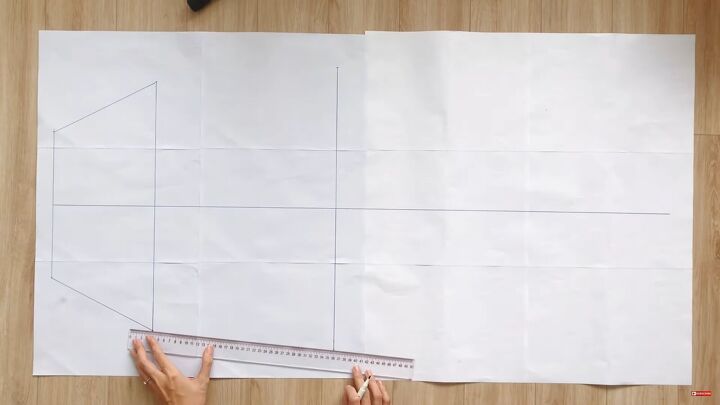
Then, connect the marks from the second straight line to the third line.
Draw a straight line at the end of the horizontal line. This measurement is based on half of your hip size + 20cm (7.87”). I measured 33cm (12.99”) from the cutting point, so I had 66cm (25.96”) total.
Then, connect the points from the third line to the bottom.
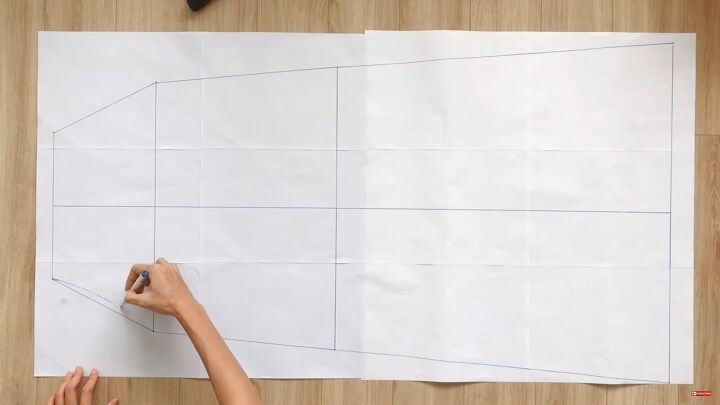
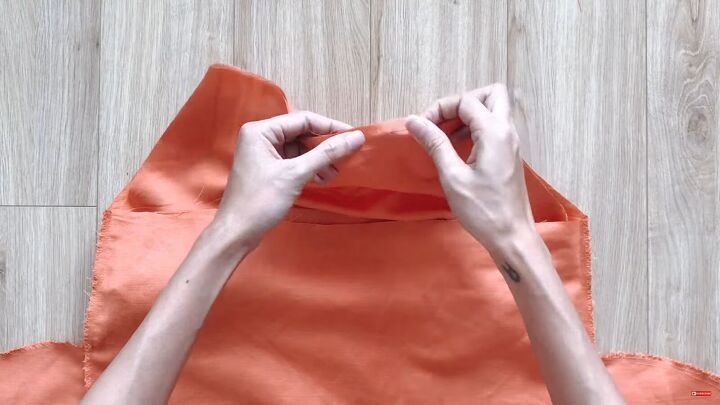
Curve the top sidelines as this will be for the armholes.
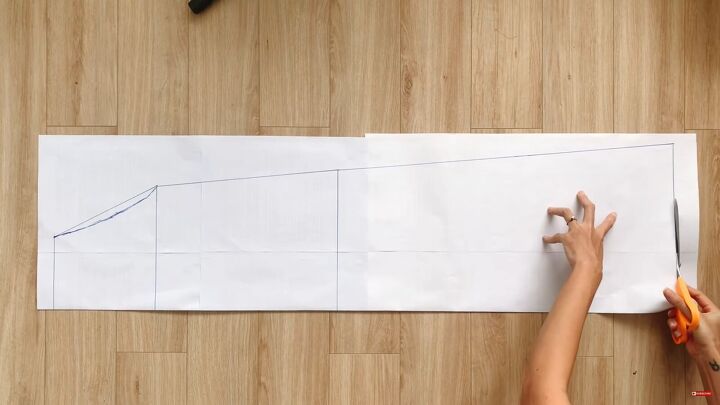
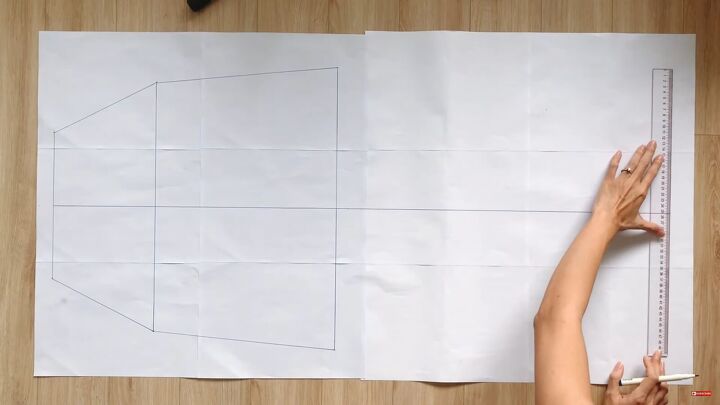
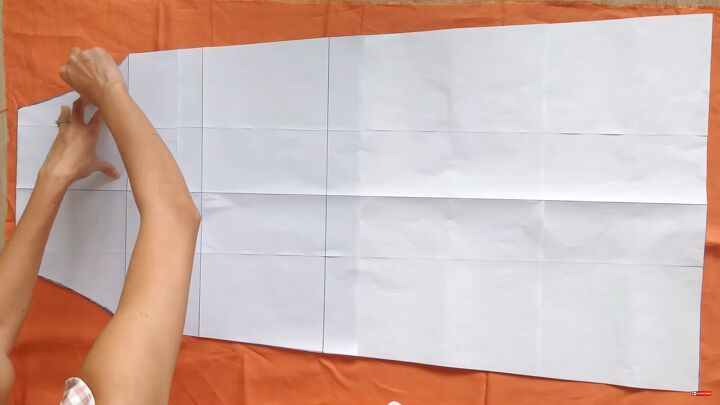
2. Cut the pattern
Fold the pattern in the middle, following the main horizontal line, and cut around.
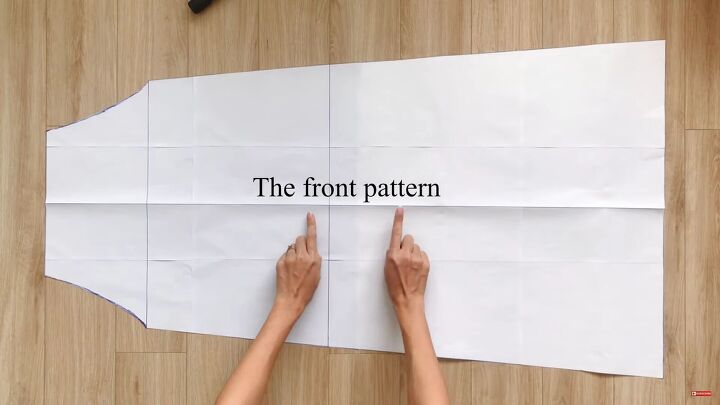
That’s how to make a DIY slip dress pattern for the front. We’re done!
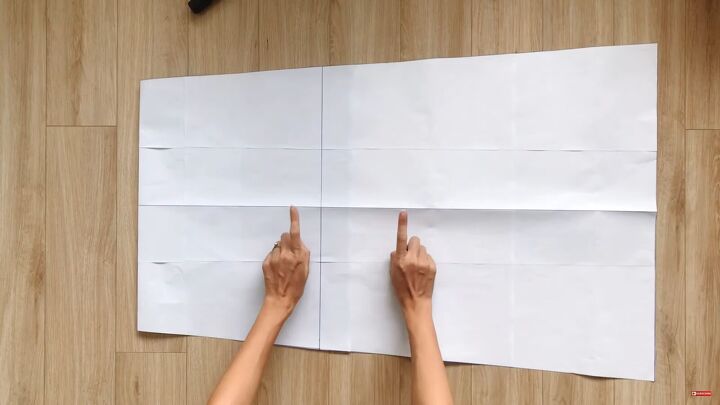
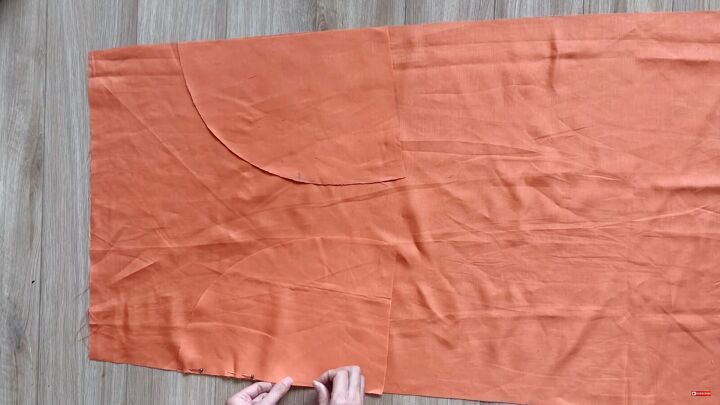
3. Make the back pattern
For the back pattern, simply fold in the second straight line.
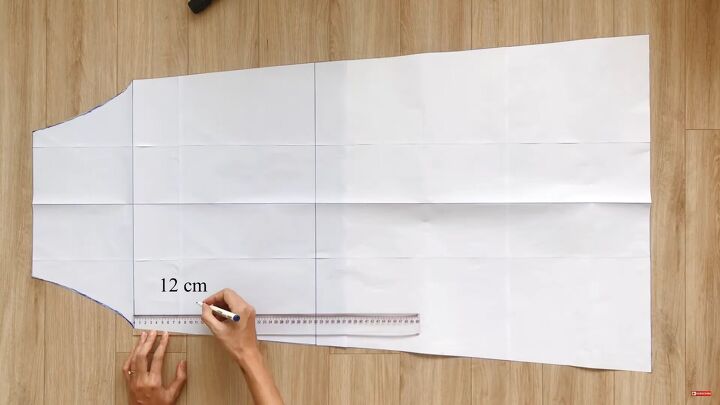

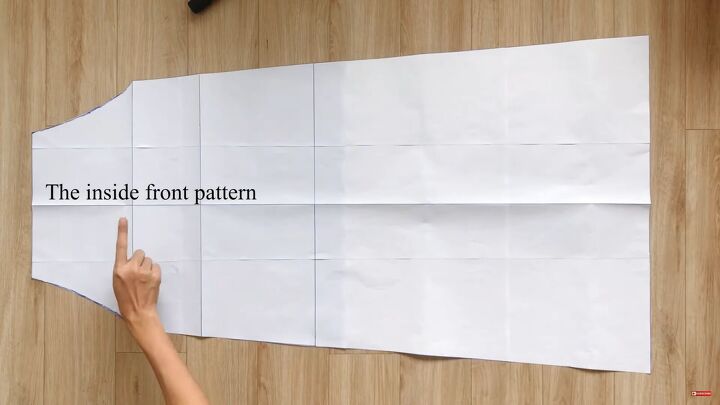
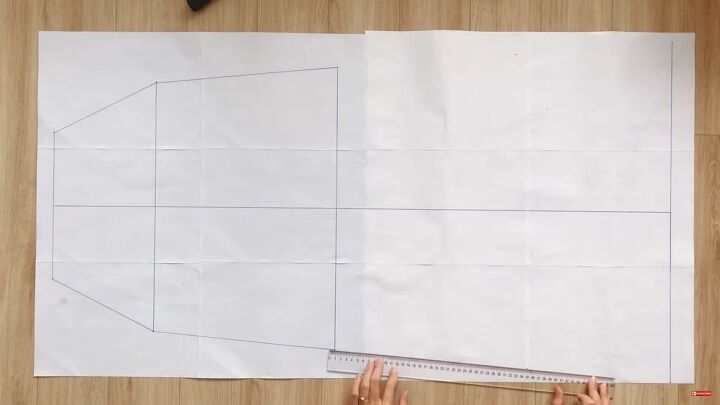
4. Make the facing pattern
From the second straight line, measure 12cm (4.72") on each side and draw a line across. This part will be for the inside front pattern (the facing).
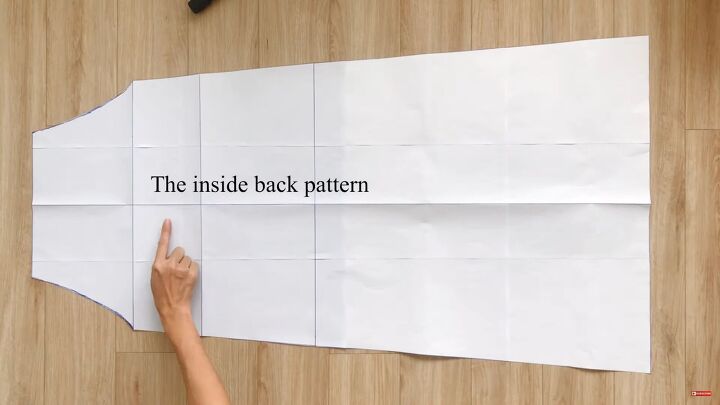
The part between the second and third lines will be the inside pattern for the back piece (back facing).
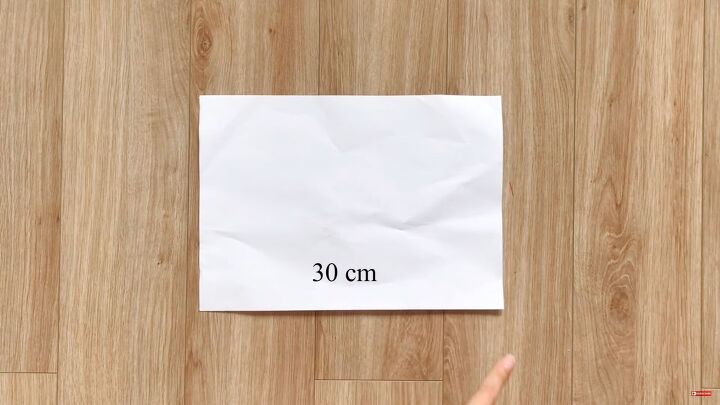
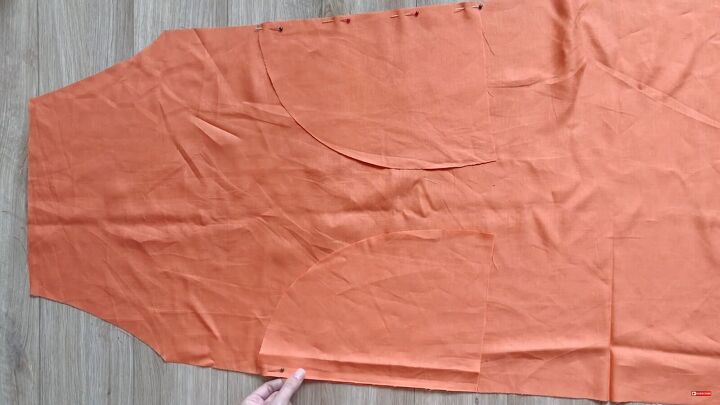
5. Make the pockets
Cut a rectangle measuring 30cm x 20cm (11.81x7.87”).
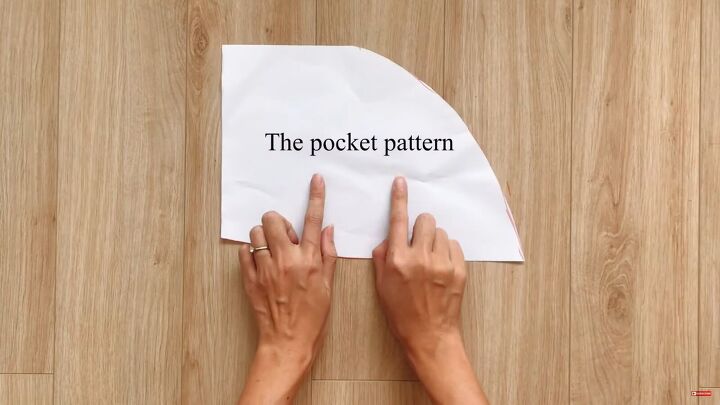
Mark the middle and draw a curve from the middle downward.
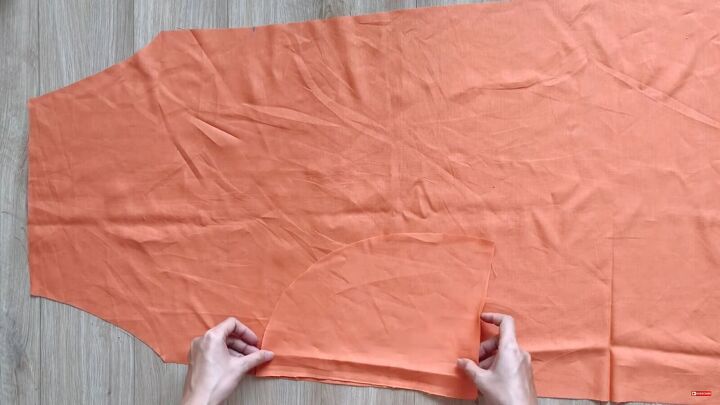
6. Cut the fabric
Cut out the patterns in your linen fabric. Remember, you’ll need four pieces for the pockets.
7. Sew the pockets
In order to know where to place the pockets, simply mark where the second part of your front pattern is located; the pockets should be placed there.
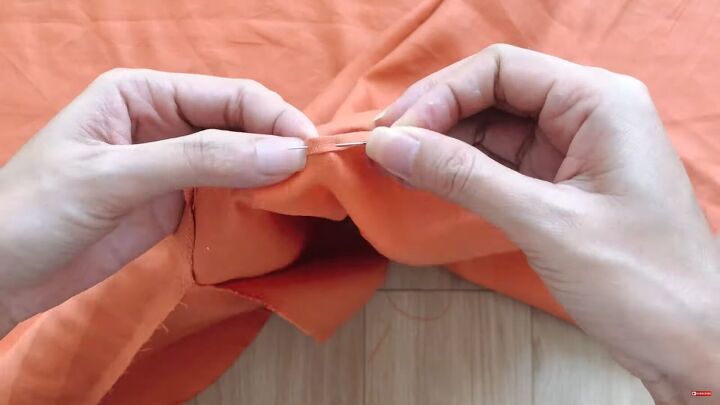
Pin the pockets, right sides facing, and sew.
Do the same for the back part of the dress.
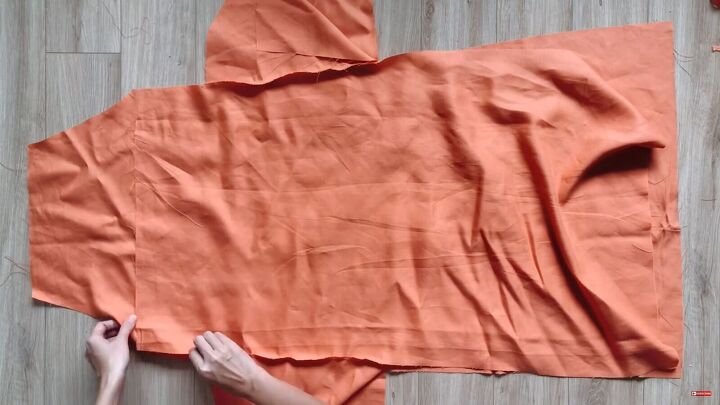
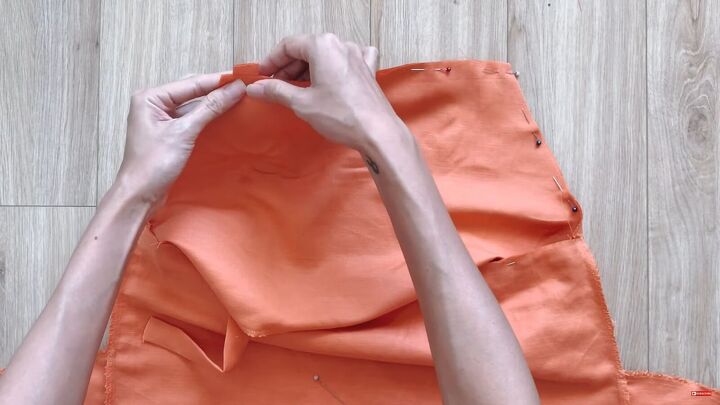
Lay the back piece onto the front, right sides facing. Then, pin the sides and pockets.
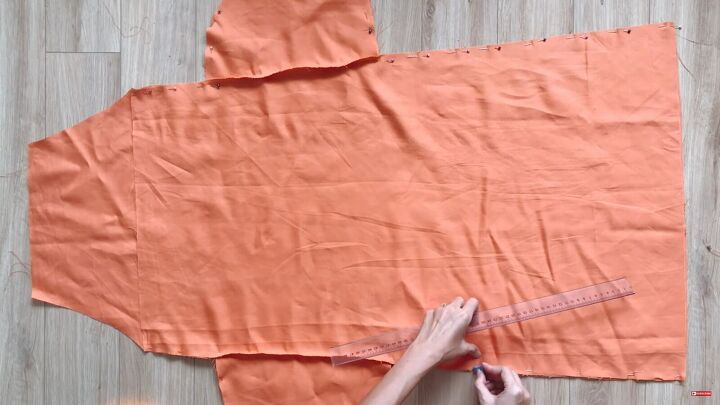
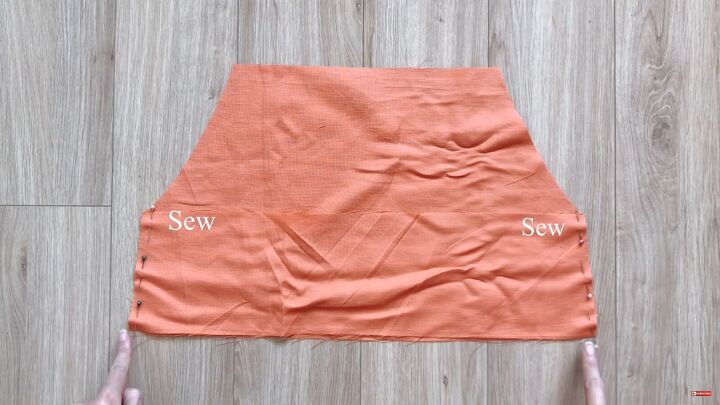
However, I want to have slits on my dress, so mark around 35cm (13.78") from the end of the dress and pin up until that point.
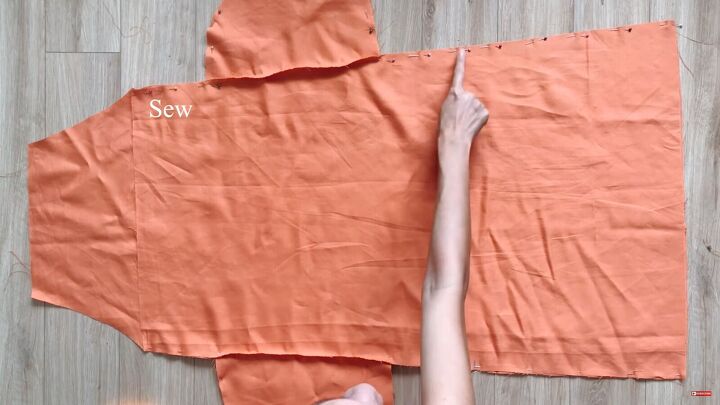
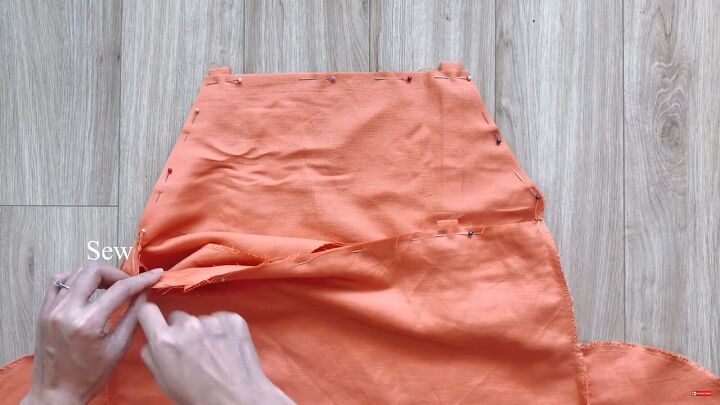
Now, sew the pinned sides. Be sure to pivot by the pockets.
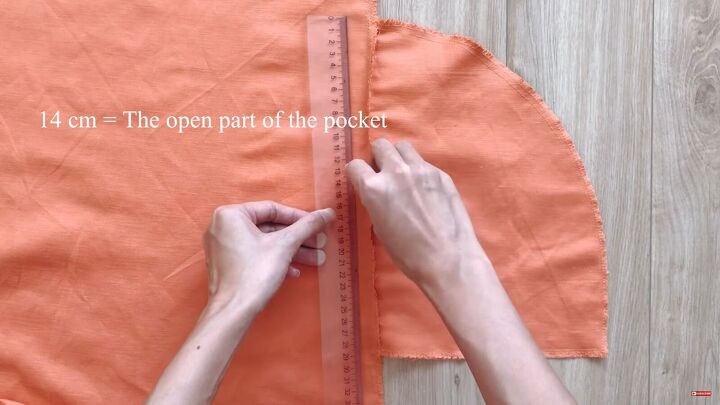
Mark 14cm (5.51”) from the top of the pocket and sew downward. This is the open area of the pocket.
8. Hem
Hem the slit areas by folding the fabric twice. Also, do the same for the bottom of the DIY slip dress.
9. Sew the inside parts
Connect the inside part of the front and back, on the sides.
Put this piece inside the dress and pin in place, but don't sew yet.
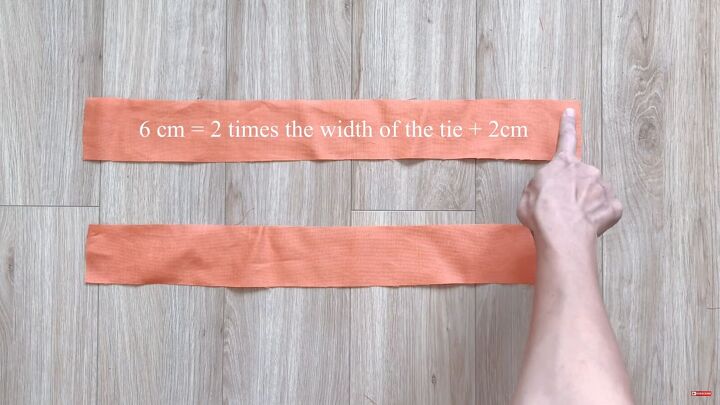
10. Make the straps
Cut two rectangles measuring 40cm (15.74”) long and 6cm (2.36”) wide. I got this measurement by measuring my shoulders (add 2cm [0.78”] seam allowance).
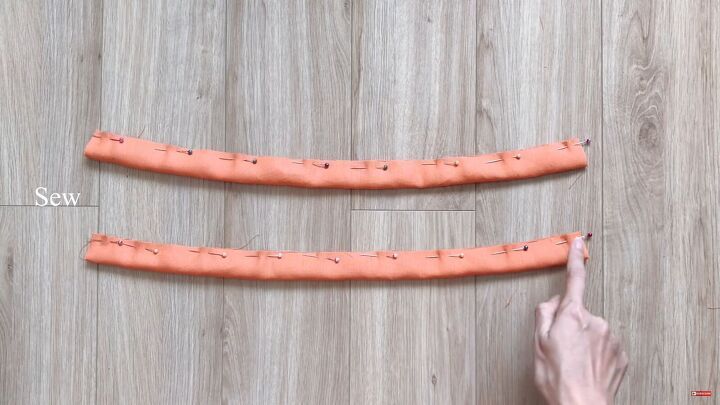
Fold each strip in half and sew along the edge. Sew and turn right sides out. Then give it a good press.
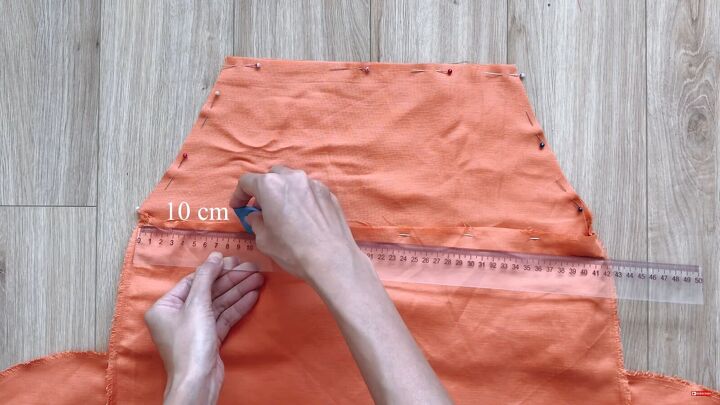
Place each strap 10cm (3.93”) from the edge of the back part.
Place the strap inside, between the dress and the facing.
Sew all layers together.
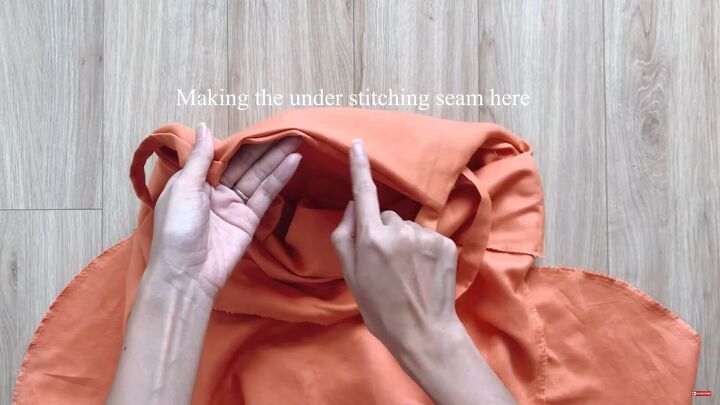
Then understitch around the facing’s edge.
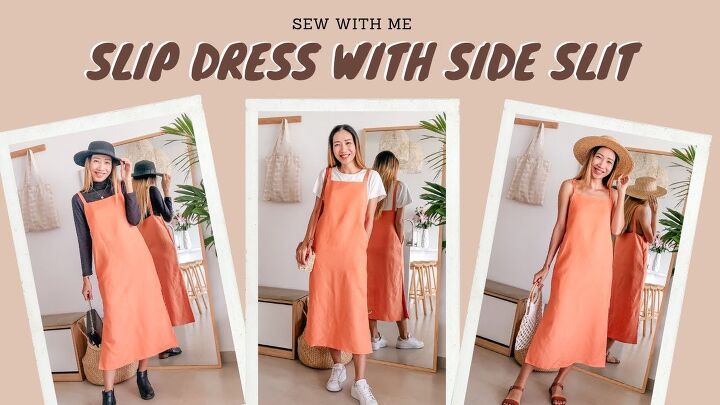
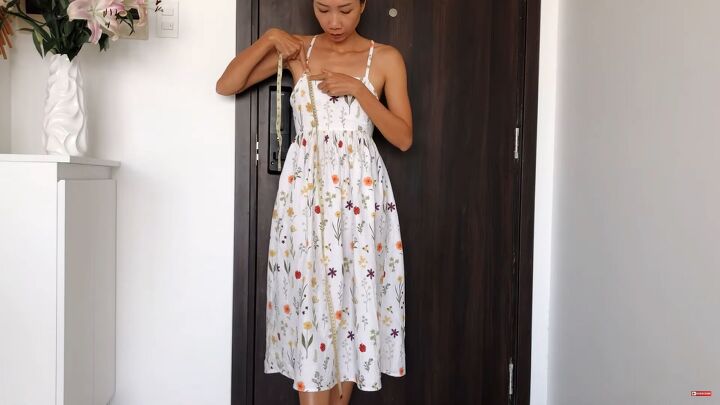
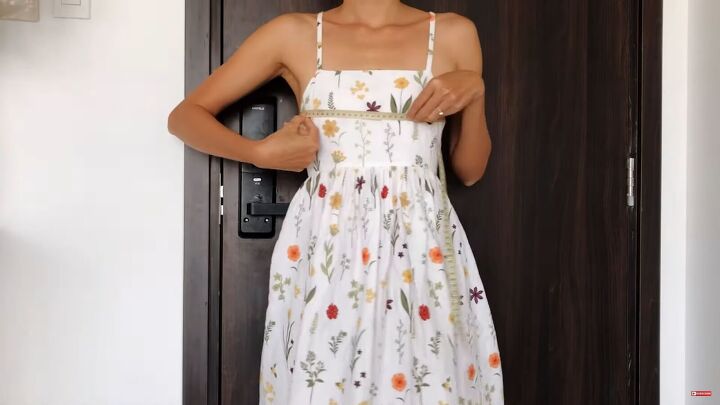
DIY slip dress tutorial
Here’s the final result! Now know how to make a simple slip dress that fits beautifully according to your measurements. I love how versatile this DIY slip dress is; any sewing enthusiast can give it a go.
Let me know your thoughts in the comments below.
The author may collect a small share of sales from the links on this page.


Comments
Join the conversation
You are a wonderful teacher! I am half way through making my pattern and you have made it so easy! I love the pattern of your dress in your tutorial! I can’t wait to make a bunch of slip dresses for the summer! I can’t wait to see what else you are willing to teach us! Thank you so much!