Make This Elegant DIY Summer Dress With a Front Split

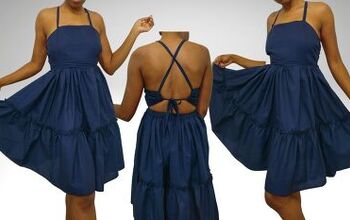
Summer is the perfect time to wear flowy, feminine, and unique dresses. I will show you how to sew a DIY summer dress with this perfect DIY summer dress guide. It has a split in the middle and will fit you just great. Wait till you see the results of this perfect DIY summer dress. Let’s get started!
Tools and materials:
- Non-stretch, lightweight fabric
- Sewing machine
- Scissors
- Thread
- Double folded bias tape
- O-ring and slider
Make the DIY summer dress pattern
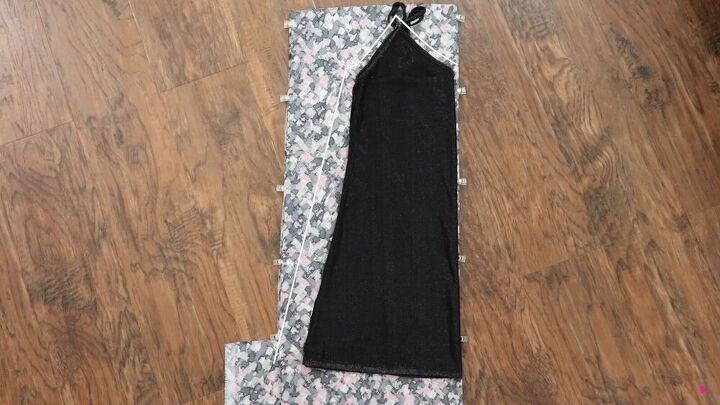
Using a flowy dress that you already own, trace out the bodice on the fold, as shown. Draw an A-line shape at the bottom.
Add ½ an inch seam allowance.
The back piece should have the same shape, but remove the top part by simple cutting through the back bodice.
Assemble the easy DIY summer dress
Lay your front and back pieces on top of each other and right sides facing. Then, sew along the sides.
Add the bias tape
To give this gorgeous DIY summer dress a clean and professional look, use a double folded bias tape for the neckline.
Line up the shortest side of the bias tape against the raw edge, and sew along the folded line.
Pivot at the corner and smooth out the tape to continue to sew.
TIP-
If your fabric frays, stabilize it with a zigzag stitch or serge the raw ends.
Now, fold the tape up, and over twice to the wrong side of the dress.
Then, sew right inside the first folded line.
With right sides together, fold the DIY summer dress in half and sew a vertical line right at the V-shape, as shown.
Repeat the same for the rest of the back neckline and leave about 15 inches of extra bias tape- this will be your shoulder straps!
Attach the bias tape with a slight curve so that the shoulder strap is perpendicular to the floor.
TIP-
Pivot at the curves where necessary
When sewing the bias tape closed, start from one shoulder strap and carry on throughout the excess strap and to the end of the other shoulder strap.
If your straps are long, feel free to trim off the excess. Don’t discard the excess, keep it for the next step.
Loop through an O-ring to each excess strap and attach it to the back of the dress.
Thread the shoulder strap through the slider, over the O-ring, and back through the slider.
TIP-
Watch this whole process from 2:50 minutes on my DIY summer dress tutorial video.
It will almost look like a bow. Now, sew the bottom part together, as pictured above.
Make the split
Decide on the position and height of the split; it should sit on one leg.
Then, cut out a facing that is 4 inches wide and 2 inches longer than the split.
Next, place the facing on top of the dress, right sides together. Then, sew a very long and narrow isosceles triangle right over the split.
Starting from the bottom, stabilize the fabric with a zigzag stitch. Then, pivot sharply at the tip and sew back down to the bottom.
Repeat this with a straight stitch right outside the zigzag stitch. Make sure the tip is a sharp point.
Snip all the way to the tip ( but not through it).
Fold everything over to the wrong side and press the folds in place.
Next, stabilize the top and sides of the facing with a zigzag stitch or serger.
Then, fold the facing under and topstitch in place.
Finish the hemline
Finish the hemline in the same manner; first by stabilizing the raw edge with a zigzag stitch or serger, and then fold over twice and stitch the fold in place. I’m using a ¼ inch seam for the hemline.
There you have it! The perfect DIY summer dress. I love the front split and I really am happy with how the bias tape turned out. It’s so simple and easy to make a DIY summer dress. Now that you know how, there’s no excuses- make your very own and be sure to flaunt it! Thanks for tuning in and I hope you enjoyed this basic DIY summer dress guide.
Enjoyed the project?
Suggested materials:
- Non-stretch, lightweight fabric
- Sewing machine
- Scissors
- Thread
- Double folded bias tape
- O-ring and slider
The author may collect a small share of sales from the links on this page.






Comments
Join the conversation