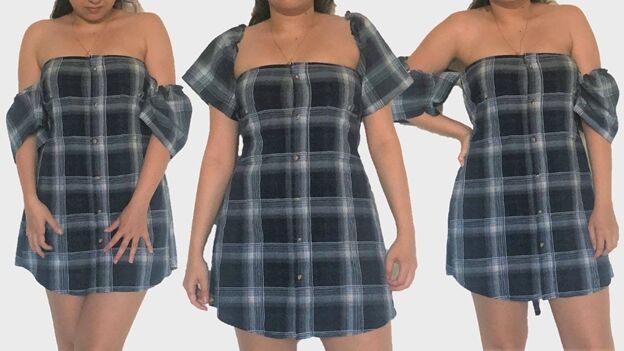
Off-shoulder Summer Dress Tutorial

If you’re looking for something to do with old men’s shirts, try this tutorial. You’ll turn that old shirt into a light and stylish summer dress that can be worn on or off the shoulders!
Tools and materials:
- Man’s button-down shirt
- Thread
- Pins
- Scissors
- Chalk
- Elastic
- Velcro
- Iron
- Sewing machine

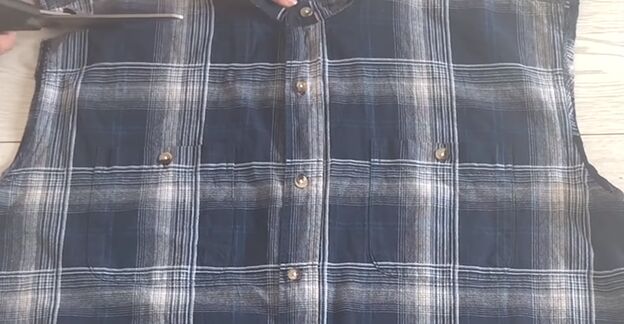
Deconstruct the shirt
Lay the shirt flat on your worktable. Cut off the sleeves at the seam and reserve them for later. Cut off the shirt collar by cutting a horizontal line straight across the shirt just below the collar.
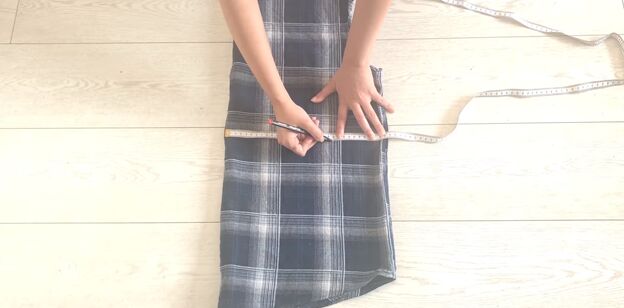
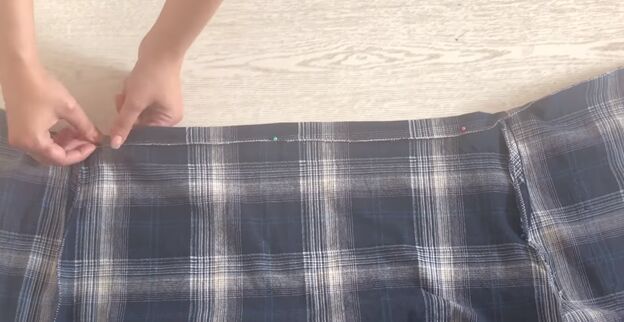
Measure the fit
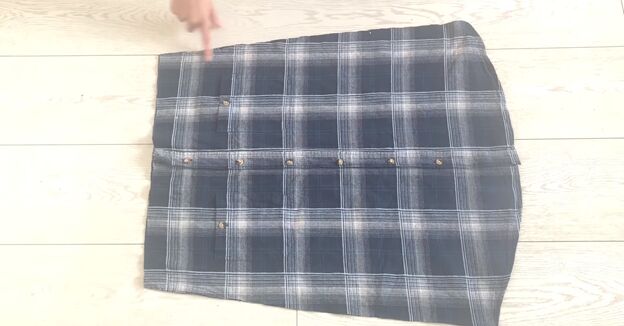
Fold the shirt in half lengthwise with the outside of the shirt facing in. Measure the circumference of your hips and divide that measurement by 4. Mark that measurement plus a seam allowance on the shirt at hip length, measuring in from the folded side. Take and mark the measurement of your waist and bust the same way. Use chalk to connect the marks with a line from the top of the shirt to the bottom. Cut off the excess fabric along the seam allowance line.
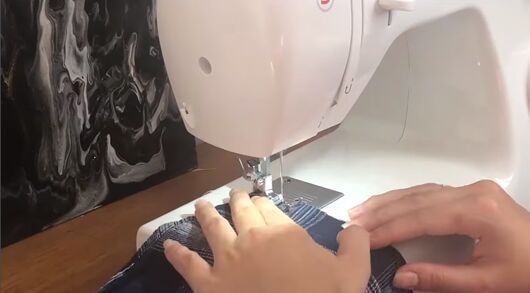
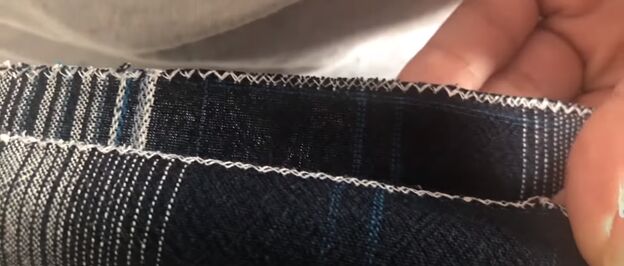
Sew the seams and edge
Sew the new side seams of the dress, with the outside facing in. Sew a zig-zag stitch along the top of the dress so it won’t fray.
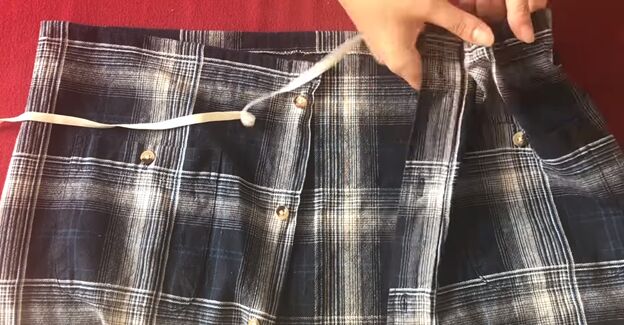
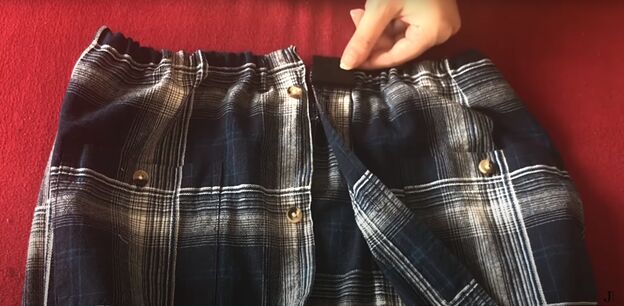
Add elastic and Velcro closure
Turn and pin the top of the dress down as much as needed to hold the elastic and pin in place. Sew the casing along the bottom edge. Insert the elastic into the casing and sew down both ends to hold it in place.
Sew a small piece of Velcro to each top front corner for extra closure of the dress.
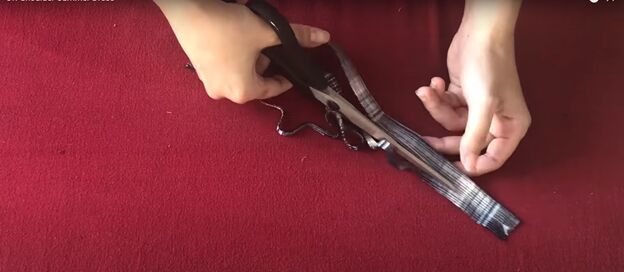
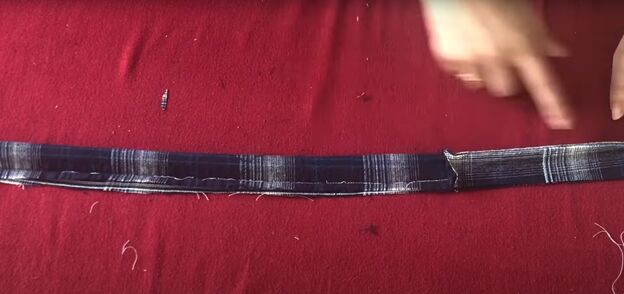
Add a belt
From your excess shirt fabric, cut a very thin piece of fabric for belt loops. Fold the fabric in half lengthwise, outside facing in, and sew as close to the open edge as possible. Turn it right side out and iron it flat. Now cut the strips into two pieces the right size for belt loops and sew the belt loops to the side seams of the dress.
Now cut two or three thin strips of fabric to make the length of belt you would like. Make the width of the strips double what you want the width of your belt to be. Sew the strips together end-to-end if you needed more than one for your belt length.
For the belt, fold the strips in half lengthwise, outside facing in, and sew along the open edge. Turn the belt right-side out.
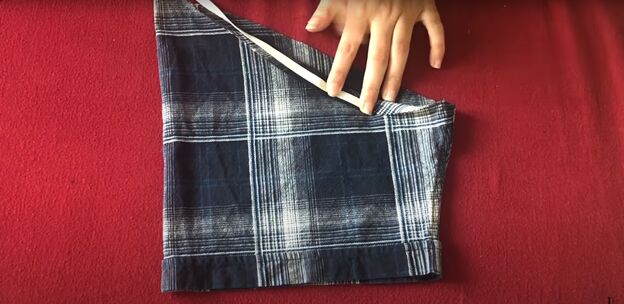
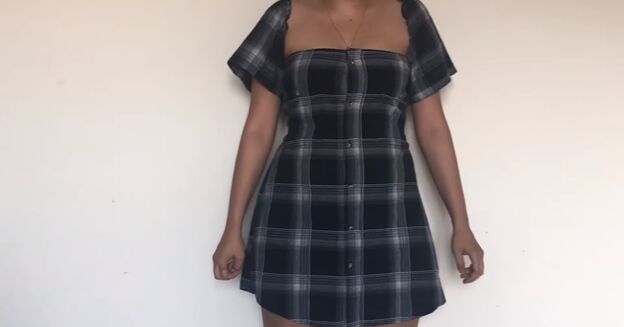
Make sleeves
Sew a simple casing on the bottom of each sleeve and insert elastic into each casing as you did with the neckline. Sew the sleeves in place at the top of the dress. You can see the placement of the sleeves on the dress in the image above.
The dress is done, and this style helps you show off an hourglass shape without having to make any darts! If you liked this tutorial, leave a comment below the video, and subscribe to see more.
The author may collect a small share of sales from the links on this page.


Comments
Join the conversation
Wow! Nicely done! I like the velcro idea to keep the top together. I'd like to suggest that you top stitch the button placket so there are no pulling or gaps. You probably want to do it twice, following the original construction and adding a second, the same distance from the other edge. This will give it a little more tailored and complete look. Keep styling; you're great at it!
Of allll the men's shirts ideas, yours is the cutest and absolute best! Ans easiest too,, lol.. Congratulations!!