4 Super Cute Hairstyles for Special Occasions

Today, I'm going to show you four simple but beautiful transitional hairstyles that work for any special occasion.
We’ll start off with a simple hairstyle, and from there, I’ll show you three other looks you can create with it. Let’s get started.
Tools and materials:
- Curler
- Heat protector spray
- Hairspray
- Bobby pins
- Comb
- Clear elastic
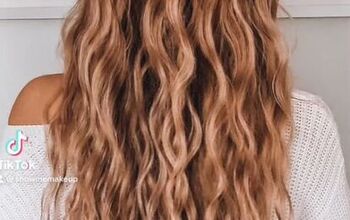
1. Gentle waves
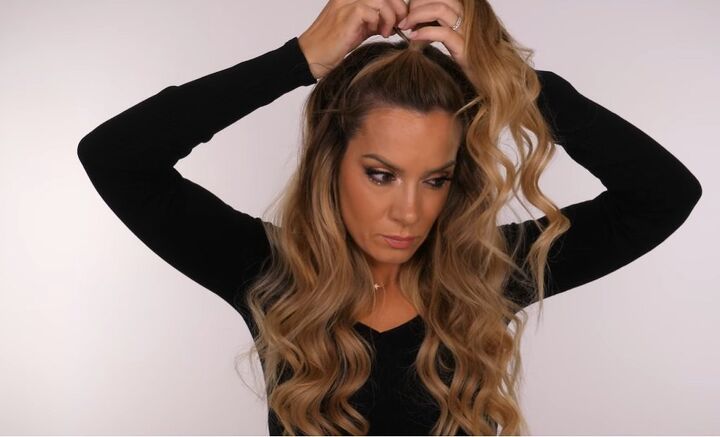
1. Curl hair
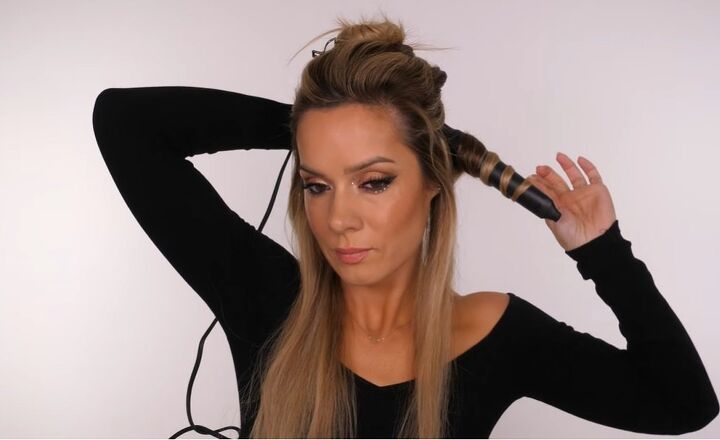
Start by curling your hair section by section to create a beachy-looking natural wave.
I'm using the wrap-and-twist technique, so as you wrap it around, you twist the hair at the base and wrap it back over.
Then twist again, wrap and twist. This gives you a bit more of a spiral curl that tends to hold a lot better.
Wrap the back sections toward my face and the front sections away from your face. So try to make sure that with each section, you are alternating the curl.
If you want more of a Hollywood wave finish, you curl all the curls in the same direction, and then when you brush them out, you get more of a uniform finish.
Be sure to use a heat protector spray to protect your hair!
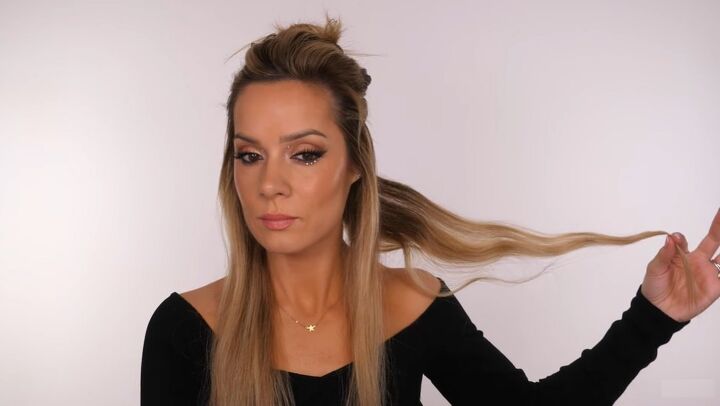
For this style, I always leave an inch out of the curler. Then, when I remove the hair, I like to hold it at a distance while it cools, and then that will stretch that curl out, so it's a lot softer.
If you want a tighter curl, when you remove your hair, just curl it back up and leave it in your hand for a couple of seconds so that the heat really penetrates, and as it leaves, it stays in that curled shape.
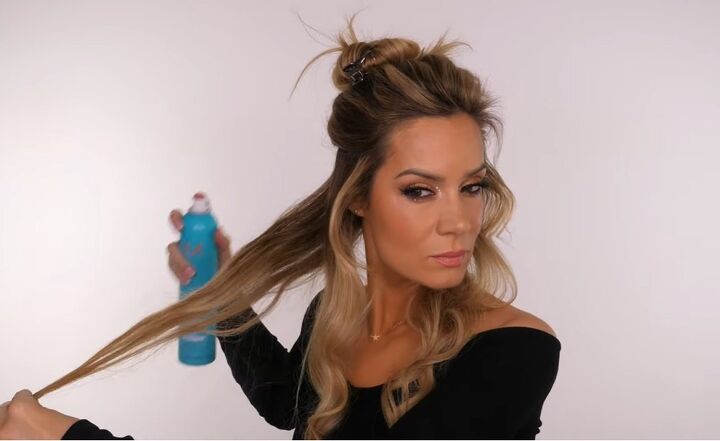
2. Spray hair
Next, go in with some hairspray. This will give your hair some grip that will help with the updo that we’re going to create.
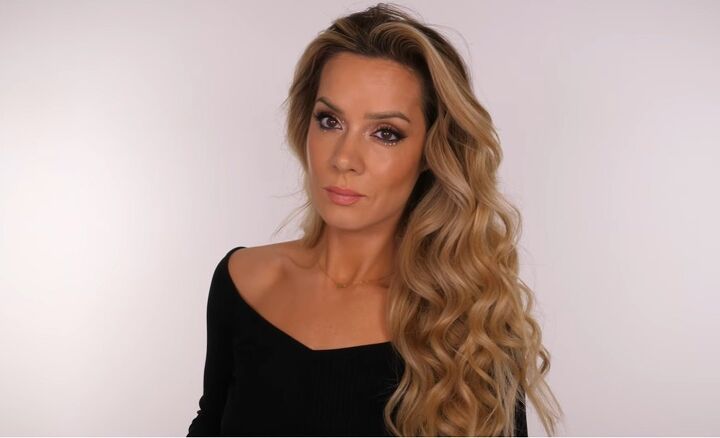
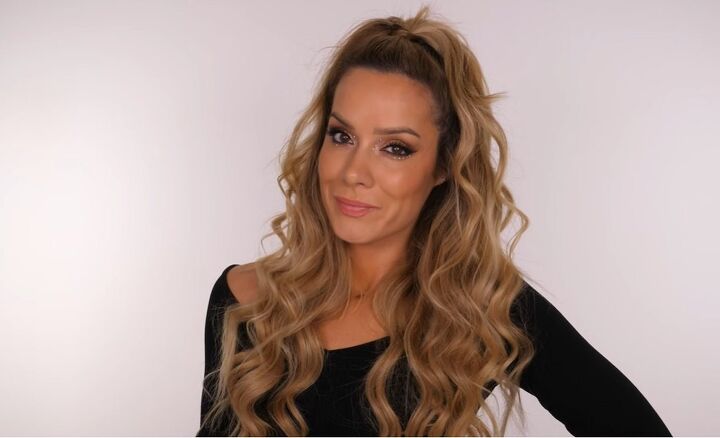
This is our first look complete. It's just using the curling wand itself. If you want nice soft waves for a special occasion, then this is how they come out.
I really love it because it's kind of beachy, it has volume, and it's great if you want something relaxed and effortless.
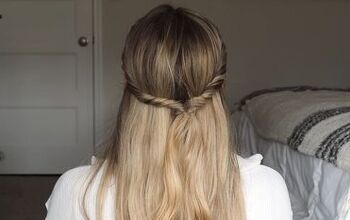
2. Half-up half-down
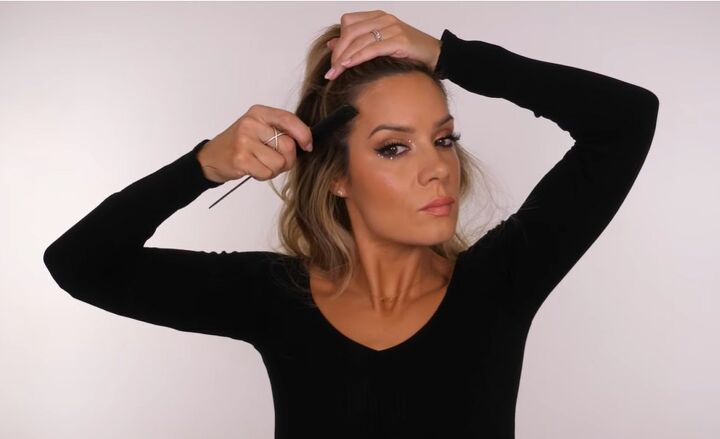
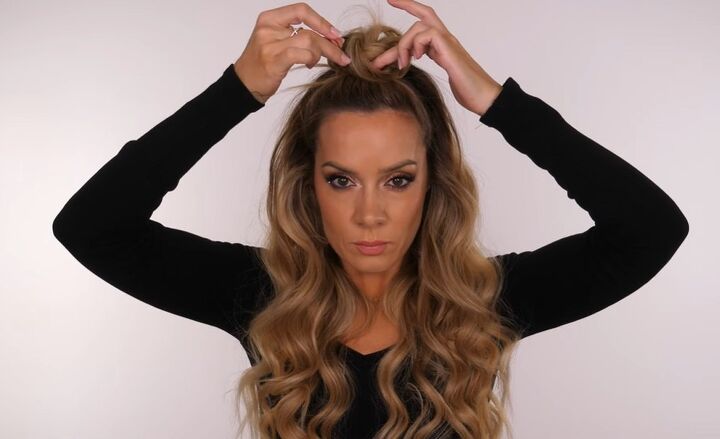
1. Create a parting
Use your fingers to create a quick and simple zigzag part. That way, when you turn to the side, the parting is less obvious.
2. Tie into ponytail
Secure that with a tiny clear elastic.

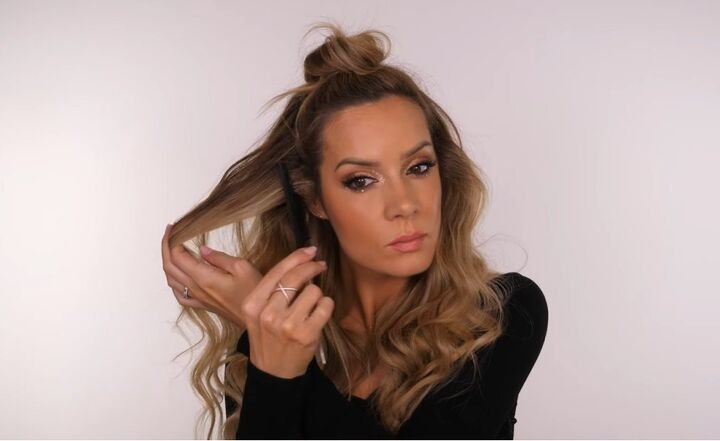
3. Wrap hair around
Take a small section of hair from the ponytail part and wrap that around the front to hide the elastic.
You only want to do this a couple of times. Otherwise, it can be a bit bulky. Then hide it from behind, lay it down the back of the hair and secure it behind the base with a bobby pin.
Give it one more little tightening at the base of the elastic.
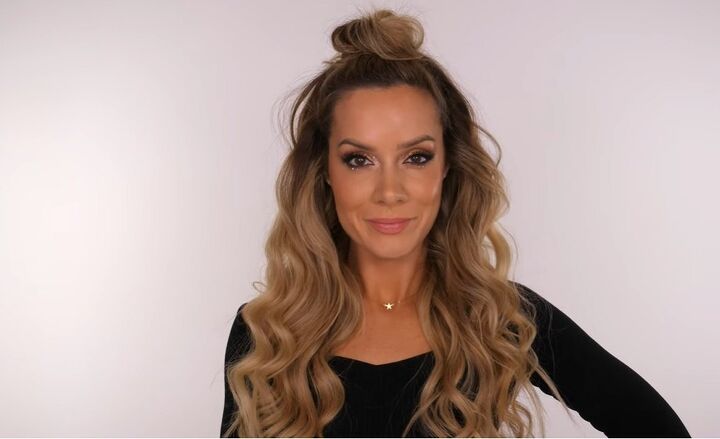
And that completes the second hairstyle.
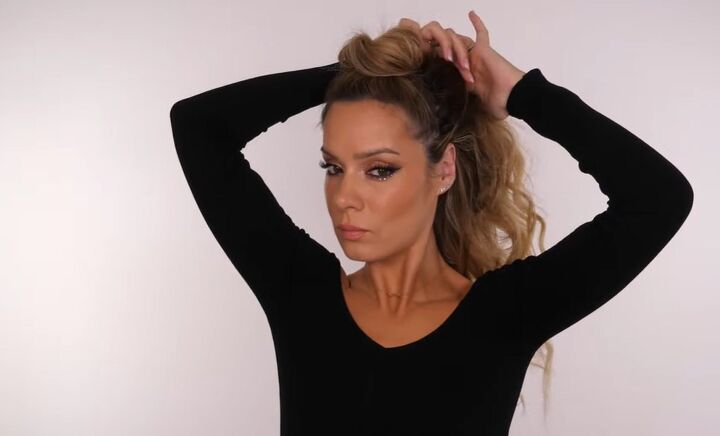
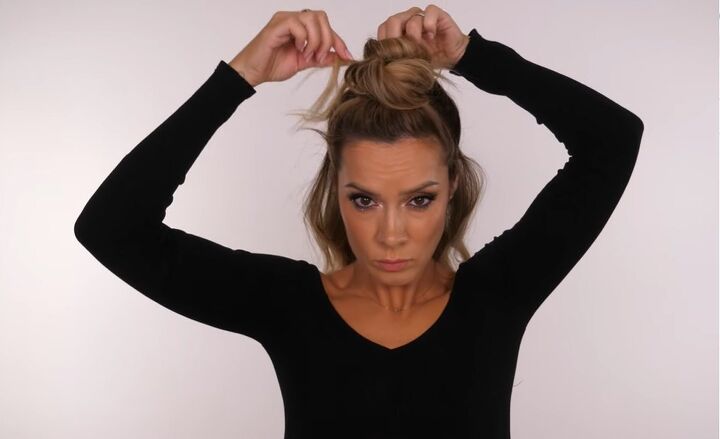
3. High bun
1. Wrap your hair
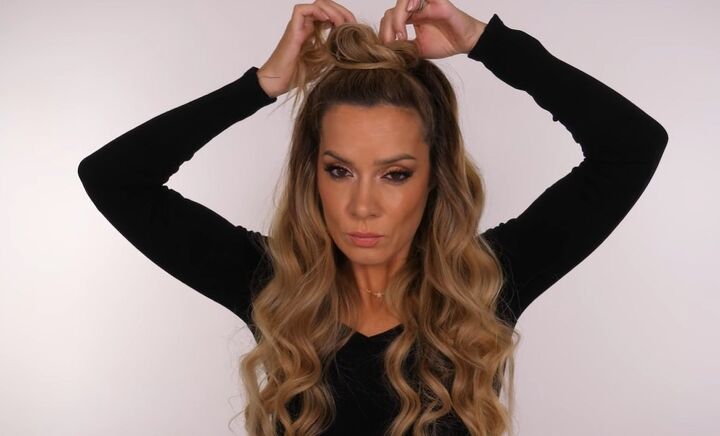
Remove the little wrap-around from the elastic, take the ponytail and start wrapping it around in a bun. Make sure you've got some loose sections for added texture.
After a couple of wraps, loosely wrap the ends around and secure it underneath the bun and then just start to tug at it.
So you've got some tendrils coming out, but it's not too big on top of your head.
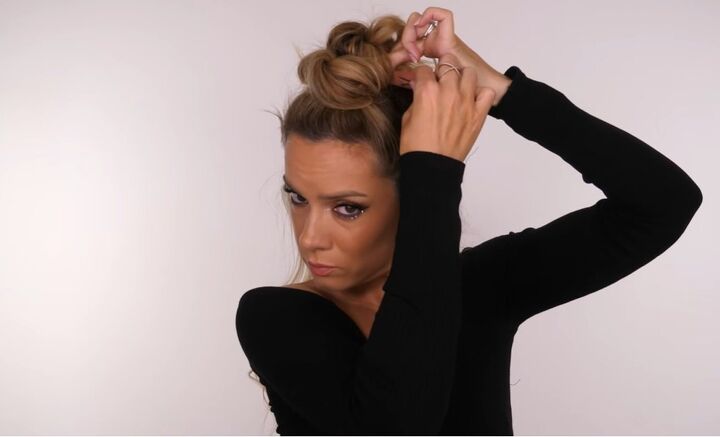
2. Secure the bun
Take some bobby pins and secure them in four areas: The front, the back, and both sides.
3. Backcomb the sides
Volumize the sides of your hair.
That completes the third look.
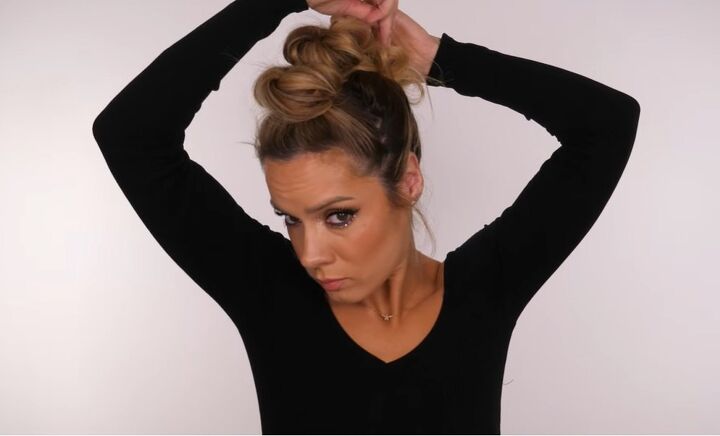
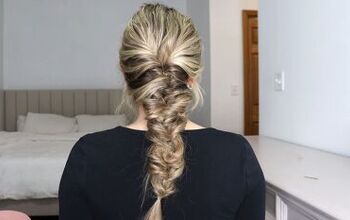
4. Mohawk buns
1. Section your hair
Leaving that top bun in place, take a section from your ears to the crown of your head.
2. Make a second bun
Holding that ponytail in place, with the other hand, loosely rotate the ponytail itself and wrap it around into a disheveled bun.
Make sure it's around the same size as the one at the front, and secure it in place.
If your hair is particularly heavy, you can secure the ponytail with an elastic first. Again make sure some tendrils are sticking out.
3. Make a third bun
Complete the mohawk bun with the remaining hair.
Comb all your hair together, and then pull it up to the crown of your head to meet the middle bun. Then repeat the same process.
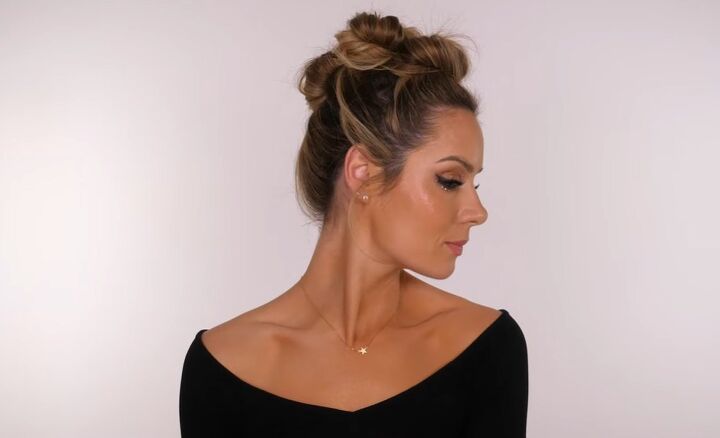
Hairstyles for special occasions
I really love that we've not brushed it up so that it's completely neat. I love the looseness of it and the fact that it is really effortless.
So those are my four easy transitional hairstyles suitable for any special occasion.
I hope you’ve enjoyed them, let me know which is your favorite in the comments below.
The author may collect a small share of sales from the links on this page.


Comments
Join the conversation
Great tutorial! Saved!