DIY Halloween Cat Costume From Supplies You Already Own

Today, we are going to make a DIY Halloween cat costume out of supplies you have laying around the house. Let's get started!
Tools and materials:
- Black facemask
- Scissors
- White paint
- Pink paint
- Paintbrush
- Black thread
- Needle
- Ruler
- Headband
- Wire
- Chalk
- Wire cutters
- Black fabric

1. Sketch the design
Put the face mask on and chalk out where the nose and whiskers are going to go.

2. Paint the mask
Once done, paint the nose with pink paint. Because the face mask is shaped for the face, you're going to need to take a rolled-up t-shirt or something round and put it under the mask so that way you have a nice smooth surface to paint that's rounded.
Then, grab your white paint and paint on the mouth and the whiskers. When you’ve finished painting the mask, set it aside and let it dry.
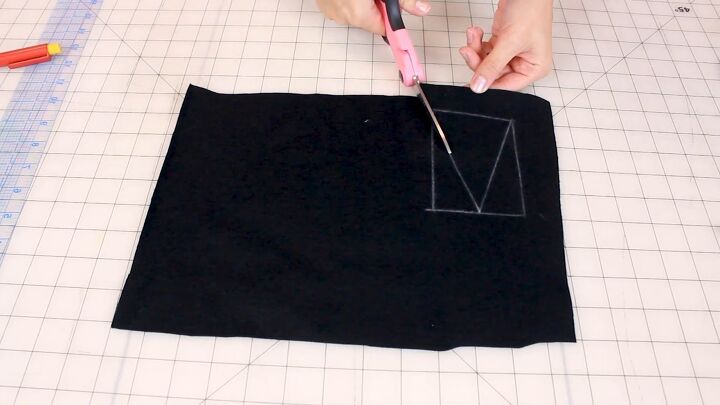
3. Create the ears
Next, we're going to create the ears. Trace out some ears on your black fabric using some chalk and a ruler. I'm going to make my ears 3 inches (7.5cm) wide and 4 inches (10cm) high.
Draw a rectangle and then make it into a triangle. Put a mark at 1.5 inches (3.8cm) which is the center. Then, take that center point and angle it down to the corners. Proceed to cut the ear out. Then use it as a template to cut three more out.
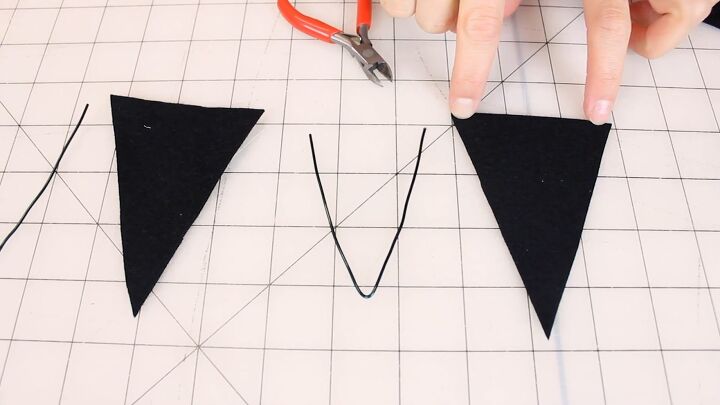
4. Cut the wire
Grab your wire and your wire cutters and clip your wire. Make sure that it’s a little bit shorter than the black fabric because you’re going to have to leave some room at the bottom to sew the ear to the headband.
When you place the wire on top it should be able ⅜ inch away from the hem. Cut two of these, one for each ear.
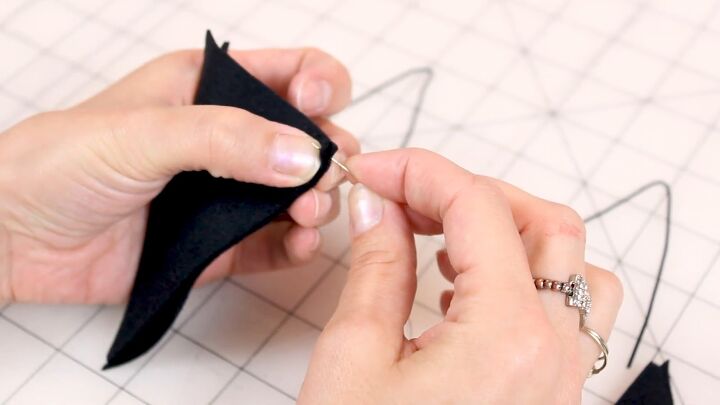
5. Sew the fabric
Now that we have both wires cut it's time to sew the four fabric pieces together. Take your fabric and place it with the wrong sides together. Then sew up the sides of the ear with a whip stitch but make sure you leave the bottoms of the ears open. Repeat with the second ear.
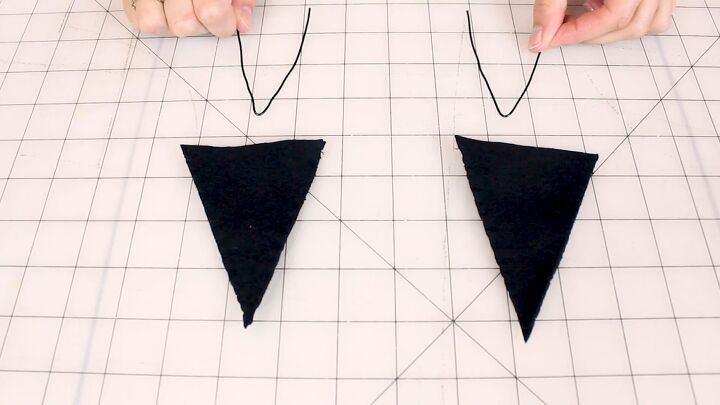
6. Insert the wire into the ears
Next, insert the wire into the ears to make them nice and stiff.
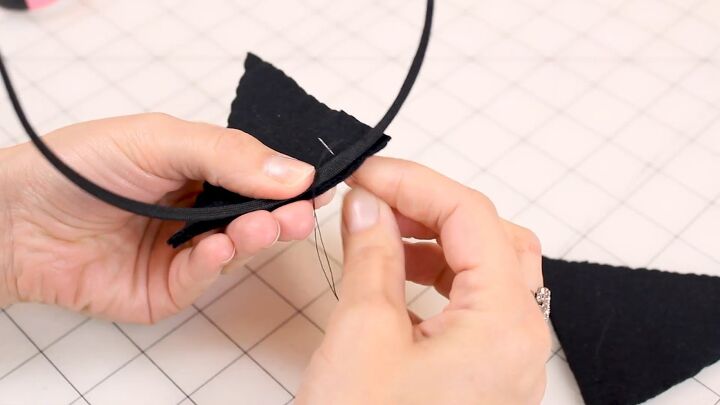
7. Sew the ears to the headband
Now sew the ears to the headband. Decide the position of where you want your ears and then flip your headband up and whip stitch them on lining up the edge of the headband with the edge of the fabric for your ear.
Holding it in place is a little tricky because we're working on a curve. When you’ve got the ear on, do a couple more whip stitches right at the ends which will keep it up nice and straight when you're wearing it, so it doesn't flip forward.

When you have the ear in a position going straight up, take your needle and push it through the side of the fabric. Then wrap it around the headband and just keep going through the fabric in a circle.
Do this about four or five times. Then go ahead and make a knot. You'll notice how the ear is going to stand up straight. Now you need to do the exact same thing to the other side.
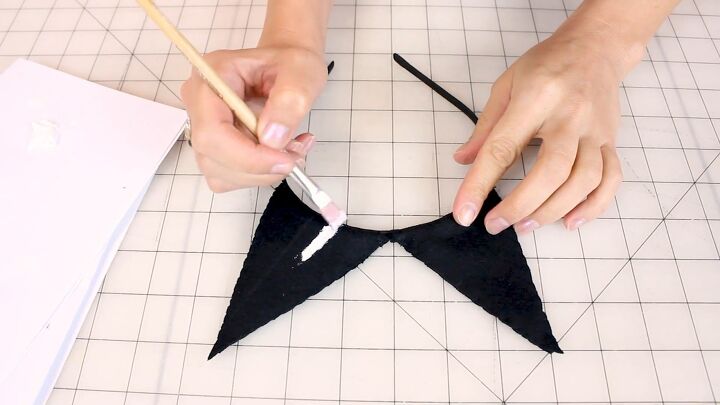
8. Paint the ears
To finish off, grab your white paint and paint little white triangles inside of the ears.

Halloween cat costume
Here is the finished DIY cat Halloween costume made from materials that I already had at home.
Making your own costume doesn’t mean that you have to work tirelessly on it for hours on end, the project doesn’t take very long at all, and the end result is super cute! If you try out this fun DIY, let me know in the comments.
The author may collect a small share of sales from the links on this page.


Comments
Join the conversation