Make a Purse Out of a Ball With This Tutorial

Who knew that a toy ball could be so much more practical than just something to play with? In this tutorial I’m going to show you how to take a toy ball and turn it into an adorable purse. You can do this with a ball in any size or pattern, so feel free to really get creative with how you want it to look. No matter what colors you choose, I can guarantee that it will look great!
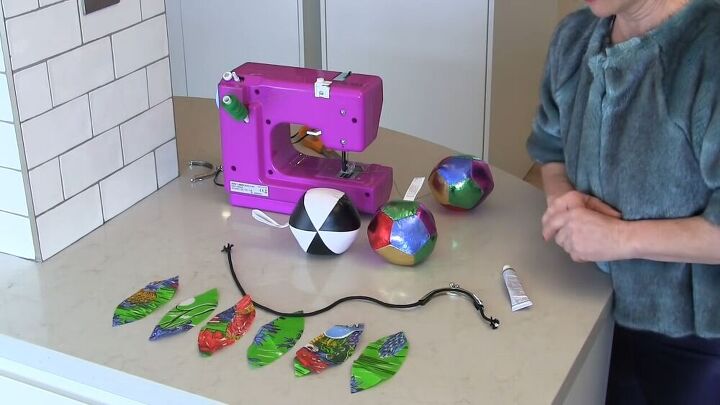
Tools and Materials:
- Soft toy ball
- Glue-in purse clasp
- Glue
- Fabric cut up into segments so that they form a ball
- String
- Erasable marker
- Scissors
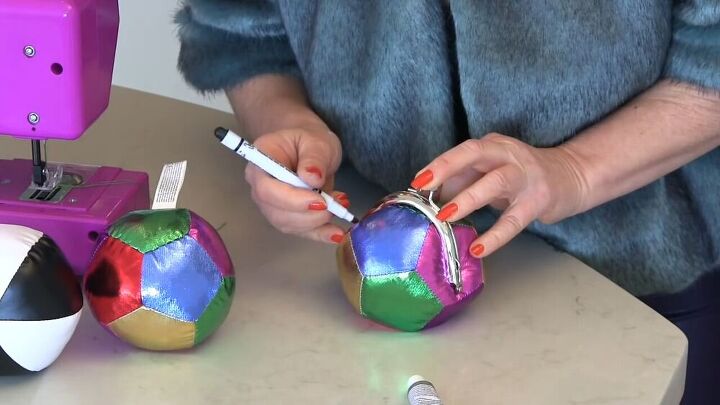
First you need to figure out where exactly your purse clasp is going to go. Most balls have a hand stitched seam, so that’s where I decided to put my clasp. Go ahead and set your clasp where you’re going to want it and mark the edges of it with an erasable marker. Then move the clasp and form a curved line of dots to indicate the curve of the clasp.
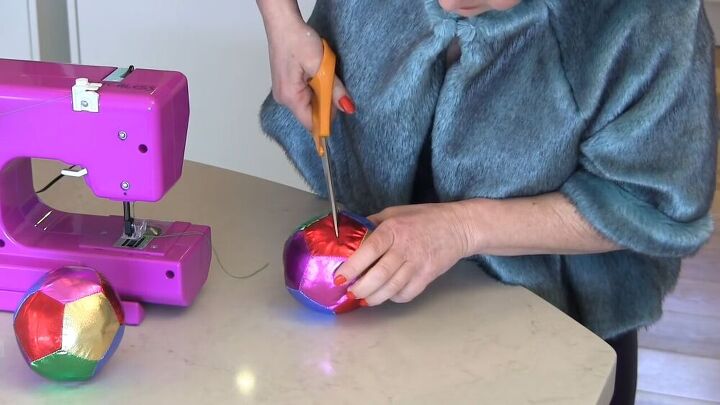
Start cutting on the stitch, and cut all the way to the ends of the curved line you drew. Then remove all the stuffing from inside the ball. I don’t know about you, but I definitely saved the stuffing to use for future projects!
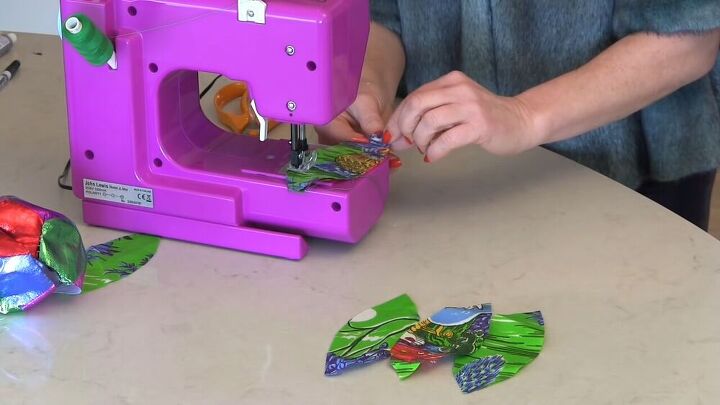
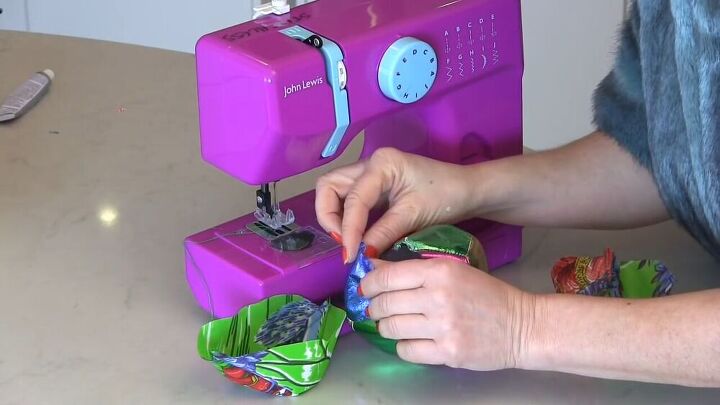
I’ll start off by saying that if you want to make your life easier you can just purchase a second one of the same ball to use for the lining, and it’ll already be in the right size. But we’re going to go for the challenge today. So you should have six pieces of fabric that you’ve already cut up to look like the ones in the above picture. First sew two pieces right sides together with a ½ cm seam allowance, going forward and backwards at the start and end, then going all the way down.

Now take a third piece of fabric and sew it, right sides together, to one of the pieces of fabric you just sewed. Line the ends up together and stitch around the curve just like before. Then flip it right side out and you’ll have half a sphere. Then do the same with the other three pieces so that you end up with two halves of a sphere.
Place a notch that signifies the center of the edge on both sides of the lining and on the ball itself. Then, right sides together, line up the notch on one part of the lining with the notch on the ball and carefully sew them together with a small seam allowance. Then sew down the other side of that same opening, starting at a cm past where the stitching began before. Repeat with the other side of the opening, also with right sides together.
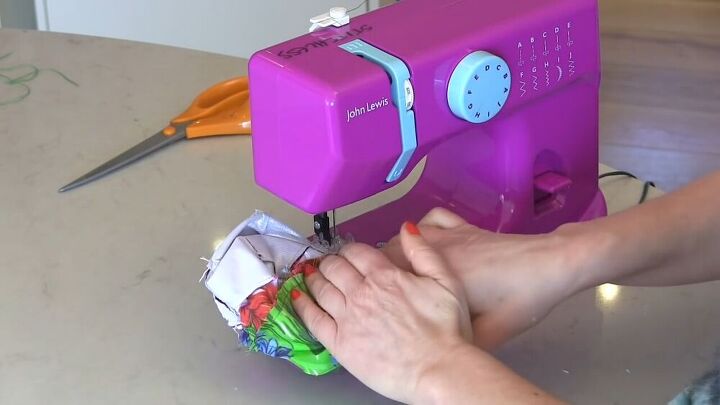
Now you’re going to stitch the open part of the lining, right sides together. Make sure to leave about a 5 cm opening to turn it right side out later. Get as close as you can to the curve in which the lining meets the bag.
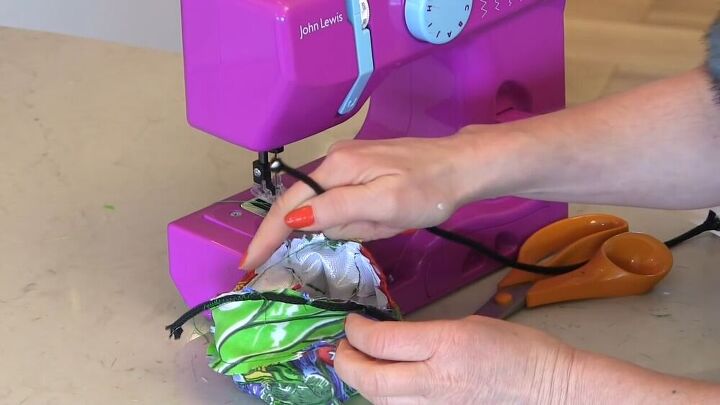
Going along the top curve, you’re going to sew the rope into place. I found that using a zigzag stitch along the whole length of the rope didn’t work out so well so I used a zigzag stitch at the ends just to keep it in place. The rope goes right at the top of the seam allowance. Then cut off any excess bits of rope and turn the bag right side out.
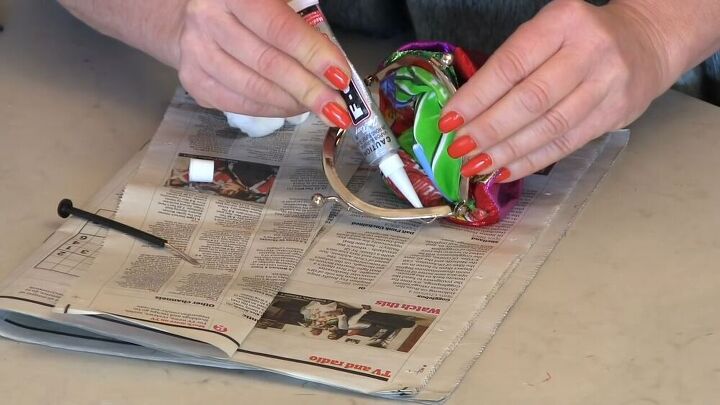
Apply glue to one side of the clasp. Then you’re going to lay the clasp down and insert one side of the purse into the clasp. Use a screwdriver or something of the sort to help you push the rope at the edge of your lining into the groove of the clasp, starting at the middle and working your way out. Some of your glue might squirt out when you do this, but just take a baby wipe with some acetone and remove any excess. Then let it dry and repeat on the other side. Ideally they say that you should let the glue stand for a little bit before starting to insert the lining so that it’s more tacky, but I didn’t do that.
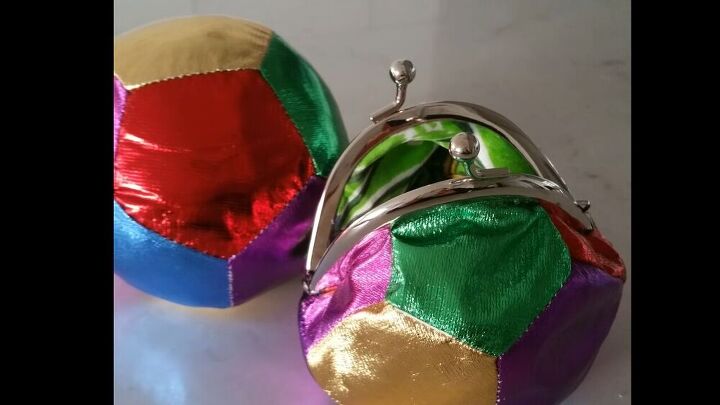
And there you have it! You now have a gorgeous and totally unique purse that you made yourself. I really enjoyed this project because I love taking things apart and turning them into something completely different and new. I think this purse came out so adorable and am definitely excited to start using it! I can not wait to see the purses that you guys make, so drop a picture in the comments and let me know how you enjoyed making it!
The author may collect a small share of sales from the links on this page.


Comments
Join the conversation
It's called a Mini JL. But is the same as a Janome Mini.
I love this little purse! A great idea! And your little sewing machine too!