How to Make a Cute DIY Wrist Wallet Out of Old Jeans

Are you tired of losing your wallet? Maybe you want to travel without having to carry a purse around with you all day. Today, I’m going to show you how to make a DIY wrist wallet from a pair of old jeans so you only have to carry your daily essentials around your wrist. Let’s get started!
Tools and materials:
- Old jeans
- Super or hot glue
- Velcro
- Zipper
- Scissors
- Ruler
- Fabric chalk
1. Measure and cut
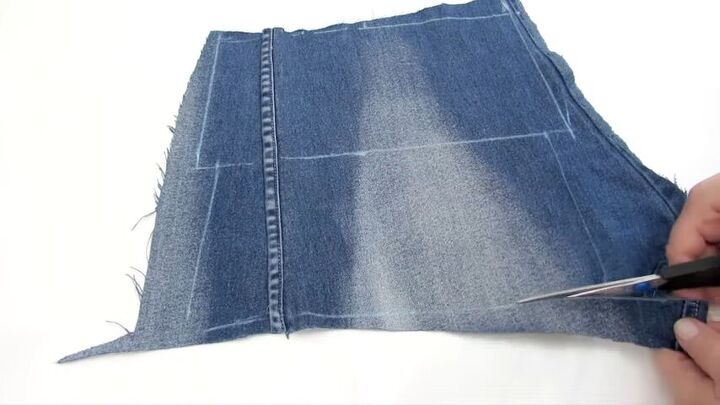
Lay out your jean fabric and measure out two rectangles with a ruler and fabric chalk. The sides should be approximately 5 inches, the top 10.5 inches, and the bottom 12 inches. Then, cut out the two pieces.
2. Fold the edges
Flip your fabric over. Then, fold the top side down by ½ inch. Do this to both fabrics. If necessary, iron the fold down so it stays in place.
3. Glue
Using a glue gun or super glue, glue the folds down to the fabric. Set those aside for now.
4. Fold the zipper edges
Now, onto our zipper. Start by taking two small pieces of jean fabric and, similar to the larger pieces, fold the side down ½ inch and super glue.
5. Glue
Add super glue to both ends of the zipper.
Then, glue the two smaller pieces to each end.
6. Attach the fabric to the zipper
Now, do the same with the bigger pieces. Add glue to the longer side of the zipper and on the two smaller pieces of fabric.
Then attach the bigger piece of fabric. Make sure you’re pressing down for the best hold.
7. Clean up edges
Flip over and clean up any messy or uneven edges.
8. Measure around your wrist
Fold the fabric in two with the zipper at the top and wrap it around your wrist.
Now, flip the fabric so its right sides facing and pin where it overlapped on your arm.
9. Glue edges together
Now, glue all of the open edges together, making sure not to surpass the pins.
10. Remove pins and clean up edges
Remove the pins and cut off the uneven strip.
11. Attach Velcro
Flip right side out and wrap around your wrist again. This time, pay attention to where it overlaps and decide how tight you want it against your wrist.
With a piece of velcro cut to size, use glue to attach it to the wallet where you want it.
Make sure to do this to both sides. All done!
You can even decorate them!
DIY wrist wallet tutorial
These DIY wrist wallet bracelets are so easy to make. They can hold your everyday essentials, including but not limited to your money, keys, and credit cards.
They’re super convenient if you’re going on a walk, to the gym, or just traveling!
You can even make them for your kids so you can send them off to school with the house key or the lunch money without worrying they’ll lose it.
If you like this DIY wrist wallet, let me know how you plan on using it!
Enjoyed the project?
Suggested materials:
- Old jeans
- Super or hot glue
- Velcro
- Zipper
- Scissors
- Ruler
- Fabric chalk
The author may collect a small share of sales from the links on this page.


Comments
Join the conversation
😁
Yes! I will use my sewing machine instead of glue.