Make This DIY Bucket Bag by Following These Easy Steps

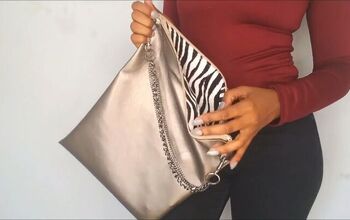
Ok, y’all, I’m super excited about this one! Today I’m going to be walking you through how to create your very own gorgeous bucket bag from scratch! Bucket bags are stunning and so fashionable, but why buy them when you can make one yourself? You can choose a material that fits your style and really customize it and make it your own. So grab some leather or vinyl that you like, and let’s get started.
Tools and Materials:
- Leather/vinyl
- Needle and thread
- Ruler
- Pliers
- Awl
- Scissors/box cutter
- Diamond punch/hole punch
- Glue
- Binder clips
- Leather strap or cord

In order to make any handbag, first you have to create a pattern. The bucket bag that I created had a 7” length, a 5” width, and a 4” depth, so the measurements I’m going to list for the pattern are according to those measurements. The top width of the pattern I used was 9 6/8”, the side piece was 7 3/8", both sides of the corners on the bottom were 2”, and the bottom width was 5 7/8". All these measurements include seam allowance and everything you need.
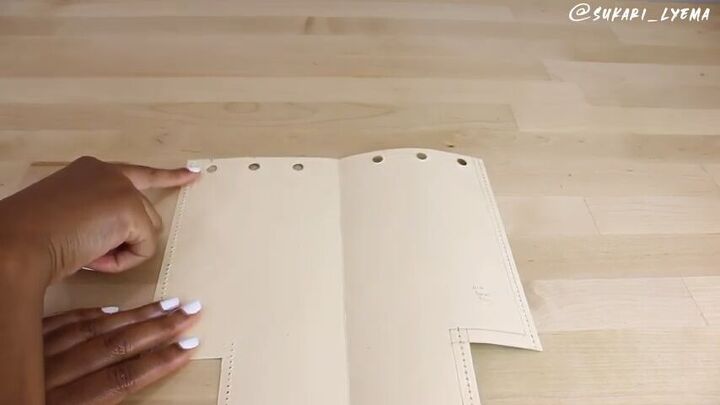
Make a line that’s ⅛” in from the outermost edge and draw a line on all the sides except for the top horizontal line. Then take your diamond punch and make holes along those lines. Now you’re going to make the holes that you’ll be using later to lace up the bag. So measure ¼” down from the top line and from there insert six holes. First put in three holes, about 1” apart from each other, then measure out 2”, and add another three holes, 1” apart from each other.
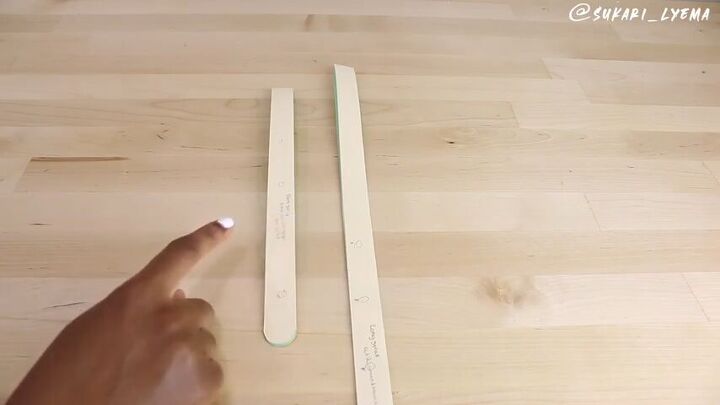
You’ll need two patterns for the shoulder straps. The first is the long pattern, which is 32” long and 6/8” wide and the second is the short pattern, which is 22” long and 6/8” wide. I connected the straps using snaps so that they’ll be adjustable, but you can also use a buckle or whatever you have.
Next you’re going to use your pattern to cut out your material. For this project I recommend using a leather or vinyl that is stiff and holds its own shape because you won’t be using any fillers. And since you’re not going to line it, you also want the material to look nice on the inside. Using double-sided tape (that you can roll yourself!) stick your pattern on your material and cut around it. You’re going to cut out two pieces, one for the front and one for the back.

With your pattern still in place over the material, use the punch through the existing holes in order to create holes in the leather. Since the material is thick, it might be helpful to use a small hammer to help you press down your hole puncher. For the back piece, you only need the six big holes at the top, not the small ones along the side. Then use your straps patterns to cut those out of the material as well.
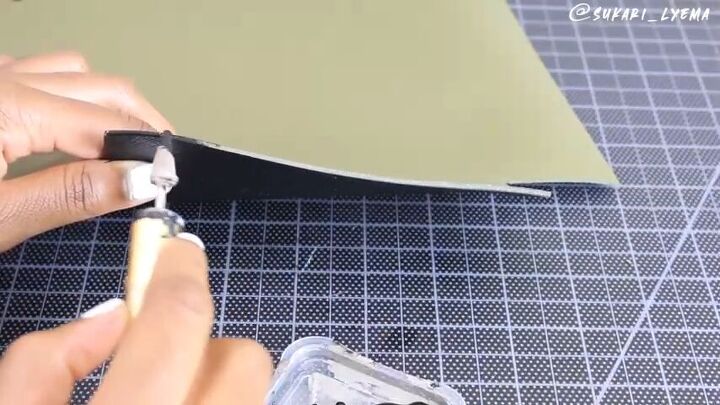
Because the color of my material’s edges was a bland gray that I didn’t like, I grabbed some black edge paint and painted all the edges of all my pieces to give it a nicer and cleaner look.
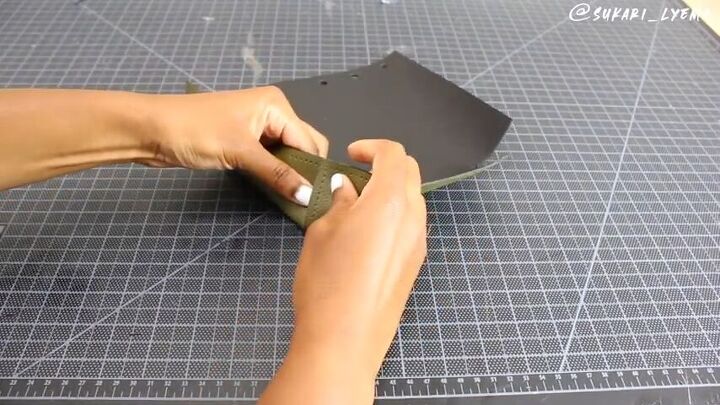
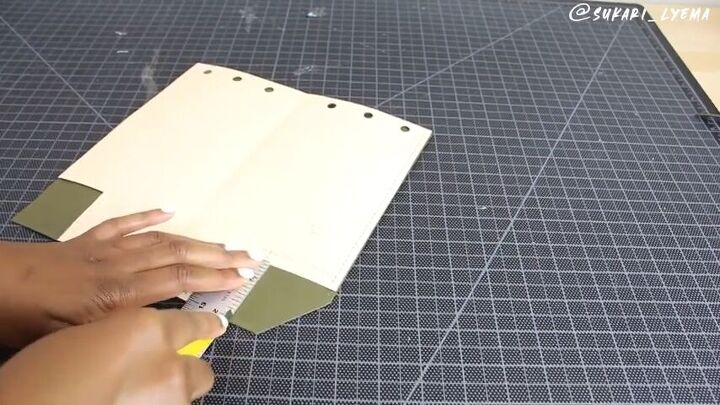
Using all-purpose cement or rubber cement glue, place a line of glue on the top side of the bottom corners on both sides. However, the glue should not be placed any lower than ⅜”. Then place glue on the other side of the side part of the corner as well. Once your glue is on and tacky, fold the bottom of the corner onto the top of the corner right on that ⅜” mark. Once you’ve folded the corners place a binder clip onto them to keep them together. Do this on both pieces.
Using an awl to help you punch your holes all the way through, and pliers to help you push your needle if it gets stuck, hand sew the glued corners of your handbag along the holes you punched earlier. Then do the same on the back piece.
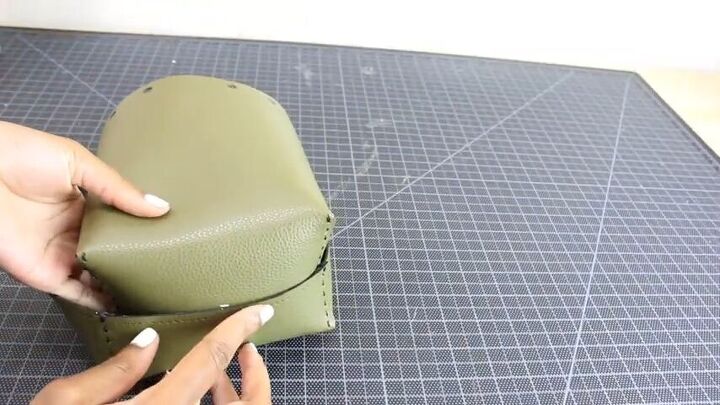
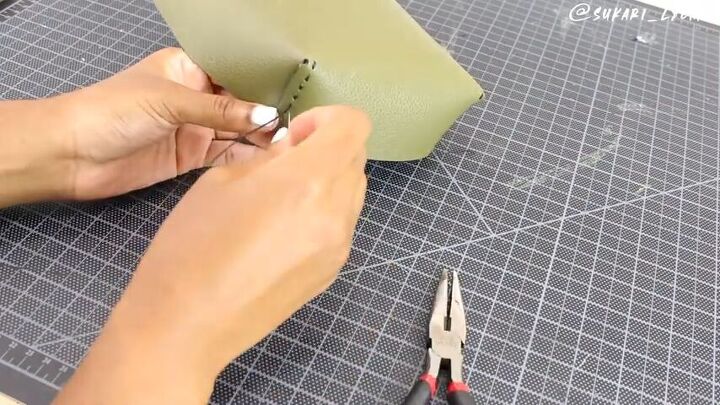
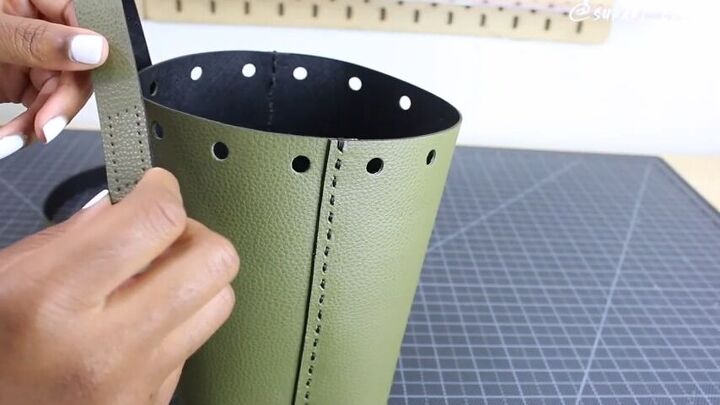
Take your back piece and apply glue around the sides, all the way around, but not past ⅜”. Then you’re going to take the front piece, which has the holes from the diamond punch on it, and place it over the back piece, connecting them at ⅜”. Clip them together.
Now you’re going to use your awl to punch those holes all the way through, then use your glover’s needle and pliers to hand-sew the pieces together along the sides and bottom.
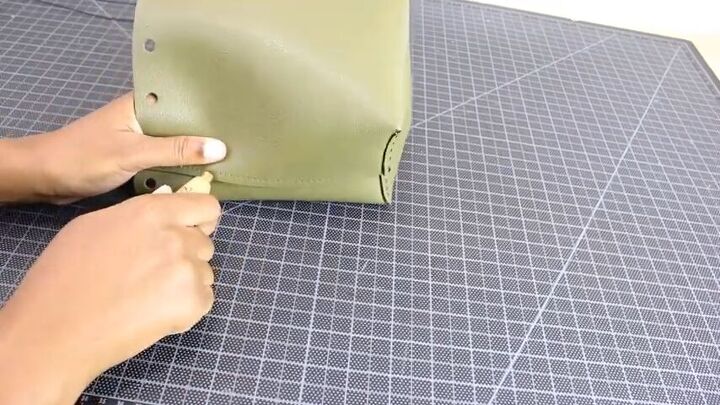
In order to sew on the straps, you’re going to need holes there as well. So take your strap pattern and place a line that is 1 ½” up from the end, and then make lines around that that are ⅛” in so that you’re essentially left with a rectangle. Then use your diamond punch to create holes on those lines and use that pattern to create the same rectangle of holes on your actual strap.
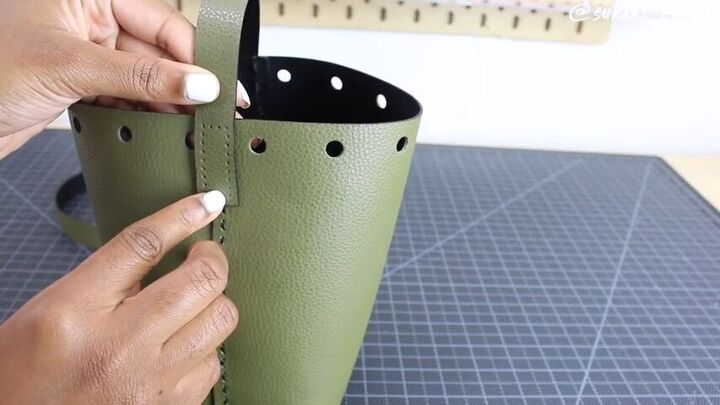
Now it’s time to attach your straps to the bag. You can choose to attach them on the inside of the bag or the outside. I chose to do it on the outside. Use a piece of double-sided tape to hold it in place, then use your awl to punch your holes through and hand sew the strap in place. Don’t forget to use your pliers to help you pull the needle through. Do the same with both straps, on both sides of the bag.

In order to connect my straps to each other, I used a snap set that I got from Amazon. This will allow my straps to be adjustable. So go ahead and make the holes where you want your snaps to be and insert your snaps.
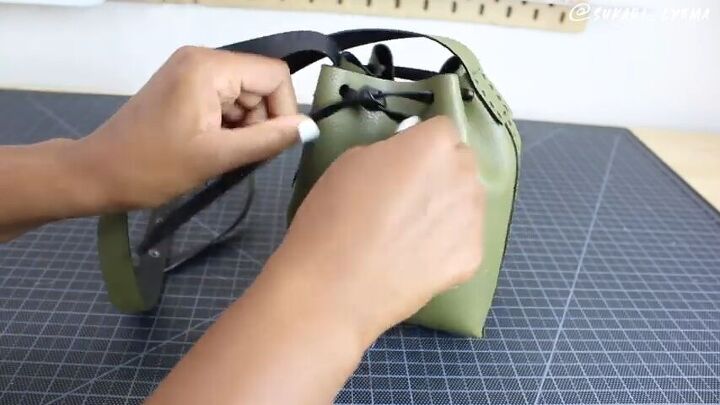
The last step is to take a leather strap or cord of your choosing and to lace it through the holes at the top. Tie it off to close your bag.
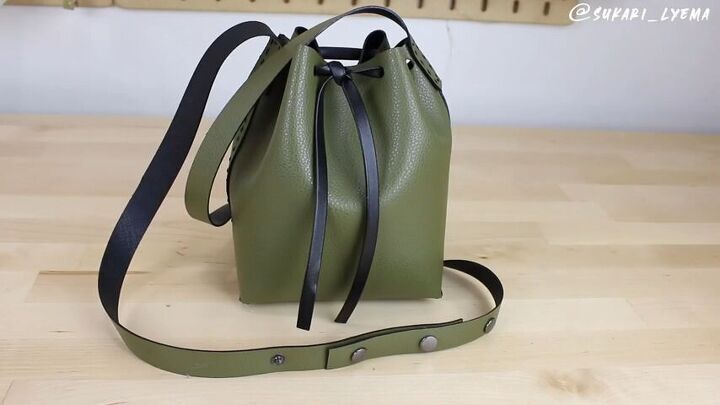
And that’s it! You now have your very own DIY bucket bag, and if you ask me it is absolutely stunning! This was such a fun project. A few hours ago I was looking at a piece of leather, and now it’s an actual bucket handbag! I love it. I feel like it’ll be such a great accessory, and you can make yours according to your own style by choosing the material that speaks to you. I HAVE to see your versions, so drop ‘em down below!
The author may collect a small share of sales from the links on this page.


Comments
Join the conversation
It's all your fault! I went straight to Amazon to buy a leather tool kit with threads! LOL! Thank you for the FABULOUS idea!
Great project and great idea!!! Well done!