DIY Stylish Origami Bag in 20 Minutes
Do you like durable, stylish, multipurpose bags? If you do, this stylish origami bag will pique your interest without a doubt.
Also known as a bento bag, this bag doesn’t just look good - it's super comfortable and folds flat when needed. When you open it up it turns into a stylish tote.
It’s durable and reliable too, you can use it for grocery shopping, trips to the beach, picnics, or anything else you like to do.

Making a bag like this is fun and easy, as you’ll see for yourself in this tutorial.
Cut and stack the fabrics
Cut out a rectangle measuring 16.5 x 48.5 inches from the lining fabric and the main fabric.
Put the main fabric piece on your workspace with its right side up and set the lining over it.
- You can make the bag smaller or larger, check out my full origami bag tutorial for all sizing options
Start sewing the origami bag
Align the edges of the layers and pin them together. Sew around the edges, leaving a gap unstitched for turning.
Trim the corners and turn the whole thing inside-out. Push out the corners. Fold the raw edges on the opening inward. Press everything flat. Topstitch close to the edge all around the fabric piece.
Fold the bag
Set the bag onto your workspace so that the main fabric is facing up and the short edges are on the left and right sides.
It’s origami time.
Pull the top-right corner down and to the left, to the bottom edge. Align the edges.
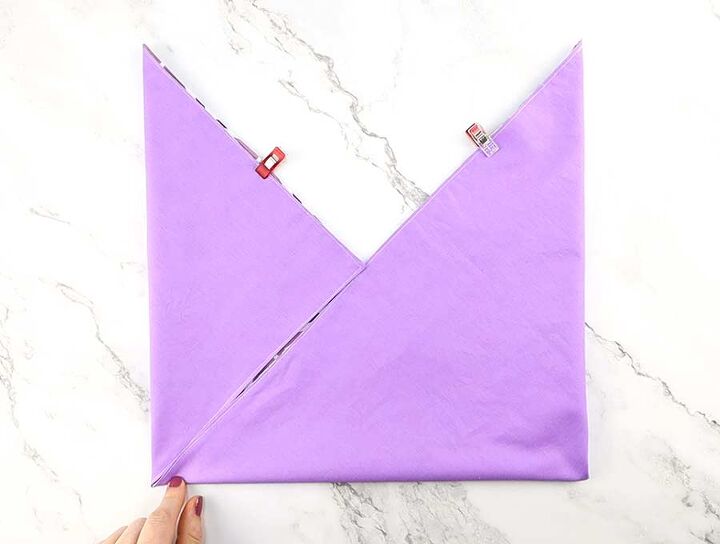
Pull the bottom-left corner up and to the right, to the top edge. Align the edges. Pin everything together.
You’ll notice that there’s a square in the center of the fabric. Draw a diagonal from its bottom-left corner to its top-right corner. Now bring the bottom-right corner of the entire thing up and to the left, so that you end up folding the fabric along the line you drew.
Pin the edges of the flaps together to close the gaps between them. Flip the bag and repeat on the other side. Stitch both of them.
 Need more help with a lot of images? Check my origami bag tutorial over at helloSewing.com
Finish the origami bag
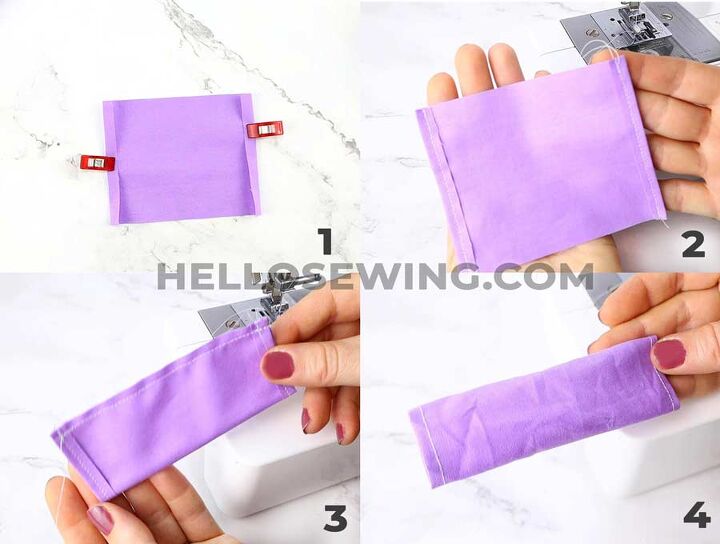
Take a piece of fabric measuring 4 x 7 inches and fold its short edges in for a quarter inch. Sew them in place. Fold the square in half so that the long edges are aligned. Sew along the raw long edges. Turn the tube.
Turn the bag and slide the tube over one handle. Overlap the handles and sew a rectangular over them to secure them together. Slide the tube over the rectangular to hide it.
Your origami bag is now ready for action! Feel free to use it for whatever you want. Go ahead and make some for your friends, they’ll love the gift.
The author may collect a small share of sales from the links on this page.


Comments
Join the conversation