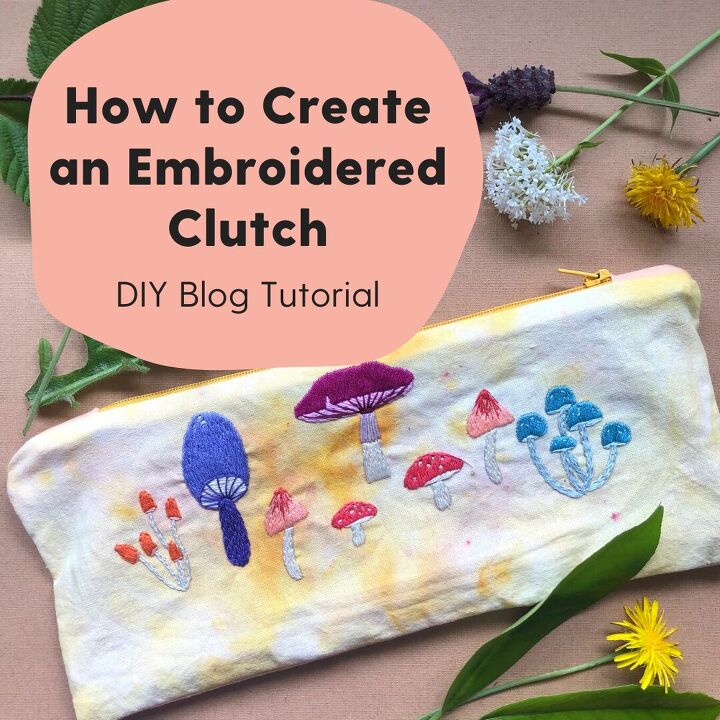
Tutorial: How To Create An Embroidered Clutch
Updated: Jan 4
I often get asked the question, "What am I supposed to do with this embroidery once I'm done stitching?" While many modern embroidery artists finish their embroideries in the hoop to hang on your wall, we all only have so much wall space for embroidery. Right?
Because of this question, I've created a few tutorials on how to turn your embroidery into something other than a piece of art to hang on the wall. For this DIY tutorial, check out how to turn your embroidery into a clutch.
Supplies:
- Fabric to embroider
- Fabric for bag lining
- Fabric for zipper tabs (optional)
- Zipper
- Marking tool ( chalk pencil, water soluble pen, heat erasable pen, etc.)
- Embroidery thread
- MCreativeJ Peel Stick and Stitch Mushroom Patterns
- Pins
- Sewing machine with regular foot and zipper foot (optional, can be done by hand but takes wayyyy longer)
- Sewing thread (optional, if not using sewing machine)
- Scissors
- Rotary cutter
- Ruler
- Embroidery hoop
- Cutting mat
- Iron
Step-by-step Instructions
1. Cut the fabric you would like to embroider to the full bag size (front and back) + 1/4 inch on all side for seam allowances
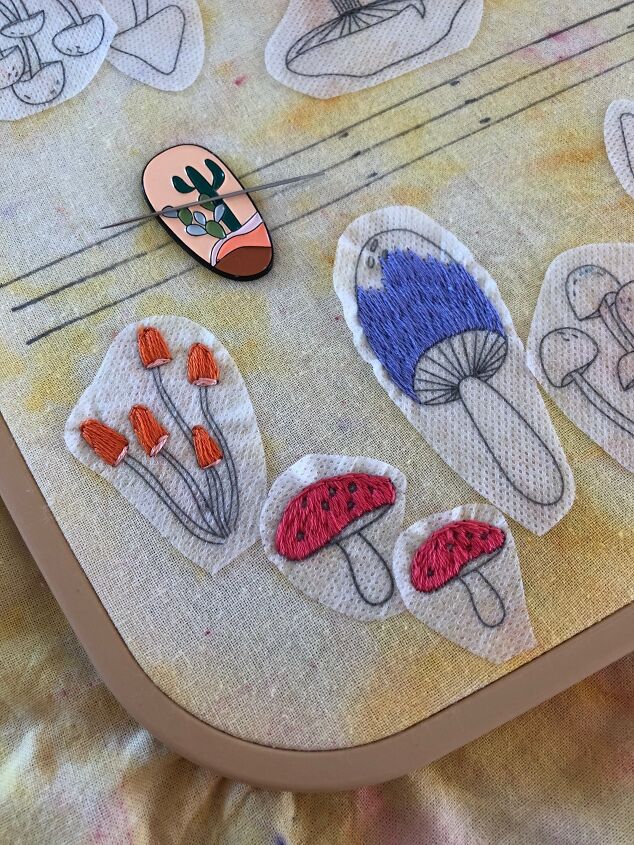
2. Center fabric in the hoop. Using your marking tool and ruler, draw a line down the middle of your fabric. Then draw a line 1/4 an inch away on either side of the line. This will be where you cut the embroidery in half and place the zipper.
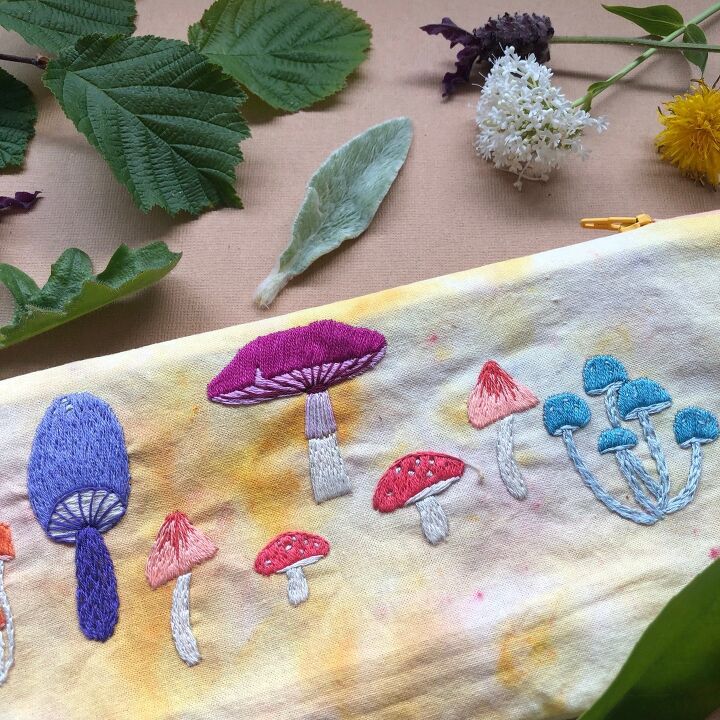
3. Remove the backing from the Mushroom Peel Stick and Stitch patterns and place them in your desired pattern on the fabric. Make sure to cover both sides of the bag and don't get too close to the cut/sew line. I like using these patterns because I can customize my design and also have added stability to my bag embroidery.
4. Embroider your design! Need some inspiration? Check out some of my embroidery stitch video tutorials here.
5. When finished, remove your fabric from the hoop and wash away the patterns. Lay the fabric flat to dry.
6. Once the fabric is dry, iron the back of the embroidery.
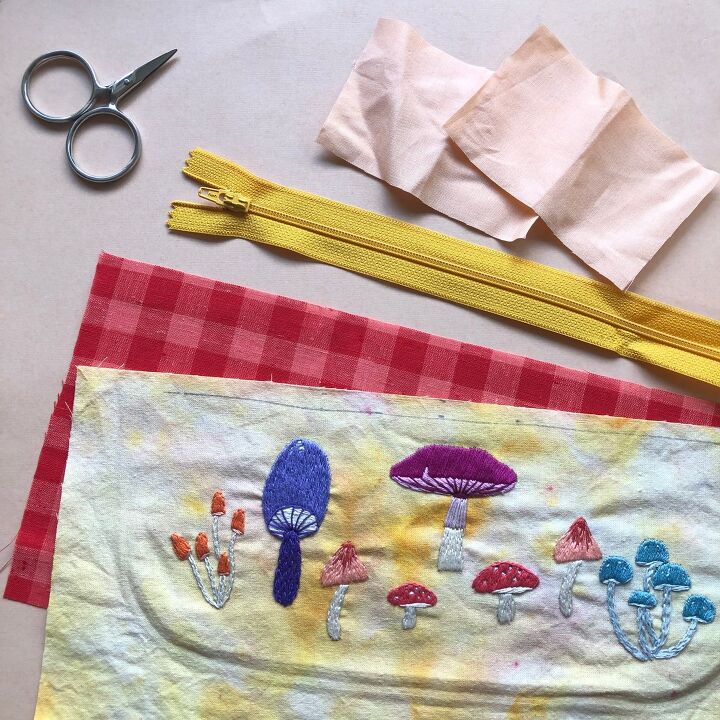
7. Next, using the cutting mat, ruler, and scissors/rotary cutter, cut the bag fabric down the middle line and cut the bag lining fabric to the same size.
8. Next, create the zipper tabs. (Optional, skip to step 14 if you don't want zipper tabs) Cut the zipper tab fabric. This will be 2x the width of the zipper + 1/4 inch (for seam allowances) and the 3 inches long.
9. First, fold the zipper tab fabric in half, length wise and iron. Then fold the the edges into the center and iron.
10. Next, flip the folded zipper tab so that the folds are on the back and fold the sides towards the center.
11. Pin and sew raw edges together using a 1/4 inch seam allowance, with sewing machine. If you're sewing by hand, use the back stitch.
12. Turn the zipper tabs right side out. (This can be tricky because they're so dang small!)
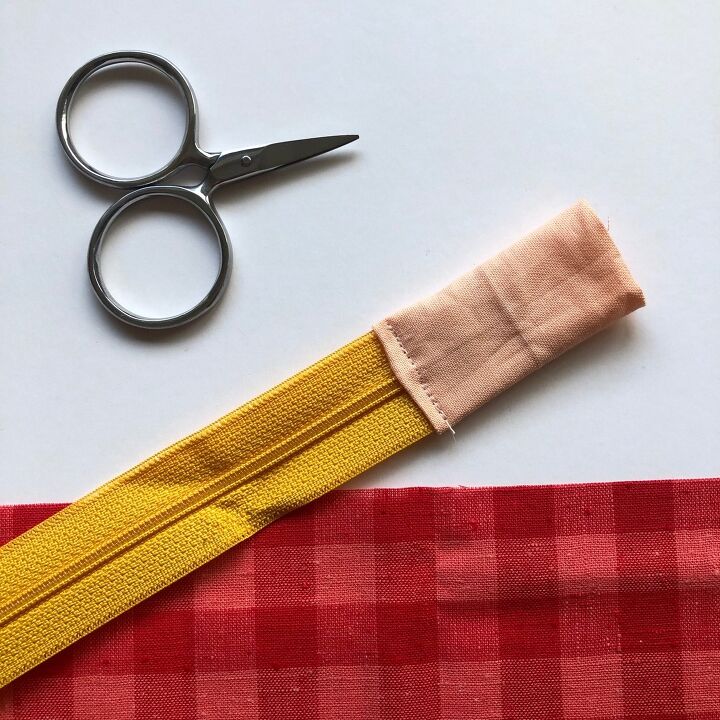
13. Slide the zipper into the tab. Sew along the inner edge of the tab to attach the tab to the zipper. If needed, trim the zipper after the tabs are added.
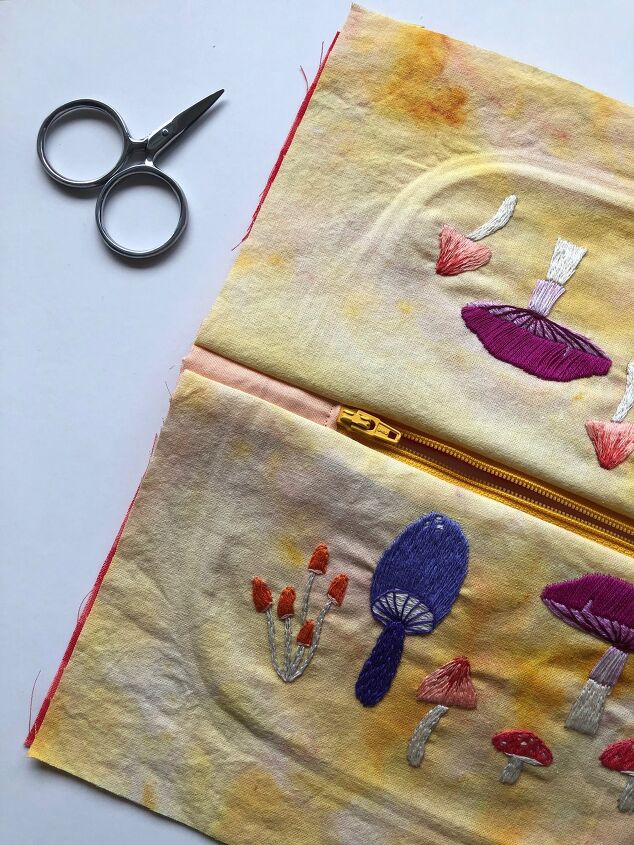
14. Now let's sew our bag together! First, lay the lining fabric face down. Next, lay the zipper on top, aligning the top edges. Then lay the outer (embroidered fabric) face down, aligning the edge. Pin together and sew a 1/4 inch seam along the zipper edge.
15. Repeat on other side of zipper with lining fabric and embroidered fabric.
16. Once the inner and outer fabric is sewn to the zipper, lay the bag open and iron the fabric away from the zipper.
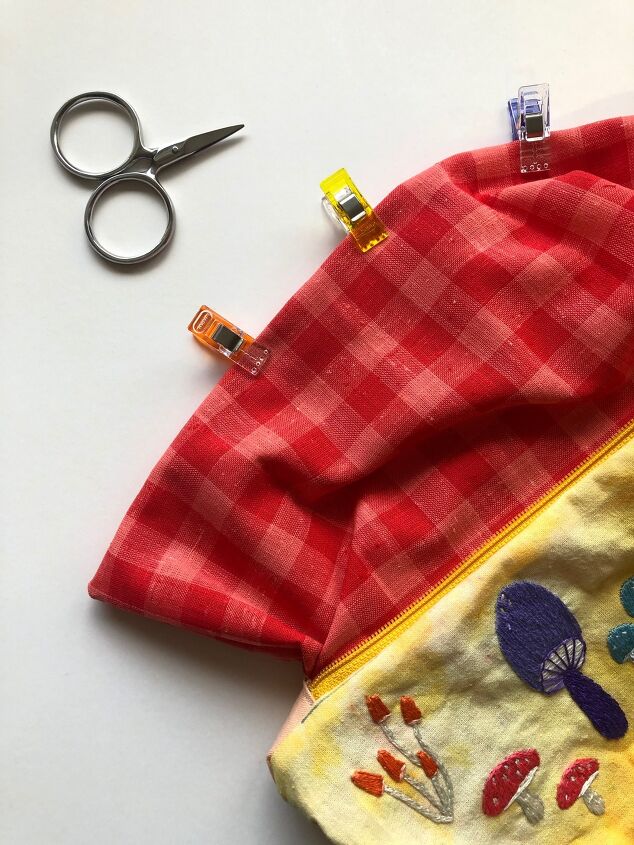
17. Next, un-zip the zipper (Very important!)
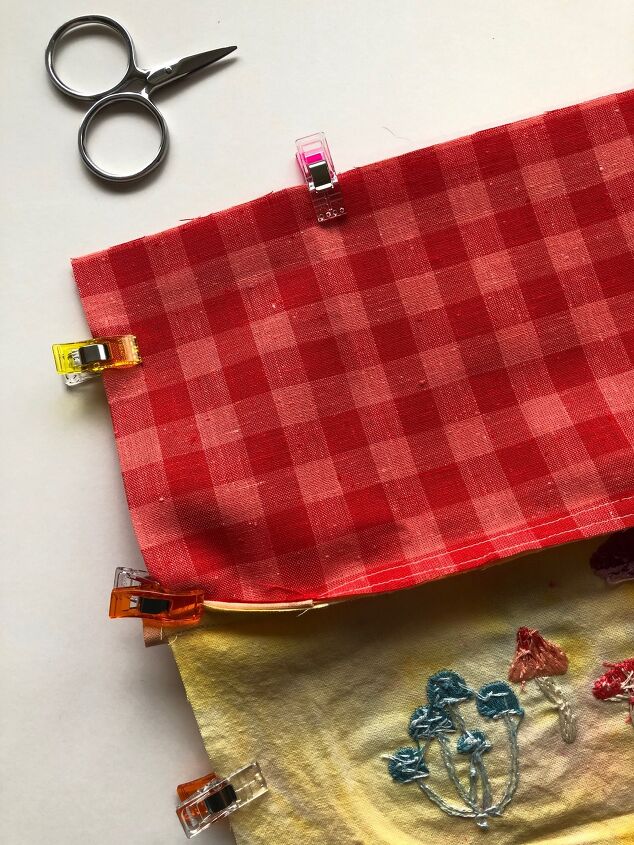
18. Match up the edges of the wrong sides of the lining fabric and embroidered fabric and pin together. Leave a hand size hole along the lining edge so that you can flip the bag after it's sewn.
19. Sew a 1/4 inch seam along the outer edge of the bag.
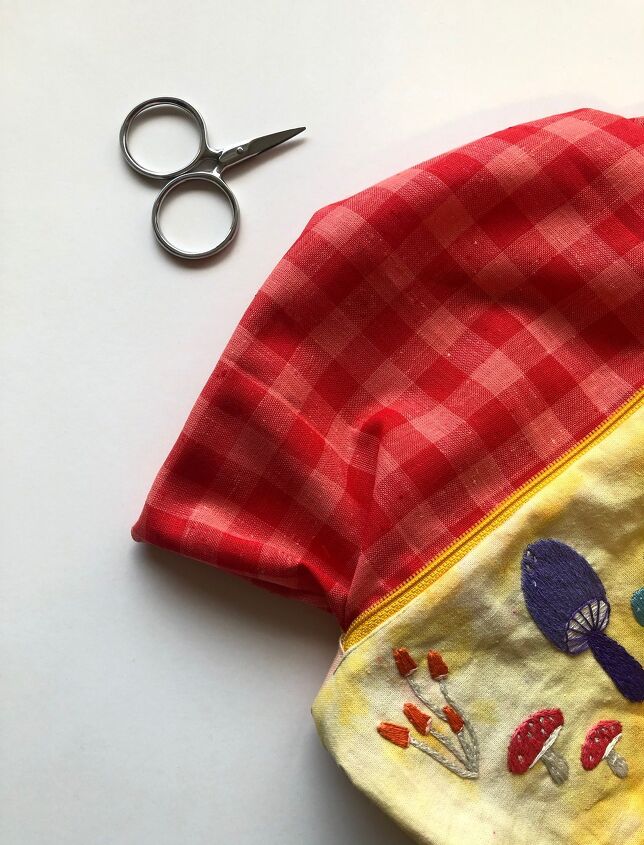
20. Flip the bag right side out. Next, iron the lining fabric so that the raw edge is folded to align with the seam.
21. Top stitch along the inner edge of the bag lining to close it. If you don't have a sewing machine, use the ladder stitch.
22. Finally, push the lining into the bag and enjoy your clutch!

***This post contains affiliate link. If you choose to make a purchase, I may receive a small portion of the sale. Thanks for checking out my recommendations.***
0 views
The author may collect a small share of sales from the links on this page.


Comments
Join the conversation