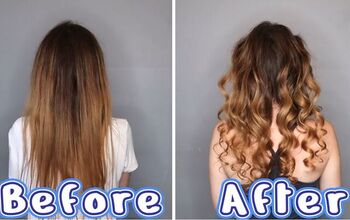
How to Create Gorgeous Heatless Curls With a Robe Tie

For this tutorial, we are going to try out the reverse heatless curls with a robe tie. I saw this trend on TikTok and really wanted to have a go at it myself.
I love heatless curling methods because they obviously don’t cause any heat damage to your hair.
These are called reverse heatless curls because you start from the back and do it all the way to the front. Let’s get started!
Tools and materials:
- Robe tie
- Hair tie
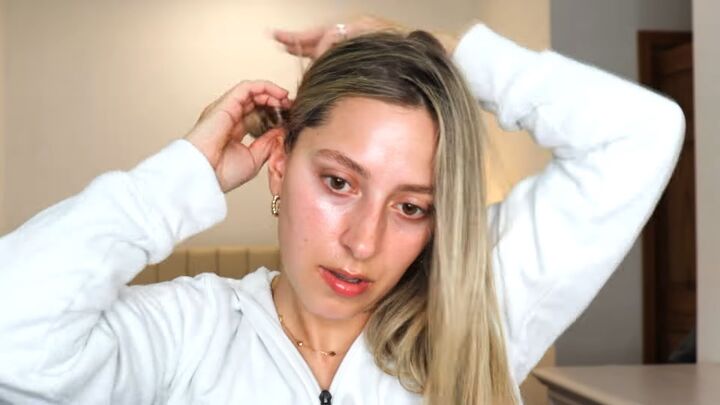
1. Tie up hair
I am not going to use any product on my hair or even wet it, so my hair will just be a blank slate.
I did wash it with shampoo and conditioner a few hours ago, but other than that, nothing is in it.
Do a zigzag part so that you don’t have a definitive part line. Tie one section up and out of the way.
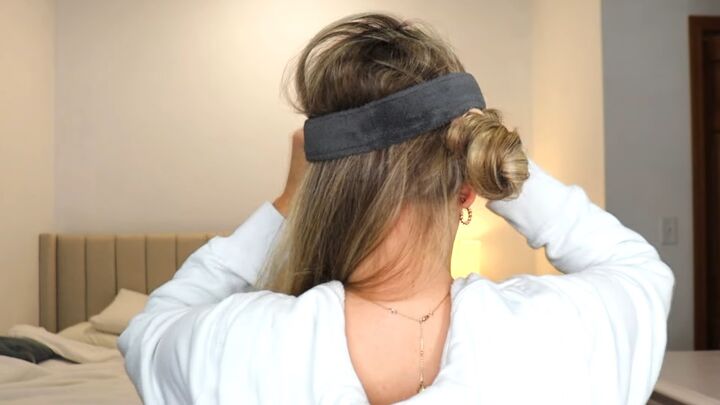
2. Place the tie around your head
Place the robe tie around the back of your head.
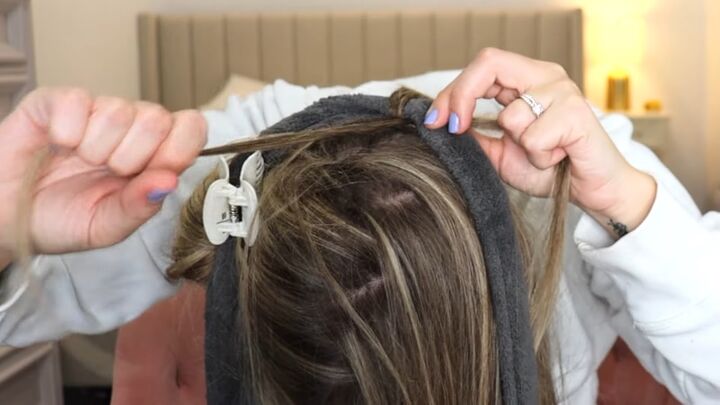
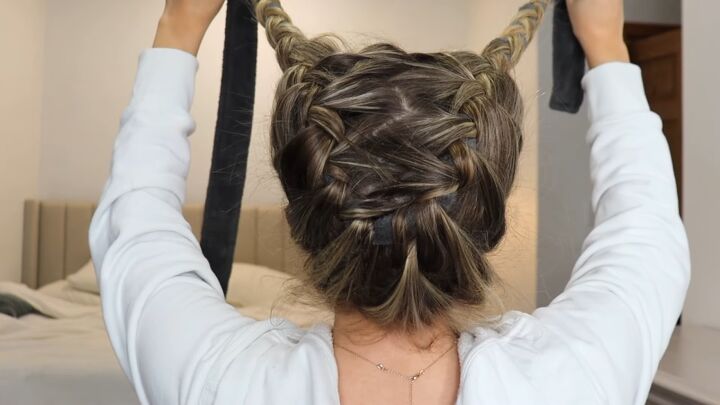
3. Braid around the robe
Flip your head over and start at the bottom of your head. Grab a section of hair, split it into two, and then take your robe tie and put it right in between those two sections.
Take one section, cross it over the rope tie, under the rope tie, and bring it back in that same hand.
Do the same thing with the opposite section. Cross it over the rope tie, under the rope tie, and bring it back in the same hand.
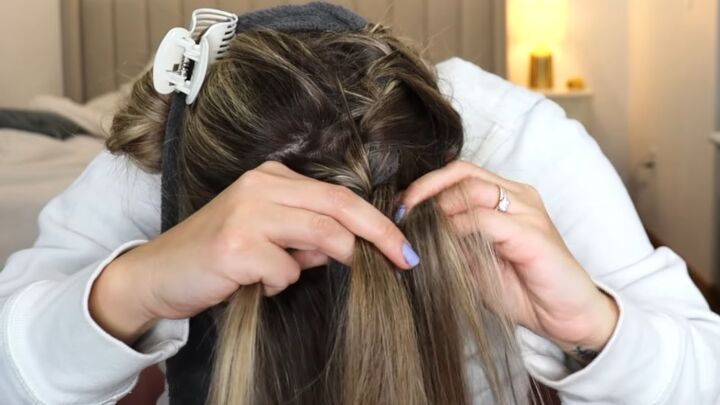
Now we're doing the same steps, except we are now grabbing a section of hair and adding it in.
We’re doing the same thing, crossing it over the rope tie, under the robe tie, and bringing it back into that same hand.
Do the same thing with the opposite section. Grab a section of hair, add it in, make sure it's nice and smooth, and then cross it over the robe tie, under the robe tie, and then back into your same hand.
Keep doing this all the way up your head.
Remember you're hanging on to the two same sections the entire time, you're never crossing them, and you're just picking up hair as you are going towards the front of your head. But it's the same steps the entire time.
The trickiest part is not being able to see, and that means that this isn’t so beginner-friendly.
I recommend practicing the technique on the side of your head first!

4. Tie the ends
Once you add in all your hair, you just do the same thing, crossing your sections over and under the robe tie, and you do it all the way down.
Once you reach the bottom of the robe tie, you can tie it off with a hair tie.
We want to make sure our ends are nice and secure, so they don't unravel throughout the night. Repeat on the other side.
This is what it should look like.
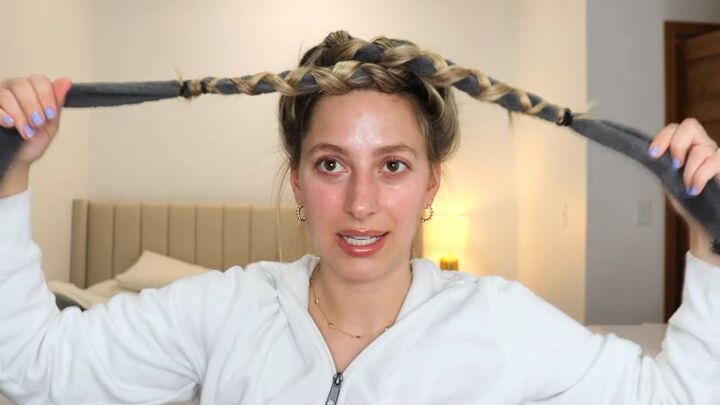
5. Tie it together
Now cross it and cross it again and then take it up front and tie it.
You could sleep with it in a bonnet or shower cap if you like. Sleep with it in overnight.
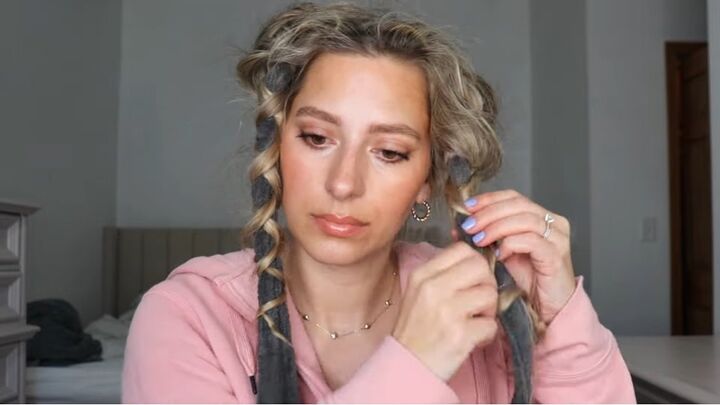
6. Unwrap the robe ties
The next day unwrap the robe ties.
Here's what it looks like right off the robe tie!
Shake the curls out a bit and brush them out with your fingers.
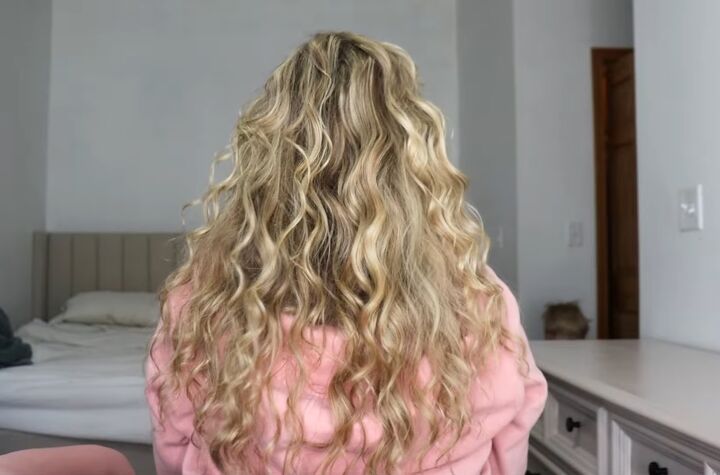
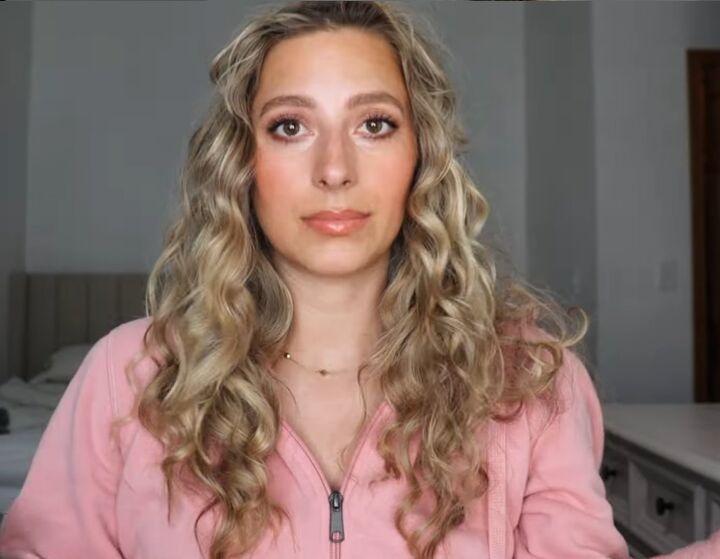
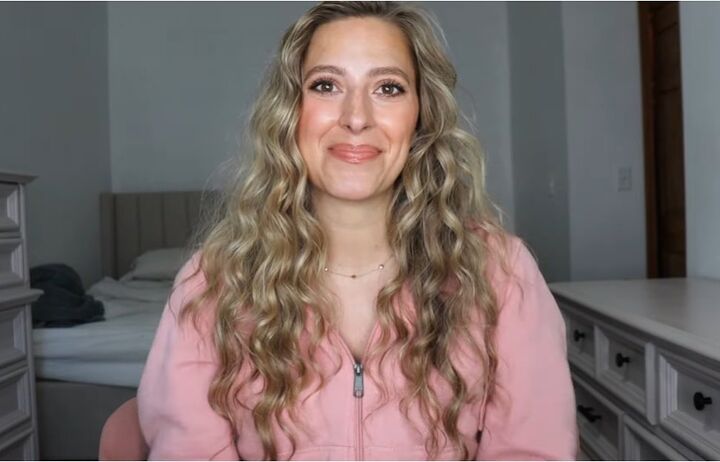
Heatless curls with robe tie
It looks really beautiful. The true test is the back, and I think it looks great at the back. I love these curls and give them 10 out of 10.
I really like this method, I will say it was a little hard to do at first, especially if you're a beginner to this method, you're probably going to have a hard time with it. I slept well on them.
If you are someone whose curls loosen up a lot or they just like fall out, definitely consider using a mousse or a styling cream prior to wrapping your hair.
Let me know what you think and if you’re going to try this.
Check out my 5 Super Cute Hairstyles for Special Occasions.
The author may collect a small share of sales from the links on this page.


Comments
Join the conversation