How to Make a Santa Hat - Fun & Festive Activity to Do With Family

In this tutorial, we are getting into the holiday season and I'll be showing you how to make a Santa hat! This DIY Santa hat is so fun to make and comes out really beautiful.
The great thing about making this yourself is that you can customize it and get as creative as you would like.
Tools and materials:
- Red fabric
- Feather scarf or white fabric
- White yarn
- Scissors
- Ruler
- Measuring tape
- Chalk
- Sewing machine
- Needle
- Thread
1. Set up the fabric
Lay your fabric out flat on the table.
I am using red fleece fabric.
2. Mark your head circumference
Measure your head circumference and divide by two. Using chalk, mark this measurement out, plus an inch for seam allowance, along the width of your fabric.
3. Mark the hat height
Mark your desired hat height along the other side of the fabric.
I am going with 25 inches.
4. Mark the center point of the hat
Divide half your head circumference by two. In my case, that is 6 inches.
Mark the distance of half of your head circumference along the top where your hat height is.
This will give us the exact center point of the hat in order to connect the marks together to create the triangular hat shape.
5. Connect the dots
Now connect the center point to the bottom two points, creating a triangle.
6. Cut out the fabric
Cut out the shape along the lines using fabric scissors.
7. Double up the layers
Lay the piece of fabric on top of the remaining fabric and use it as a stencil to cut out another piece of the same shaped fabric.
We want two layers of this fabric.
8. Pin the sides
Keep the two layers lined up on top of each other and pin the long sides in place.
9. Sew
Sew up the long sides along the pins by a quarter of an inch.
10. Trim
Trim off excess edges.
11. Pin the bottom
Fold the bottom edges down and pin them into place.
I am folding the fabric down once because this fabric doesn’t fray. If your fabric frays, then fold it down twice.
12. Hem
Sew up the hems all the way around.
13. Turn right side out
Turn the hat right side out.
In order to get the entire point right side out, I used this tool, but if you do not have this then you can just use the end of your scissors.
14. Measure the trim
I have a white feather scarf that I am using to line the bottom circumference of the hat.
If you do not have something like this, you can just use regular white fabric.
Measure the amount of the white feathers needed by lining the fabric around the bottom of the hat.
15. Cut the trim
Once the feathers are correctly measured you can go ahead and cut it and knot the ends so it doesn’t fray.
16. Clean up the trim
Trim off the feathers a little bit to clean up the look.
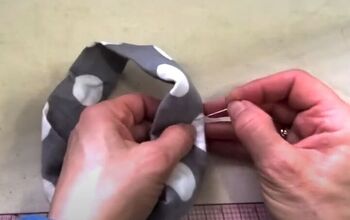
17. Attach the trim to the hat
In order to attach the feathers to the hat, you will need to hand-sew it on because you cannot use a sewing machine for this.
Continue all the way around until the feathers are fully attached to the hat.
If you are using regular fabric then you can use the sewing machine.
18. Make the pompom
Wind yarn around the width of your fingers until all the yarn in the ball is used up.
Leave around 6-10 inches of yarn to tie the pompom together.
Slide the yarn off your fingers, making sure to keep your thumb inside the middle.
Slip the extra yarn through the middle and tie together. Wrap the yarn around the pompom and tie it together again.
You want the pompom to be as secure as possible so tie the yarn together around the pompom as many times as you would like.
Cute all the loops using scissors. Trim the pompom until it is your desired shape.
19. Attach the pompom to the hat
Attach the pompom to the tip of the hat by hand with a needle and thread.
How to make a Santa hat tutorial
This is the completed DIY Santa hat. Making this festive Santa hat is a super fun activity to do with friends or family during the holiday season.
Try this at home and let me know in the comments below how it turns out!
Enjoyed the project?
Suggested materials:
- Red fabric
- Feather scarf or white fabric
- White yarn
- Scissors
- Ruler
- Measuring tape
- Chalk
- Sewing machine
- Needle
- Thread
The author may collect a small share of sales from the links on this page.


Comments
Join the conversation