DIY Fashion: How to Rip Jeans and Leave the White Thread Intact
Ripped jeans have been a popular fashion trend for decades, exuding a casual, edgy vibe that complements various styles. However, achieving the perfect distressed look can be a challenge, especially when you want to leave the white threads intact for a more authentic appearance.
In this step-by-step guide, we'll walk you through the process of ripping jeans while preserving the white threads, giving your denim an effortlessly cool and lived-in look.

Materials Needed:
- A pair of jeans: Choose a sturdy pair of jeans with a tight weave for better control over the ripping process.
- Chalk or fabric pen: For marking areas you want to distress.
- Scissors: To cut initial slits in the denim.
- Tweezers: For extracting blue threads without damaging the white threads.
- Sandpaper or a pumice stone: To achieve a natural worn-out appearance.
- Washing machine (optional): For further fraying after ripping.
Step 1: Mark the Areas for Distressing
Put on the jeans and use the chalk or fabric pen to mark the areas where you want to create the rips. Popular locations include the knees, thighs, and pockets. You can also mark areas along the edges or near seams for a more natural look.
Step 2: Cut Slits in the Denim
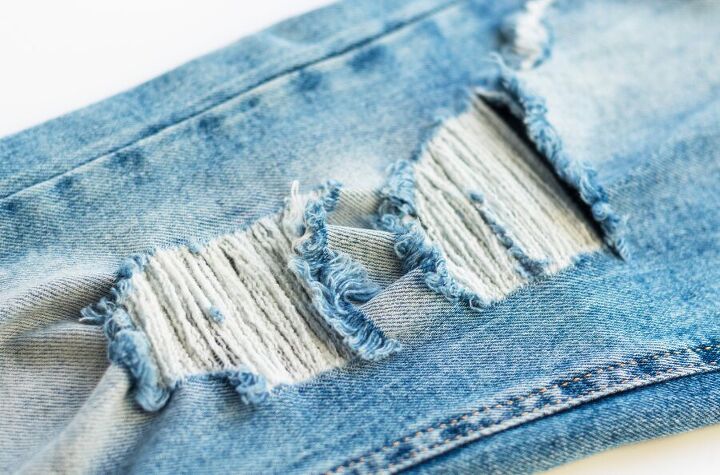
Using the scissors, carefully cut small vertical slits into the marked areas. These slits will serve as starting points for the rips. Make sure to cut only the top layer of denim, leaving the white threads underneath untouched.
Step 3: Pull Out Blue Threads
Gently grasp one of the slits and begin pulling out horizontal blue threads with the tweezers. Be patient and take your time to avoid damaging the white threads. Pull out a few blue threads at a time until the white threads are exposed, creating the desired distressed effect.
Step 4: Create Horizontal Rips
To make the rips look more natural, create horizontal tears along the length of the jeans. You can achieve this by using your fingers to tear the denim gently, following the direction of the fabric's weave. This step should reveal more white threads while fraying the edges of the ripped areas.
Step 5: Distress Other Areas
Continue distressing the jeans in other marked areas, repeating steps 2 to 4 until you achieve the desired level of distressing. Remember, it's better to start with fewer rips and add more later if needed.
Step 6: Add Sandpaper or Pumice Stone Detailing
To enhance the worn-out appearance of the ripped areas, use sandpaper or a pumice stone to gently rub the distressed areas. Focus on the edges and the places that naturally experience more wear, like the knees and pockets. This process will further fray the fabric and give the jeans a vintage look.
Step 7: Optional: Wash and Dry the Jeans
For more fraying and a softer feel, wash the distressed jeans in a washing machine using cold water and a gentle cycle. Afterward, air dry or use a dryer on low heat. This step will help the white threads loosen and blend with the distressed areas, creating a seamless and authentic look.
Step 8: Final Touches
Inspect your ripped jeans and add or adjust distressing if necessary. You can also use a lint roller to remove any loose blue threads that might be lingering on the fabric.
Ripping jeans and leaving the white thread intact is an art that can elevate your denim game to new heights. By following these step-by-step instructions, you can achieve that sought-after distressed look while maintaining the authentic charm of white threads.
Remember to take your time, be patient, and experiment with different levels of distressing until you achieve the perfect balance of edgy and fashionable.
The author may collect a small share of sales from the links on this page.


Comments
Join the conversation