Using Shape and Texture in Jewellery Design
Texture, shape, colour, lustre, material – it’s all important in your jewellery designs. Let’s talk about that.
When designing a necklace, bracelet or earrings, it’s really important that you take all these things into consideration. Using beads and components with different texture and shape, helps to make the piece more interesting.
Combining different shapes and textures, as well as colours and materials, can take an ordinary piece of jewellery and make it stunning.
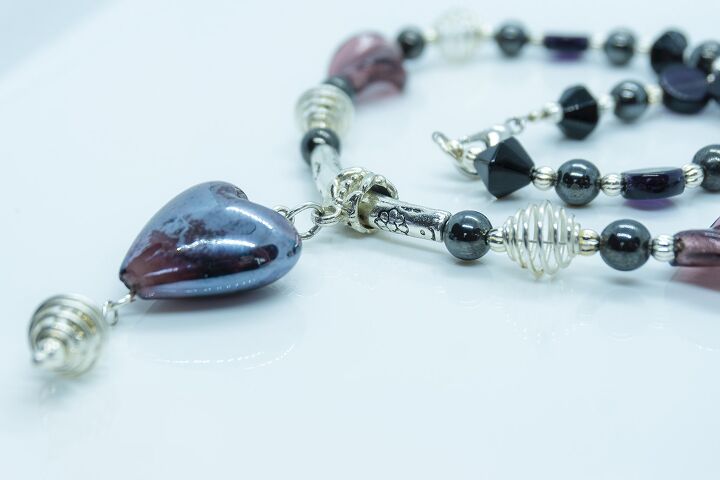
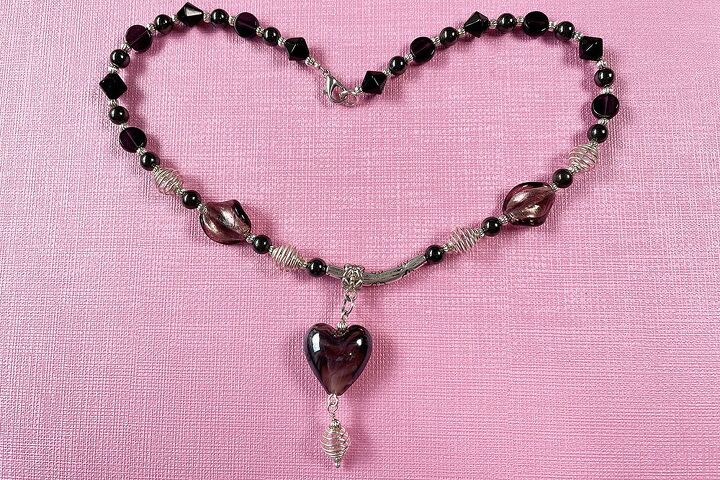
In this week’s tutorial, I made this Heart and Cage Necklace using a variety of shapes, textures and materials.
Let me explain why I chose the beads that I did and how I put them together.
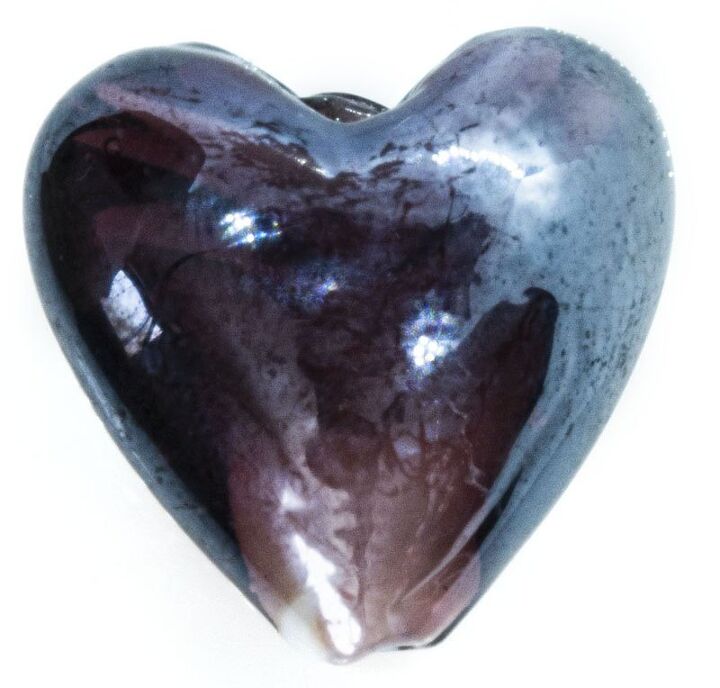
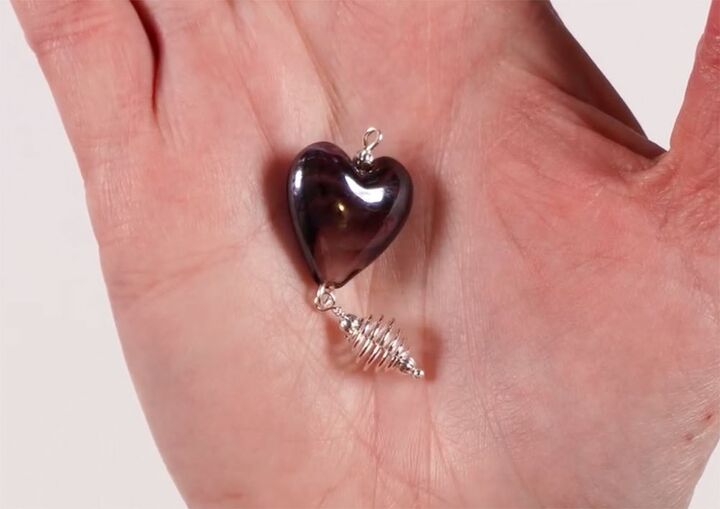
Glass Hearts
It all started with the glass hearts. You know me, I fall in love with beads and then I can’t stop thinking about them. That was the case with these hearts (we also have them in red, white, blue and green). They are smooth and shiny with a slight AB finish.
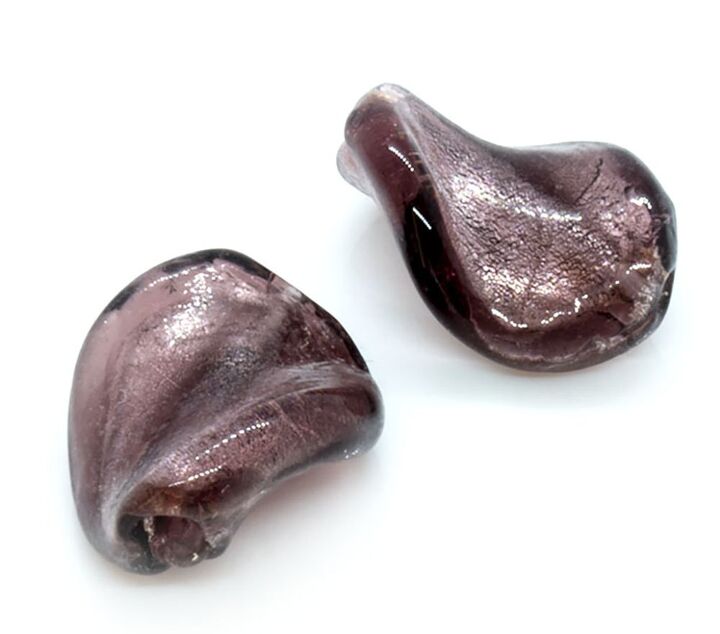
Lampworked Silver Lined Twist Beads
Next, I needed to choose something to go with the hearts. I chose these lampworked silver lined twist beads for two reasons. First, the colour was a perfect match. Second, I loved the shape and texture of them. Even though they have shiny interior (silver foil), the actually exterior looks quite textured.
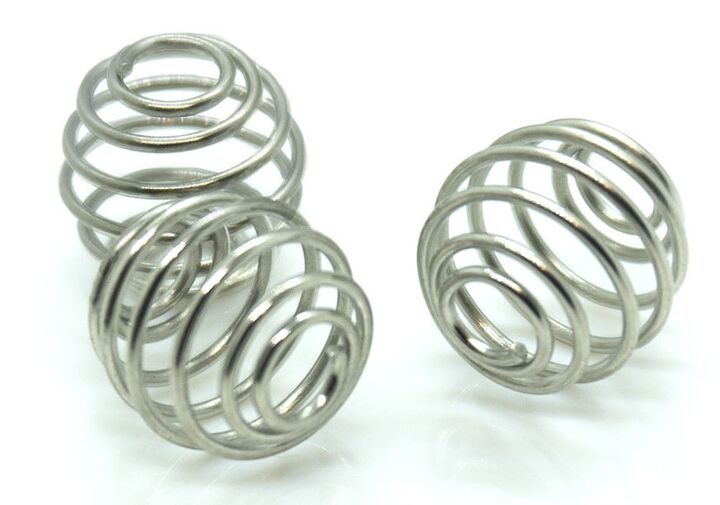
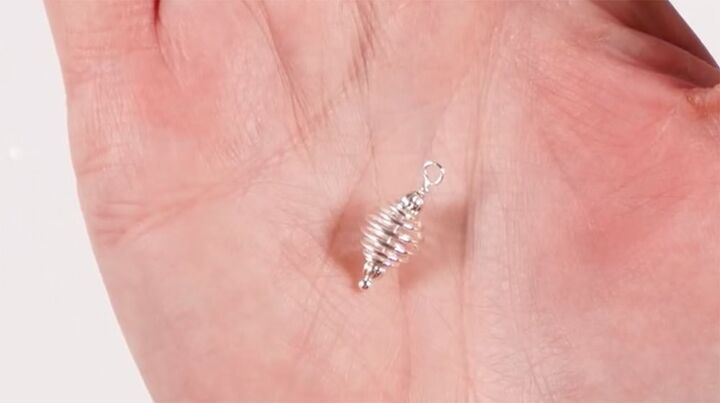
Spring Cage Beads
Now I had some glass, I decided that I needed to add beads made from a different material. These spring cage beads were perfect for adding texture, a different lustre and also a different material.
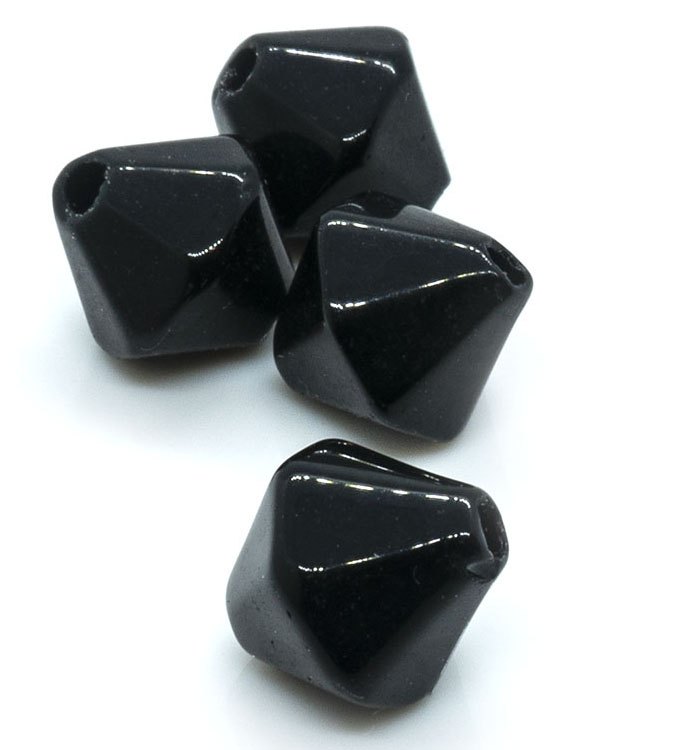
Glass Bicones
I liked how the glass bicone was completely different to all the other shapesI had chosen. I also liked the colour – the jet bicone provides a very dark(black) colour to the next which contrasts nicely with the silver and goes well with the amethyst coins.
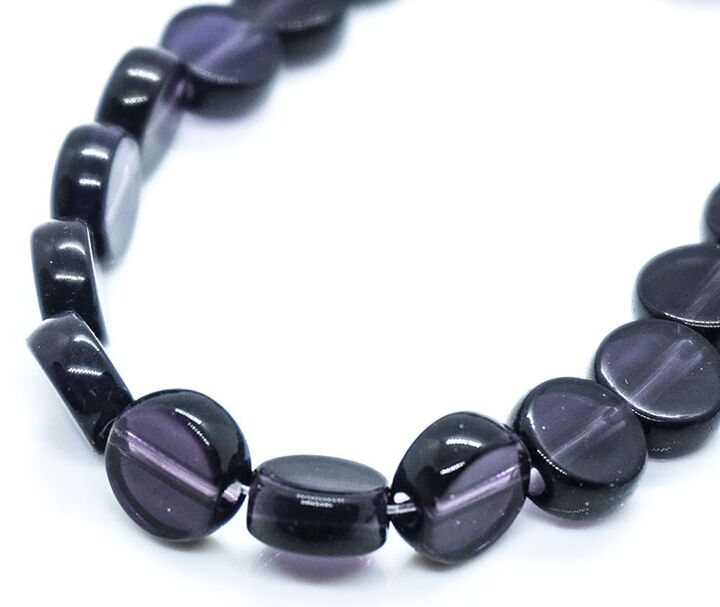
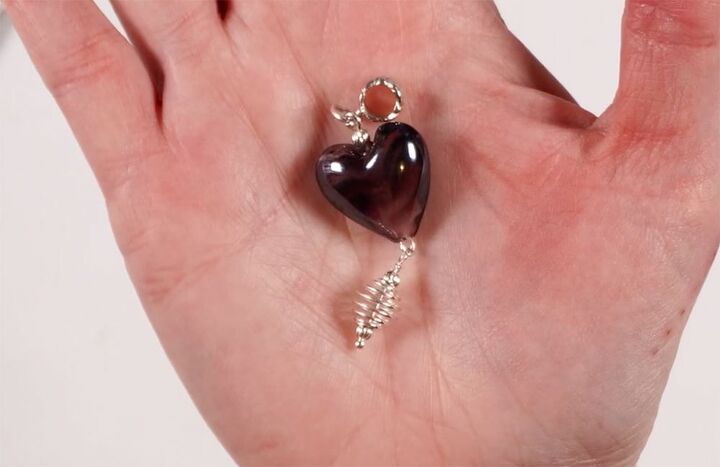
Flat Round Glass Coin
I had some interesting shapes already chosen so I wanted to add something a little quieter. These amethyst coins are still within the purple colouring, but they are darker so added more depth to the piece.
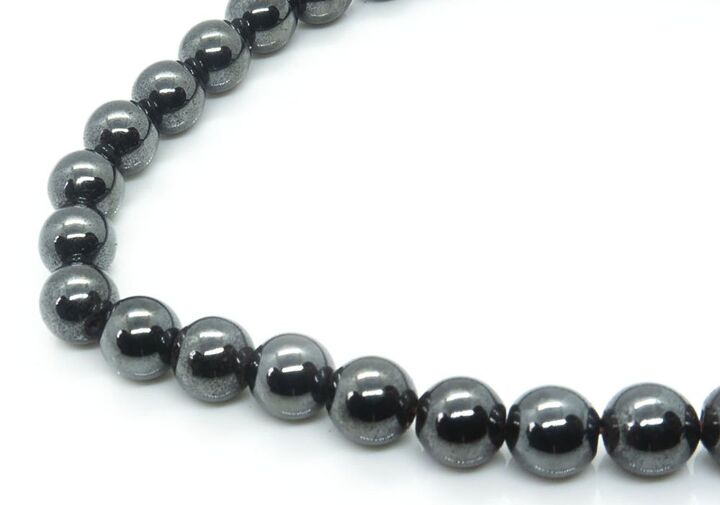
Hematite Round Beads
Another quiet shape here. Smooth, round and shiny, these hematite beads add some peace to the necklace.
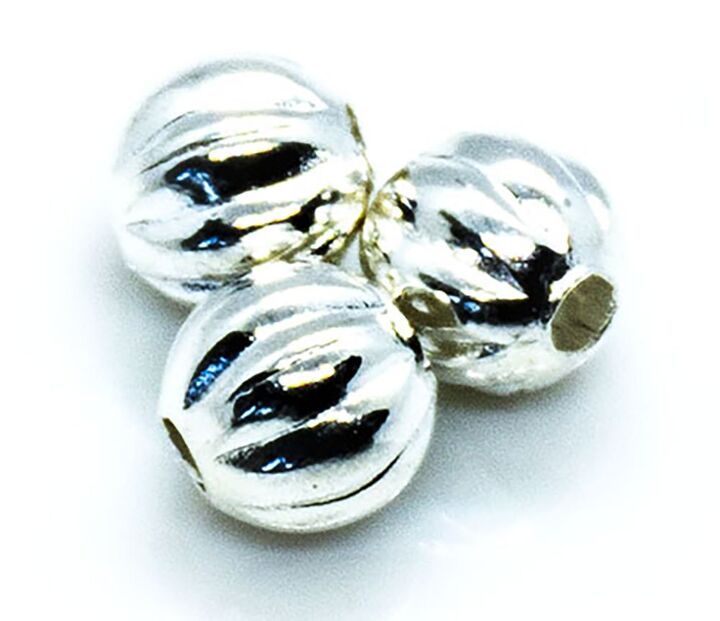
Silver Corrugated Round Beads
Now, you may think that your tiny spacer beads don’t matter but I’m hereto tell you, they do. I chose this particular bead because I wanted to bring the silver up away from the focal. The corrugated texture is a bonus. I could easily have used smooth silver beads here but I think that the added texture of these beads adds something really special. I also needed a bead to stop the ball pin from going up inside the cage bead so the 3mm bead worked perfectly for this purpose. It also added some accent to the cage bead on the strand.
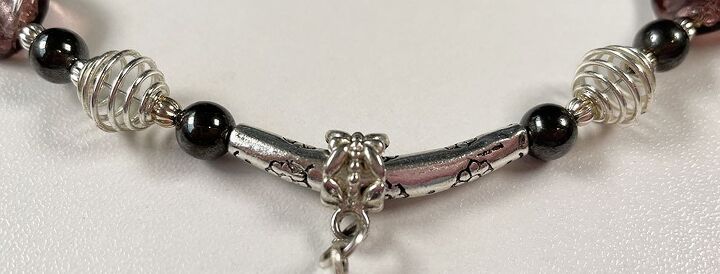
Curved Tibetan Silver Tube and Barrel Bead
Why did I choose to combine a curved tube and a barrel bead? Well, to be perfectly honest with you, it was because I didn’t have a barrel bead large enough to do the job. I also found though, that when I combined the two pieces together,I really liked the different textures that they added. Because the tube is smoother than the barrel, it worked, especially with the smooth hematite and cage beads close by.
Now we’ve talked about why I did what I did, let’s go ahead and make the necklace.
Materials
To make the pearl earrings you will need:
- 20x12mm Plum Glass Heart x1
- 18x5mm Lampwork Glass Twist with Silver Foil x2
- 31x3mm Tibetan Silver Curved Tube x1
- 11x8x6mm Antique Silver Barrel Bead x1
- 6mm Synthetic Hematite Round Beads x17
- 3mm Silver Corrugated Round Beads x39
- 7mm Dark Amethyst Flat Round Glass Beads x6
- 8mm Jet Crystal Glass Bicone x6
- 9mm Silver Spring Cage Bead x5
- 0.38mm Silver Tiger Tail x 60cm
- 12mm Platinum Lobster Clasp x1
- 2mm Silver Magical Crimping Beads x2
- 4cm Silver Ball Pin x1
- 6mm Silver Jump Rings x 2
- 20 Gauge Silver German Style Wire
Tools
The tools I used to make these earrings are:
- Chain Nose Pliers x 2
- Flush Cutters
- Bead Design Board
- Bead Stopper
- Round Nose Pliers
- Magical Crimp Forming Tool
Instructions
Watch the video or read the instructions below:
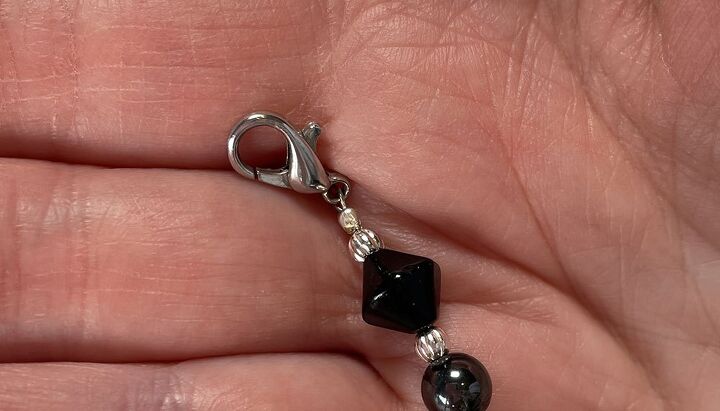
Make the Focal
Onto the ball pin thread on:
- 1 x 3mm Corrugated Bead
- 1 x Spring Cage Bead
- 1 x 3mm Corrugated Bead.
Make a wire wrapped loop above the bead. If you need to watch this video about how to make a wire wrapped loop.
Make a loop in the end of the 20 Gauge wire, using the round nose pliers. If you haven’t done this before, watch this video on how to make a simple loop.
Thread on the Glass Heart then another 3mm Corrugated Bead. Make a loop in the end of the wire above the silver bead. Open the lower loop and thread on the cage bead dangle you just made. Close the loop.
Open one of the 6mm jump rings. Thread on the top loop of the heart component and the loop of the barrel bead. Close the jump ring. If you need help with this, watch this video all about jump rings.
Lay Out the Beads
Use the design board to lay out the beads. Here’s a diagram of how I laid them out.
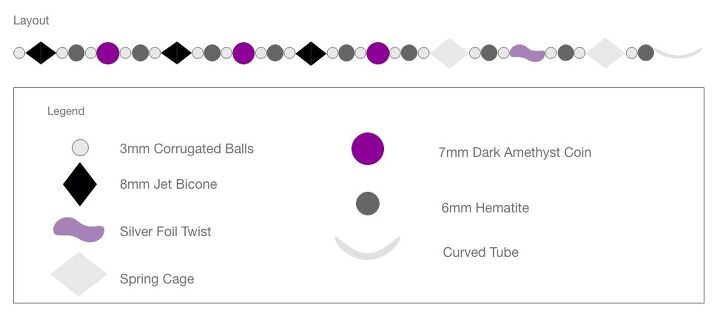
Put the bead stopper on one end of the Tiger Tail and thread on the beads.
Add the Clasp
Thread on one of the Magical Crimp Tubes, then the loop of the clasp. Thread the Tiger Tail back through the crimping tube, making sure that the clasp is in the loop of Tiger Tail, and through several of the beads. You could use a wire guardian here if you wanted to.
Next, use the Magical Crimp Forming Tool to squeeze the crimp bead. If you haven’t got a Magical Crimp Forming Tool, here’s a video showing other ways to crimp. Trim off the excess Tiger Tail.
Take the remaining jump ring and ensure it is closed properly. Run all the beads down towards the clasp so that there are no spaces. Repeat the process above to add the jump ring on the other end.
Jewellery I’m Wearing
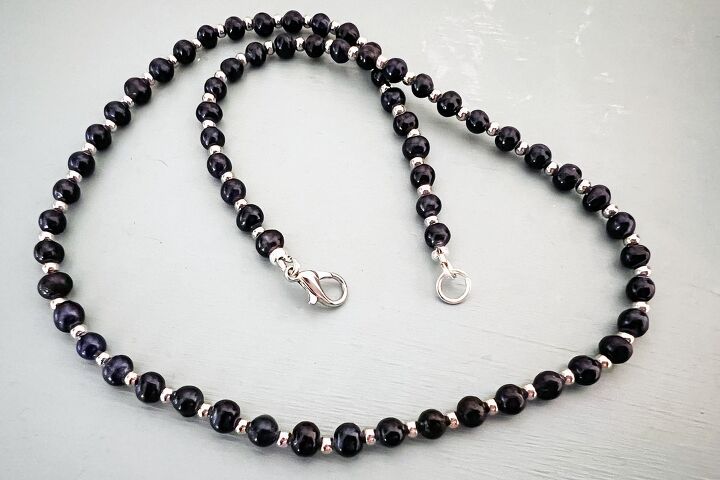
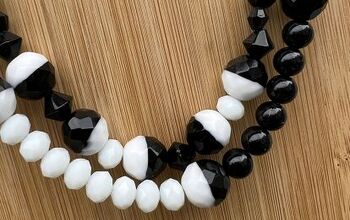
Necklace
Here’s the tutorial for the black pearl necklace I was wearing in the video.
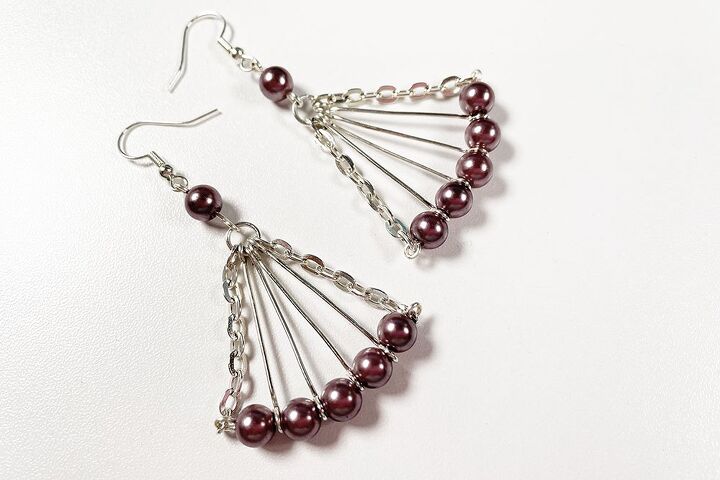
Earrings
The tutorial for the Pearl Fan Earrings can be found here:
Please let me know in the comments section if you enjoyed this post all about using different shapes, textures and materials in jewellery design, and if you would like to see more tutorials on how I design my jewellery.
Remember to subscribe to my YouTube channel and ring the notification bell so you will never miss a thing.
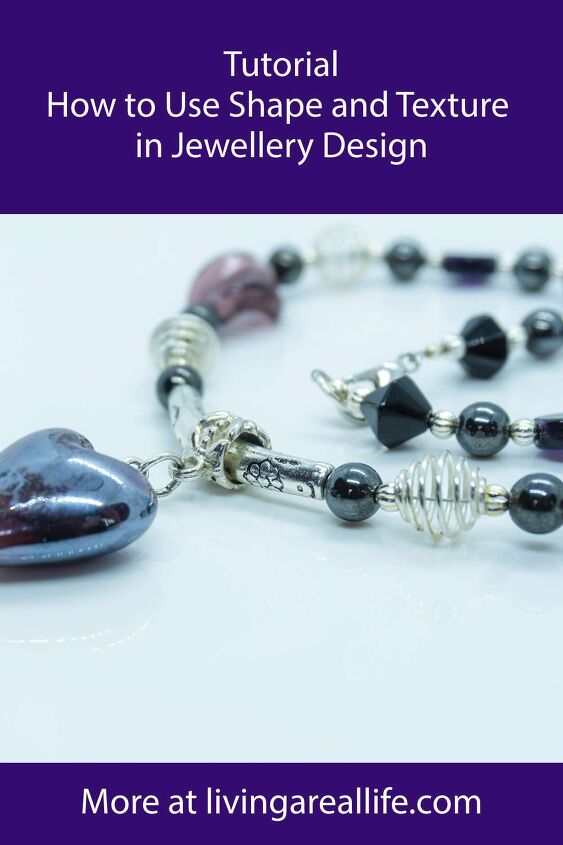
⇓ REMEMBER TO PIN THIS PROJECT FOR INSPIRATION AND SHARE WITH YOUR FRIENDS!!⇓
If you like my blog be sure to click on the RECOMMENDED button and SHARE it with your friends! It’s the best way for my blog to grow so I can continue to give you great content. I would love for you to be part of my family so sign up to receive my emails. Every time I post a blog, I will send you an update email. Also, follow me on Facebook HERE, Instagram HERE and Pinterest HERE.
Come by and say Hey!
The author may collect a small share of sales from the links on this page.


Comments
Join the conversation