DIY Paracord Keychains
DIY Paracord Keychains are a fun and easy craft for kids of all ages to make!
Keychains made of paracord are a fun and simple project that only takes about 5 minutes. This is a great activity to do during summer camps or rainy afternoons that will keep kids of all ages busy. The keychains are also a fantastic way to use up paracord scraps left over from other paracord projects. Once you get the hang of making your own colorful paracord keychains, you can share your creations as gifts or even start your own little business and sell them to everyone you know!
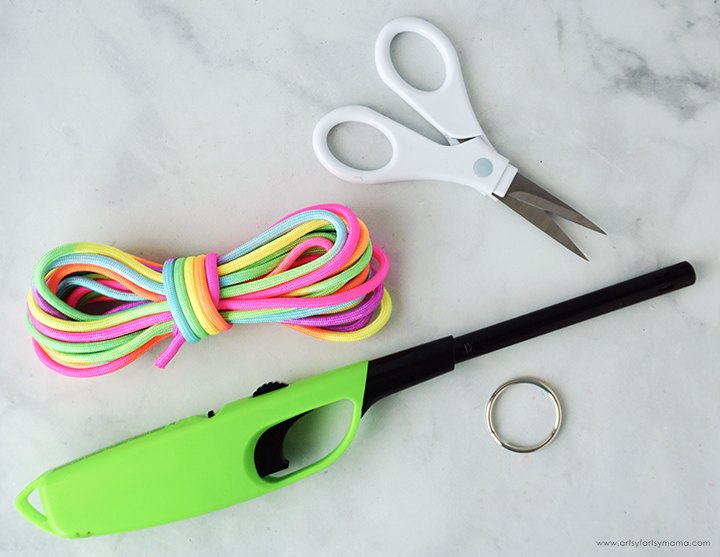
To make your own DIY Paracord Keychains, you will need these supplies:
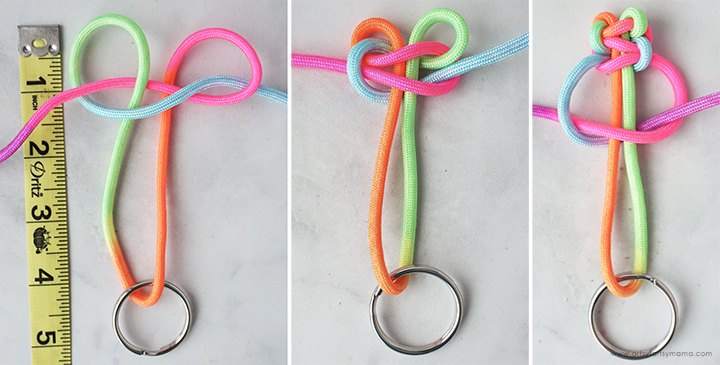
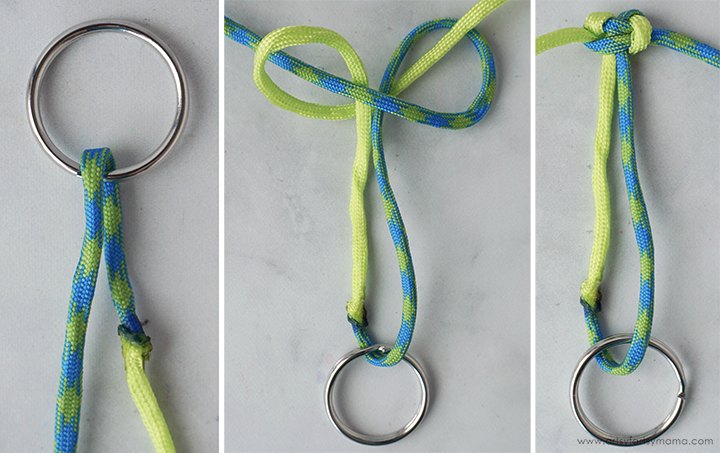
Cut a length of paracord measuring 60 inches (5 feet) long. Thread the paracord through the keyring until it is halfway through. If this is your first time making a paracord keychain, I would recommend taping the keyring down on your workspace.
- Fold the cord on the left into a "4", and bring the cord over the top of the right cord.
- Fold the cord on the right the opposite way, but bring the cord under the left cord and up through the loop.
- Make sure the left cord end is going down through the loop of the right cord.
- Pull the ends to tighten the knot, but use your thumbs to keep the knot in place at the 4" mark.
- Fold the cord on the right over the top of the two center cords.
- Bring the cord on the left over the end of the right cord.
- Fold the left cord under the center cords. Bring the end up through the loop on the right.
- Pull the ends of the cord to tighten the knot.
- Fold the cord on the left over the top of the two center cords.
- Bring the cord on the right over the end of the left cord.
- Fold the right cord under the center cords. Bring the end up through the loop on the left.
- Pull the ends of the cord to tighten the knot.
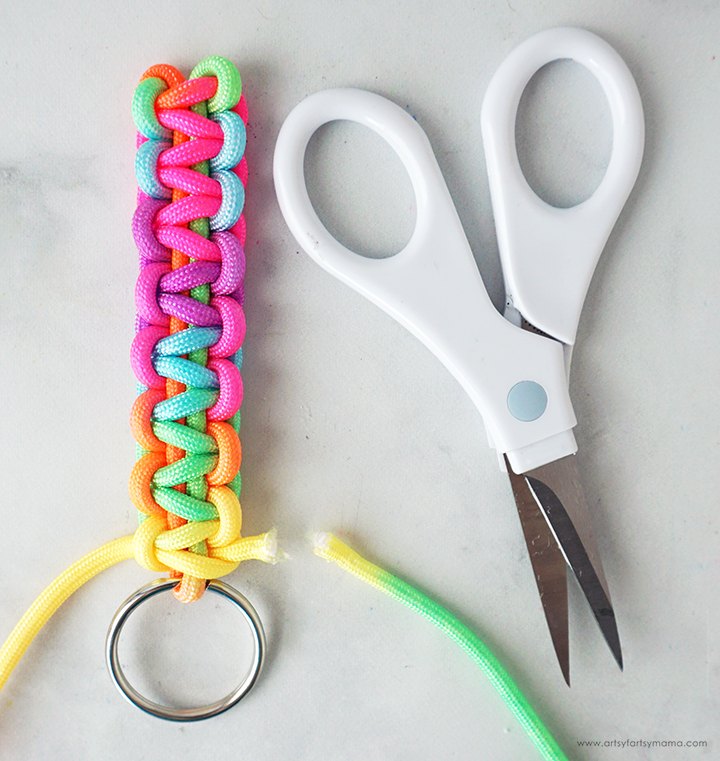
Repeat those alternating knots until you get to the keyring. Pull the last knot tight, and then cut the ends about 1/4 inch long with sharp scissors.
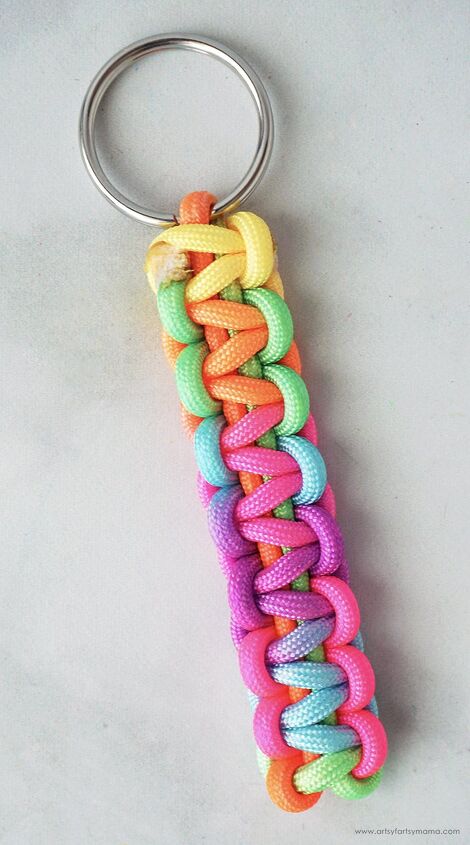
Use a lighter to melt the ends of the cords to keep them from fraying. While the cord is still hot, use the plastic part of the lighter or the flat side of your scissors to press the melted cord down*. The melted edges of the cord will stick to the cords next to it, which helps to keep your keychain from unraveling.
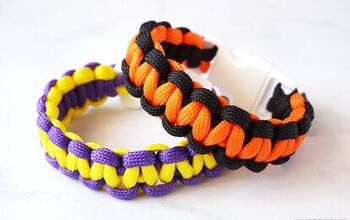
If you want to get a little more creative, you can use two different colors or patterns of paracord! Cut each length of cord 30 inches (2.5 feet) long. Fuse the ends of the cords together to make one long length of cord.
- Use the lighter to melt the two ends of cord and squish the ends together (as seen above). Hold in place until it cools down.
- Cut away some of the inner strings of one cord's unfinished end. Place the melted end of the other cord inside the unfinished cord. Use the lighter to carefully melt the edges of the unfinished cord and use pliers or the side of your lighter to press the melted ends to the "seam".

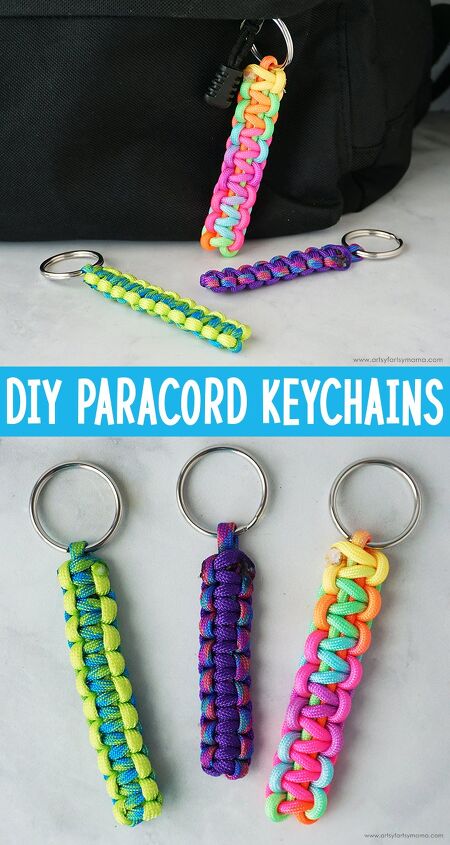
I love how easy these keychains are to make! You can customize the colors of them by combining different colors, patterns, and even thickness of paracord to make them all your own. If you want to adjust the length of the keychains, just change the length in the instructions from the 4" mark.
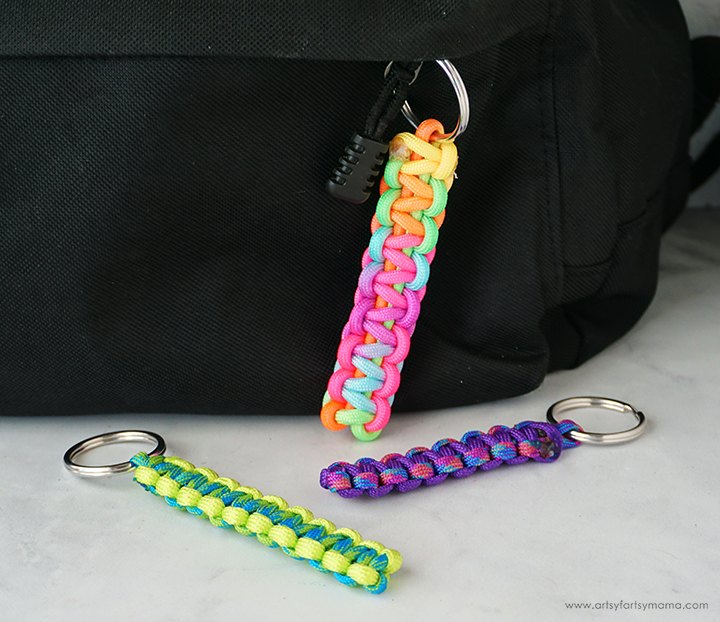
This is such a great project for kids of all ages to do, and is easy for paracord crafting beginners! These keychains can be attached to all kinds of things, like backpacks, purses, zipper pulls on coats, or even as a fun and colorful attachment to your luggage. My daughter is having so much fun making keychains, and I hope you and your kids enjoy making some, too!
The author may collect a small share of sales from the links on this page.


Comments
Join the conversation