A Step by Step DIY Macrame Keychain Tutorial

This DIY Macrame Keychain Tutorial was originally created for Darice.
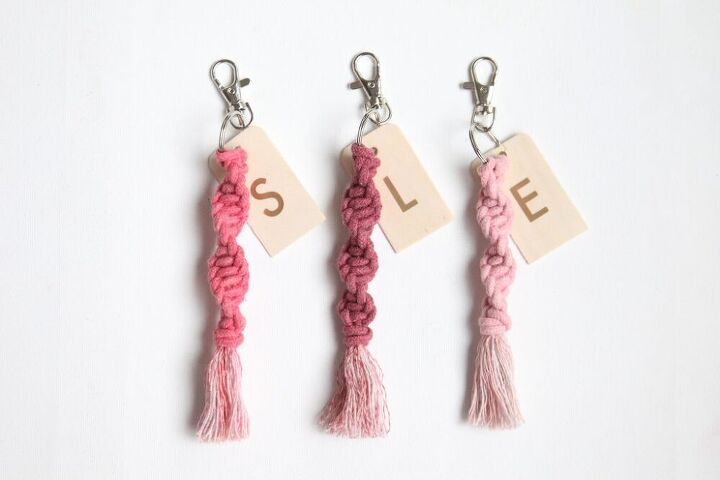
We are big fans of macrame crafts around here. Making projects out of macrame can really connect you to your younger self where you might have made friendship bracelets at camp or during a lazy summer day. Lots of the knots and techniques used to make things out of macrame are the same or similar to those of friendship bracelets or lanyards but the results are a bit more chic and adult! So, since the weather is starting to warm up, it's the perfect time to tap into your inner-friendship-bracelet-maker and try out a simple macrame craft to get your feet wet in the method, and our personalized macrame key chains are just the thing! Keep reading for the tutorial!
Supplies needed for this DIY Macrame Keychain Tutorial
Rit dye (rose pink, fuschia, wine)
Vinyl or paint
You can also buy a DIY macrame keychain kit right here:
DIY Macrame Keychain Tutorial
Step 1: Cut six piece of cord three feet long. Mix the dye according to the instructions, and add two pieces of cord to each color. Let it sit for an hour (or until you like how it looks), and then rinse until the water runs clear. Let the cord dry completely.
Step 2: Add a monogram to the wood tag by cutting and applying vinyl letters or using a stencil and paint.
Step 3: Trim down (scissors work just fine) and sand the top of the wood tag to make it easier to get on the split ring of the key chain.
Step 4: Put the tag on the key chain. Attach the first piece of macrame cord to the split ring with a larks head knot. You can do this knot by folding the cord in half, wrapping the folded end of the cord around the ring, and pulling the ends of the cord through the loop of the folded end. Pull to tighten.
Step 5: Repeat the larks head knot with the second piece of cord.
Step 6: Start with your first spiral knot. As spiral knot is made by taking the outer left cord and crossing it over the two middle cords, then taking the outer right cord and placing it over the end of the left cord and UNDER the two middle cords and loop it through the hole on the left side. Pull it tight.
Step 7: Continue with your spiral knots, making sure you always put the left cord on top first. This will make the knots spiral.
Step 8: Once you're happy with the length of your spiral, finish it by tying all four cords together in a knot. Then trim the end so about two inches remains.
Step 9: Use a comb or brush to fray the end of the cord. This is the most time-consuming part of the project, but is super easy. Just keep combing and combing to make a tassel.
Step 10: Once you have unraveled all the cording below the knot, cut the tassel in a straight line.
Now you're done! I know there are a lot of steps here, but the whole keychain comes together in about 30 minutes, I promise! And what a cute gift your gals can carry with them!
Happy crafting!
xo, Sam
Enjoyed the project?
The author may collect a small share of sales from the links on this page.


![DIY Headband [Step-by-Step Tutorial With Pictures]](https://cdn-fastly.upstyledaily.com/media/2021/04/22/6428632/diy-headband-step-by-step-tutorial-with-pictures.jpg?size=350x220)


Comments
Join the conversation
What size of macrame cord is used in this tutorial. I tried the link to macrame cord in the list of supplies but the link was to Michaels crafts and the link did not lead to the product.
Awesome easy to follow tutorial thankyoy