How to Make 5 Fun Hair Ties That Double as Bracelets

Many girls wear a plain black hair elastic on their wrists in case they need to put up their hair. How wonderful would it be to make super cute, fashionable hair ties that double as bracelets?
I’ll show you how to make these five styles of elastic bracelets that you can use as hair ties. They not only look super cute but are also super functional. These are also really cute to make with your best friend as a friendship bracelet or make a complete set to give as a gift. Let me show you how to make a hair tie that looks like a bracelet.
Tools and materials:
- 2 or 3 mm thick elastic cord (0.07 to 0.11 inches)
- Clear glue
- Hot glue and glue gun
- Scissors
- Beads
- Decorative ribbon
- Bottle the size of your wrist
- Clips
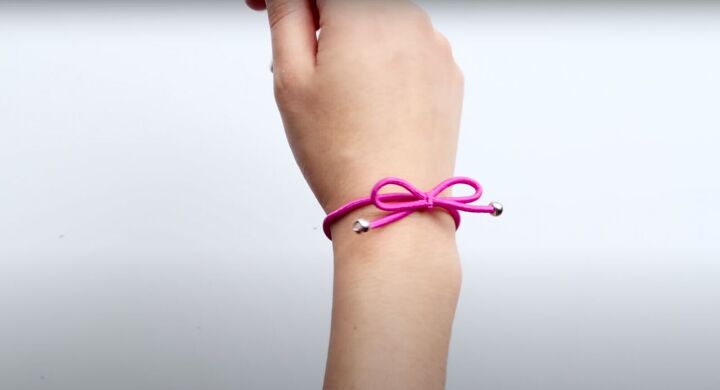
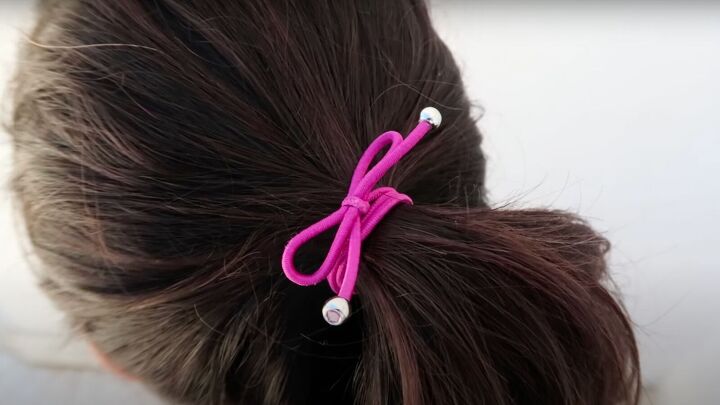
Bracelet with bow
Use 3 mm elastic cord, glue and beads
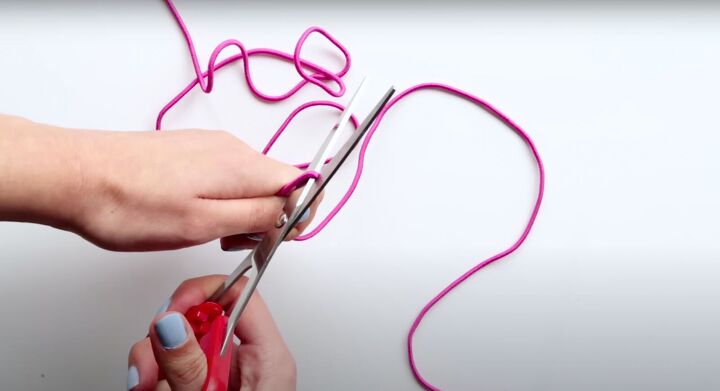
1. Make the bracelet
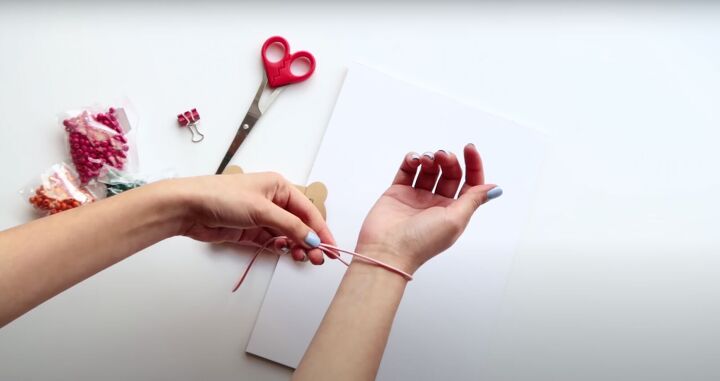
Cut the elastic to measure your wrist plus extra to make sure you have enough.
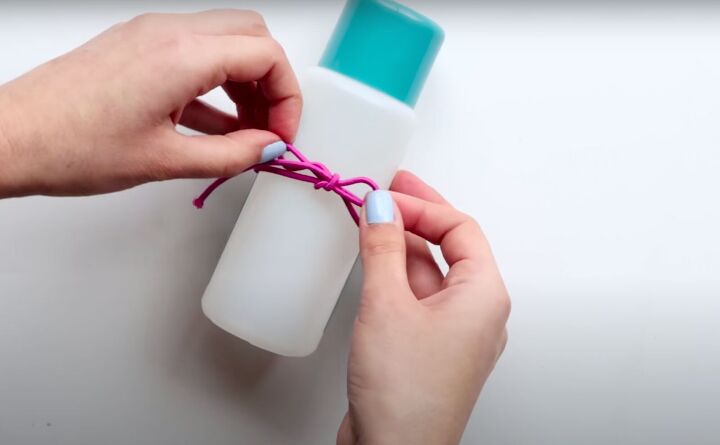
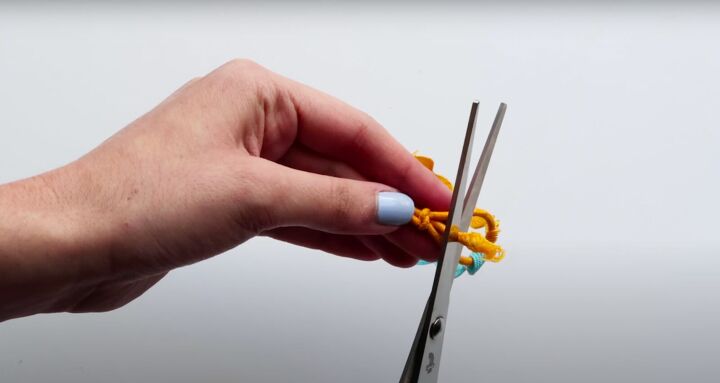
Wrap the elastic around a bottle that is similar to the size of your wrist. Make a simple bow. Pull it taut until you’re happy with the bow. Cut the ends.
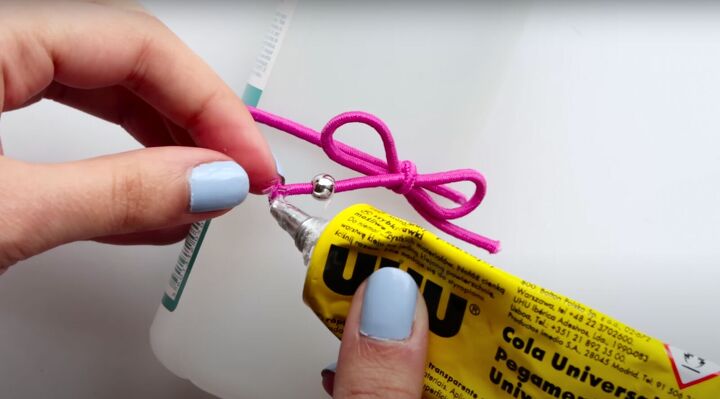
2. Decorate the bow
Add beads to finish the ends and glue in place. Pull the bead up the elastic a bit. Dab some glue at the end. Slide the bead down.
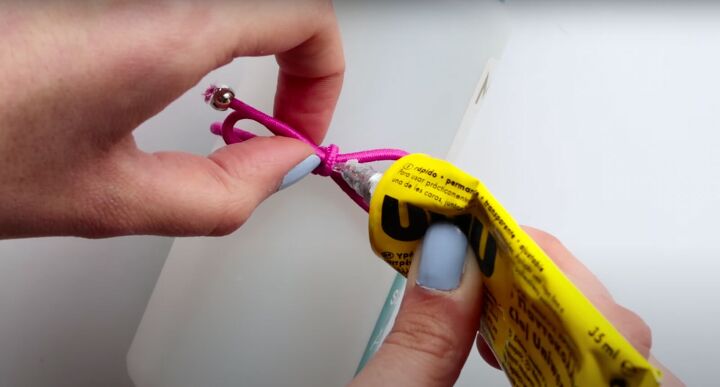
Add some glue to the bow to secure it. Let it dry on the bottle until it’s ready to wear.
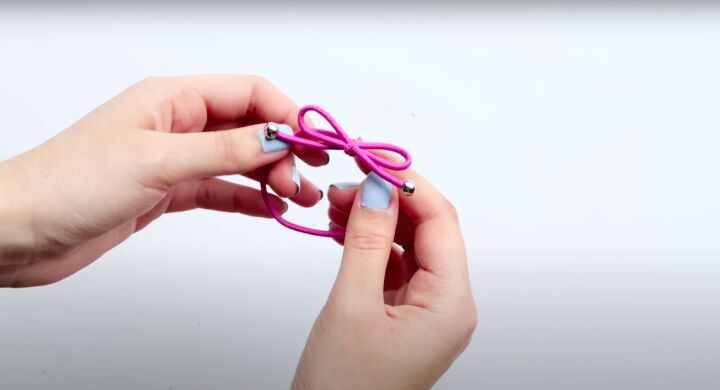
What a beautiful bracelet with bow hair tie.
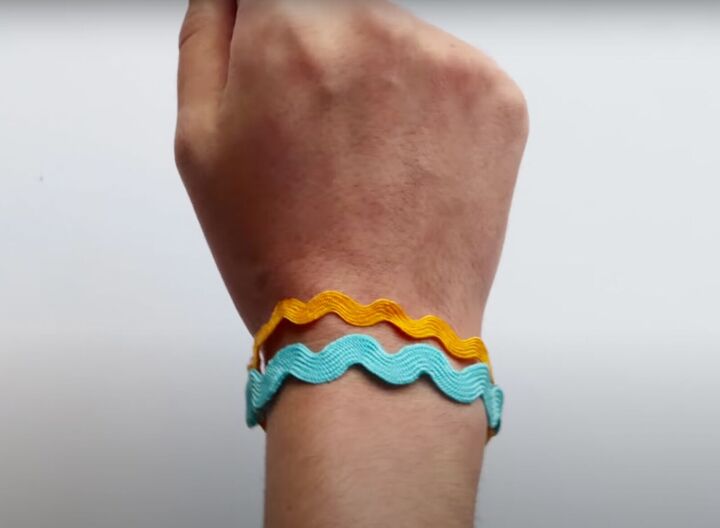
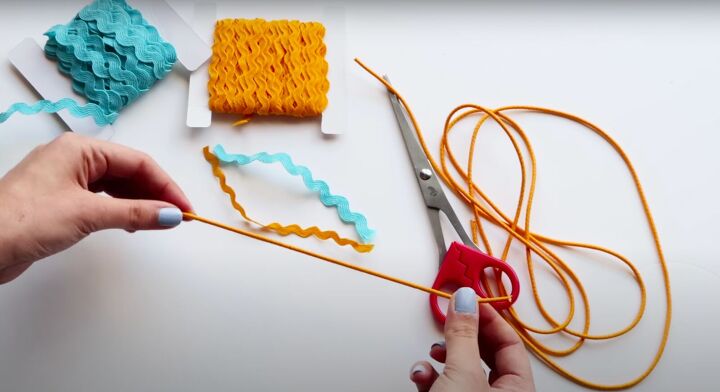
Ribbon bracelet
Use decorative ribbon, 3mm elastic and hot glue
1. Make the bracelet
Use any type of decorative ribbon. Cut the ribbon and the elastic to fit your wrist.
On the ribbon only, make a loop by folding over and gluing the ribbon about ⅛ of an inch inward on both sides. I’m using two ribbons and I made two loops on each ribbon.
Once the glue is dry, pull the elastic through the loops. Make sure the ribbons aren’t twisted.
Use the bottle to help you tie the elastic into a bow. Put the ribbons to one side and the elastic to the other. Tie the elastic.
At the top, pull the elastic through at the top and tie it so there isn’t a large gap.
Cut the ends. If you want to, you can carefully use a flame to singe or burn the edges so they don’t fray.
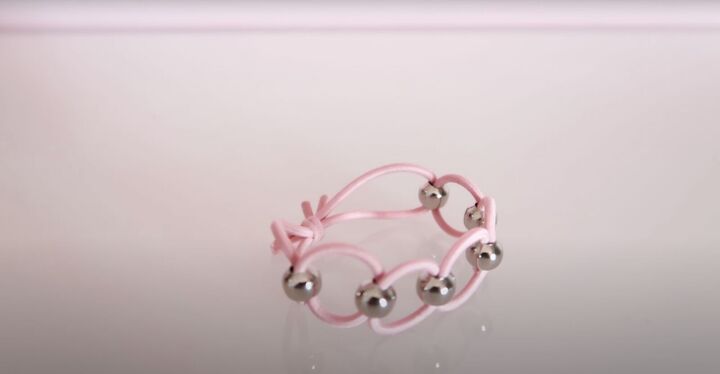
Beaded bracelet
Use 2 mm elastic and beads
1. Make the bracelet
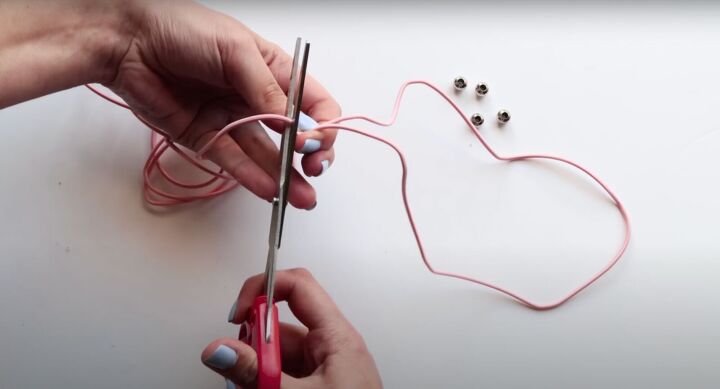
Cut two strands of elastic equal in length. Make a knot at the end.
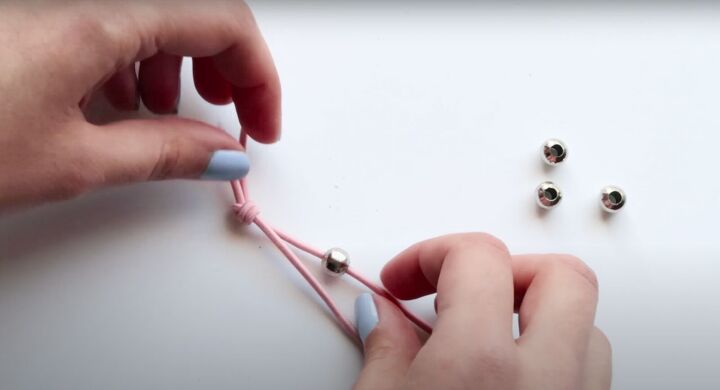
Put a bead through one of the strands.
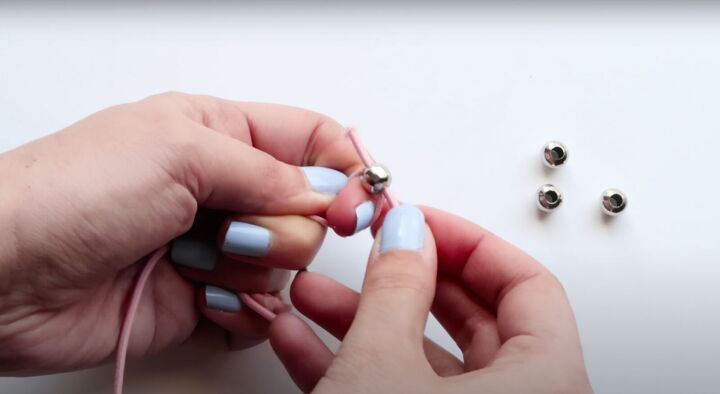
Then take the other strand and put it through the same bead on the opposite side.
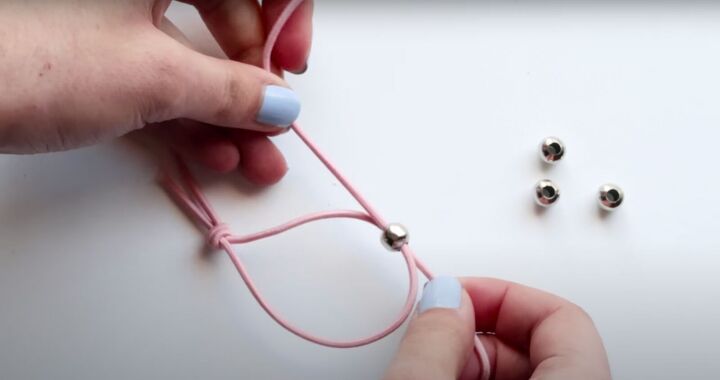
Leave some space in between them.
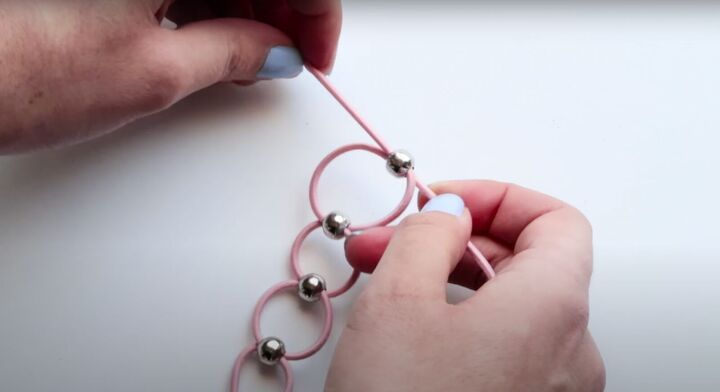
Continue doing this until the bracelet is long enough for your wrist.
To close, use the bottle to hold in place while you tie a simple knot. Trim the ends. You can carefully singe them to stop fraying.
Braided hair tie
Use 2 mm elastic, beads, clips and hot glue
1. Make the bracelet
Start by estimating how much elastic you’ll need.
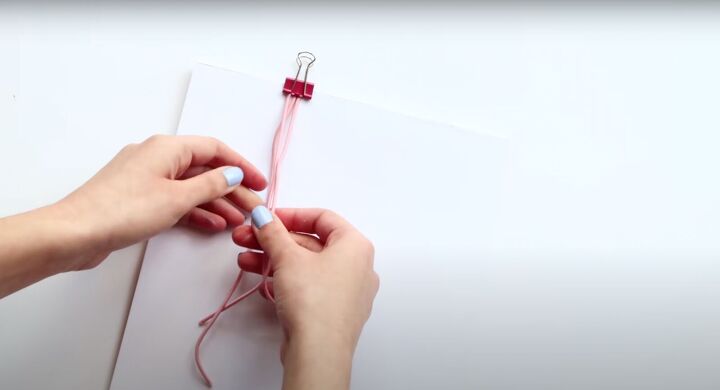
Cut three strands all the same length. Clip them onto a board.
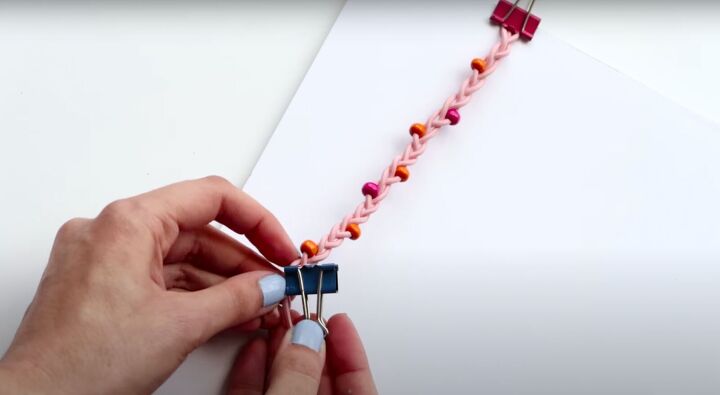
You can make it plain or add beads. I like to add different colored beads and put them alternating on the left and right sides of the braid. Once it’s long enough, clip the bottom.

Hot glue the ends on both sides to keep the braid in place.
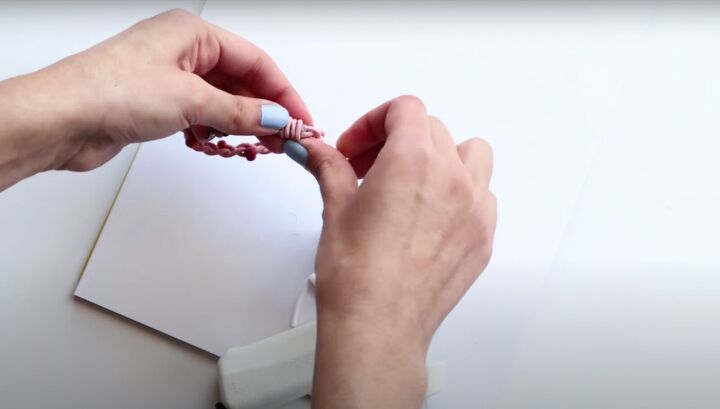
Then hot glue the ends together by laying one on top of the other. To hide the glue, wrap a piece of elastic around it.
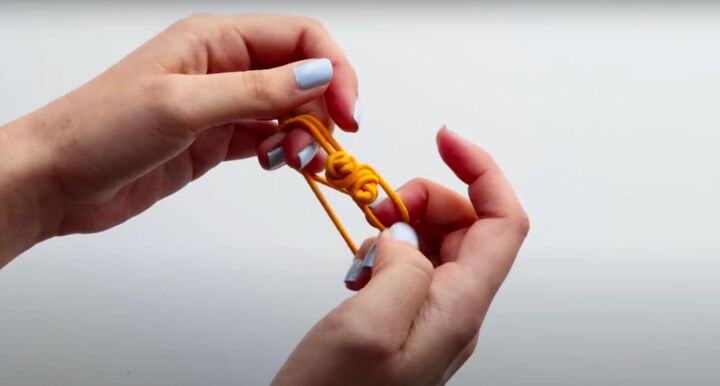
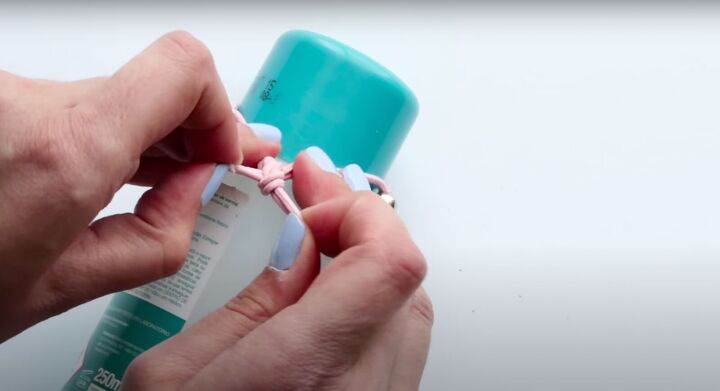
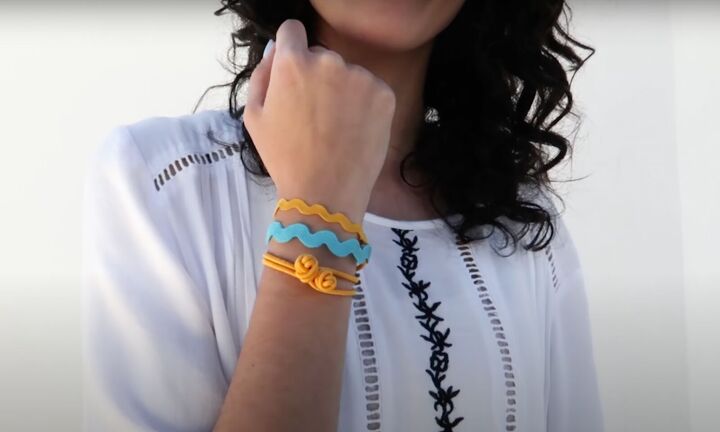
Knotted bracelet
Use 3 mm elastic, clear glue and hot glue

1. Make the bracelet
This is Anthropologie inspired. Cut the elastic to go around your wrist twice, plus some extra.
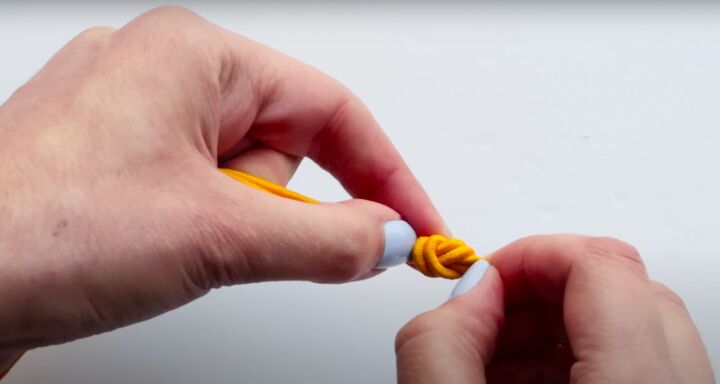
Loop the elastic. Make a knot on the looped end. Secure the knot and glue in place.
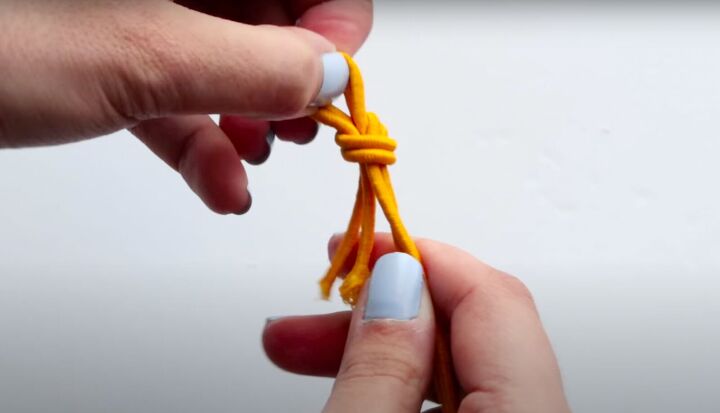
Knot the open end at the bottom. Leave the ends tucked in. Pull to secure and glue the knot in place.

Trim the excess.
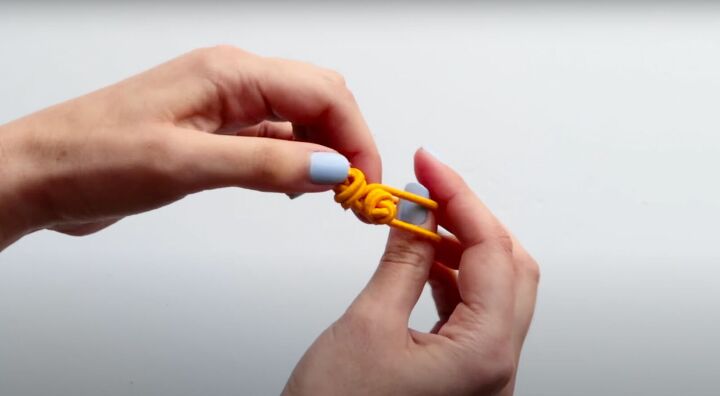
Place one knot inside the other. Glue the knots to each other.
I love these hair ties that double as bracelets.
Perfect for your wrist or your hair.

Please let me know in the comments if you made these and which ones you made.
The author may collect a small share of sales from the links on this page.


Comments
Join the conversation