How to Make Easy Faux Leather Earrings
This post contains affilate links which means if you click and buy, I may make a commission at no cost to you. See my full discloure policy for more details.
Of all of the “must make” projects on my crafting lists, how to make easy faux leather earrings was never near the top. Jewelry making has never really been one of my crafting interests. Sure, I made friendship bracelets with embroidery floss as a kid. But when it came to the beads and jewelry findings aisle at Michael’s, that’s not where you’d find me. Besides, I only ever wore small hoops or stud earrings.
Of course, we change as we grow. Our tastes in style widen and we try new things. For me, seeing faux leather earring files only recently caught my interest. I can’t say exactly what it was that finally made me want to try making them. But once I made the pairs I’m about to show you, I knew I’d be making lots more.
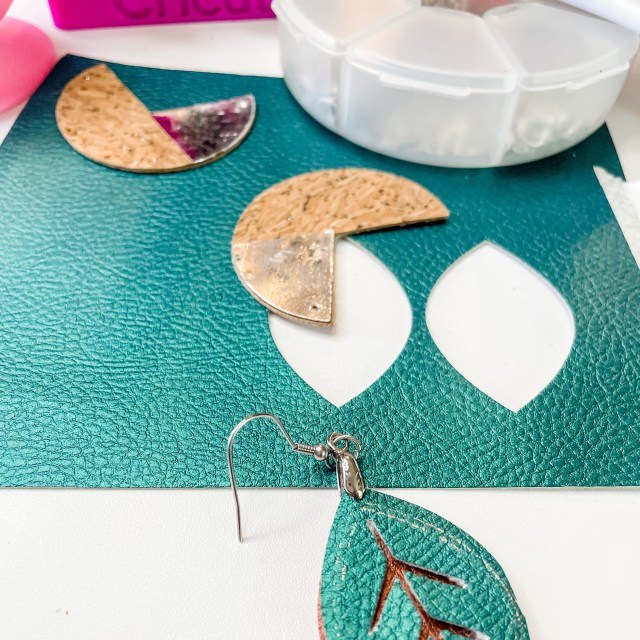
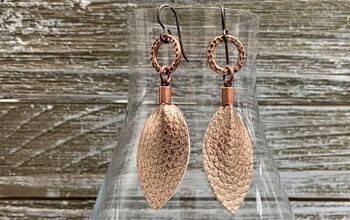
In this post I’ll show you first pair of earrings I made. They were so-so. Let’s face it: rarely does anything come out with that WOW factor on the first go. My goal was to create earrings that would easily go with a fall theme. So I chose a leaf image from Cricut Design Space. To make it a little more fun, I added a background piece in a contrasting color. Of course, I included my trademark sparkle (thanks to my friend Amanda for encouraging me to ‘own the sparkle’). I tried using the Cricut foil tool to accent the outer edges. Let me show you just how easy it is to make these faux leather earrings.
Get your Cricut Access Premium subscription here!
- Faux leather in 2 colors. I used green (3″ square) and a brownish copper (3″ x 6″)
- Cricut Design Space Leaf Earring image (
- This image is included in Cricut Access
- Cricut Maker, Explore, or Joy
- Cutting mat (light grip or standard grip)
- Brayer
- Fabric glue or other adhesive
- Earring hardware
- Jewelry pliers
- Cricut Foil Sheet *optional
- Cricut Foil Tool system *optional
*You can make similar earrings using any brand cutting machine. I’m using my Cricut because it’s the machine I am most familiar with.
- Open a new canvas in Design Space and select “images”
- Search for “earrings” or “ to find the exact earrings I made.
- Insert the earrings image onto your canvas
- For now, you can made your image as large as you need to work with it
At this point, you may have noticed that the earrings comes as a single image. It isn’t a group with each earring being a separate image. This is fine if you will not be adding a solid background. However, if you’d like to add that extra bit of contrast to add interest and dimension, follow along with this next section.
- Make a duplicate of the image by selecting it and then selecting “duplicate” at the top of the layers panel
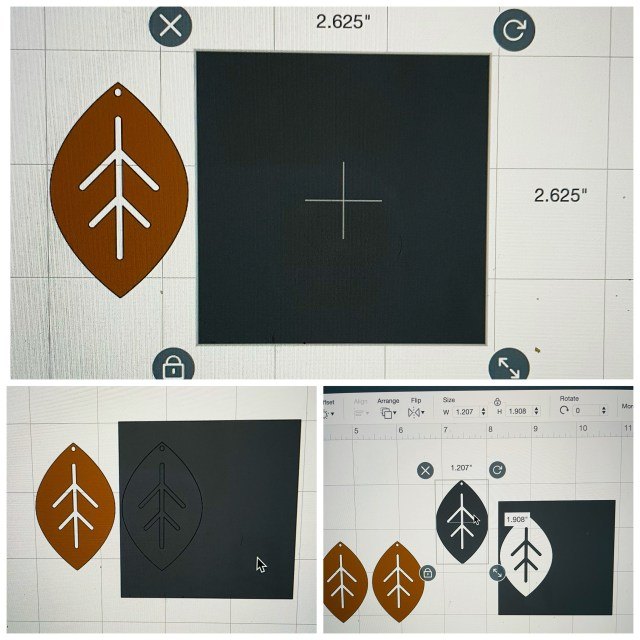
- Select “shapes” from the side menu and insert a square
- Size the square so that it is covering just one of the earrings on the duplicate you made.
- Once the square is positioned over one earring, select both the square and the earring.
- Choose “slice” from below the layers panel
- Now you can separate the different pieces.
- Delete the 2 pieces that you don’t need
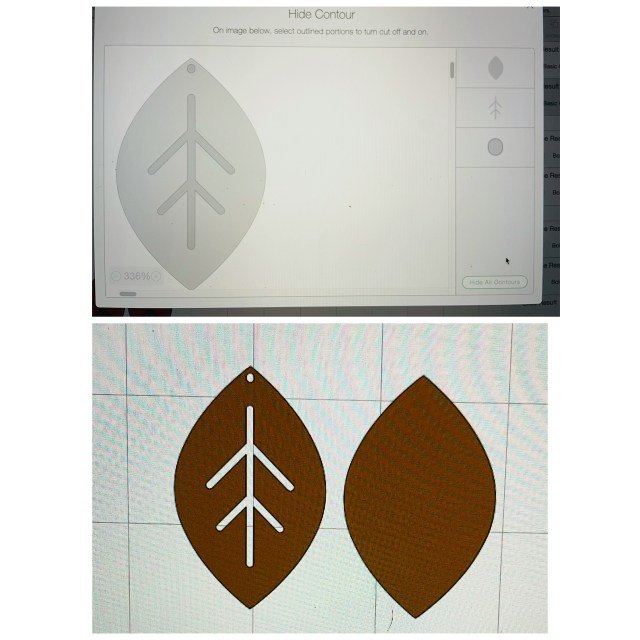
Hiding contours for the back
- Select one of the earrings you just sliced
- Below the layers panel, select “contour”
- In the contour window, select “hide all contours”
- Click on the “X” in the top right corner to close the window
- Repeat steps 1-4 with the other sliced earring
- *Optional* Select the 2 solid earrings and duplicate. This will give you a nice back to the earrings.
- Finally, stack all of your earrings on top of each other and select “group”
- Once grouped, edit them to the size you would like. I made mine about 2″ long
We’re almost done! Now it’s time to cut. Let’s go…
- Prepare your cutting mats by placing the faux leather onto the mat in the top, left corner
- Use the brayer to smooth out and lightly press the material onto the mat
- If your mat is not as sticky as you need it, you can use tape around the edges of the faux leather to make it stick for now
- Back on your Design Space canvas, select “Make it” in the top right corner
- The screen will show that you have 2 mats to cut, one for each color
- If you’re comfortable, you can move your images all to one mat. Just be sure to lay your material on your mat in the right areas
- Select “continue” and then select your Cricut machine. (Make sure it is on and paired)
- Select “faux leather” from the materials list
- Load your mat and follow the prompts to cut
You are just minutes away from completing your fall faux leather earrings. Let’s bring it on home now!
- If you cut out 2 sets of the backing, use a thin bead of fabric glue to put them together, right sides facing out
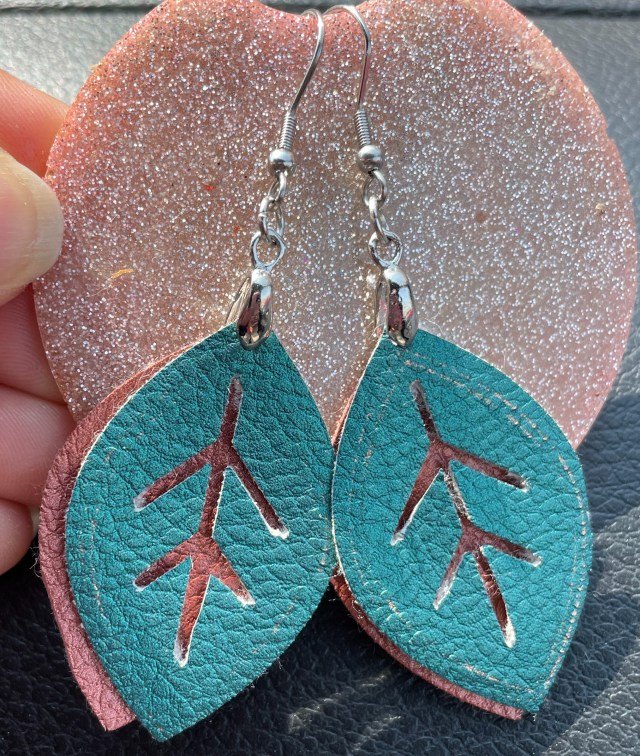
- Line up the front of the earrings (the part with the leaf vein cutouts) with the background pieces
- Use your jewelry pliers to add the hardware to the earrings
You are DONE! Can you believe how simple that was?
I wanted to make this an easy tutorial, so I didn’t include how to use the Cricut foil tool. If you want to include some shine, you’re welcome to follow the steps below when making your faux leather earrings.
Before proceeding to “Cutting the earrings” insert these steps.
- Select one of the SOLID earrings and choose “Offset” from the top menu
- Slide the slider to the LEFT to make an INSET. I made my inset -0.125
- Click “Apply”
- The inset will become a solid shape; don’t worry
- With the inset selected, click on drop down arrow under “operation” on the top tool bar
- Under the “Draw” section, select “Foil” and then select the thickness. I used medium.
- Your solid inset will now be a line
- Duplicate the inset.
- Place the insets on top of the earrings that have the cutouts. Line them up where you want them.
- Select the earrings and the insets and choose “Attach” from below the layers panel on the right.
- Put your faux leather on your mat and smooth with a brayer
- Place the piece of foil on top of the material
- Use the white tape that comes with the foil sheets to tape around all four sides of the foil.
- It’s super duper important to make sure that your foil is smooth and secure (ask me how I know…)
- Be sure there is no tape where the design will be
- When you’re ready to proceed, follow the prompts on the screen
- Your Cricut machine will foil first. Load your tool into the B side of tool cartridge
- When done foiling, remove the foil and tape WITHOUT UNLOADING the mat
- Replace the blade and follow the remaining instructions
- When everything is cut, assemble your earrings
I really did enjoy making these earrings. I loved making the so much that I have more tutorials coming about making faux leather earrings. One thing I do want mention is that the Cricut foil tool and the offset feature are not available in the mobile app. If you want to use either one of these, you will need to work from a laptop or desktop. There are work-arounds for both, but that’s a whole other blog post. If you’d like to know some of those, please send me a message and I’ll be happy to get that posted in the near future.
So what do you think? Are you ready to make some fall earrings? Of course, there are many other designs, materials, and methods you could use to create. Whether you create these for yourself or for your business, have fun! If you decide to give this a try, I’d love to see them. Tag me on Instagram, Facebook, or even TikTok. I am EJsFunCrafting on all platforms.
Now, go make something fun!
The author may collect a small share of sales from the links on this page.


Comments
Join the conversation