Real Flower Resin Stud Earring Tutorial

I have done a few resin tutorials on my blog, it is very on-trend at the moment and a really fun craft to try. It can look daunting but believe me when I say it is super easy, and once you have the hang of it, you will be creating lots of cool items with the numerous molds that are available.
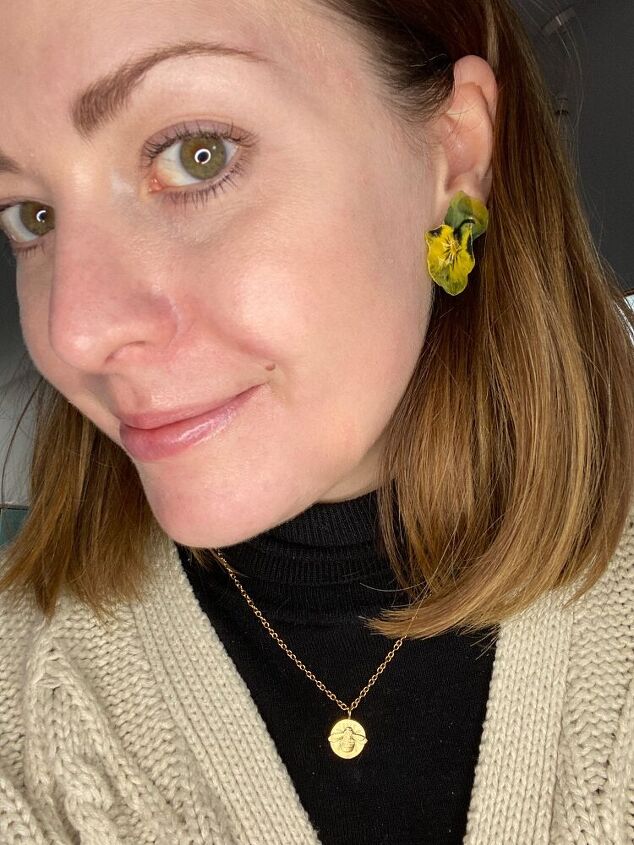
I usually create my earrings using different shaped molds, placing flowers inside but this time, I wondered if I could make the earrings soley just using the flowers, this would make a really unique shape and really show off the beauty of the flower.
What You Will Need
- Dried flowers – I used Violas
- Resin
- Earring fixings & jump rings
- Small old paintbrush
You can buy your Violas dried from places like Ebay and Amazon or you can easily dry them yourself. If you choose to dry your own, pick your flower, snipping it off at the base of the head. Ensure it is dry, then place between two pieces of baking paper, make sure your flower is as flat as can be as this is how it will dry. Place your baking paper inside a heavy book, I think cook books work well, then place more books on top to weight it down. Leave for a few weeks till dry, then carefully remove from the baking paper.
Mix a small mount of resin, you won’t need much at all, the resin I use is a two part system and you mix equal measures. I made 1.5gs of each part then used the left overs for another pair of earrings. Mix your resin for a few minutes till combined. I picked up these silicone pots for mixing and they are fab for using over and over.
You will need a small paint brush that you are happy to ruin, the resin can be wiped off after use but it will not be good for painting afterwards so don’t use your favourite brush. When brushing on the resin, you will need to carefully lift the layers of the viola to ensure all the bits of flower are covered. Use tweezers to gently lift the petals.
Place your flowers on a silicone mat, this will make it easier to remove the flower once dry. Dip the brush in resin and then working from the centre outwards, brush the resin over the petal to coat flower, covering the whole area with a light but substantial layer of resin. Repeat on all the petals till covered. Leave to dry for 24 hours.
The next day, mix a bit more resin and repeat the above actions on the back of the flower, again leave to dry for 24 hours.
When you are happy the back of your earrings are covered, use an earring post and press it into the resin, you can add a small amount of resin over the flat pace of the earring back to really secure it to the flower. The earrings will need roughly 48 hours to set completely, they should be pretty solid by then.
I love these earrings due to their quirky shapes, they are totally unique and will be a real talking point whenever you wear them. I also made a pair using daisies and these also turned out great, there are so many flowers you can use to create your earrings, you could even create dangling earrings by drilling small hole to thread a jump-ring and earring fixing through.
You can follow me @i_heart_maggie on Instagram or Tik Tok and you can also subscribe to my YouTube channel so you can see what I have been making, and don’t forget to check out my other blog posts.
Love
Claire X
Enjoyed the project?
The author may collect a small share of sales from the links on this page.


Comments
Join the conversation
So so pretty!!
I bought a pair of earrings like these off ebay a number of years ago. Beautiful in the beginning but over time they have faded to a brown color. So sad as they are my favorite flower.